Page 121 of 292

Resuming the stored speed
G
Warning
Only select a stored speed if you know what
that speed is
and whether it is suitable for the
current driving and traffic situation. You can
otherwise endanger yourself and others by
unintentionally triggering sudden
acceleration or braking.
X Briefly pull the cruise control lever in the
direction of arrow 0047.
X Release the accelerator pedal.
Cruise control is
activated and resumes the
vehicle's speed to the last speed stored.
i When you first move the cruise control
lever in the direction of arrow 0047 after
starting the engine, cruise control is
activated and the current road speed is
stored.
Setting the speed G
Warning
The rate at which you increase the speed in
increments of 1 mph (1 km/h) may be faster
than your vehicle is able to accelerate. Your
vehicle may
then continue to accelerate up to
the newly set speed even after you have
released the cruise control lever.
Only increase the speed as the prevailing
conditions permit. Sudden acceleration could
otherwise endanger you and others.
X Briefly push the cruise control lever
upwards 0046 to increase the speed or
downwards 008A to reduce the speed.
The last speed stored is increased/
reduced in increments of 1 mph
(1 km/h
).
or
X Press and hold the cruise control lever
up 0046 or down 008A until the desired speed
has been reached.
X Release the cruise control lever.
The current speed is stored. i
Cruise control is not deactivated if you
depress the accelerator pedal. If you
accelerate briefly, e.g. to overtake, and
then ease off the accelerator pedal again,
cruise control adjusts the vehicle's speed
to the last speed stored.
Deactivating cruise control There are various ways to deactivate cruise
control:
X
Briefly push the cruise control lever
forwards 0088.
or
X Apply the brakes.
The last speed set remains stored.
i The last speed set is deleted when you
switch off the engine.
i Cruise control is deactivated
automatically when:
R you apply the brakes.
R you apply the parking brake and the
0066 indicator lamp in the instrument
cluster lights up.
R you are driving slower than 20 mph
(30 km/h).
R ESP ®
or ASR intervenes.
R you shift the automatic transmission to
neutral position N while the vehicle is in
motion.
R there is a malfunction in the ESP ®
, ASR
or ABS system. PARKTRONIC
General notes G
Warning
PARKTRONIC is only an aid and may not
detect all obstacles. It is not a substitute for
attentive driving.
You are always responsible for safety and
must continue to pay attention to your Driving systems
119
Controls
Z
Page 122 of 292

immediate surroundings when parking and
maneuvering. You could otherwise endanger
yourself and others.
G
Warning
Make sure that no persons or animals are in
the maneuvering range. Otherwise, they
could be injured.
PARKTRONIC is an electronic parking aid.
PARKTRONIC indicates visually and audibly
the distance between your vehicle and an
object.
Your vehicle features
two sound emitters with
different frequencies for the warning tones.
The warning ranges in front of and behind the
vehicle are indicated by different warning
tones.
PARKTRONIC is automatically activated when
the key is turned to position 2 in the ignition
lock, the parking brake is released and the
selector lever is moved to position D, N or R.
PARKTRONIC is deactivated automatically at
speeds above 11 mph (18 km/h).
PARKTRONIC is reactivated automatically at
speeds below 10 mph (16 km/h).
PARKTRONIC monitors the area around your
vehicle with sensors in the front and rear
bumpers.
Range of the sensors The sensors must be free of dirt, ice and
slush; otherwise, they may not function
correctly. Clean
the
sensors regularly, taking
care not to scratch or damage them
(Y page 163). Front sensors
Center Approximately 39 in
(100 cm)
Corners Approximately 26 in
(65 cm)
Rear sensors
Center Approximately 71 in
(180 cm)
Corners Approximately 39 in
(100 cm)
Minimum distance
Center Approximately 12 in
(30 cm)
Front corner
sensors Approximately 10 in
(25 cm)
Rear corner sensors Approximately 12 in
(30 cm)120
Driving systems
Controls
Page 123 of 292

If an obstacle is within this range, all
segments of
the
warning displays light up and
you hear a warning tone. If the distance
between the vehicle and the obstacle falls
below the minimum range, it is possible that
the distance may no longer be displayed.
! Pay particular attention to obstacles
above or below the sensors when parking,
such as flower pots or trailer towbars.
PARKTRONIC does not recognize such
objects when they are in the immediate
vicinity of the vehicle. You could damage
the vehicle or objects.
PARKTRONIC can suffer interference from:
R ultrasonic sources such as a lorry's
compressed-air brakes, an automatic car
wash or a pneumatic drill
R attachments to the vehicle, e.g. rear
mounted racks
R number plates (vehicle license plates)
that are not affixed flat against the
bumper
R dirty or icy sensors
Warning displays The warning displays show the distance
between the sensor and the obstacle.
Warning display, front area
0046
Left-hand side of vehicle
0047 Right-hand side of vehicle
008A Segments Warning display for the left-hand rear area in the
left-hand exterior mirror
0088
Warning display segments
0086 Readiness indicator segment
The warning display is divided into five yellow
and two red segments for each side of the
vehicle. PARKTRONIC is operational if yellow
indicator segments 008A and 0086 light up.
There is a malfunction if only the red
segments of the warning display light up
(Y page 215).
The position of
the selector lever determines
whether the front and/or rear area is
monitored. Selector lever
position Monitoring
D
Front area
R or N Front and rear area
P
No areas activated
One or more segments light up as the vehicle
approaches an obstacle, depending on the
vehicle's distance from the obstacle.
From the:
R
sixth segment, an intermittent warning
tone sounds for approximately
two seconds.
R seventh segment, a continuous warning
tone sounds. You have reached the
minimum distance. Driving systems
121
Controls Z
Page 124 of 292

Roll-back warning
PARKTRONIC automatically monitors the
area behind the vehicle if the vehicle begins
to roll backwards without reverse gear
engaged, e.g. after stopping on an uphill
gradient.
If PARKTRONIC recognizes an obstacle at a
distance of at most 31 in (80 cm), all the
segments in the warning display light up. A
continuous warning tone also sounds as the
vehicle approaches the obstacle and for a
further two seconds after the vehicle has
come to a halt.
Activating/deactivating PARKTRONIC You can activate/deactivate PARKTRONIC
manually.
X
Press button 0046.
If PARKTRONIC is deactivated, the
indicator lamp in the switch lights up.
Towing a trailer If your vehicle is equipped with the electric
wiring required for towing a trailer and you
attach a trailer, PARKTRONIC is deactivated
for the rear area as soon as you have
established an
electrical
connection between
your vehicle and the trailer. If you use an
adapter for the socket, remove it from the
socket after detaching the trailer. Otherwise,
PARKTRONIC remains deactivated for the
rear area.
If the trailer coupling is detachable, remove it
when it is no longer required. PARKTRONIC measures the minimum detection range to an
obstacle from the bumper, not the ball
coupling.
Rear view camera
The rear view camera is a visual parking aid.
It shows you
the area behind the vehicle on a
separate monitor on the center console.
The rear view camera is activated when you
engage reverse gear.
The camera is in the middle of the roof above
the high-mounted brake lamp ( Y page 163). 0046
Monitor for rear view camera G
Warning
The rear-view camera is only a driving aid and
may display obstacles as foreshortened,
incorrectly or not
at all. It cannot replace your
attentiveness.
The rear-view camera cannot display all
objects located very near and/or under the
rear bumper. It does not warn you of a
collision, persons or objects.
You are responsible for safety at all times and
must continue to pay attention to your
immediate surroundings during parking and
maneuvering. This applies not only to the area
behind, but also to the area in front of and
beside your vehicle.
You may otherwise not recognize people or
objects, if any, and by driving onwards, injure
people or damage objects and the vehicle. We
recommend also using PARKTRONIC at all
times during parking. 122
Driving systems
Controls
Page 125 of 292

G
Warning
Make sure that no persons or animals are in
the maneuvering range. Otherwise, they
could be injured. G
Warning!
The rear-view camera could either stop
functioning or function incorrectly if:
R it is raining very heavily or snowing, or it is
foggy.
R the parking space is located in a very dark
place.
R the camera is
exposed to very strong white
light. White stripes may appear on the
display.
R the surrounding area is illuminated with
fluorescent light. The display may flicker.
R there is a rapid change in temperature, e.g.
if you drive out of the cold during winter into
a heated garage.
R ambient temperatures are very high.
R the camera lens is dirty or obstructed.
R the rear of the vehicle is damaged. In this
case, have the position and setting checked
at a qualified specialist workshop that has
the necessary specialist knowledge and
tools to carry out the work required. For this
reason, we recommend an authorized
Sprinter Dealer.
You will find information about cleaning the
camera in the "Operation" section
(Y page 163).
Switching on the rear view camera X
Make sure
that the ignition is switched on.
X Engage reverse gear.
The rear view camera is switched on. Using the monitor
Monitor buttons
0046
003D Down button
0047 003C Up button
008A 0093 Menu/Confirm button
0088 0094 Monitor on/off switch
0086 Speaker cover
Switching on the monitor
You can switch on the monitor by:
R engaging reverse gear
The rear
view
camera is activated. This then
switches the monitor on.
R pressing the 0094 button
The input for auxiliary equipment (AUX) on
the monitor is activated.
i If you have switched the monitor off using
the 0094 button, you must press
the 0094 button after engaging reverse
gear. Only then is the monitor switched on. Input for auxiliary equipment (AUX)
If you engage reverse gear while using
auxiliary equipment, the monitor switches to
the rear view camera.
When you disengage reverse gear, the
monitor continues to show the picture from Driving systems
123
Controls Z
Page 126 of 292

the rear view camera for around 15 seconds
before switching back to the auxiliary device
input (AUX).
Switching off the monitor
If the monitor was switched on by engaging
reverse gear, it switches off automatically
15 seconds
after
you disengage reverse gear.
You can switch off the monitor by pressing
the 0094 button. In this case, the following
message is shown for seven seconds before
it switches off. Menu system
Setting the volume
X
Press the 003D or 003C button.
The volume of the integrated loudspeaker
is adjusted in increments.
i The volume of the optional infrared
headphones is adjusted on the
headphones themselves.
X Press the 0093 button to exit the volume
adjustment.
i If you do not press a button for seven
seconds, the monitor switches off the
volume adjustment. Selecting the main menu
X
Press the 0093 button.
The menu selection for the main menu
(menu level 1) is displayed. X
Press the 003D or 003C button until the
menu you want is highlighted.
X Press the 0093 button.
The menu is selected.
You can select the following menus:
R Display ( Y page 125)
R Picture format (
Y page 126)
R Standard (Y page 127)
R Menu language ( Y page 127)
R Factory setting (Y page 128)
R Back 0056(Y page 124)
Skipping back a menu X
Press the 003D or 003C button until the
0056 symbol is highlighted.
X Press the 0093 button.
The higher-level menu is displayed.124
Driving systems
Controls
Page 127 of 292

Display menu
You can
customize
the monitor display in the
Display menu.
You can select the following submenus:
R Lighting (Y page 125)
R Brightness ( Y page 125)
R Contrast (Y page 125)
R Color ( Y page 126)
R Tint
R Back 0056(Y page 124)
Lighting submenu
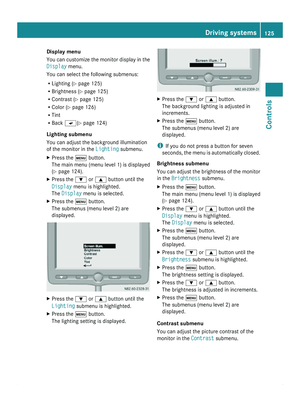
You can adjust the background illumination
of the monitor in the Lighting submenu.
X Press the 0093 button.
The main
menu
(menu level 1) is displayed
(Y page 124).
X Press the 003D or 003C button until the
Display menu is highlighted.
The Display menu is selected.
X Press the 0093 button.
The submenus (menu level 2) are
displayed. X
Press the 003D or 003C button until the
Lighting submenu is highlighted.
X Press the 0093 button.
The lighting setting is displayed. X
Press the 003D or 003C button.
The background lighting is adjusted in
increments.
X Press the 0093 button.
The submenus (menu level 2) are
displayed.
i If you do not press a button for seven
seconds, the menu
is automatically closed.
Brightness submenu
You can adjust the brightness of the monitor
in the Brightness submenu.
X Press the 0093 button.
The main menu
(menu level 1) is displayed
(Y page 124).
X Press the 003D or 003C button until the
Display menu is highlighted.
The Display menu is selected.
X Press the 0093 button.
The submenus (menu level 2) are
displayed.
X Press the 003D or 003C button until the
Brightness submenu is highlighted.
X Press the 0093 button.
The brightness setting is displayed.
X Press the 003D or 003C button.
The brightness is adjusted in increments.
X Press the 0093 button.
The submenus (menu level 2) are
displayed.
Contrast submenu
You can adjust the picture contrast of the
monitor in the Contrast submenu. Driving systems
125
Controls Z
Page 128 of 292

X
Press the 0093 button.
The main menu
(menu level 1) is displayed
(Y page 124).
X Press the 003D or 003C button until the
Display menu is highlighted.
The Display menu is selected.
X Press the 0093 button.
The submenus (menu level 2) are
displayed.
X Press the 003D or 003C button until the
Contrast submenu is highlighted.
X Press the 0093 button.
The contrast setting is displayed.
X Press the 003D or 003C button.
The contrast is adjusted in increments.
X Press the 0093 button.
The submenus (menu level 2) are
displayed.
Color submenu
You can adjust the color setting of the
monitor in the Color submenu.
X Press the 0093 button.
The main
menu
(menu level 1) is displayed
(Y page 124).
X Press the 003D or 003C button until the
Display menu is highlighted.
The Display menu is selected.
X Press the 0093 button.
The submenus (menu level 2) are
displayed.
X Press the 003D or 003C button until the
Color submenu is highlighted.
X Press the 0093 button.
The color setting is displayed.
X Press the 003D or 003C button.
The contrast is adjusted in increments.
X Press the 0093 button.
The submenus (menu level 2) are
displayed. Tint submenu (NTSC color balance)
In
the NTSC
standard you can adjust the color
balance of the monitor in the TINT submenu.
X Press the 0093 button.
The main menu
(menu level 1) is displayed
(Y page 124).
X Press the 003D or 003C button until the
Display menu is highlighted.
The Display menu is selected.
X Press the 0093 button.
The submenus (menu level 2) are
displayed.
X Press the 003D or 003C button until the
TINT submenu is highlighted.
X Press the 0093 button.
The color balance setting is displayed.
X Press the 003D or 003C button.
The color balance is adjusted in
increments.
X Press the 0093 button.
The submenus (menu level 2) are
displayed.
Picture format menu
You can
set
the display format for the monitor
in the Picture format menu.
X Press the 0093 button.
The main menu
(menu level 1) is displayed
(Y page 124).
X Press the 003D or 003C button until the
Picture format menu is highlighted.
X Press the 0093 button.
The submenu (menu level 2) is displayed.
i The current
picture
format is marked with
the 0050 symbol. 126
Driving systems
Controls