2012 MERCEDES-BENZ SL ROADSTER washer fluid
[x] Cancel search: washer fluidPage 26 of 637

Route demonstration
........................ 359
Route guidance .................................. 353
Cancel ........................................... 356
Continue ........................................ 356
Destination reached ...................... 357
General information ....................... 351
Lane recommendations ................. 353
Off-road ......................................... 362 S
Safety Child restraint systems .................... 61
Safety notes .............................. 468, 511
Audio CD/DVD and MP3 mode ..... 468
Using the telephone ....................... 387
Video DVD mode ........................... 511
Safety system
see Driving safety systems
Saving the crosshair position .......... 373
Screen ................................................ 520
Selecting for remote operation ...... 520
SD memory card
Ejecting .......................................... 472
Inserting ........................................ 472
Seat
Balance (seat heating) ................... 320
Resetting adjustments ................... 322
Seat functions (COMAND Online) .. 318
Selecting for adjustment
(COMAND Online) .......................... 319
Seat belt
Seat belt guide ............................... 115
Switching belt adjustment on/off
(on-board computer) ...................... 243
Seat belts
Adjusting the driver's and front-
passenger seat bel t......................... 59
Belt force limite r.............................. 60
Belt tensioner .................................. 60
Cleaning ......................................... 574
Fastening ......................................... 59
Important safety guidelines ............. 57
Releasing ......................................... 59
Warning lamp ................................. 274
Warning lamp (function) ................... 60
Seats
Active multicontour seat ................ 319 Adjusting (electrically) ................... 114
Adjusting lumbar support
(COMAND Online) .......................... 319
Adjusting the head restraint .......... 115
Belt guide ...................................... 115
Cleaning the cover ......................... 573
Correct driver's seat position ........ 112
Important safety notes .................. 113
Multicontour seat .......................... 319
Overview ........................................ 113
Seat heating problem .................... 117
Seat ventilation problem ................ 117
Sliding forward/back ..................... 115
Storing settings (memory func-
tion) ............................................... 123
Switching AIRSCARF on/of
f.......... 117
Switching seat heating on/of f....... 116
Switching the seat ventilation on/ off .................................................. 117
Selecting channels
TV .................................................. 503
Selecting the country ....................... 327
Selector lever
Cleaning ......................................... 573
Positions ........................................ 163
Sensors (cleaning instructions) ....... 571
Service
see ASSYST PLUS
Service menu (on-board com-
puter) .................................................. 238
Service products
Brake fluid ..................................... 627
Coolant (engine) ............................ 627
Engine oil ....................................... 626
Fuel ................................................ 623
Important safety notes .................. 622
Washer fluid ................................... 628
Setting the air distribution ............... 145
Setting the airflow ............................ 146
Setting the audio format
Audio DVD ..................................... 478
Rear Seat Entertainment System ... 539
Video DVD ..................................... 515
Setting the date format .................... 311
Setting the day design ...................... 310
Setting the language
COMAND ....................................... 313 Index
23
Page 32 of 637
Locking (in an emergency) ............... 93
Locking (key) ................................... 85
Lowering ........................................ 609
Pulling away ................................... 158
Raising ........................................... 607
Registration ..................................... 34
Securing from rolling away ............ 606
Tow-starting ................................... 588
Towing away .................................. 588
Transporting .................................. 591
Unlocking (in an emergency) ........... 93
Unlocking (key) ................................ 85
Vehicle data ................................... 629
Vehicle battery
see Battery (vehicle)
Vehicle data ....................................... 629
Vehicle dimensions ........................... 629
Vehicle emergency locking ................ 93
Vehicle identification number
see VIN
Vehicle identification plate .............. 622
Vehicle level
Active Body Control (AMG vehi-
cles) ............................................... 202
Active Body Control (except AMG
vehicles) ........................................ 199
Display message ............................ 260
Vehicle tool kit .................................. 577
Video
Operating the DVD ......................... 235
see Video DVD
Video DVD .......................................... 514
Automatic picture shutoff .............. 501
Data carrier .................................... 511
DVD menu ..................................... 514
Fast forward/rewind ...................... 513
Function restrictions ...................... 511
Interactive content ........................ 516
Operation ....................................... 511
Pause function ............................... 513
Playing conditions .......................... 511
Safety notes .................................. 511
Selecting ........................................ 514
Selecting a film/title ...................... 514
Selecting a scene/chapter ............ 513
Setting the audio format ................ 515
Setting the language ...................... 515 Setting the picture ......................... 502
Showing/hiding the menu ............. 512
Showing/hiding the navigation
menu ............................................. 512
Stop function ................................. 513
Subtitles ........................................ 516
Switching on .................................. 512
Video-AUX
Setting the picture ......................... 502
VIN ...................................................... 622 W
Warning and indicator lamps ABS ................................................ 275
Brakes ........................................... 275
Distance warning signal ................. 283
ESP® ............................................. 277
ESP® OFF ...................................... 278
LIM (cruise control) ........................ 182
LIM (DISTRONIC PLUS) .................. 186
LIM (variable SPEEDTRONIC) ......... 194
Overview .......................................... 42
PASSENGER AIRBAG OFF ................ 63
Reserve fuel ................................... 280
Seat belt ........................................ 274
SRS ................................................ 280
Tyre pressure monitor ................... 284
Warning triangle ................................ 576
Washer fluid
Display message ............................ 272
Waypoints .......................... 335, 337, 338
Accepting waypoints for the
route .............................................. 338
Creating ......................................... 335
Editing ........................................... 337
Entering ......................................... 335
Searching for a filling station when the fuel level is lo w........................ 338
Weather display (COMAND
Online) ........................................ 447, 448
Calling up the weather map ........... 448
Information chart ........................... 447
Selecting locations in the informa-
tion chart ....................................... 447
Selecting the location .................... 447
Selecting the location in the
weather map .................................. 448 Index
29
Page 33 of 637
Switching off .................................. 447
Switching on .................................. 447
Weather map (COMAND
Online) ........................................ 448, 449
Legend ........................................... 449
Showing/hiding the menu ............. 448
Switching to the weather informa- tion display .................................... 449
Website .............................................. 458
Adding to favourites ....................... 458
Wheel and tyre combinations
see Tyres
Wheel bolt tightening torque ........... 609
Wheel chock ...................................... 606
Wheels
Changing a wheel .......................... 605
Changing/replacing ....................... 605
Checking ........................................ 597
Cleaning ......................................... 570
Cleaning (warning) ......................... 606
Emergency spare wheel ................. 614
Fitting a new wheel ........................ 609
Fitting a wheel ............................... 606
Important safety notes .................. 596
Overview ........................................ 596
Removing a wheel .......................... 608
Storing ........................................... 606
Tightening torque ........................... 609
Wheel size/tyre size ...................... 610
Windows
Cleaning ......................................... 570
see Side windows
Windscreen
Demisting ...................................... 146
Windscreen washer fluid
see Windscreen washer system
Windscreen washer system
Notes ............................................. 628
Topping up ..................................... 566
Windscreen wipers
Display message ............................ 272
Problem (malfunction) ................... 138
Replacing the wiper blades ............ 136
Switching on/of f........................... 135
Winter operation
Important safety notes .................. 598
Overview ........................................ 598
Slippery road surfaces ................... 181 Snow chains .................................. 599
Winter tyres
Limiting the speed (on-board com-
puter) ............................................. 242
M+S tyres ...................................... 598
Wiper blades
Cleaning ......................................... 571
Important safety notes .................. 136
Replacing ....................................... 136
Wooden trim (cleaning instruc-
tions) .................................................. 573
Workshop
see Qualified specialist workshop Z
ZONE function Switching on/of f........................... 146 30
Index
Page 134 of 637
The hazard warning lamps switch on auto-
matically if:
R an airbag is deployed or
R the vehicle decelerates rapidly from a
speed of above 70 km/h and comes to a
standstill
The hazard warning lamps switch off auto-
matically if the vehicle reaches a speed of
above 10 km/ha gain after a full brake appli-
cation.
i The hazard warning lamps continue to
operate even if the ignition is switched off. Headlamp cleaning system
The headlamps are cleaned automatically if
the "Wipe with washer fluid" function is oper-
ated five times (Y page 135) while the lights
are on and the engine is running. When you
switch off the ignition, the automatic head-
lamp cleaning system is reset and counting is
resumed from 0. Intelligent Light System
General notes The Intelligent Light System is a system that
adjusts the headlamps automatically to suit
the prevailing driving and weather conditions. It offers advanced functions for improved illu-
mination of the road surface, e.g. depending
on the vehicle speed or weather conditions.
The system includes the active light function, cornering light function, motorway mode and
extended range foglamps. The system is only
active when it is dark.
You can activate or deactivate the "Intelligent Light System" using the on-board computer
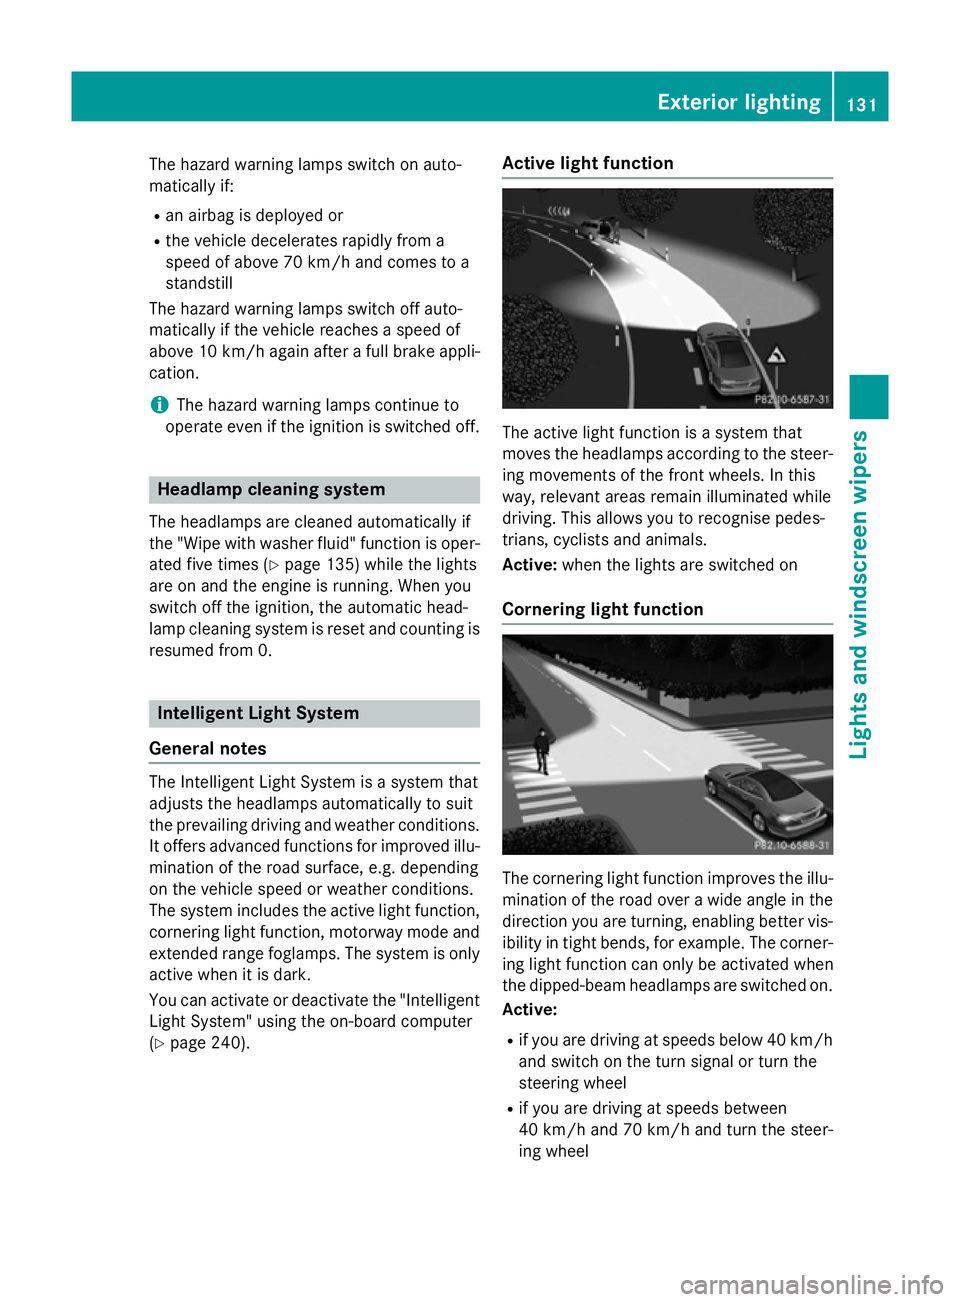
(Y page 240). Active light function
The active light function is a system that
moves the headlamps according to the steer-
ing movements of the front wheels. In this
way, relevant areas remain illuminated while
driving. This allows you to recognise pedes-
trians, cyclists and animals.
Active: when the lights are switched on
Cornering light function The cornering light function improves the illu-
mination of the road over a wide angle in the direction you are turning, enabling better vis-
ibility in tight bends, for example. The corner- ing light function can only be activated when
the dipped-beam headlamps are switched on.
Active:
R if you are driving at speeds below 40 km/h
and switch on the turn signal or turn the
steering wheel
R if you are driving at speeds between
40 km/ha nd 70 km/h and turn the steer-
ing wheel Exterior lighting
131Lights andwindscreen wipers Z
Page 138 of 637
Manual interior lighting control
X
To switch the interior lighting on: set the
switch to the cposition.
X To switch the interior lighting off: set the
switch to the |or (if the door is closed)
to the centre position.
X To switch the reading lamps on/off:
press the pbutton. Crash-responsive emergency lighting
The interior lighting is activated automatically
if the vehicle is involved in an accident.
X To switch off the crash-responsive
emergency lighting: press the hazard
warning lamp button.
or X Lock and then unlock the vehicle using the
key. Replacing bulbs
G
DANGER
Xenon bulbs are under high voltage. You can
get an electric shock if you remove the cover
of the xenon bulb and touch the electrical
contacts. There is a risk of fatal injury.
Never touch the parts or the electrical con-
tacts of the xenon bulb. Always have work on the xenon bulbs carried out at a qualified spe- cialist workshop.
The front and rear lamps of your vehicle are
equipped with either xenon or LED bulbs. Do
not replace the bulbs yourself. Contact a
qualified specialist workshop which has the
necessary specialist knowledge and tools to
carry out the work required.
Bulbs and lamps are an important aspect of
vehicle safety. You must therefore make sure
that these function correctly at all times.
Have the headlamp setting checked regularly. Windscreen wipers
Switching the windscreen wipers on/
off
! Do not operate the windscreen wipers
when the windscreen is dry, as this could
damage the wiper blades. Moreover, dust
that has collected on the windscreen can
scratch the glass if wiping takes place when the windscreen is dry.
If it is necessary to switch on the wind-
screen wipers in dry weather conditions,
always operate them using washer fluid.
! If the windscreen wipers leave smears on
the windscreen after the vehicle has been
washed in an automatic car wash, this may
be due to wax or other residue. Clean the
windscreen with washer fluid after an auto- matic car wash.
! Intermittent wiping with rain sensor: due
to optical influences and the windscreen
becoming dirty in dry weather conditions,
the windscreen wipers may be activated
inadvertently. This could damage the wind- screen wiper blades or scratch the wind-
screen.
For this reason, you should always switch
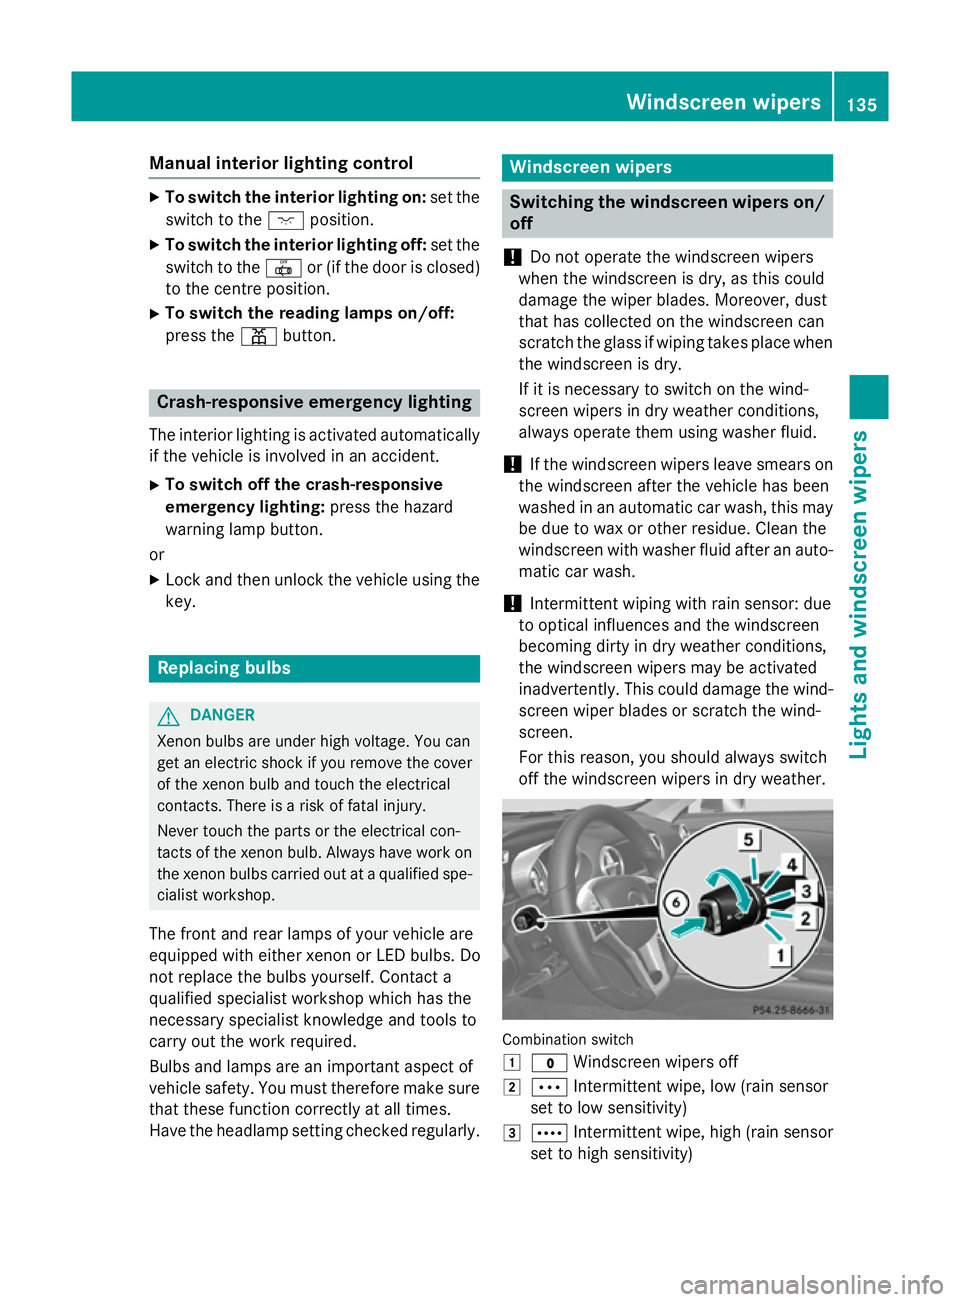
off the windscreen wipers in dry weather. Combination switch
1
$ Windscreen wipers off
2 Ä Intermittent wipe, low (rain sensor
set to low sensitivity)
3 Å Intermittent wipe, high (rain sensor
set to high sensitivity) Windscreen wipers
135Lights and windscreen wipers Z
Page 139 of 637
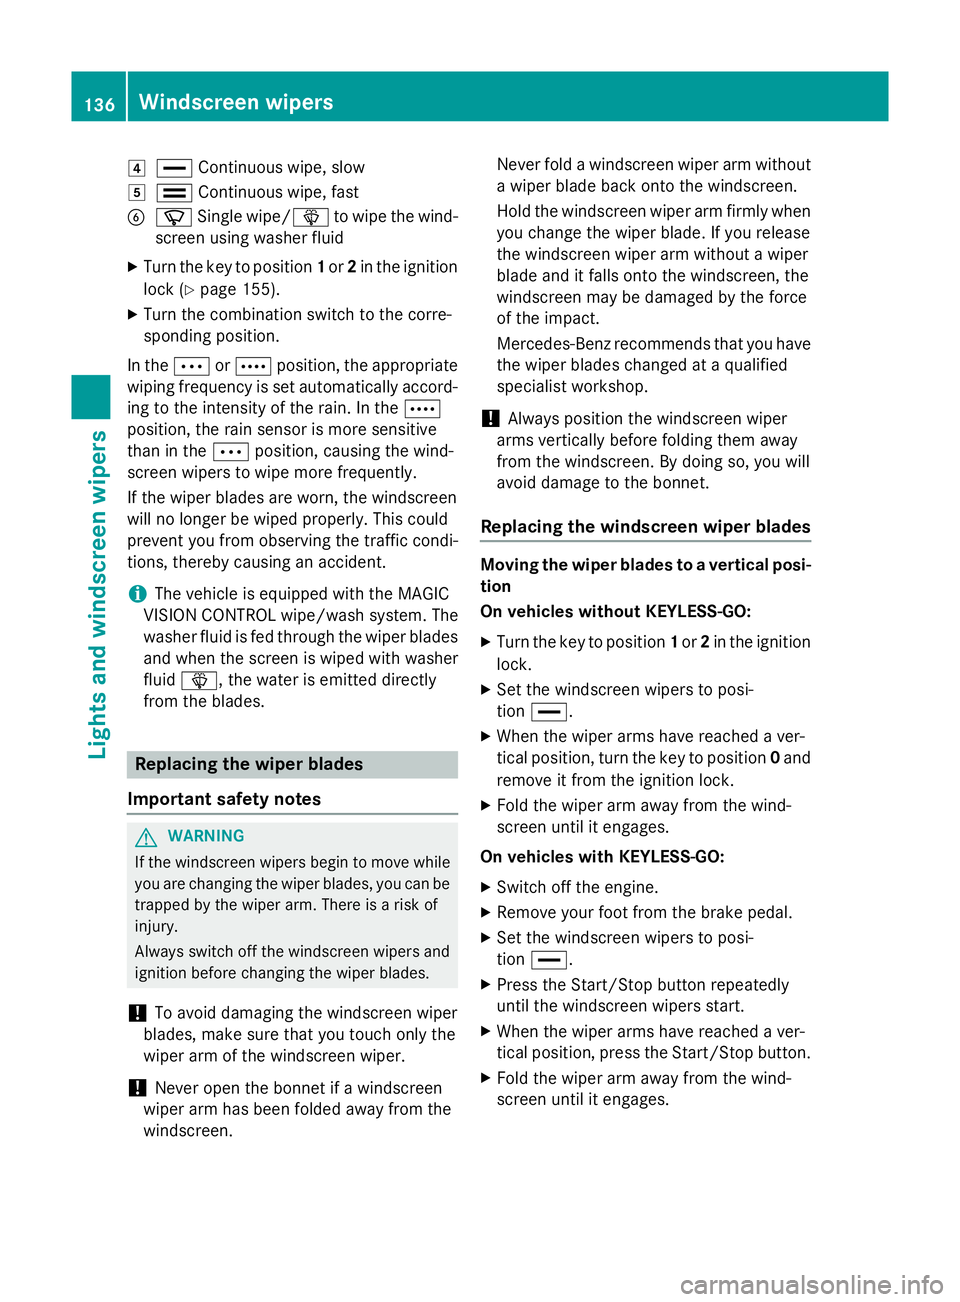
4
° Continuous wipe, slow
5 ¯ Continuous wipe, fast
B í Single wipe/ îto wipe the wind-
screen using washer fluid
X Turn the key to position 1or 2in the ignition
lock (Y page 155).
X Turn the combination switch to the corre-
sponding position.
In the ÄorÅ position, the appropriate
wiping frequency is set automatically accord- ing to the intensity of the rain. In the Å
position, the rain sensor is more sensitive
than in the Äposition, causing the wind-
screen wipers to wipe more frequently.
If the wiper blades are worn, the windscreen
will no longer be wiped properly. This could
prevent you from observing the traffic condi-
tions, thereby causing an accident.
i The vehicle is equipped with the MAGIC
VISION CONTROL wipe/wash system. The
washer fluid is fed through the wiper blades
and when the screen is wiped with washer
fluid î, the water is emitted directly
from the blades. Replacing the wiper blades
Important safety notes G
WARNING
If the windscreen wipers begin to move while
you are changing the wiper blades, you can be trapped by the wiper arm. There is a risk of
injury.
Always switch off the windscreen wipers and
ignition before changing the wiper blades.
! To avoid damaging the windscreen wiper
blades, make sure that you touch only the
wiper arm of the windscreen wiper.
! Never open the bonnet if a windscreen
wiper arm has been folded away from the
windscreen. Never fold a windscreen wiper arm without
a wiper blade back onto the windscreen.
Hold the windscreen wiper arm firmly when you change the wiper blade. If you release
the windscreen wiper arm without a wiper
blade and it falls onto the windscreen, the
windscreen may be damaged by the force
of the impact.
Mercedes-Benz recommends that you have the wiper blades changed at a qualified
specialist workshop.
! Always position the windscreen wiper
arms vertically before folding them away
from the windscreen. By doing so, you will
avoid damage to the bonnet.
Replacing the windscreen wiper blades Moving the wiper blades to a vertical posi-
tion
On vehicles without KEYLESS-GO:
X Turn the key to position 1or 2in the ignition
lock.
X Set the windscreen wipers to posi-
tion °.
X When the wiper arms have reached a ver-
tical position, turn the key to position 0and
remove it from the ignition lock.
X Fold the wiper arm away from the wind-
screen until it engages.
On vehicles with KEYLESS-GO: X Switch off the engine.
X Remove your foot from the brake pedal.
X Set the windscreen wipers to posi-
tion °.
X Press the Start/Stop button repeatedly
until the windscreen wipers start.
X When the wiper arms have reached a ver-
tical position, press the Start/Stop button.
X Fold the wiper arm away from the wind-
screen until it engages. 136
Windscreen wipersLights and windscreen wipers
Page 275 of 637
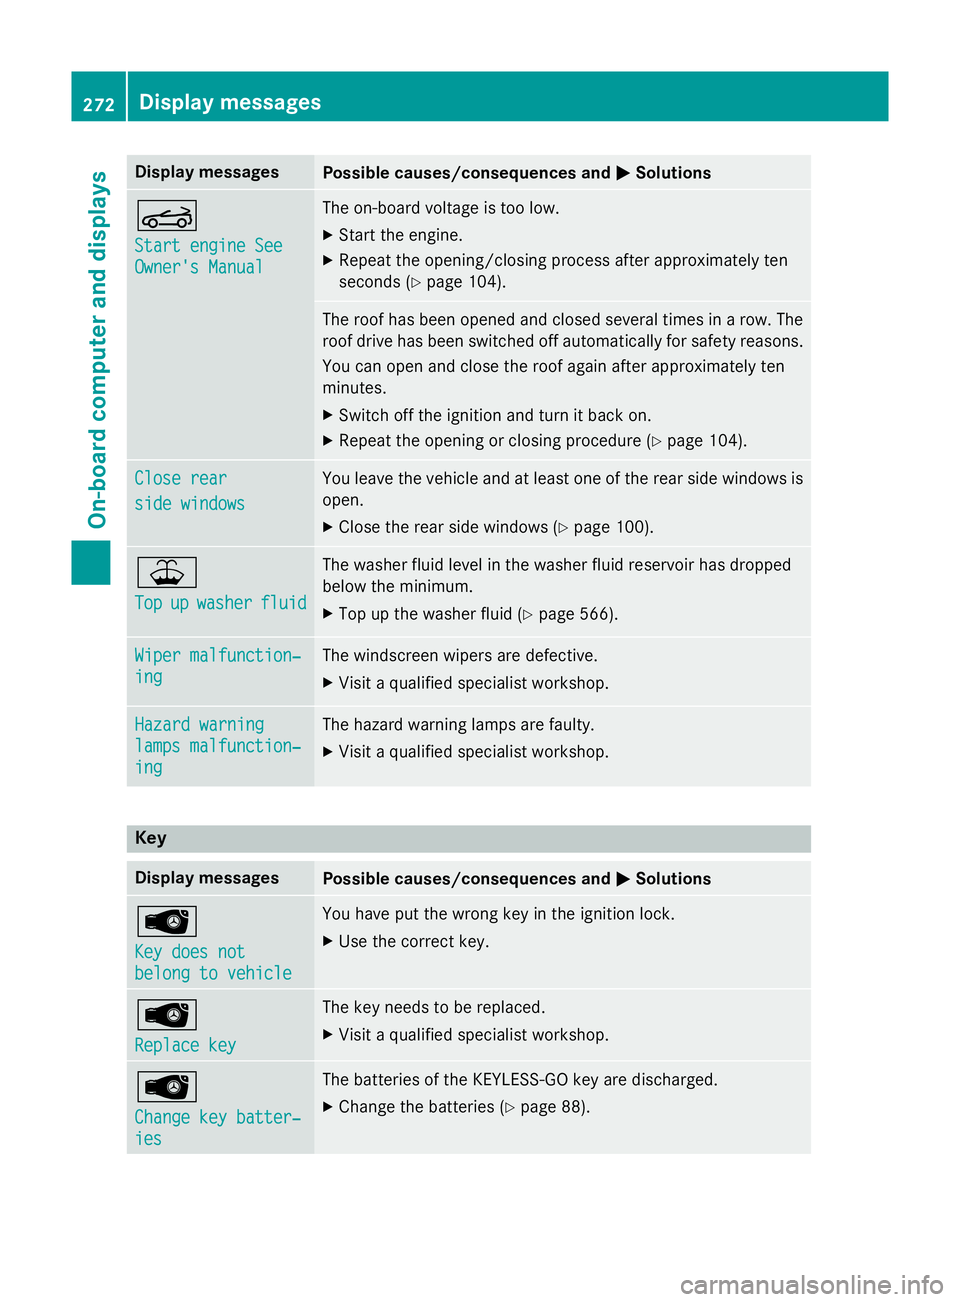
Display messages
Possible causes/consequences and
M
MSolutions K
Start engine See Start engine See
Owner's Manual Owner's Manual The on-board voltage is too low.
X Start the engine.
X Repeat the opening/closing process after approximately ten
seconds (Y page 104). The roof has been opened and closed several times in a row. The
roof drive has been switched off automatically for safety reasons.
You can open and close the roof again after approximately ten
minutes.
X Switch off the ignition and turn it back on.
X Repeat the opening or closing procedure (Y page 104).Close rear
Close rear
side windows side windows You leave the vehicle and at least one of the rear side windows is
open.
X Close the rear side windows (Y page 100).¥
Top Top
up
upwasher
washer fluid
fluid The washer fluid level in the washer fluid reservoir has dropped
below the minimum.
X Top up the washer fluid (Y page 566).Wiper malfunction‐ Wiper malfunction‐
ing ing The windscreen wipers are defective.
X Visit a qualified specialist workshop. Hazard warning
Hazard warning
lamps malfunction‐ lamps malfunction‐
ing ing The hazard warning lamps are faulty.
X Visit a qualified specialist workshop. Key
Display messages
Possible causes/consequences and
M
MSolutions Â
Key does not Key does not
belong to vehicle belong to vehicle You have put the wrong key in the ignition lock.
X Use the correct key. Â
Replace key Replace key The key needs to be replaced.
X Visit a qualified specialist workshop. Â
Change key batter‐ Change key batter‐
ies ies The batteries of the KEYLESS-GO key are discharged.
X Change the batteries (Y page 88).272
Display
messagesOn-board computer and displays
Page 569 of 637
X
Park the vehicle on a level surface.
Only check the coolant level if the vehicle is
on a level surface and the engine has
cooled down.
X Turn the key to position 2in the ignition
lock (Y page 155).
On vehicles with KEYLESS-GO, press the
Start/Stop button twice (Y page 155).
X Check the coolant temperature gauge in
the multifunction display.
The coolant temperature must be below
70 †.
X Turn the key to position 0(Y page 155) in
the ignition lock.
X Slowly turn cap ;half a turn anti-clock-
wise to allow excess pressure to escape.
X Turn cap ;further anti-clockwise and
remove it.
If the coolant is at the level of marker bar =
in the filler neck when cold, there is enough
coolant in coolant expansion tank :.
If the coolant level is approximately 1.5 cm above marker bar =in the filler neck when
warm, there is enough coolant in coolant
expansion tank :.
X If necessary, top up with coolant that has
been tested and approved by Mercedes-
Benz.
X Replace cap ;and turn it clockwise as far
as it will go.
For further information on coolant, see
(Y page 627).
Windscreen washer system and head-
lamp cleaning system G
WARNING
Certain components in the engine compart-
ment could be very hot, e.g. the engine, the
radiator and parts of the exhaust system.
There is a risk of injury when accessing the
engine compartment.
As far as possible, allow the engine to cool
down and only touch the following compo-
nents. G
WARNING
Windscreen washer concentrate is highly
flammable. If it comes into contact with hot
engine components or the exhaust system it
could ignite. There is a risk of fire and injury.
Make sure that no windscreen washer con-
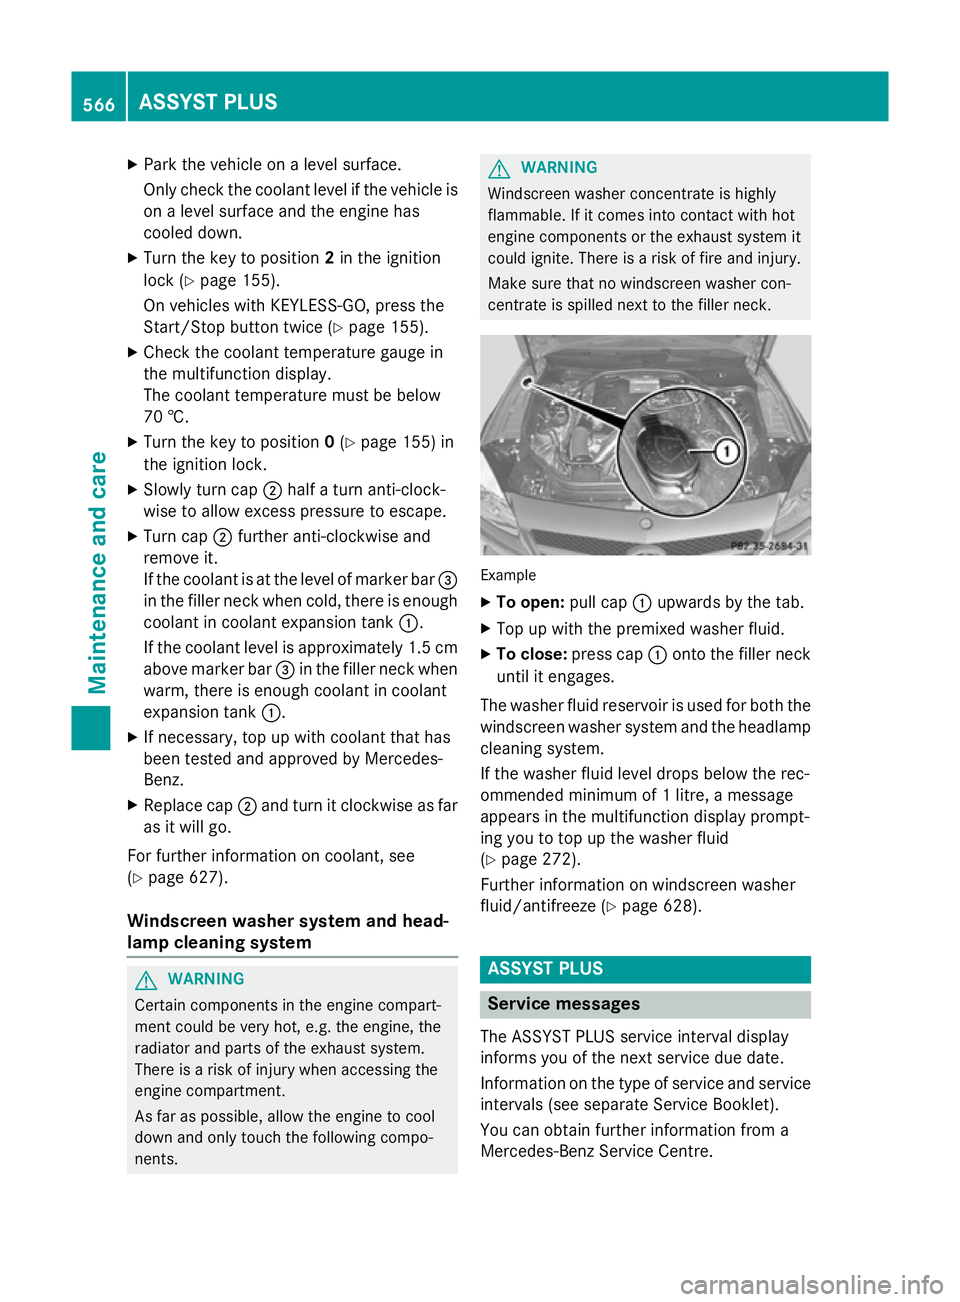
centrate is spilled next to the filler neck. Example
X To open: pull cap:upwards by the tab.
X Top up with the premixed washer fluid.
X To close: press cap :onto the filler neck
until it engages.
The washer fluid reservoir is used for both the
windscreen washer system and the headlamp cleaning system.
If the washer fluid level drops below the rec-
ommended minimum of 1 litre, a message
appears in the multifunction display prompt-
ing you to top up the washer fluid
(Y page 272).
Further information on windscreen washer
fluid/antifreeze (Y page 628). ASSYST PLUS
Service messages
The ASSYST PLUS service interval display
informs you of the next service due date.
Information on the type of service and service
intervals (see separate Service Booklet).
You can obtain further information from a
Mercedes-Benz Service Centre. 566
ASSYST PLUSMaintenance and care