2012 MERCEDES-BENZ SL ROADSTER stop start
[x] Cancel search: stop startPage 286 of 637
Problem
Possible causes/consequences and
M
MSolutions X
Leave the vehicle and keep a safe distance from the vehicle until
the engine has cooled down.
X Check the coolant level and top up the coolant, observing the
warning notes (Y page 565).
X If you have to top up the coolant frequently, have the engine
cooling system checked.
X Make sure that the air supply to the engine radiator is not
blocked, e.g. by frozen slush.
X If the coolant temperature is below 120 †, you can continue
driving to the nearest qualified specialist workshop.
X Avoid heavy loads on the engine as you do so, e.g. driving in
mountainous terrain and stop-start traffic. Driving systems
Problem
Possible causes/consequences and
M MSolutions ·
The red distance warn-
ing lamp lights up while
the vehicle is in motion. The distance to the vehicle in front is too small for the speed
selected.
X Increase the distance. ·
The red distance warn-
ing lamp lights up while
the vehicle is in motion. A warning tone also
sounds. You are approaching a vehicle or a stationary obstacle in your line
of travel at too high a speed.
X Be prepared to brake immediately.
X Pay careful attention to the traffic situation. You may have to
brake or take evasive action.
Further information on DISTRONIC PLUS (Y page 185).
Further information on PRE‑ SAFE®
Brake (Y page 77). Warning and indicator lamps
283On-board computer and displays Z
Page 321 of 637
X
To call up the full-screen display: press
the W button.
X In the system menu, slide ZVthe
COMAND controller up until the Full Full
screen screen option is selected.
X Press Wthe COMAND controller.
The system display is shown as full screen
(without system menu).
X Slide XVY the COMAND controller repeat-
edly until the fuel consumption indicator
appears.
The COMAND display shows the fuel con-
sumption for the last 15 minutes of the
journey.
X To exit the full-screen display: pressW
the COMAND controller.
The system menu appears.
Every bar of the graph displays the average
value for one minute.
The fuel consumption display may differ from
the display in the FROM START FROM STARTtrip computer
in the Trip
Trip menu; see the vehicle Owner's
Manual. Driving conditions menu (Active Body
Control)
General notes On vehicles with Active Body Control (ABC),
you can display some driving systems and
additional information in the COMAND dis-
play.
Calling up drive status regulator (ABC) X
Press W.
X In the system menu, slide ZVthe
COMAND controller up until the display/
selection window is selected.
X Slide XVY the COMAND controller repeat-
edly until the drive status regulator (ABC)
appears.
The corresponding displays appear in the
COMAND display. Details on the displays:
R for vehicles except AMG vehicles; see the
separate vehicle Owner's Manual
R for AMG vehicles; see the separate vehicle
Owner's Manual
Exiting the display X
Slide XVY the COMAND controller until
the desired display (clock or fuel consump-
tion) is shown. Seat functions
Overview Using the
Tbutton next to the COMAND
controller or the Seat menu item in the sys-
tem menu, you can call up different setting
functions: The following settings depend on
the type of seat and the vehicle model series:
R seat cushion length
R backrest side bolsters
R lumbar
R balance
R cushion side bolsters
R driving dynamics
R massage
i You also can save and recall the current
settings of a seat function using the mem-
ory button and the corresponding memory
position switch; see the separate vehicle
Owner's Manual.
The massage function cannot be started or
stopped using the memory button. 318
Vehicle functionsCOMAND Online
Page 333 of 637
X
Select Yes
YesorNo
No and press Wto confirm.
If you select Yes
Yes, COMAND Online will stop
route guidance and start route calculation
for the new destination.
If you select No No, COMAND Online will con-
tinue with the active route guidance.
i Route calculation takes a certain amount
of time. The time depends on the distance
from the destination, for example.
COMAND Online calculates the route using the digital map data.
The calculated route may differ from the
ideal route, e.g. due to roadworks or incom-
plete map data. Please also refer to the
notes about the digital map (Y page 382).
Entering and storing your home address
You can either enter your home address for
the first time (option 1) or edit a previously
stored home address (option 2).
X Option 1: enter the address, e.g. a town,
street and house number (Y page 326).
X Call up the address entry menu
(Y page 326).
X Select Save
Save in the address entry menu by
turning cVdand sliding ZVÆthe
COMAND controller and press Wto con-
firm.
X Select Save as "My address" Save as "My address" and press
W to confirm.
COMAND Online stores your home address
as My
My address
address in the destination memory.
X Option 2: proceed as described under
"Option 1".
A prompt appears asking whether the cur-
rent home address should be overwritten.
X Select Yes Yesand press Wto confirm.
After selecting Yes
Yes, the Saving proce‐
Saving proce‐
dure successful
dure successful message appears.
Entering a postcode, centre and junction
Entering a postcode
Entering a postcode will delete a previously
entered town. X
Call up the address entry menu
(Y page 326).
X Select Postcode Postcode in the address entry menu
by turning cVdand sliding ZVÆthe
COMAND controller and press Wto con-
firm.
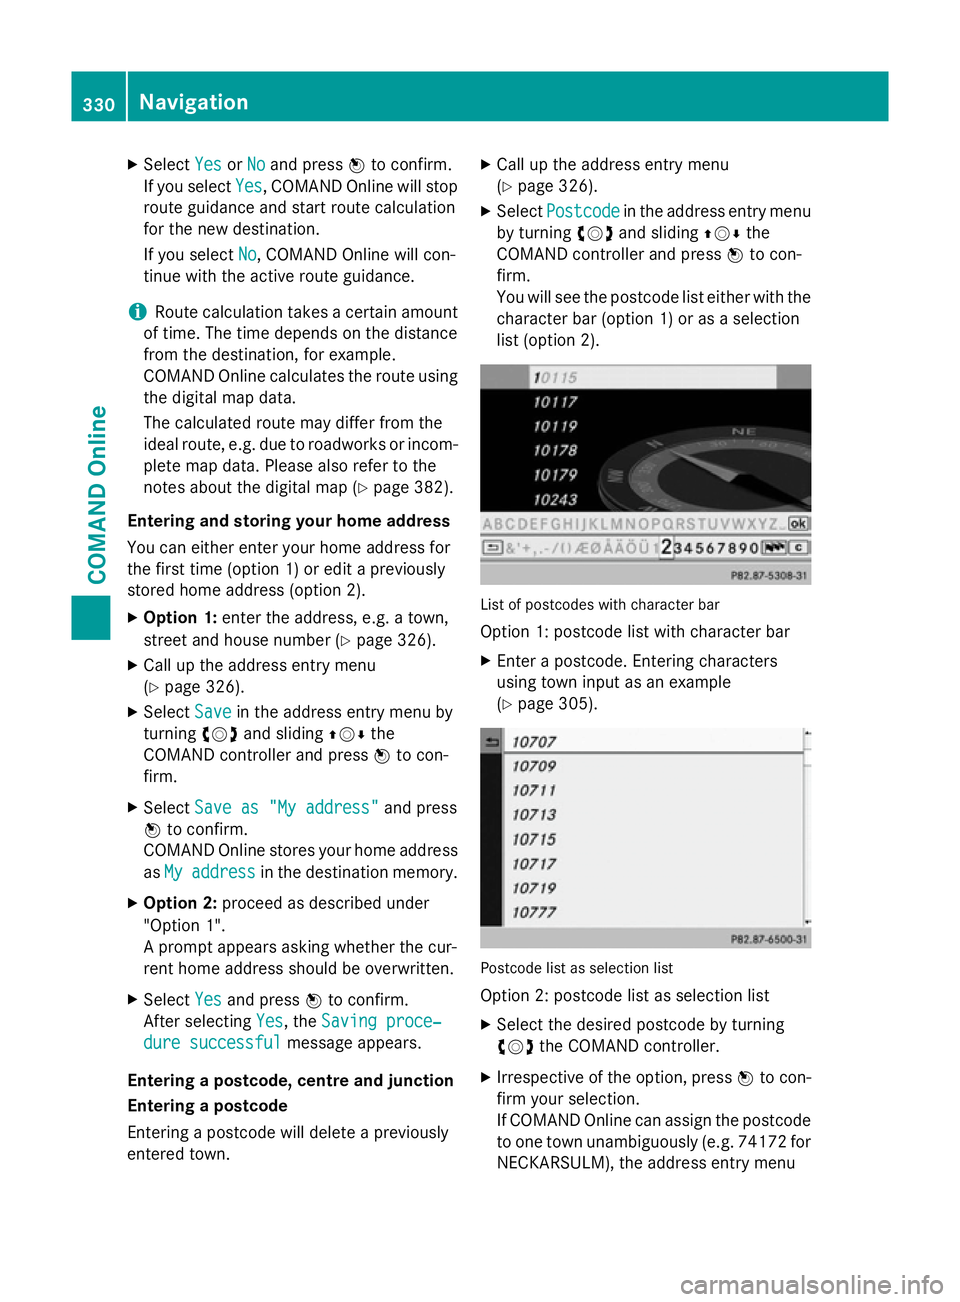
You will see the postcode list either with the
character bar (option 1) or as a selection
list (option 2). List of postcodes with character bar
Option 1: postcode list with character bar
X Enter a postcode. Entering characters
using town input as an example
(Y page 305). Postcode list as selection list
Option 2: postcode list as selection list
X Select the desired postcode by turning
cVd the COMAND controller.
X Irrespective of the option, press Wto con-
firm your selection.
If COMAND Online can assign the postcode to one town unambiguously (e.g. 74172 for
NECKARSULM), the address entry menu 330
NavigationCOMAND Online
Page 354 of 637
X
Call up the travel guide (Y page 349).
X Select a search position, e.g. Using map
Using map .
The map appears.
X Select Details
Details and press Wto confirm.
The destination address is shown.
X To display images: selectImages
Images and
press Wto confirm.
One or more photos of the tourist destina-
tion are shown.
X To display text information: selectInfo
Info
and press Wto confirm.
A short text provides interesting details
about the tourist destination.
X To play an audio file: selectMand press
W to confirm.
You hear useful information about the tou-
rist destination.
X To stop playback, select ¯and press Wto
confirm.
X To call the destination: selectCall
Call and
press Wto confirm.
If a mobile phone is connected to COMAND Online, the telephone function is activated
and the call is connected (Y page 398).
X To start route calculation: selectStart
Start
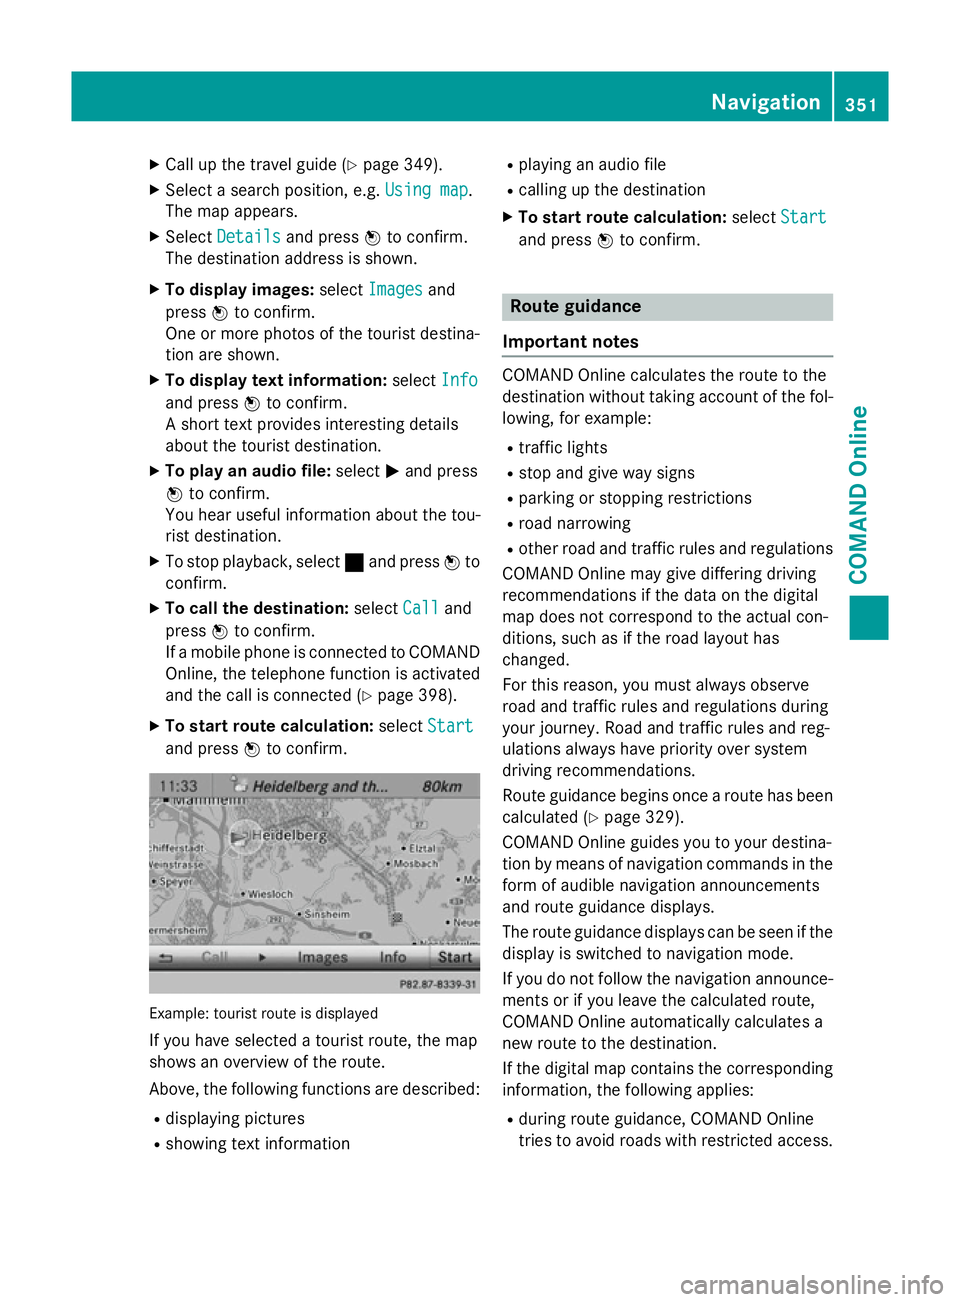
and press Wto confirm. Example: tourist route is displayed
If you have selected a tourist route, the map
shows an overview of the route.
Above, the following functions are described:
R displaying pictures
R showing text information R
playing an audio file
R calling up the destination
X To start route calculation: selectStart
Start
and press Wto confirm. Route guidance
Important notes COMAND Online calculates the route to the
destination without taking account of the fol-
lowing, for example:
R traffic lights
R stop and give way signs
R parking or stopping restrictions
R road narrowing
R other road and traffic rules and regulations
COMAND Online may give differing driving
recommendations if the data on the digital
map does not correspond to the actual con-
ditions, such as if the road layout has
changed.
For this reason, you must always observe
road and traffic rules and regulations during
your journey. Road and traffic rules and reg-
ulations always have priority over system
driving recommendations.
Route guidance begins once a route has been
calculated (Y page 329).
COMAND Online guides you to your destina-
tion by means of navigation commands in the
form of audible navigation announcements
and route guidance displays.
The route guidance displays can be seen if the
display is switched to navigation mode.
If you do not follow the navigation announce- ments or if you leave the calculated route,
COMAND Online automatically calculates a
new route to the destination.
If the digital map contains the corresponding
information, the following applies:
R during route guidance, COMAND Online
tries to avoid roads with restricted access. Navigation
351COMAND Online Z
Page 361 of 637
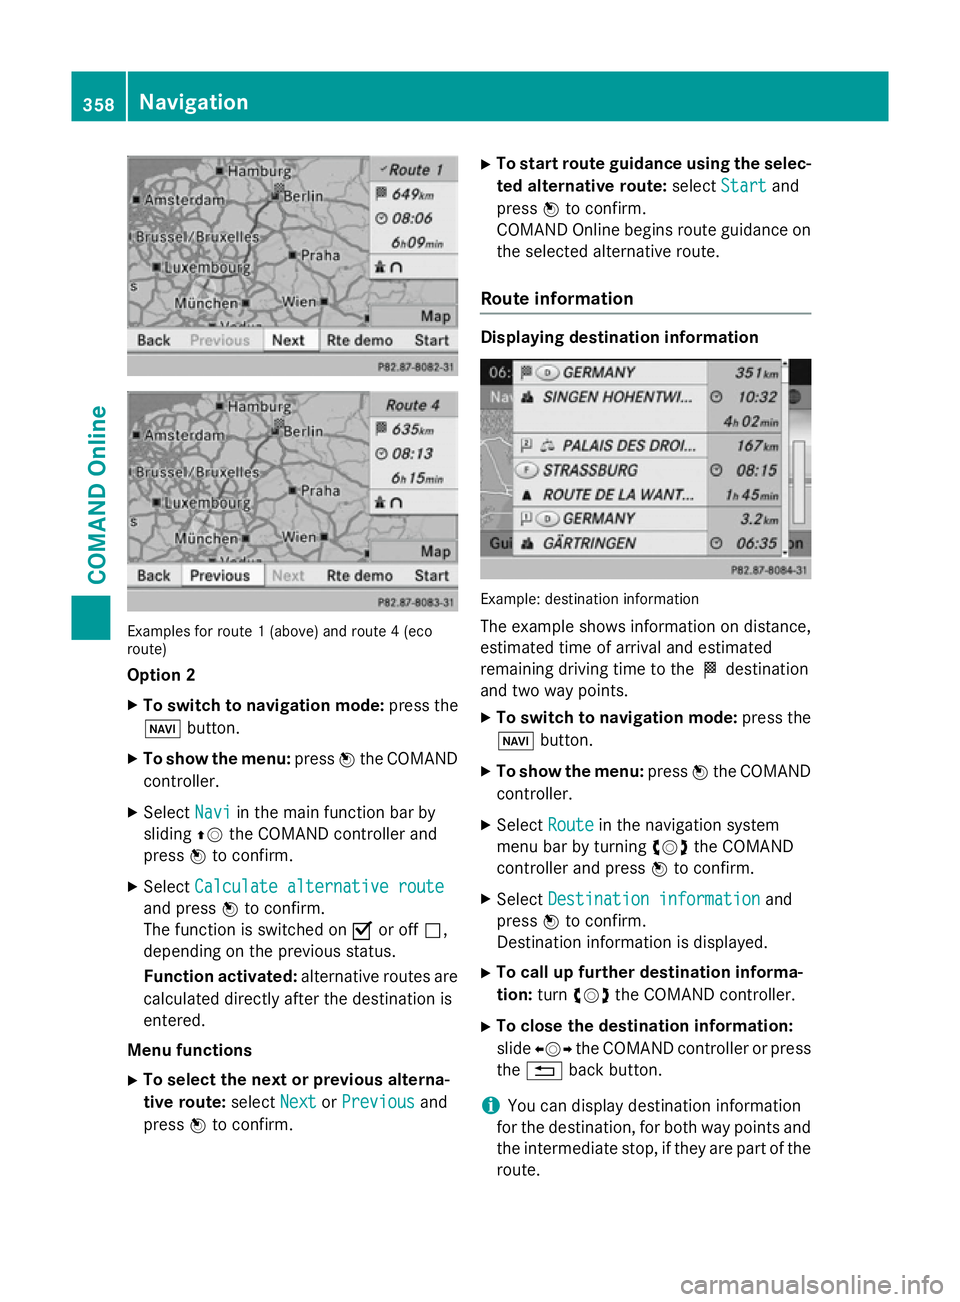
Examples for route 1 (above) and route 4 (eco
route)
Option 2
X To switch to navigation mode: press the
Ø button.
X To show the menu: pressWthe COMAND
controller.
X Select Navi
Navi in the main function bar by
sliding ZVthe COMAND controller and
press Wto confirm.
X Select Calculate alternative route
Calculate alternative route
and press Wto confirm.
The function is switched on Oor off ª,
depending on the previous status.
Function activated: alternative routes are
calculated directly after the destination is
entered.
Menu functions X To select the next or previous alterna-
tive route: selectNext
Next orPrevious Previous and
press Wto confirm. X
To start route guidance using the selec-
ted alternative route: selectStart
Start and
press Wto confirm.
COMAND Online begins route guidance on the selected alternative route.
Route information Displaying destination information
Example: destination information
The example shows information on distance,
estimated time of arrival and estimated
remaining driving time to the Odestination
and two way points.
X To switch to navigation mode: press the
Ø button.
X To show the menu: pressWthe COMAND
controller.
X Select Route Routein the navigation system
menu bar by turning cVdthe COMAND
controller and press Wto confirm.
X Select Destination information
Destination information and
press Wto confirm.
Destination information is displayed.
X To call up further destination informa-
tion: turncVd the COMAND controller.
X To close the destination information:
slide XVY the COMAND controller or press
the % back button.
i You can display destination information
for the destination, for both way points and
the intermediate stop, if they are part of the route. 358
NavigationCOMAND Online
Page 362 of 637
If a mobile phone is connected to COMAND
Online and a phone number is included in
the destination information, you can call it
(Y page 390).
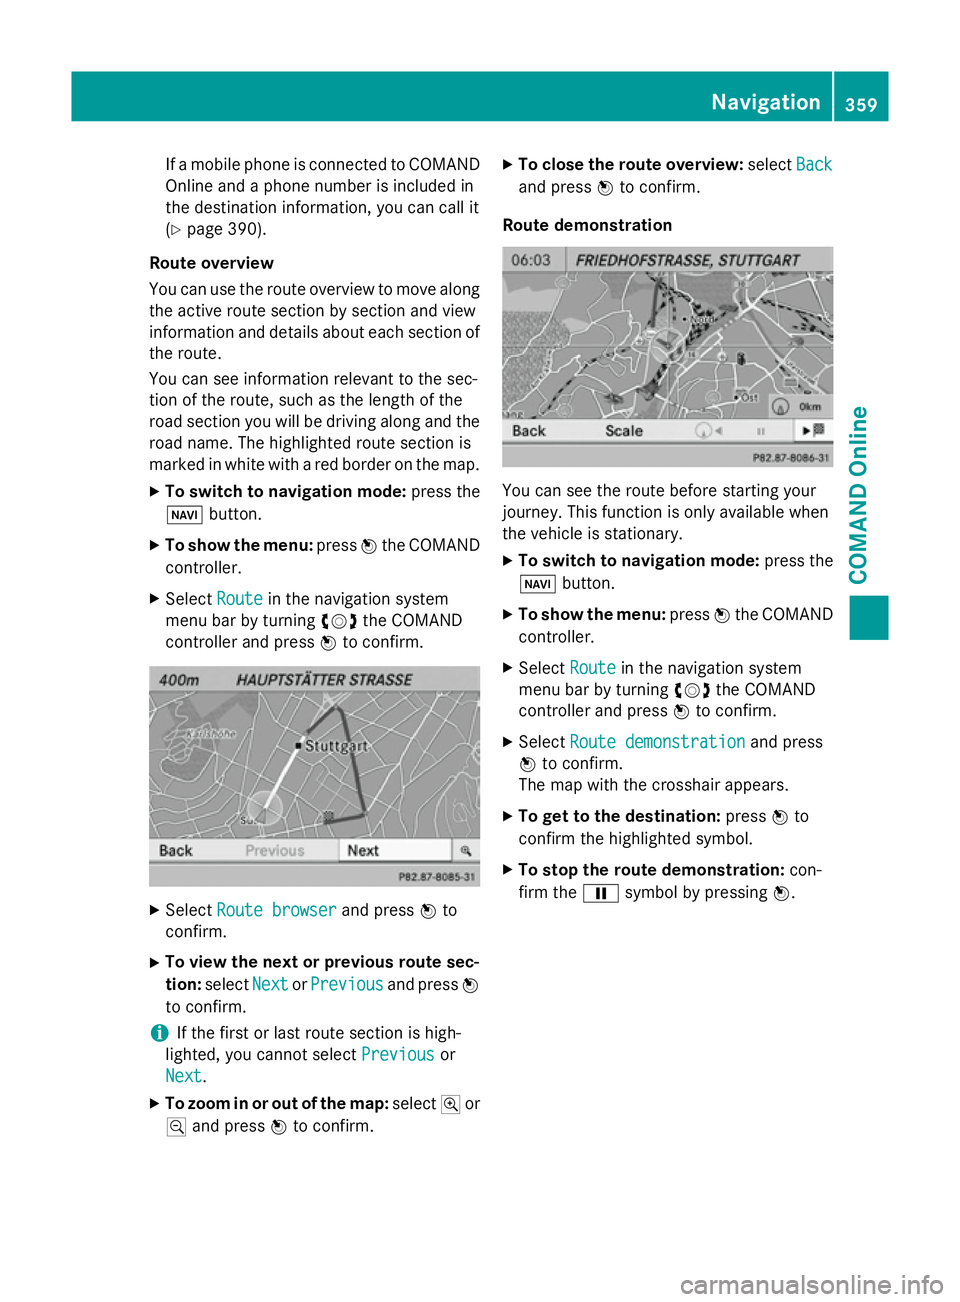
Route overview
You can use the route overview to move along the active route section by section and view
information and details about each section of
the route.
You can see information relevant to the sec-
tion of the route, such as the length of the
road section you will be driving along and the road name. The highlighted route section is
marked in white with a red border on the map.
X To switch to navigation mode: press the
Ø button.
X To show the menu: pressWthe COMAND
controller.
X Select Route
Route in the navigation system
menu bar by turning cVdthe COMAND
controller and press Wto confirm. X
Select Route browser Route browser and pressWto
confirm.
X To view the next or previous route sec-
tion: select Next
Next orPrevious
Previous and pressW
to confirm.
i If the first or last route section is high-
lighted, you cannot select Previous
Previous or
Next
Next.
X To zoom in or out of the map: selectNor
M and press Wto confirm. X
To close the route overview: selectBack
Back
and press Wto confirm.
Route demonstration You can see the route before starting your
journey. This function is only available when
the vehicle is stationary.
X To switch to navigation mode: press the
Ø button.
X To show the menu: pressWthe COMAND
controller.
X Select Route Routein the navigation system
menu bar by turning cVdthe COMAND
controller and press Wto confirm.
X Select Route demonstration
Route demonstration and press
W to confirm.
The map with the crosshair appears.
X To get to the destination: pressWto
confirm the highlighted symbol.
X To stop the route demonstration: con-
firm the Ësymbol by pressing W. Navigation
359COMAND Online Z
Page 363 of 637
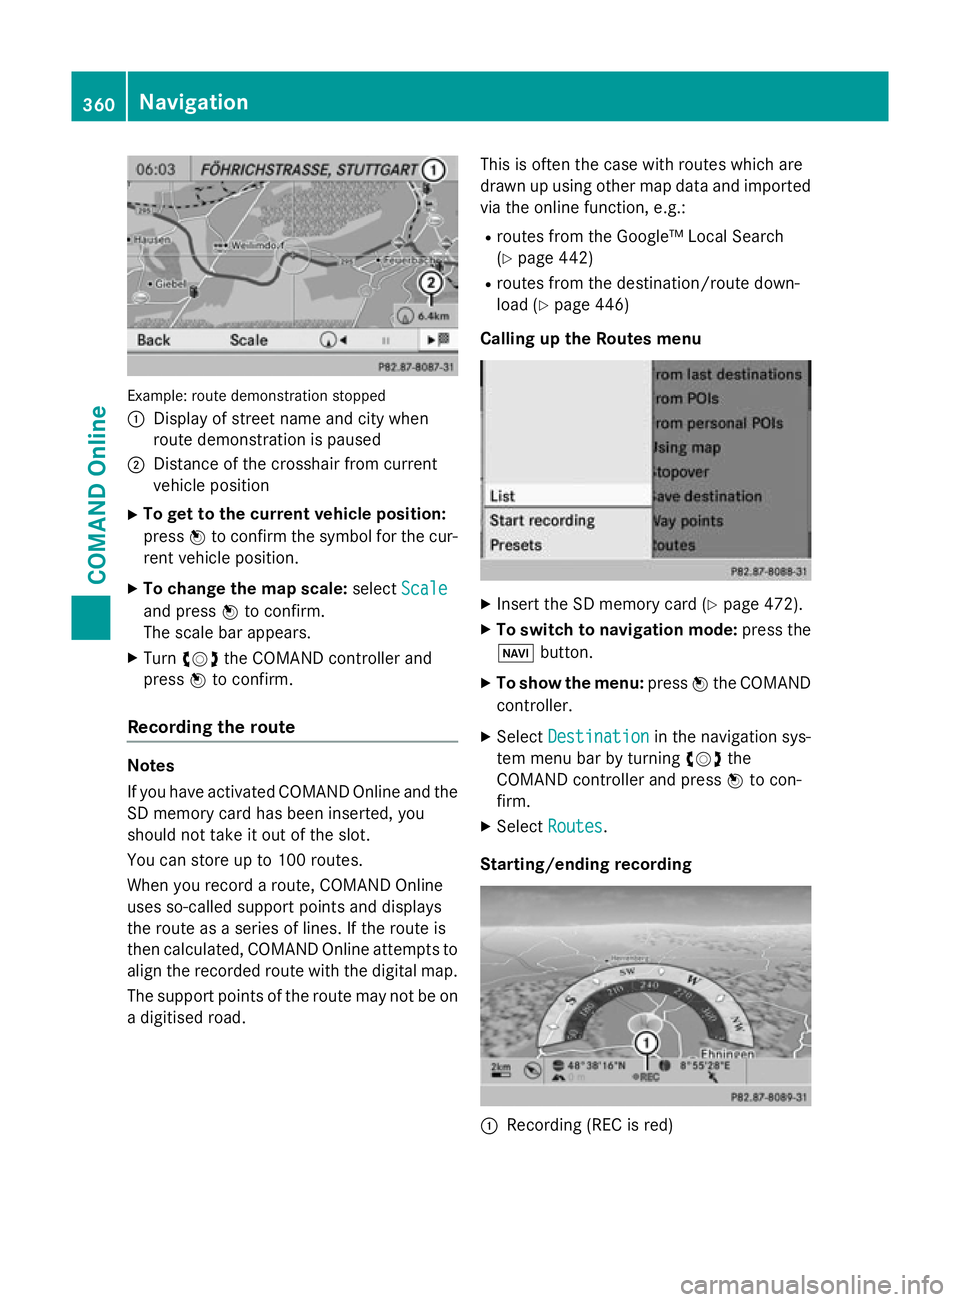
Example: route demonstration stopped
: Display of street name and city when
route demonstration is paused
; Distance of the crosshair from current
vehicle position
X To get to the current vehicle position:
press Wto confirm the symbol for the cur-
rent vehicle position.
X To change the map scale: selectScale
Scale
and press Wto confirm.
The scale bar appears.
X Turn cVd the COMAND controller and
press Wto confirm.
Recording the route Notes
If you have activated COMAND Online and the
SD memory card has been inserted, you
should not take it out of the slot.
You can store up to 100 routes.
When you record a route, COMAND Online
uses so-called support points and displays
the route as a series of lines. If the route is
then calculated, COMAND Online attempts to
align the recorded route with the digital map.
The support points of the route may not be on
a digitised road. This is often the case with routes which are
drawn up using other map data and imported
via the online function, e.g.:
R routes from the Google™ Local Search
(Y page 442)
R routes from the destination/route down-
load (Y page 446)
Calling up the Routes menu X
Insert the SD memory card (Y page 472).
X To switch to navigation mode: press the
Ø button.
X To show the menu: pressWthe COMAND
controller.
X Select Destination Destination in the navigation sys-
tem menu bar by turning cVdthe
COMAND controller and press Wto con-
firm.
X Select Routes
Routes .
Starting/ending recording :
Recording (REC is red) 360
NavigationCOMAND Online
Page 364 of 637
X
Call up the Routes menu (Y page 360).
X To start recording : selectStart
Start
recording
recording in the Routes menu by turning
cVd the COMAND controller and press W
to confirm.
The route is recorded and entered in a list.
# REC REC is displayed in red :.
X To end recording: selectStop
Stoprecording
recording
in the Routes menu by turning cVdthe
COMAND controller and press Wto con-
firm.
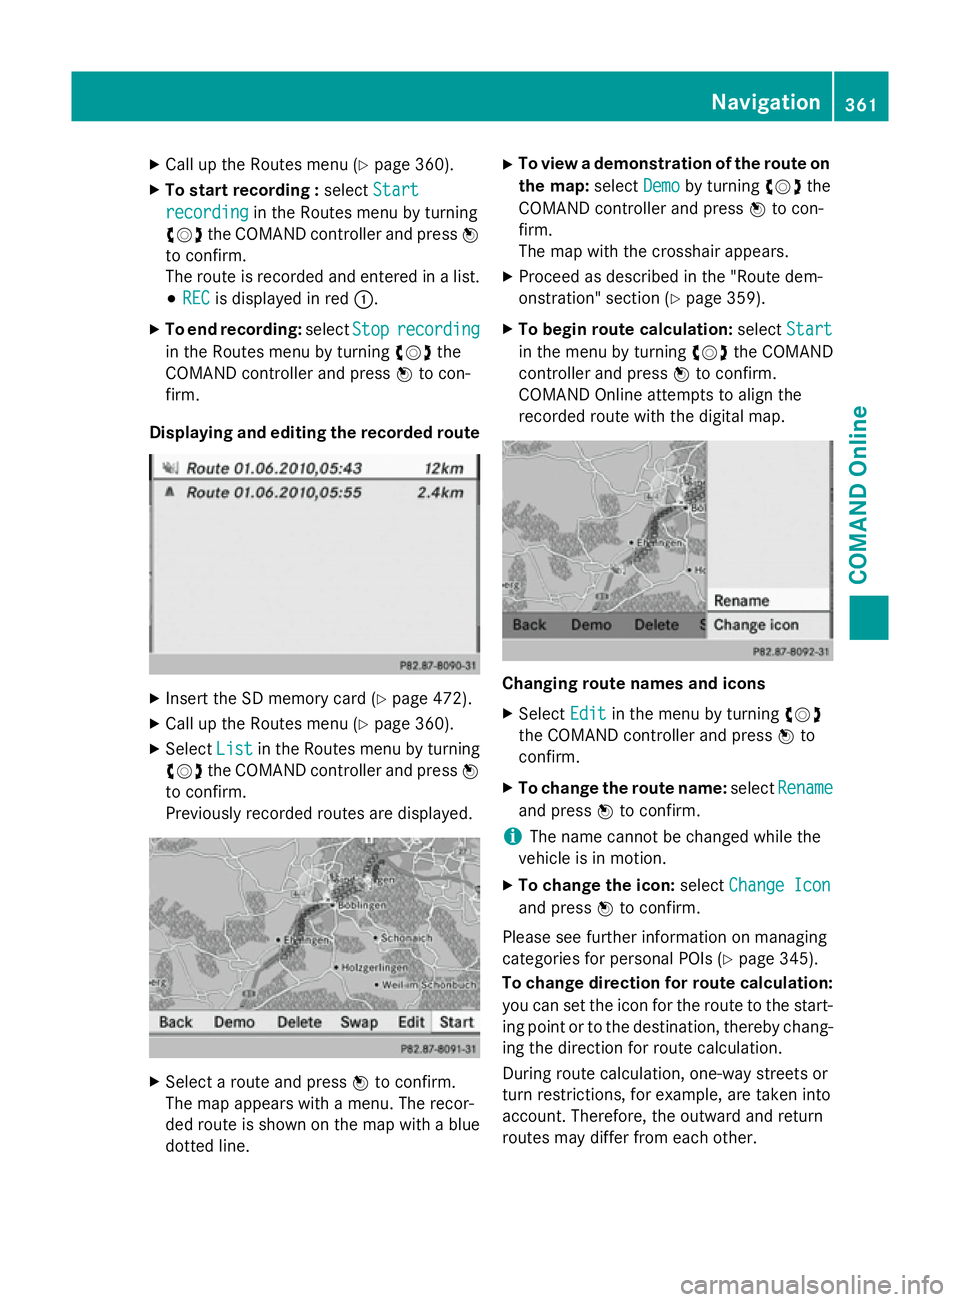
Displaying and editing the recorded route X
Insert the SD memory card (Y page 472).
X Call up the Routes menu (Y page 360).
X Select List
List in the Routes menu by turning
cVd the COMAND controller and press W
to confirm.
Previously recorded routes are displayed. X
Select a route and press Wto confirm.
The map appears with a menu. The recor-
ded route is shown on the map with a blue dotted line. X
To view a demonstration of the route on
the map: selectDemo
Demo by turning cVdthe
COMAND controller and press Wto con-
firm.
The map with the crosshair appears.
X Proceed as described in the "Route dem-
onstration" section (Y page 359).
X To begin route calculation: selectStart Start
in the menu by turning cVdthe COMAND
controller and press Wto confirm.
COMAND Online attempts to align the
recorded route with the digital map. Changing route names and icons
X
Select Edit Editin the menu by turning cVd
the COMAND controller and press Wto
confirm.
X To change the route name: selectRename
Rename
and press Wto confirm.
i The name cannot be changed while the
vehicle is in motion.
X To change the icon: selectChange Icon
Change Icon
and press Wto confirm.
Please see further information on managing
categories for personal POIs (Y page 345).
To change direction for route calculation:
you can set the icon for the route to the start- ing point or to the destination, thereby chang-
ing the direction for route calculation.
During route calculation, one-way streets or
turn restrictions, for example, are taken into
account. Therefore, the outward and return
routes may differ from each other. Navigation
361COMAND Online Z