2012 MERCEDES-BENZ SL ROADSTER climate control
[x] Cancel search: climate controlPage 149 of 637
air vents. The side air vents can only be
closed when the controls on the side air
vents are turned downwards. Setting the airflow
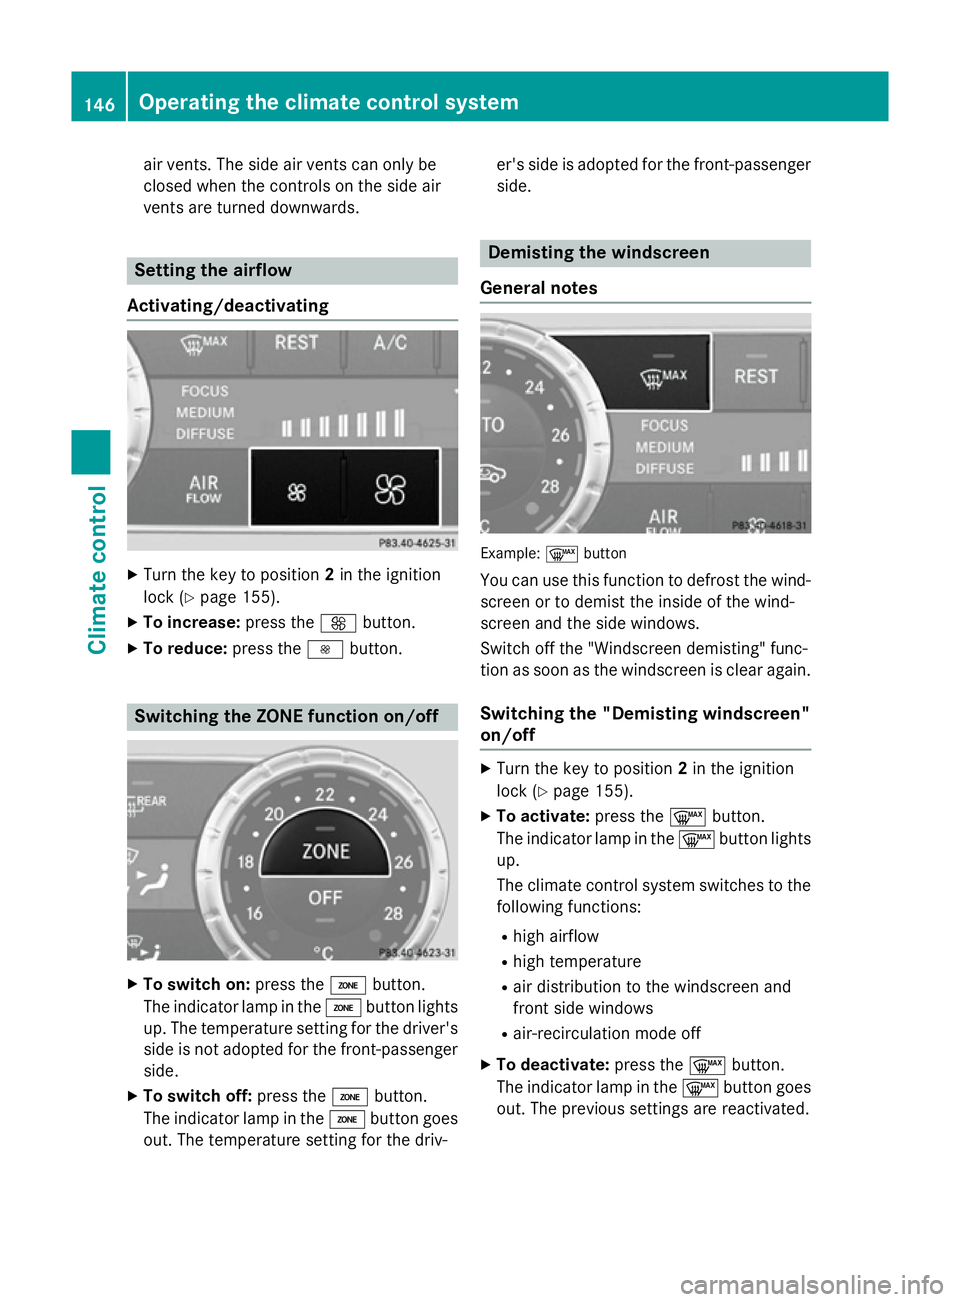
Activating/deactivating X
Turn the key to position 2in the ignition
lock (Y page 155).
X To increase: press theKbutton.
X To reduce: press theIbutton. Switching the ZONE function on/off
X
To switch on: press theábutton.
The indicator lamp in the ábutton lights
up. The temperature setting for the driver's side is not adopted for the front-passengerside.
X To switch off: press theábutton.
The indicator lamp in the ábutton goes
out. The temperature setting for the driv- er's side is adopted for the front-passenger
side. Demisting the windscreen
General notes Example:
¬button
You can use this function to defrost the wind-
screen or to demist the inside of the wind-
screen and the side windows.
Switch off the "Windscreen demisting" func-
tion as soon as the windscreen is clear again.
Switching the "Demisting windscreen"
on/off X
Turn the key to position 2in the ignition
lock (Y page 155).
X To activate: press the¬button.
The indicator lamp in the ¬button lights
up.
The climate control system switches to the
following functions:
R high airflow
R high temperature
R air distribution to the windscreen and
front side windows
R air-recirculation mode off
X To deactivate: press the¬button.
The indicator lamp in the ¬button goes
out. The previous settings are reactivated. 146
Operating the climate control systemClimate control
Page 150 of 637
Air-recirculation mode remains deactiva-
ted.
or
X Press the Ãbutton.
The indicator lamp in the ¬button goes
out. Airflow and air distribution are set to
automatic mode.
or X Turn the temperature controls on the left or
the right on the climate control panel clock- wise or anti-clockwise.
Turn temperature controls :orD clock-
wise or anti-clockwise (Y page 141).
or
X Press the KorI button. Demisting the windows
Windows misted up on the inside X
Activate the ¿cooling with air dehu-
midification function.
X Activate the Ãmode button.
X If the windows continue to mist up, activate
the ¬ "Windscreen demisting" function.
i You should only select this setting until
the windscreen is clear again.
Windows misted up on the outside X
Activate the windscreen wipers.
X Press the _button repeatedly until the
P orO symbol appears in the dis-
play.
i You should only select this setting until
the windscreen is clear again. Rear window heating
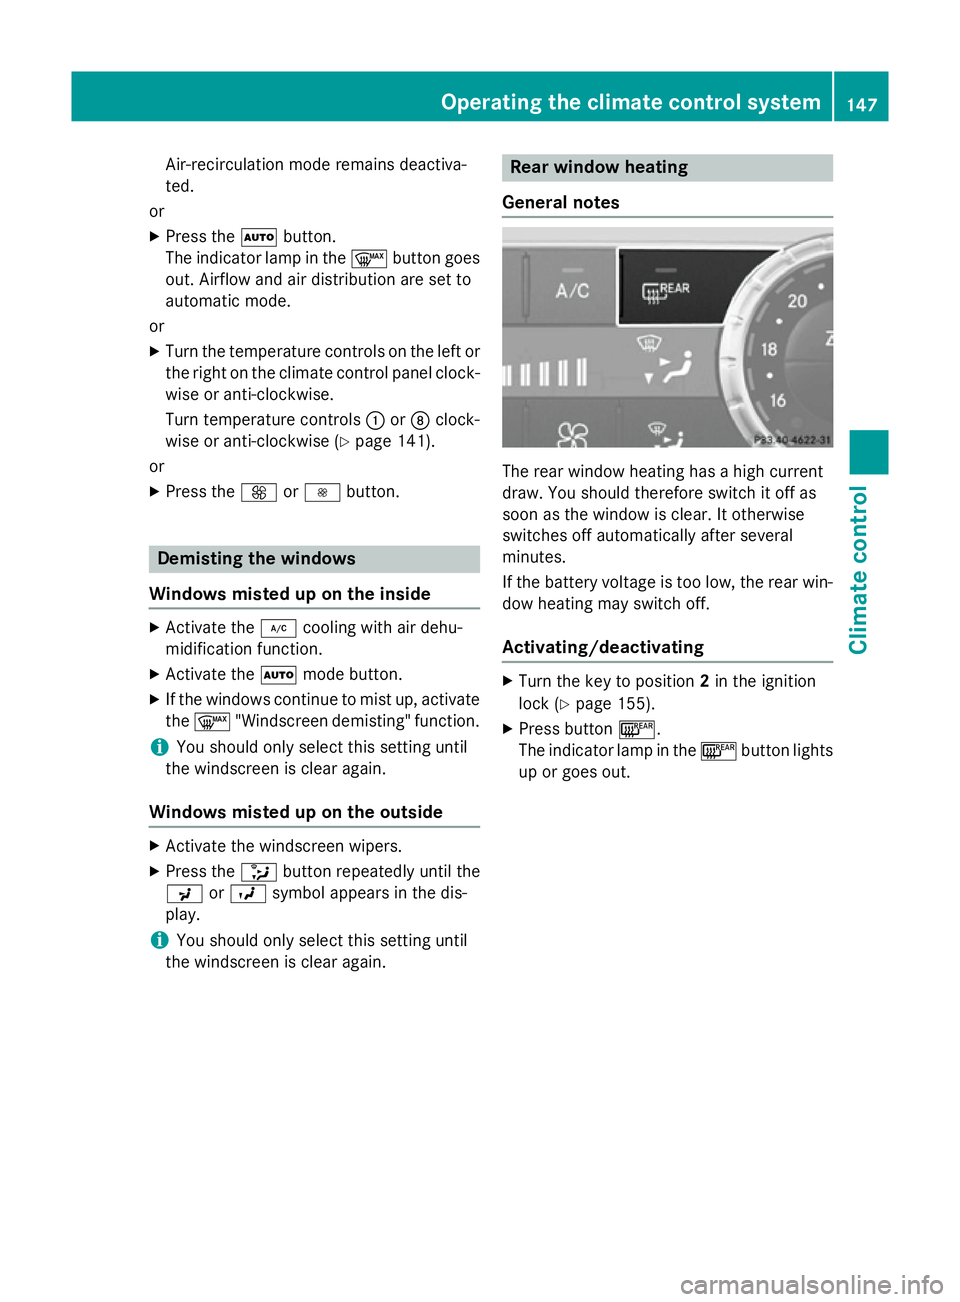
General notes The rear window heating has a high current
draw. You should therefore switch it off as
soon as the window is clear. It otherwise
switches off automatically after several
minutes.
If the battery voltage is too low, the rear win-
dow heating may switch off.
Activating/deactivating X
Turn the key to position 2in the ignition
lock (Y page 155).
X Press button ¤.
The indicator lamp in the ¤button lights
up or goes out. Operating the climate control system
147Climate control
Page 151 of 637
Problems with the rear window heating
Problem
Possible causes/consequences and
M
MSolutions The rear window heat-
ing has switched off
prematurely or cannot
be activated. The on-board voltage is too low because too many electrical con-
sumers are switched on.
X Switch off any consumers that are not required, e.g. reading
lamps, interior lighting or the seat heating.
When the battery is sufficiently charged, the rear window heat-
ing can be activated again. Activating/deactivating air-recircula-
tion mode
General notes If you switch on air-recirculation mode, the
windows can mist up more quickly, in partic-
ular at low temperatures. Only use air-recir-
culation mode briefly to prevent the windows
misting up.
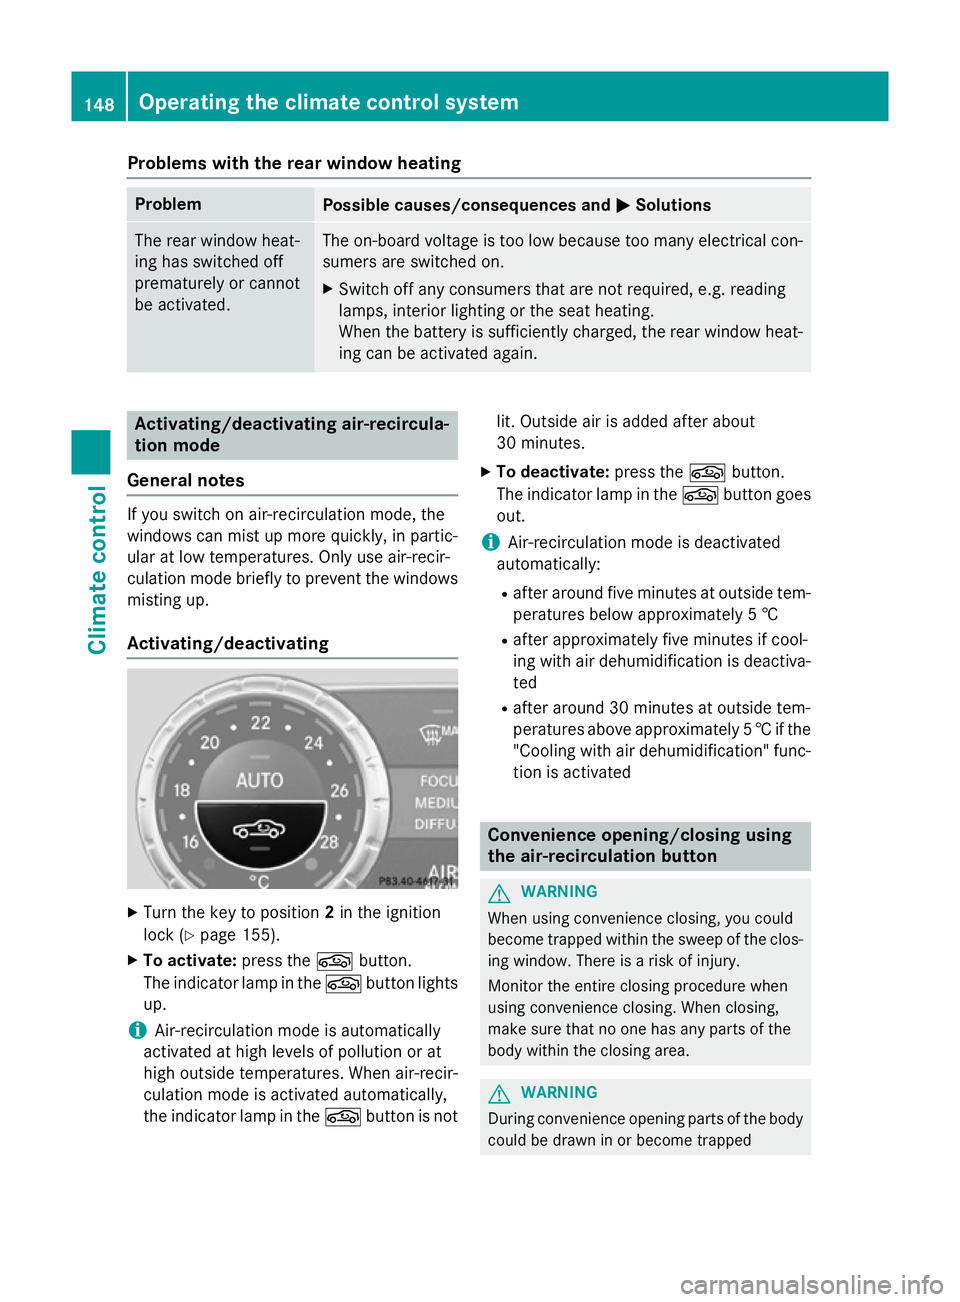
Activating/deactivating X
Turn the key to position 2in the ignition
lock (Y page 155).
X To activate: press thegbutton.
The indicator lamp in the gbutton lights
up.
i Air-recirculation mode is automatically
activated at high levels of pollution or at
high outside temperatures. When air-recir-
culation mode is activated automatically,
the indicator lamp in the gbutton is not lit. Outside air is added after about
30 minutes.
X To deactivate: press thegbutton.
The indicator lamp in the gbutton goes
out.
i Air-recirculation mode is deactivated
automatically:
R after around five minutes at outside tem-
peratures below approximately 5 †
R after approximately five minutes if cool-
ing with air dehumidification is deactiva- ted
R after around 30 minutes at outside tem-
peratures above approximately 5 †if the
"Cooling with air dehumidification" func- tion is activated Convenience opening/closing using
the air-recirculation button
G
WARNING
When using convenience closing, you could
become trapped within the sweep of the clos- ing window. There is a risk of injury.
Monitor the entire closing procedure when
using convenience closing. When closing,
make sure that no one has any parts of the
body within the closing area. G
WARNING
During convenience opening parts of the body could be drawn in or become trapped 148
Operating the climate control systemClimate control
Page 152 of 637
between the side window and window frame.
There is a risk of injury.
When opening, make sure that nobody is
touching the side window. If someone
becomes trapped, press the Wswitch
immediately to open/close the side window
in the door. The side window stops. To con-
tinue closing the side window, pull on the
W switch. X
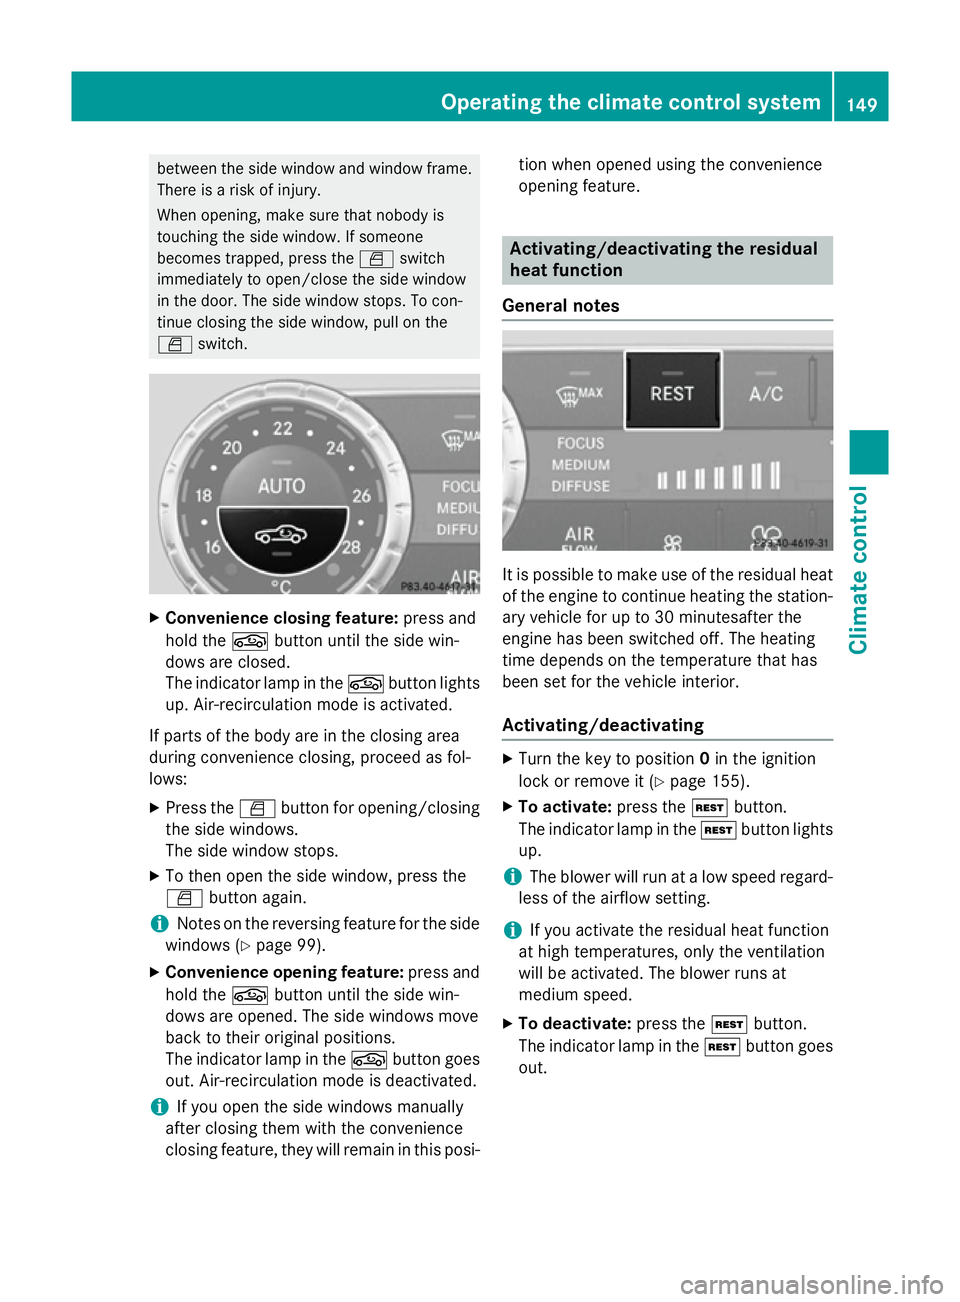
Convenience closing feature: press and
hold the gbutton until the side win-
dows are closed.
The indicator lamp in the gbutton lights
up. Air-recirculation mode is activated.
If parts of the body are in the closing area
during convenience closing, proceed as fol-
lows: X Press the Wbutton for opening/closing
the side windows.
The side window stops.
X To then open the side window, press the
W button again.
i Notes on the reversing feature for the side
windows (Y page 99).
X Convenience opening feature: press and
hold the gbutton until the side win-
dows are opened. The side windows move
back to their original positions.
The indicator lamp in the gbutton goes
out. Air-recirculation mode is deactivated.
i If you open the side windows manually
after closing them with the convenience
closing feature, they will remain in this posi- tion when opened using the convenience
opening feature. Activating/deactivating the residual
heat function
General notes It is possible to make use of the residual heat
of the engine to continue heating the station- ary vehicle for up to 30 minutesafter the
engine has been switched off. The heating
time depends on the temperature that has
been set for the vehicle interior.
Activating/deactivating X
Turn the key to position 0in the ignition
lock or remove it (Y page 155).
X To activate: press theÌbutton.
The indicator lamp in the Ìbutton lights
up.
i The blower will run at a low speed regard-
less of the airflow setting.
i If you activate the residual heat function
at high temperatures, only the ventilation
will be activated. The blower runs at
medium speed.
X To deactivate: press theÌbutton.
The indicator lamp in the Ìbutton goes
out. Operating the climate control system
149Climate control Z
Page 153 of 637
Residual heat is deactivated automatically:
R after approximately 30 minutes
R when the ignition is switched on
R if the battery voltage drops Adjusting the air vents
Important safety notes
G
WARNING
Very hot or very cold air can flow from the air vents. This could result in burns or frostbite in the immediate vicinity of the air vents. There
is a risk of injury.
Make sure that all vehicle occupants always
maintain a sufficient distance to the air out-
lets. If necessary, redirect the airflow to
another area of the vehicle interior. G
WARNING
When AIRSCARF is switched on, very hot air
can flow from the vents in the head restraints. This could result in burns in the immediate
vicinity of the air vents. There is a risk of injury.
Reduce the heater output before it becomes
too hot.
In order to ensure the direct flow of fresh air
through the air vents into the vehicle interior, please observe the following notes:
R keep the air inlet grille on the bonnet and in
the engine compartment on the front-
passenger side free of blockages, such as
ice, snow or leaves.
R never cover the vents or ventilation grilles
in the vehicle interior.
i You can move the adjusters for the air
vents vertically or horizontally to set the
direction of the airflow.
i Optimal climate control function is ach-
ieved by opening the air vents fully and set-
ting the adjusters to the middle position. Setting the centre air vents
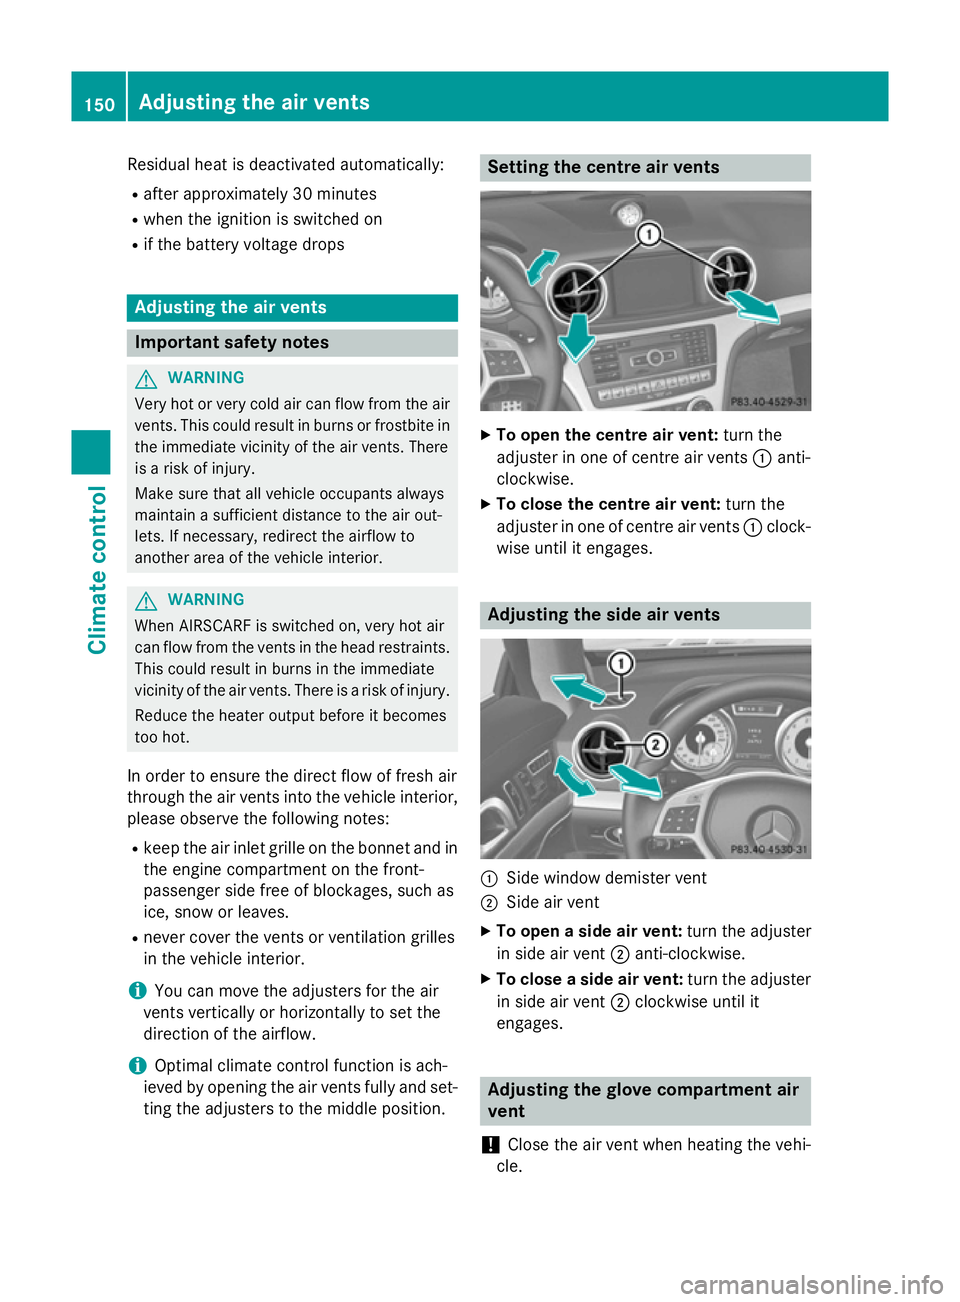
X
To open the centre air vent: turn the
adjuster in one of centre air vents :anti-
clockwise.
X To close the centre air vent: turn the
adjuster in one of centre air vents :clock-
wise until it engages. Adjusting the side air vents
:
Side window demister vent
; Side air vent
X To open a side air vent: turn the adjuster
in side air vent ;anti-clockwise.
X To close a side air vent: turn the adjuster
in side air vent ;clockwise until it
engages. Adjusting the glove compartment air
vent
! Close the air vent when heating the vehi-
cle. 150
Adjusting the air ventsClimate cont
rol
Page 154 of 637
At high outside temperatures, open the air
vent and activate the "cooling with air dehu- midification" function. Otherwise, temper-
ature-sensitive items stored in the glove
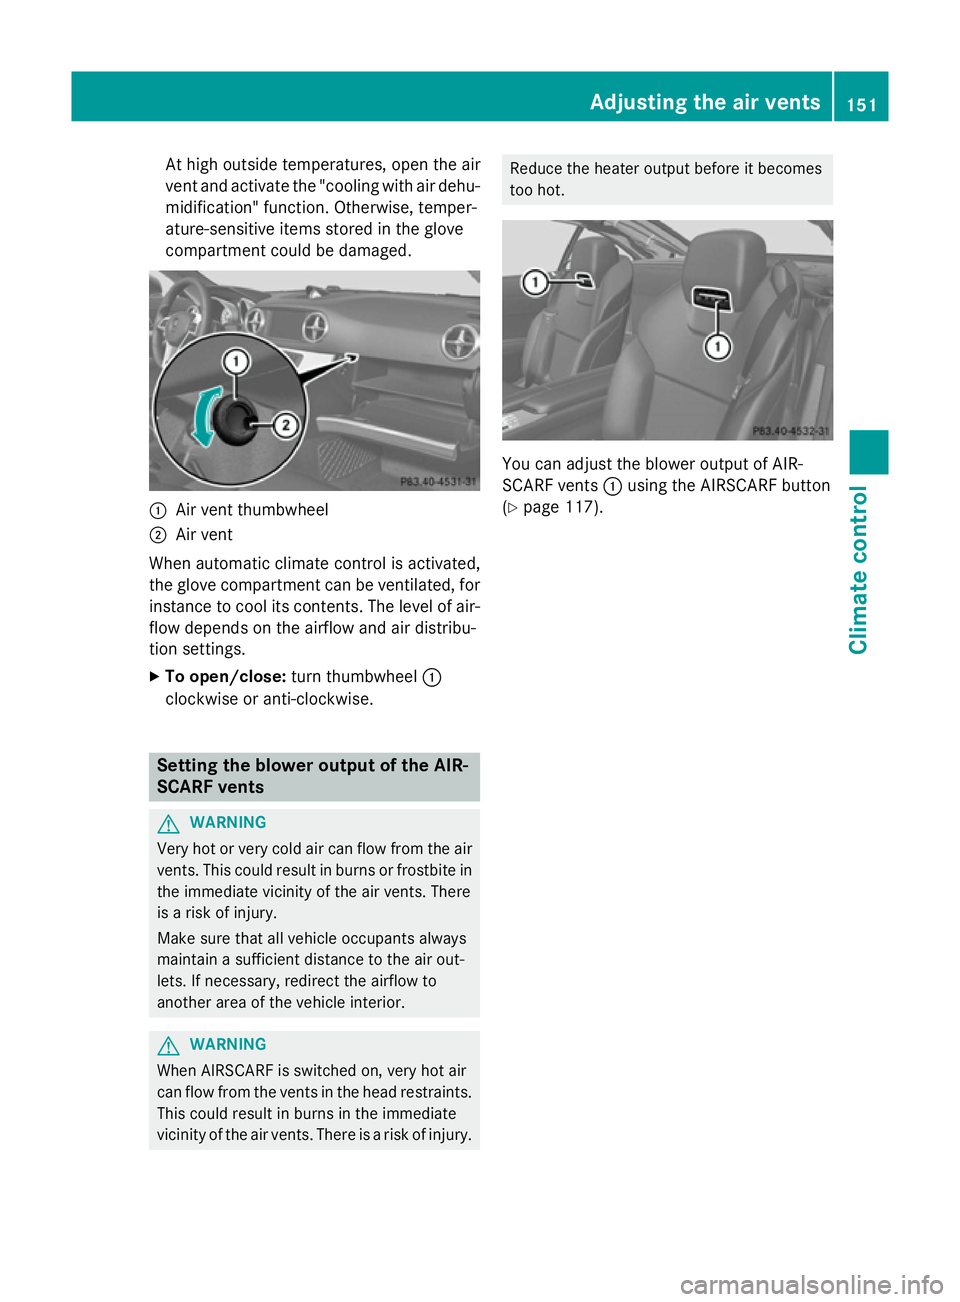
compartment could be damaged. :
Air vent thumbwheel
; Air vent
When automatic climate control is activated,
the glove compartment can be ventilated, for
instance to cool its contents. The level of air-
flow depends on the airflow and air distribu-
tion settings.
X To open/close: turn thumbwheel :
clockwise or anti-clockwise. Setting the blower output of the AIR-
SCARF vents G
WARNING
Very hot or very cold air can flow from the air vents. This could result in burns or frostbite in the immediate vicinity of the air vents. There
is a risk of injury.
Make sure that all vehicle occupants always
maintain a sufficient distance to the air out-
lets. If necessary, redirect the airflow to
another area of the vehicle interior. G
WARNING
When AIRSCARF is switched on, very hot air
can flow from the vents in the head restraints. This could result in burns in the immediate
vicinity of the air vents. There is a risk of injury. Reduce the heater output before it becomes
too hot.
You can adjust the blower output of AIR-
SCARF vents
:using the AIRSCARF button
(Y page 117). Adjusting the air vents
151Climate control Z
Page 320 of 637
Climate control status display
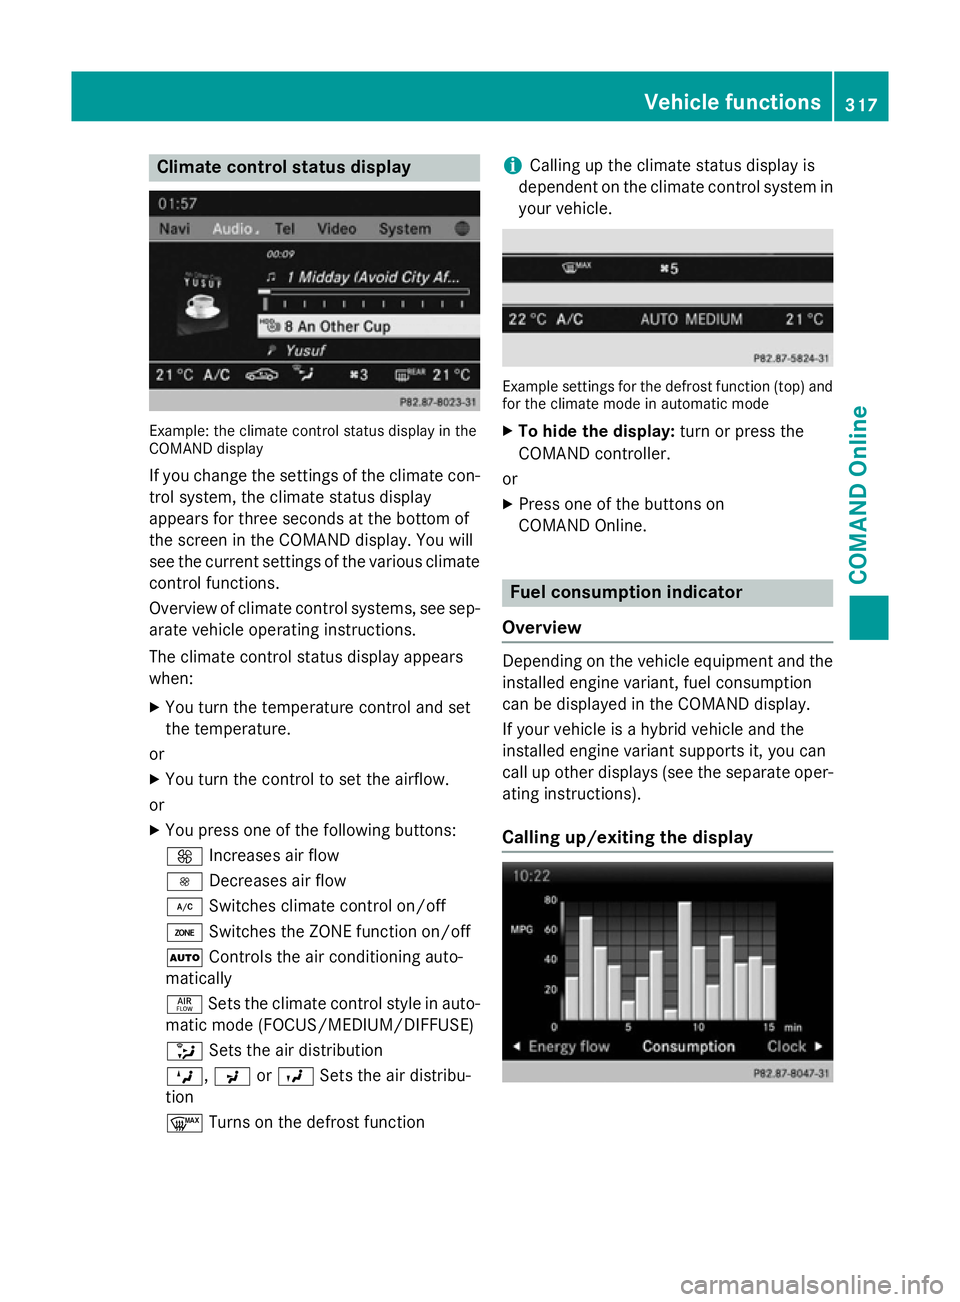
Example: the climate control status display in the
COMAND display
If you change the settings of the climate con-
trol system, the climate status display
appears for three seconds at the bottom of
the screen in the COMAND display. You will
see the current settings of the various climate control functions.
Overview of climate control systems, see sep- arate vehicle operating instructions.
The climate control status display appears
when:
X You turn the temperature control and set
the temperature.
or
X You turn the control to set the airflow.
or X You press one of the following buttons:
K Increases air flow
I Decreases air flow
¿ Switches climate control on/off
á Switches the ZONE function on/off
à Controls the air conditioning auto-
matically
ñ Sets the climate control style in auto-
matic mode (FOCUS/MEDIUM/DIFFUSE)
_ Sets the air distribution
M, PorO Sets the air distribu-
tion
¬ Turns on the defrost function i
Calling up the climate status display is
dependent on the climate control system in your vehicle. Example settings for the defrost function (top) and
for the climate mode in automatic mode
X To hide the display: turn or press the
COMAND controller.
or
X Press one of the buttons on
COMAND Online. Fuel consumption indicator
Overview Depending on the vehicle equipment and the
installed engine variant, fuel consumption
can be displayed in the COMAND display.
If your vehicle is a hybrid vehicle and the
installed engine variant supports it, you can
call up other displays (see the separate oper-
ating instructions).
Calling up/exiting the display Vehicle functions
317COMAND Online Z
Page 572 of 637
vehicle in a tow-through car wash. Other
transmission positions may lead to damage to the vehicle.
! Make sure that:
R the side windows and the roof are com-
pletely closed
R the climate control blower is switched off
R the windscreen wiper switch is at posi-
tion 0
The vehicle could otherwise be damaged.
You can wash the vehicle in an automatic car
wash from the very start.
Wash off excess dirt before cleaning the vehi- cle in an automatic car wash.
After using an automatic car wash, wipe wax
off the windscreen and the wiper blades. This
will prevent smears and reduce wiping noises caused by residue on the windscreen.
Washing by hand In some countries, washing by hand is only
allowed at specially equipped washing bays.
Observe the legal requirements for each indi- vidual country.
X Do not use hot water and do not wash the
vehicle in direct sunlight.
X Use a soft sponge to clean.
X Use a mild cleaning agent, such as a car
shampoo approved by Mercedes-Benz.
X Thoroughly hose down the vehicle with a
gentle jet of water.
X Do not point the water jet directly towards
the air inlet.
X Use plenty of water and rinse out the
sponge frequently.
X Rinse the vehicle with clean water and dry
thoroughly with a chamois.
X Do not let the cleaning agent dry on the
paintwork.
When using the vehicle in winter, remove all
traces of road salt deposits carefully and as
soon as possible. High-pressure cleaning equipment G
WARNING
The water jet of circular-jet nozzles (dirt grind- ers) can cause damage not visible from the
outside to tyres or chassis components. Com-
ponents damaged in this way can unexpect-
edly fail. There is a risk of an accident.
Do not use high-pressure cleaners with circu-
lar-jet nozzles to clean the vehicle. Have dam- aged tyres or chassis components replaced
immediately.
! Always maintain a distance of at least
30 cm between the vehicle and the high-
pressure cleaner nozzle. Information about
the correct distance is available from the
equipment manufacturer.
Move the high-pressure cleaner nozzle
around when cleaning your vehicle.
Do not aim directly at any of the following:
R tyres
R door gaps, roof gaps, joints etc.
R electrical components
R battery
R connectors
R lights
R seals
R trim elements
R ventilation slots
Damaged seals or electrical components
can lead to leaks or failures.
! Vehicles with HANDS-FREE ACCESS: if a
key with KEYLESS-GO is within the detec-
tion range of the KEYLESS-GO antenna, the
following situations could lead to the unin-
tentional opening of the boot lid:
R using a car wash
R using a high-pressure cleaner
Make sure that the key is at least 2 m away
from the vehicle. Care
569Maintenance and care Z