2012 MERCEDES-BENZ SL ROADSTER fuel type
[x] Cancel search: fuel typePage 15 of 637
SPEEDTRONIC ............................... 193
Driving tips
AMG ceramic brakes ..................... 180
Aquaplaning ................................... 181
Automatic transmission ................. 167
Brakes ........................................... 179
DISTRONIC PLUS ........................... 192
Downhill gradient ........................... 179
Driving abroad ............................... 126
Driving in winter ............................. 181
Driving on flooded roads ................ 181
Driving on wet roads ...................... 181
Fuel ................................................ 178
General .......................................... 178
Icy road surfaces ........................... 181
Limited braking efficiency on sal-
ted roads ....................................... 180
New brake pads/linings ................ 180
Running-in tips ............................... 154
Snow chains .................................. 599
Symmetrical dipped beam ............. 126
Wet road surface ........................... 180
DTMF tone transmission .................. 398
DVD
Copy protection ............................. 480
Fast forward/fast rewind ............... 476
Inserting ........................................ 469
Inserting/loading (Rear Seat
Entertainment System) .................. 528
Notes on discs ............................... 480
Removing/ejecting (Rear Seat
Entertainment System) .................. 528
Selecting a media type .................. 474
Selecting a track ............................ 475
Sound settings (balance, bass,
treble) ............................................ 299
DVD audio
Operating (on-board computer) ..... 234
DVD video
Operating (on-board computer) ..... 235
Rear Seat Entertainment System ... 535
Dynamic route guidance/TMC
Displaying traffic reports ............... 365
Displays on the map ...................... 365
Introduction ................................... 364
Switching on/of f........................... 364 E
EASY-ENTRY feature Activating/deactivating ................. 243
Function/note s............................. 118
EASY-EXIT feature
Crash-responsive ........................... 119
Function/note s............................. 118
Switching on/of f........................... 243
EBD (electronic brake force distri-
bution)
Display message ............................ 250
Function/note s................................ 76
ECO display
Function/note s............................. 178
On-board computer ....................... 232
ECO start/stop function
Automatic engine start .................. 159
Automatic engine switch-off .......... 159
Deactivating/activating ................. 160
General information ....................... 159
Important safety notes .................. 158
Introduction ................................... 158
Electrical fuses
see Fuses
Electromagnetic compatibility
Declaration of conformity ................ 33
Electronic Stability Program
see ESP® (Electronic Stability Program)
Emergency call 999 or 112 .............. 389
Emergency key
Unlocking the driver's door .............. 93
Emergency key element
Function/note s................................ 86
Locking vehicle ................................ 93
Emergency release
Driver's door .................................... 93
Emergency spare wheel
General notes ................................ 614
Important safety notes .................. 614
Inflating the collapsible spare
wheel ............................................. 615
Removing ....................................... 615
Technical data ............................... 617
Emergency unlocking
Vehicle ............................................. 93
Engine
Display message ............................ 258 12
Index
Page 25 of 637
Adjusting sound settings ............... 525
Adjusting the brightness ................ 526
Adjusting the colou r...................... 526
Adjusting the contrast ................... 526
AUX mode ...................................... 541
CD/DVD audio and MP3 mode ...... 527
Changing the batteries .................. 523
Changing the picture format .......... 526
Cordless headphone s.................... 522
Multiple users ................................ 525
Operating with the headphones ..... 525
Picture settings .............................. 526
System settings ............................. 526
TV mode ........................................ 531
Using the main loudspeaker .......... 525
Video DVD mode ........................... 535
Rear window heating
Problem (fault) ............................... 148
Switching on/of f........................... 147
Rear-compartment screens .............. 520
Rear-view mirror
Anti-dazzle mode (automatic) ........ 121
Dipping (manual) ........................... 120
Receiving vCards ............................... 418
Redialling (telephone) ....................... 397
Refuelling
Fuel gaug e....................................... 40
Important safety notes .................. 173
Notes for AMG vehicles ................. 624
Refuelling process ......................... 174
see Fuel
Remote control
Button lighting ............................... 521
Programming (garage door
opener) .......................................... 553
Rear Seat Entertainment System ... 520
Replacing bulbs
General notes ................................ 135
Reserve (fuel tank)
see Fuel
Reserve fuel
Display message ............................ 260
Warning lamp ................................. 280
Reset function ................................... 316
Resetting (factory settings) ............. 316
Residual heat (climate control) ........ 149Restraint system
see SRS (Supplemental Restraint
System)
Rev counter ........................................ 229
Reverse gear (selector lever) ........... 163
Reversing camera
Cleaning instructions ..................... 572
Displaying the image ..................... 322
Function/note s............................. 211
Switching on/of f........................... 212
Reversing feature
Side windows ................................... 99
Reversing function
Boot lid ............................................ 94
Reversing lamp (display message) .. 257
Roll bar
Display message ............................ 254
Operation ......................................... 55
Roller sunblind .................................. 109
Roof
Display message ............................ 271
Important safety notes .................. 103
Opening/closing (with key) ........... 105
Opening/closing (with roof
switch) ........................................... 104
Overview ........................................ 103
Problem (malfunction) ................... 110
Relocking ....................................... 105
Roof lining and carpets (cleaning
instructions) ...................................... 574
Roof switch ........................................ 104
Route .................................................. 358
Estimated time of arrival ................ 358
Route (navigation)
Calling up the "Routes" menu ........ 360
Displaying the distance to the des-tination .......................................... 358
Recording ...................................... 360
Route overview .............................. 359
Selecting an alternative route ........ 357
Setting route options (avoiding:
motorways, toll roads, tunnels,
ferries) ........................................... 325
Setting the route type (short
route, fast route, dynamic route or
economic route) ............................ 325
Starting calculation ........................ 329 22
Index
Page 177 of 637
fuel. Otherwise, fuel can enter the fuel sys-
tem. Even small amounts of the wrong fuel could result in damage to the fuel system
and the engine. Notify a qualified specialist
workshop and have the fuel tank and fuel
lines drained completely.
! Overfilling the fuel tank could damage the
fuel system.
! Take care not to spill any fuel on painted
surfaces. You could otherwise damage the
paintwork.
! Use a filter when adding fuel from a fuel
can. The fuel lines and/or the diesel injec-
tion system could otherwise be blocked by
particles from the fuel can.
Do not get into the vehicle again during the
refuelling process. Otherwise, electrostatic
charge could build up again.
If you overfill the fuel tank, some fuel may
spray out when you remove the fuel pump
nozzle.
Further information on fuel and fuel quality
(Y page 623). Refuelling
General notes The fuel filler flap is unlocked or locked auto-
matically when you open or close the vehicle
with the key or using KEYLESS-GO.
The position of the 8fuel filler cap is dis-
played in the instrument cluster. The arrow
next to the filling pump indicates the side of
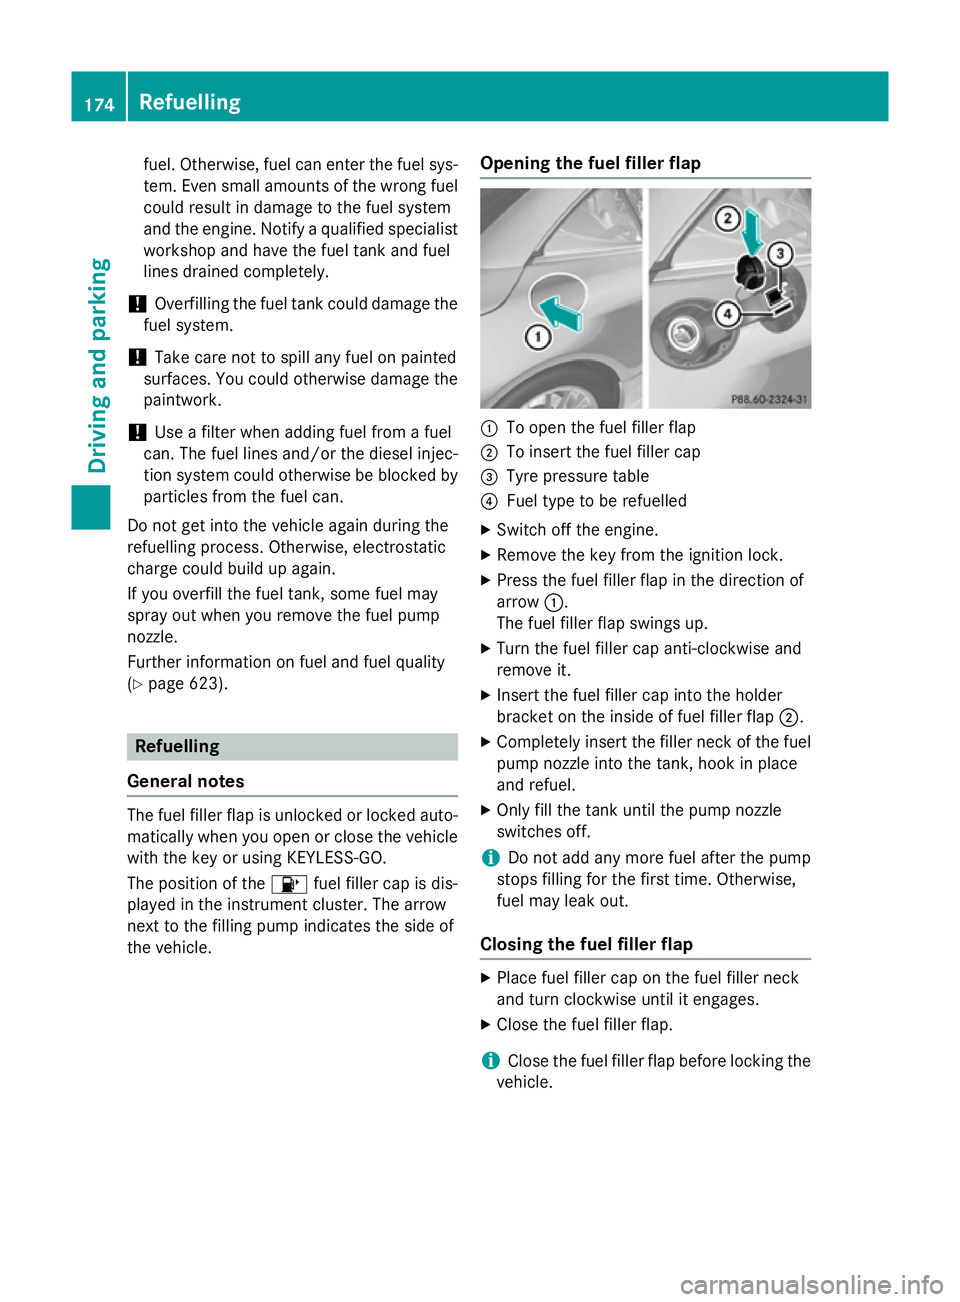
the vehicle. Opening the fuel filler flap :
To open the fuel filler flap
; To insert the fuel filler cap
= Tyre pressure table
? Fuel type to be refuelled
X Switch off the engine.
X Remove the key from the ignition lock.
X Press the fuel filler flap in the direction of
arrow :.
The fuel filler flap swings up.
X Turn the fuel filler cap anti-clockwise and
remove it.
X Insert the fuel filler cap into the holder
bracket on the inside of fuel filler flap ;.
X Completely insert the filler neck of the fuel
pump nozzle into the tank, hook in place
and refuel.
X Only fill the tank until the pump nozzle
switches off.
i Do not add any more fuel after the pump
stops filling for the first time. Otherwise,
fuel may leak out.
Closing the fuel filler flap X
Place fuel filler cap on the fuel filler neck
and turn clockwise until it engages.
X Close the fuel filler flap.
i Close the fuel filler flap before locking the
vehicle. 174
RefuellingDriving and parking
Page 321 of 637
X
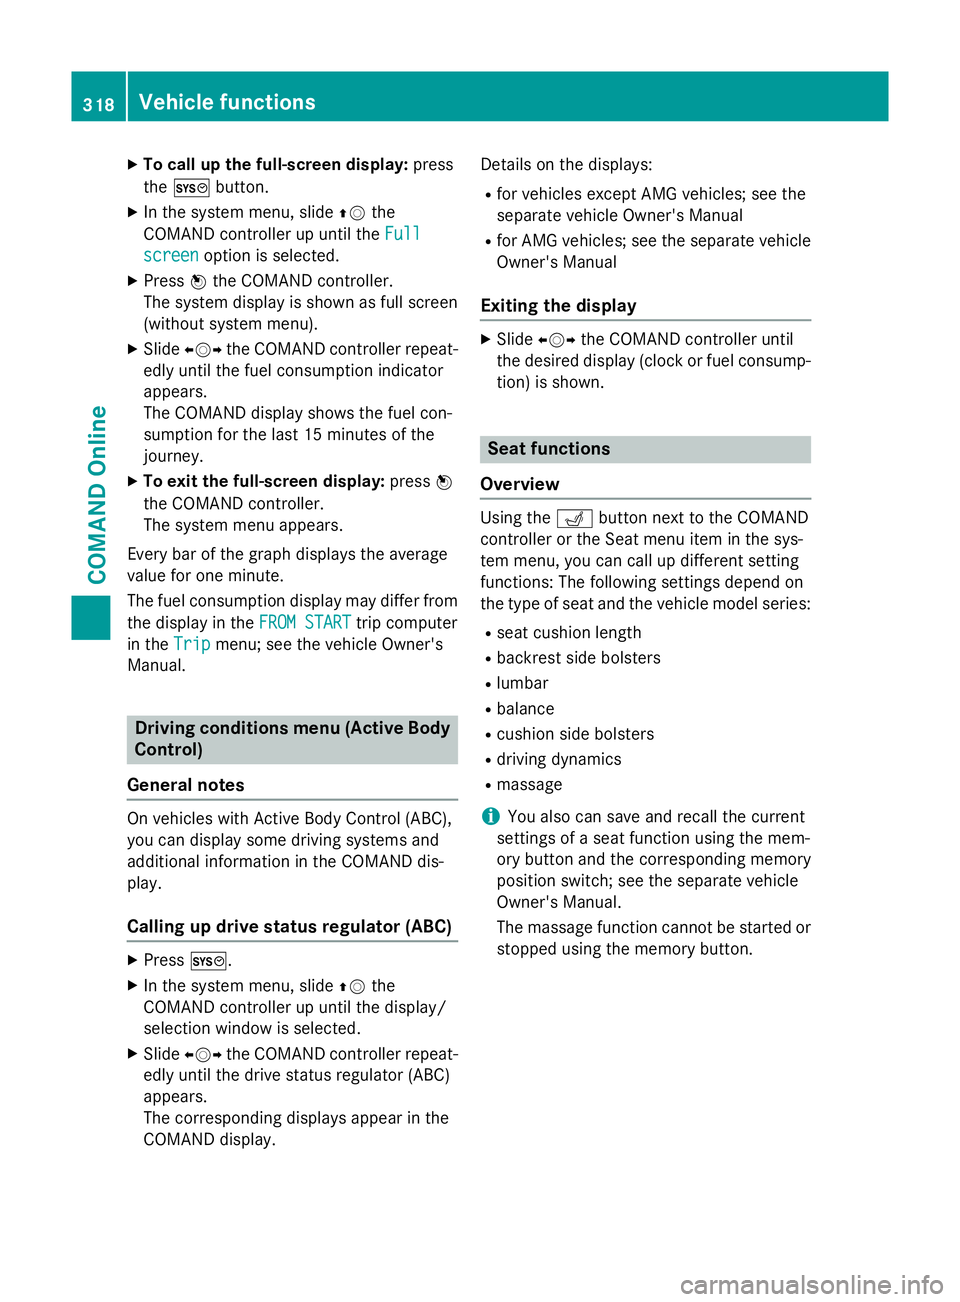
To call up the full-screen display: press
the W button.
X In the system menu, slide ZVthe
COMAND controller up until the Full Full
screen screen option is selected.
X Press Wthe COMAND controller.
The system display is shown as full screen
(without system menu).
X Slide XVY the COMAND controller repeat-
edly until the fuel consumption indicator
appears.
The COMAND display shows the fuel con-
sumption for the last 15 minutes of the
journey.
X To exit the full-screen display: pressW
the COMAND controller.
The system menu appears.
Every bar of the graph displays the average
value for one minute.
The fuel consumption display may differ from
the display in the FROM START FROM STARTtrip computer
in the Trip
Trip menu; see the vehicle Owner's
Manual. Driving conditions menu (Active Body
Control)
General notes On vehicles with Active Body Control (ABC),
you can display some driving systems and
additional information in the COMAND dis-
play.
Calling up drive status regulator (ABC) X
Press W.
X In the system menu, slide ZVthe
COMAND controller up until the display/
selection window is selected.
X Slide XVY the COMAND controller repeat-
edly until the drive status regulator (ABC)
appears.
The corresponding displays appear in the
COMAND display. Details on the displays:
R for vehicles except AMG vehicles; see the
separate vehicle Owner's Manual
R for AMG vehicles; see the separate vehicle
Owner's Manual
Exiting the display X
Slide XVY the COMAND controller until
the desired display (clock or fuel consump-
tion) is shown. Seat functions
Overview Using the
Tbutton next to the COMAND
controller or the Seat menu item in the sys-
tem menu, you can call up different setting
functions: The following settings depend on
the type of seat and the vehicle model series:
R seat cushion length
R backrest side bolsters
R lumbar
R balance
R cushion side bolsters
R driving dynamics
R massage
i You also can save and recall the current
settings of a seat function using the mem-
ory button and the corresponding memory
position switch; see the separate vehicle
Owner's Manual.
The massage function cannot be started or
stopped using the memory button. 318
Vehicle functionsCOMAND Online
Page 599 of 637
Useful information
i This Owner's Manual describes all mod-
els, series and optional equipment for your
vehicle that were available at the time of
going to press. National variations are pos- sible. Note that your vehicle may not be
equipped with all of the functions descri-
bed. This is also the case for systems and
functions relevant to safety.
i Read the information on qualified special-
ist workshops: (Y page 34). Important safety notes
G
WARNING
If wheels and tyres of the wrong size are used, the wheel brakes or suspension components
may be damaged. There is a risk of an acci-
dent.
Always replace wheels and tyres with those
that fulfil the specifications of the original
part.
When replacing wheels, make sure to fit the
correct:
R designation
R type
When replacing tyres, make sure to fit the
correct:
R designation
R manufacturer
R type G
WARNING
A flat tyre severely impairs the driving, steer-
ing and braking characteristics of the vehicle.
There is a risk of accident.
Tyres without run-flat characteristics:
R do not drive with a flat tyre.
R immediately replace the flat tyre with your
emergency spare wheel or spare wheel, or
consult a qualified specialist workshop. Tyres with run-flat characteristics:
R pay attention to the information and warn-
ing notices on MOExtended tyres (tyres
with run-flat characteristics).
Accessories that are not approved for your
vehicle by Mercedes-Benz or that are not
being used correctly can impair the operating
safety.
Before purchasing and using non-approved
accessories, visit a qualified specialist work-
shop and enquire about:
R suitability
R legal stipulations
R factory recommendations
Information on dimensions and types of
wheels and tyres for your vehicle can be
found (Y page 610).
Information on air pressure for the tyres on
your vehicle can be found:
R on the tyre pressure label on the fuel filler
flap (Y page 174)
R in the "Tyre pressure" section
Modification work on the brake system and
wheels is not permitted. The use of wheel
spacers or brake dust shields is not permit-
ted. This invalidates the general operating
permit for the vehicle.
i Further information on wheels and tyres
can be obtained at any qualified specialist
workshop. Operation
Information on driving
Check the tyre pressures when the vehicle is
heavily laden and, if necessary, adjust.
While driving, pay attention to vibrations,
noises and unusual handling characteristics,
e.g. pulling to one side. This may indicate that the wheels or tyres are damaged. If you sus-
pect that a tyre is defective, reduce your
speed immediately. Stop the vehicle as soon
as possible to check the wheels and tyres for 596
OperationWheels and tyres
Page 614 of 637
!
Large wheels: the lower the section width
for a certain wheel size, the lower the ride
comfort is on poor road surfaces. Roll com-
fort and suspension comfort are reduced
and the risk of damage to the wheels and
tyres as a result of driving over obstacles
increases.
Overview of abbreviations used in the follow- ing tyre tables:
R BA: both axles
R FA: front axle
R RA: rear axle
You will find a table with recommended tyre
pressures for various operating conditions on
the inside of your vehicle's fuel filler flap. For
further information on tyre pressure, see
(Y page 600). Check tyre pressures regularly
and only when the tyres are cold.
Notes on the vehicle equipment – always fit
the vehicle:
R with tyres of the same size on a given axle
(left/right)
R with the same type of tyres at a given time
(summer tyres, winter tyres, MOExtended
tyres)
Exception: it is permissible to fit a different
type or make in the event of a flat tyre.
Observe the "MOExtended tyres (tyres with
run-flat characteristics" section
(Y page 578).
Vehicles with MOExtended tyres are not
equipped with a TIREFIT kit at the factory. It is
therefore recommended that you additionally equip your vehicle with a TIREFIT kit if you fit tyres that do not feature run-flat characteris-
tics, e.g. winter tyres. A TIREFIT kit can be
obtained from a qualified specialist work-
shop.
i Not all wheel/tyre combinations can be
fitted at the factory in all countries. Wheel and tyre combinations
611Wheels and tyres Z