2012 MERCEDES-BENZ SL ROADSTER USB port
[x] Cancel search: USB portPage 482 of 637
All the tracks on the medium are played in
random order (e.g. track 3, 8, 5 etc.).
R Random track list
Random track list (MP3 mode only)
You will hear the tracks in the current play-
list or currently active folder (including all
subfolders) in random order.
i The
Normal track sequence
Normal track sequence option is
automatically selected when you change
the disc you are currently listening to or
when you select a different medium. If an
option is selected, it remains selected after COMAND Online is switched on or off.
Notes on MP3 mode General notes
Depending on the volume and format of the
MP3 data, the length of time required for
reading the data may increase.
Permissible data carriers
R CD-R and CD-RW
R DVD-R and DVD-RW
R DVD+R and DVD+RW
R SD memory card
R USB storage device
Permissible file systems R ISO 9660/Joliet standard for CDs
R UDF for audio and video DVDs
R FAT16, FAT32 and NTFS for SD memory
card and USB storage media
Multi-session CDs
For multi-session CDs, the content of the first session determines how COMAND Online will process the CD. COMAND Online plays only
one session and gives priority to the audio CD
session.
If possible, only play CDs on COMAND Online that have been written in one session.
File structure of a disc
When you create a disc with compressed
music files, the tracks can be organised in
folders. A folder may also contain subfolders. The disc may contain no more than eight
directory levels. Files beyond the eighth level
will not be recognised by the system.
i COMAND Online loads up to 15,000
tracks from the SD memory card or USB
storage medium.
Track and file names
When you create a disc with compressed
music files, you can assign names to the
tracks and folders.
COMAND Online uses these names accord-
ingly for the display. Folders that contain data other than MP3 or WMA tracks are not dis-
played by COMAND Online.
If MP3 or WMA files are stored in the root
directory itself, the root directory will also be
treated as a folder. COMAND Online will then show the name of the root directory as the
folder name.
You should observe the following when
assigning track names:
R track names must have at least one char-
acter.
R track names must have the extension
"mp3" or "wma".
R there must be a full stop between the track
name and the extension.
Example of a correct track name:
"Track1.mp3".
Permissible formats
COMAND supports the following formats:
R MPEG1 Audio Layer 3 (MP3)
R Microsoft Windows Media Audio V8 and V9
(WMA) without copy protection
Microsoft Windows Media Audio V2, V7, V8 and V9 (WMA)
R additional music files in AAC format with
the file extensions .aac, .mp4, .m4a
and .m4b, but not copy-protected iTunes
music files with the extension .m4p.
i If, in addition to MP3 files, there are other
music files in these audio formats stored on Audio
479COMAND Online Z
Page 497 of 637
Media Interface mode
Connection options Overview
You will find the connection sockets in the
centre console stowage compartment.
Device-specific adapter cables are required
to connect external devices to the Media
Interface. These are supplied in country-spe-
cific versions with the Media Interface
(Y
page 494).
You can connect the following data carriers to
COMAND Online via the Media Interface:
R iPod ®
R iPhone ®
R certain MP3 players
i Store individual parts in a safe place.
Only use genuine Mercedes-Benz connec-
tion cables.
i iPod ®
and iPhone ®
are registered trade-
marks of Apple Inc., Cupertino, California,
USA.
i MP3 players that support MTP (
Media
Transfer Protocol) can be used.
This allows the MP3 player to be easily con- nected to the Media Interface and removed
after use. Audio data is played without
problems.
On some MP3 players, you have to activate
the relevant function; see the MP3 player
operating instructions.
Supported devices
For further details and a list of supported
devices, contact a Mercedes-Benz Service
Centre or visit the website at http://
www.mercedes-benz-mobile.com/
connect. Then, follow the instructions in the
"Media Interface" section. Connecting an external device Do not leave external devices in the vehicle.
At extreme temperatures, they cannot be
guaranteed to function correctly (see the
operating instructions of the device in ques-
tion). Examples of extreme temperatures are direct sunlight or very low outside tempera-
tures. Mercedes-Benz accepts no liability for
damage to external devices.
i Never connect more than one device at a
time. You will otherwise not be able to play
back from the external device.
USB hubs (devices with several USB con-
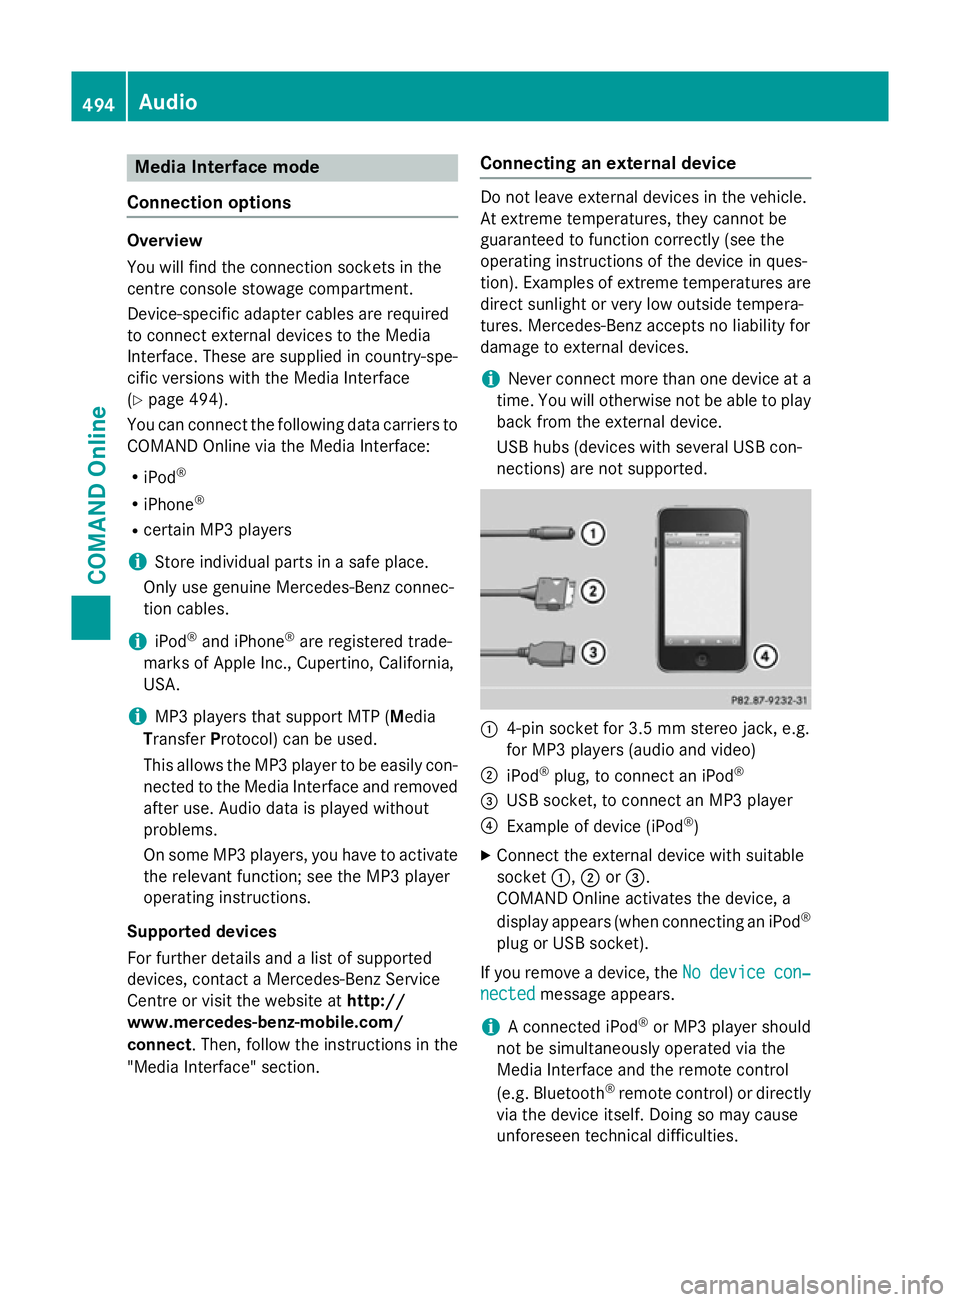
nections) are not supported. :
4-pin socket for 3.5 mm stereo jack, e.g.
for MP3 players (audio and video)
; iPod ®
plug, to connect an iPod ®
= USB socket, to connect an MP3 player
? Example of device (iPod ®
)
X Connect the external device with suitable
socket :,;or=.
COMAND Online activates the device, a
display appears (when connecting an iPod ®
plug or USB socket).
If you remove a device, the No Nodevice
device con‐
con‐
nected
nected message appears.
i A connected iPod ®
or MP3 player should
not be simultaneously operated via the
Media Interface and the remote control
(e.g. Bluetooth ®
remote control) or directly
via the device itself. Doing so may cause
unforeseen technical difficulties. 494
AudioCOMAND Online
Page 498 of 637
Applications (Apps) that are activated on
the connected device may lead to malfunc-
tions.
i Connecting a fully discharged iPod ®
or
MP3 player can result in an extended initi-
alisation period.
Error messages appear while the device is
being activated if:
R the connected device is not supported
(External device unavailable External device unavailable mes-
sage).
R the connected device consumes too much
power.
R the Media Interface connection is faulty.
R a mass storage device (e.g. USB memory
stick or USB hard drive) is connected to the Media Interface.
In this case the Please connect the Please connect the
device to the other USB port
device to the other USB port mes-
sage appears.
i The separate USB connection ensures
quick access and expanded media content
options.
i Information is available at any Mercedes-
Benz Service Centre.
Disconnecting an iPod ®
X Press the release buttons on iPod ®
plug ;
and pull the iPod ®
cable from the iPod ®
,
see the separate cable kit instructions.
Switching to Media Interface mode General notes
In extreme cases, starting up individual func-
tions can take up to several minutes; this
depends on the external device and its con-
tent (e.g. video podcasts).
Only use the original software to save files on
iPods ®
or MP3 players. Otherwise, some or all
functions may not be available. Switching on automatically
X Connect an external device (Y page 494).
COMAND Online activates the device (if
connected via the iPod ®
connector or USB
socket). The basic display then appears.
Switching on with the function button
The external device is connected to the Media Interface.
X Press the hfunction button one or more
times.
By pressing the function button repeatedly,
you can change the operating mode in the
following order: R audio CD/DVD/MP3 (disc)
R memory card mode
R MUSIC REGISTER
R USB memory
R Media Interface or audio AUX mode
R operation with Bluetooth ®
audio
Switching on using a number key
X Press the inumber key (for a DVD
changer) or the onumber key (for a
single DVD drive) number key.
This selects the connected external audio
device directly.
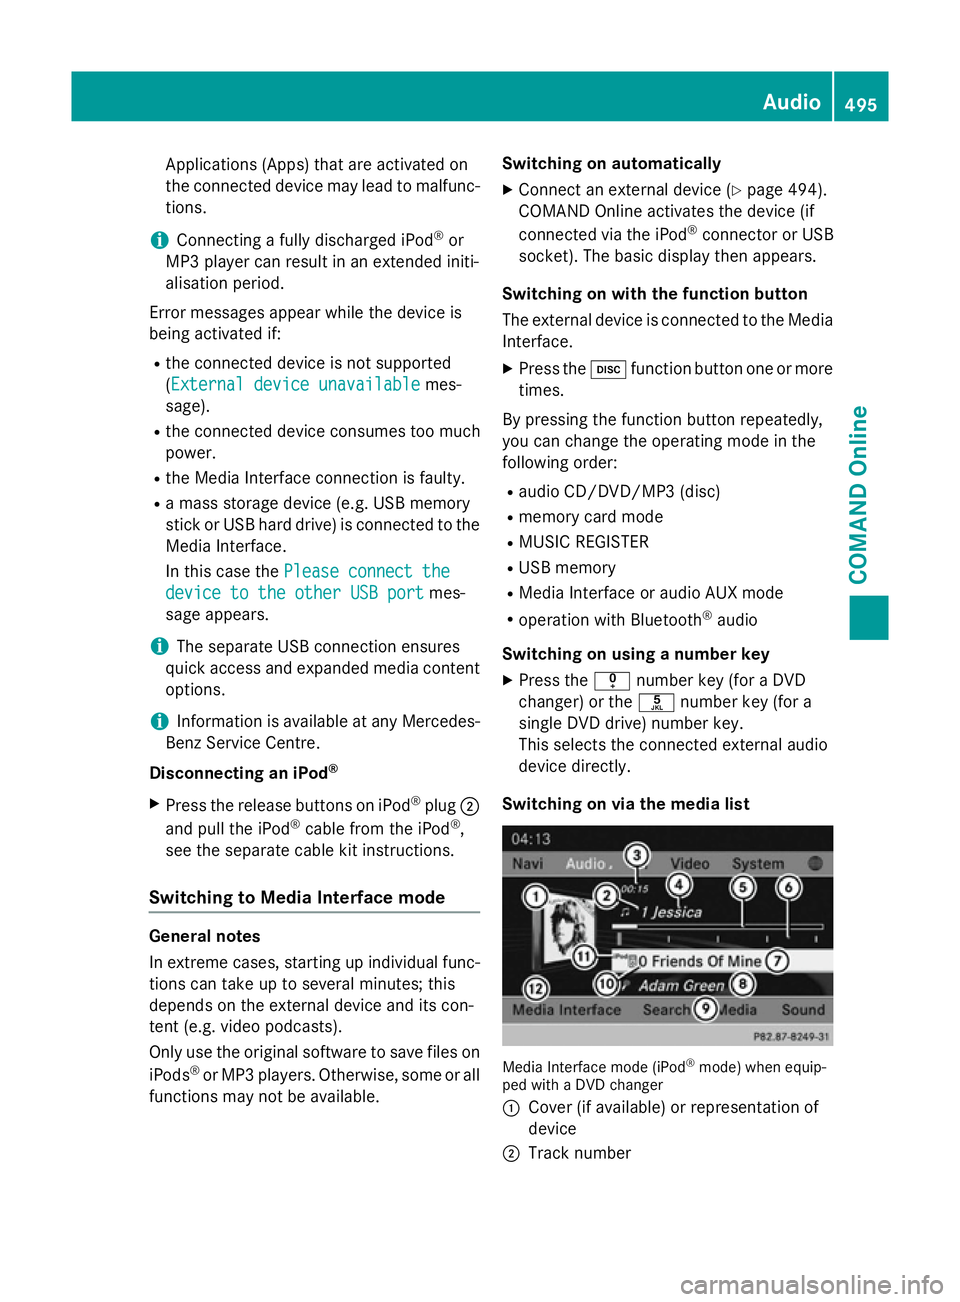
Switching on via the media list Media Interface mode (iPod
®
mode) when equip-
ped with a DVD changer
: Cover (if available) or representation of
device
; Track number Audio
495COMAND Online Z
Page 503 of 637
Special considerations when using MP3
players
Up to 8 directory levels with up to 1,000
tracks per directory are supported.
Do not use USB extension leads or adapters. They can impair functionality.
i DRM (Digital Rights Management) protec-
ted files are not supported by the Media
Interface. Audio AUX mode
Notes on audio AUX mode The varying volumes of external audio sour-
ces can mean that system messages (e.g.
traffic and navigation announcements) are
played at a noticeably increased volume. If
necessary, deactivate the system messages
or adjust their volume manually.
You can connect an external audio source
(AUX) to COMAND Online.
Depending on the vehicle model series the
connection is made via a jack in the storage
compartment in the centre console or via the
USB port (Y page 472).
If COMAND Online is equipped with a Media
Interface, external audio sources are connec-
ted using the cable set provided. The cable
set then replaces the audio AUX socket. The
connections for the Media Interface are loca- ted in the stowage compartment in the centre
console.
i You can find more information on the
Internet at http://www.mercedes-
benz.com/connect and in the "Media
Interface mode" section (Y page 494).
Switching to audio AUX mode Switching on with the function button
The external device is connected to the audio
AUX input.
X Press the hfunction button one or more
times. By pressing the function button repeatedly,
you can change the operating mode in the
following order:
R audio CD/DVD/MP3 (disc)
R memory card mode
R MUSIC REGISTER
R USB memory
R Media Interface or audio AUX mode
R operation with Bluetooth ®
audio
Switching on with the audio menu
When you connect an external audio source,
audio AUX is not selected automatically.
X Select Audio
Audio in the main function bar by
sliding ZVand turning cVdthe COMAND
controller and press Wto confirm.
If AUX mode was the last mode selected, it
will now be active.
If another audio source is switched on, you
can now switch to audio AUX mode in the
audio menu.
X Select Audio
Audio usingZVand press Wto
confirm.
The audio menu appears.
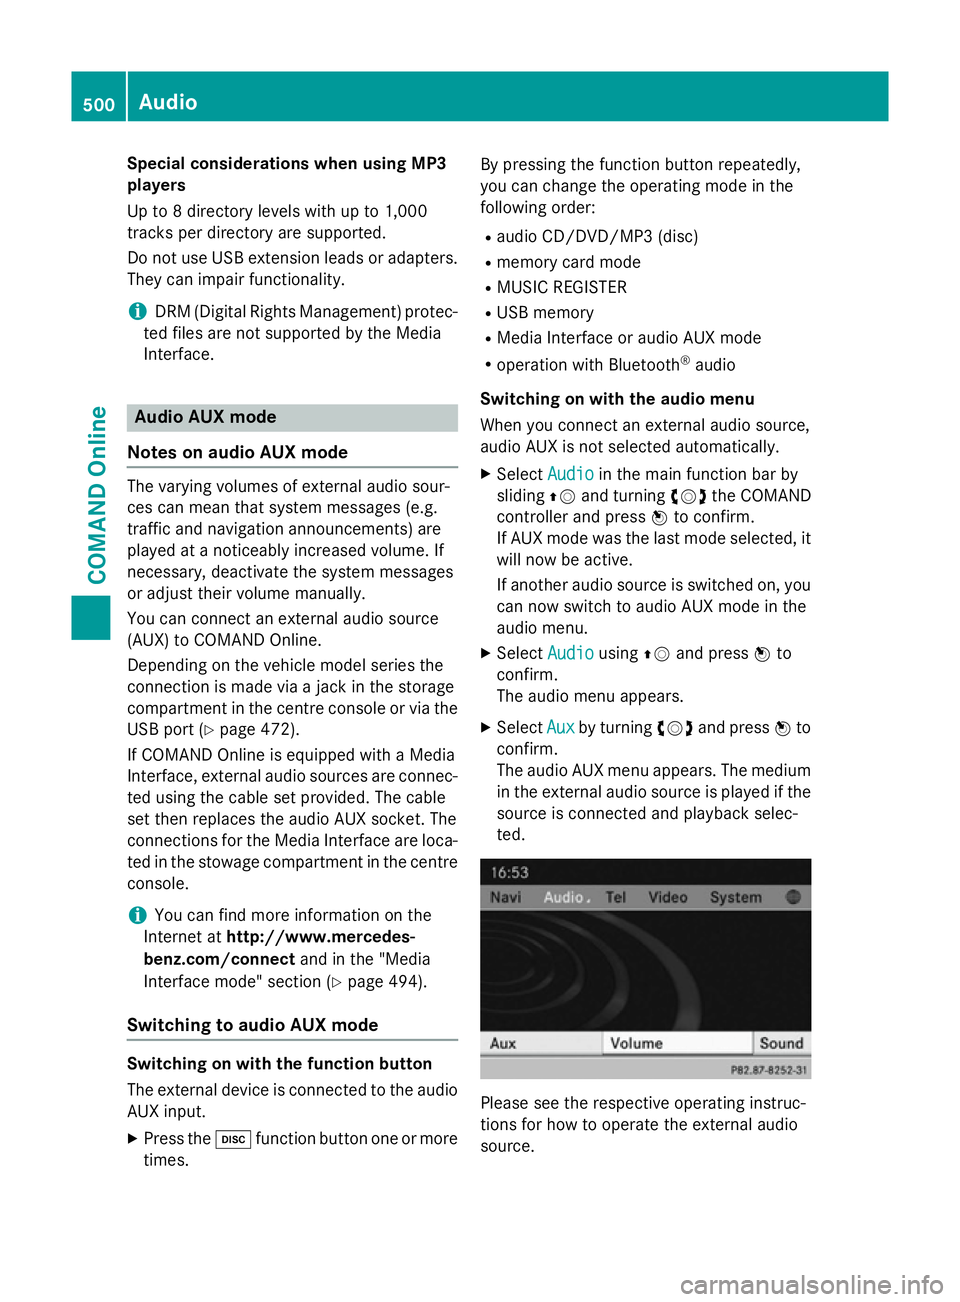
X Select Aux Auxby turning cVdand press Wto
confirm.
The audio AUX menu appears. The medium in the external audio source is played if the
source is connected and playback selec-
ted. Please see the respective operating instruc-
tions for how to operate the external audio
source.500
AudioCOMAND Online
Page 520 of 637
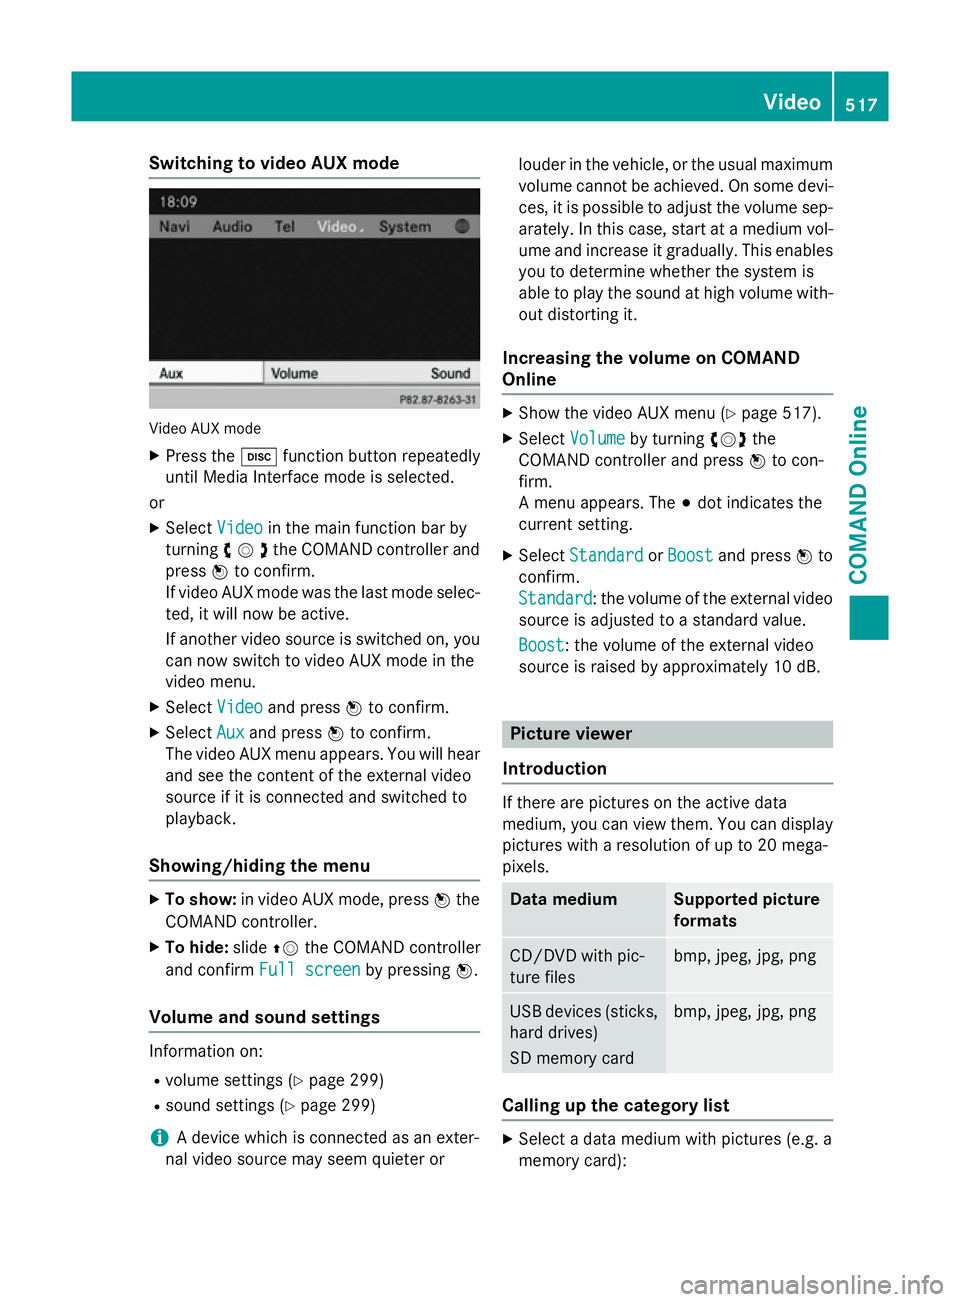
Switching to video AUX mode
Video AUX mode
X Press the hfunction button repeatedly
until Media Interface mode is selected.
or
X Select Video
Videoin the main function bar by
turning cVdthe COMAND controller and
press Wto confirm.
If video AUX mode was the last mode selec-
ted, it will now be active.
If another video source is switched on, you can now switch to video AUX mode in the
video menu.
X Select Video Videoand press Wto confirm.
X Select Aux
Aux and press Wto confirm.
The video AUX menu appears. You will hear
and see the content of the external video
source if it is connected and switched to
playback.
Showing/hiding the menu X
To show: in video AUX mode, press Wthe
COMAND controller.
X To hide: slideZVthe COMAND controller
and confirm Full screen Full screen by pressingW.
Volume and sound settings Information on:
R volume settings (Y page 299)
R sound settings (Y page 299)
i A device which is connected as an exter-
nal video source may seem quieter or louder in the vehicle, or the usual maximum
volume cannot be achieved. On some devi-
ces, it is possible to adjust the volume sep-
arately. In this case, start at a medium vol- ume and increase it gradually. This enables
you to determine whether the system is
able to play the sound at high volume with-
out distorting it.
Increasing the volume on COMAND
Online X
Show the video AUX menu (Y page 517).
X Select Volume Volume by turning cVdthe
COMAND controller and press Wto con-
firm.
A menu appears. The #dot indicates the
current setting.
X Select Standard Standard orBoost
Boost and press Wto
confirm.
Standard Standard: the volume of the external video
source is adjusted to a standard value.
Boost
Boost: the volume of the external video
source is raised by approximately 10 dB. Picture viewer
Introduction If there are pictures on the active data
medium, you can view them. You can display
pictures with a resolution of up to 20 mega-
pixels. Data medium Supported picture
formats
CD/DVD with pic-
ture files bmp, jpeg, jpg, png
USB devices (sticks,
hard drives)
SD memory card bmp, jpeg, jpg, png
Calling up the category list
X
Select a data medium with pictures (e.g. a
memory card): Video
517COMAND Online Z
Page 548 of 637
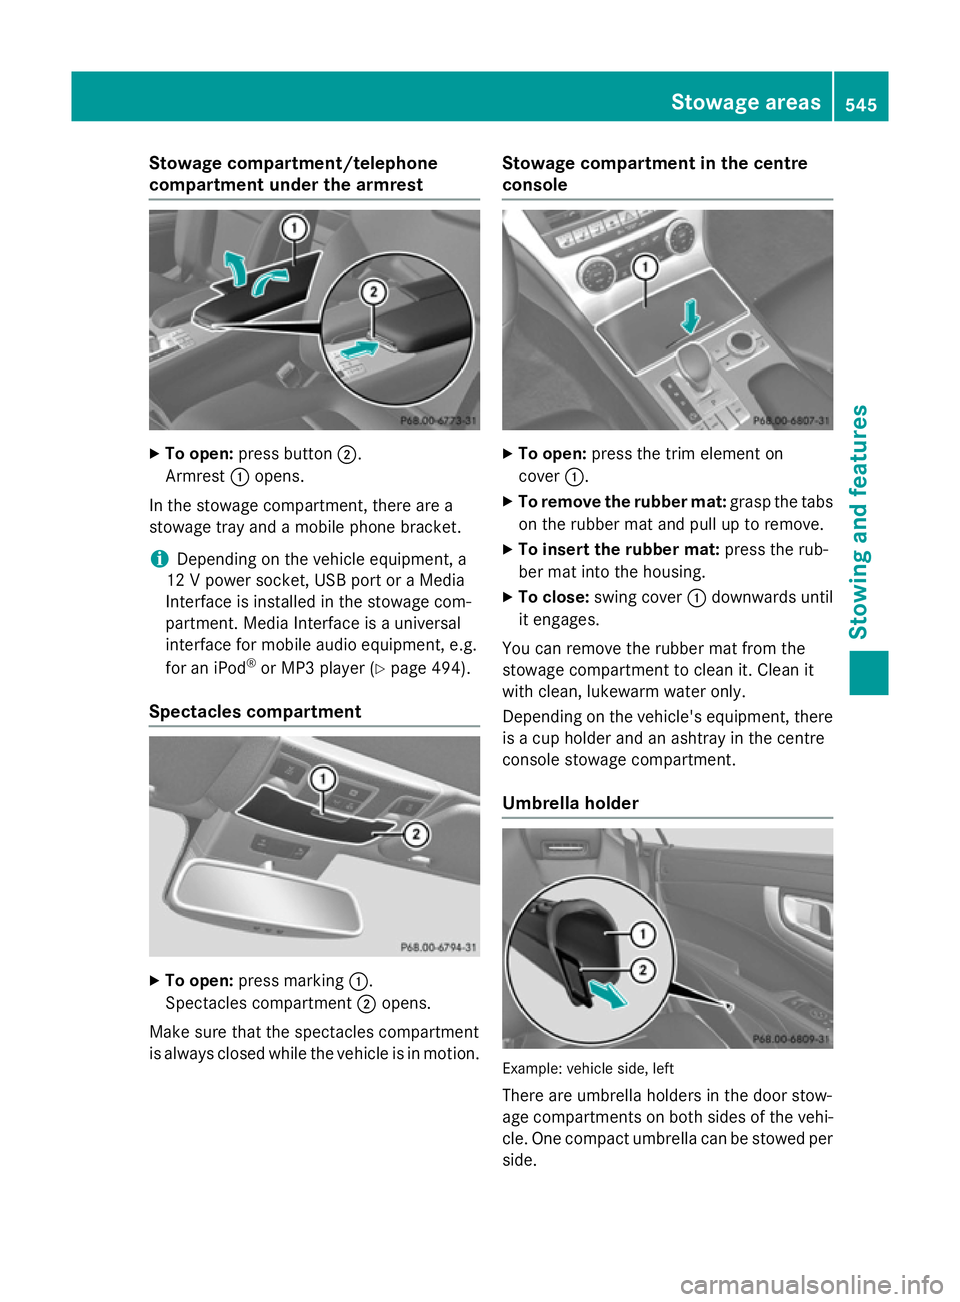
Stowage compartment/telephone
compartment under the armrest
X
To open: press button ;.
Armrest :opens.
In the stowage compartment, there are a
stowage tray and a mobile phone bracket.
i Depending on the vehicle equipment, a
12 V power socket, USB port or a Media
Interface is installed in the stowage com-
partment. Media Interface is a universal
interface for mobile audio equipment, e.g.
for an iPod ®
or MP3 player (Y page 494).
Spectacles compartment X
To open: press marking :.
Spectacles compartment ;opens.
Make sure that the spectacles compartment
is always closed while the vehicle is in motion. Stowage compartment in the centre
console
X
To open: press the trim element on
cover :.
X To remove the rubber mat: grasp the tabs
on the rubber mat and pull up to remove.
X To insert the rubber mat: press the rub-
ber mat into the housing.
X To close: swing cover :downwards until
it engages.
You can remove the rubber mat from the
stowage compartment to clean it. Clean it
with clean, lukewarm water only.
Depending on the vehicle's equipment, there is a cup holder and an ashtray in the centre
console stowage compartment.
Umbrella holder Example: vehicle side, left
There are umbrella holders in the door stow-
age compartments on both sides of the vehi-
cle. One compact umbrella can be stowed per
side. Stowage areas
545Stowing and features Z