2012 MERCEDES-BENZ SL ROADSTER steering
[x] Cancel search: steeringPage 469 of 637
X
Select a station by turning cVdand press
W to confirm.
or X Press a number key, such as l.
X To select the station using the multifunc-
tion steering wheel, see the separate vehi-
cle Owner's Manual.
Setting stations by entering the fre-
quency manually
This function is available in radio mode.
X Option 1: press thelbutton.
X Option 2: selectRadio
Radio in the radio display
by sliding VÆand turning cVdthe
COMAND controller and press Wto con-
firm.
X Select Frequency entry
Frequency entry and pressWto
confirm.
Irrespective of the option chosen, an input
menu will appear.
X Enter a frequency using the number keys.
COMAND Online sets the frequency
entered. Waveband Frequency
FM (VHF) 87.5 – 108.0 MHz
MW (medium wave) 531 – 1620 kHz
SW (short wave) 5800 – 6250 kHz
LW (long wave) 153 – 282 kHz
i
You can only enter currently permitted
numbers.
i If you enter a frequency in the MW, SW or
LW wavebands that is outside the fre-
quency range, COMAND Online sets the
next lower frequency. Storing a station Storing stations manually
There are 10 presets available for each wave-
band as well as for DAB radio mode.
X Quick save: press and hold a number key,
e.g. l, until you hear a tone.
The station is stored.
X Directly in the station presets: pressW
the COMAND controller when the display/
selection window is active.
or
X Select Presets Presets by sliding VÆand turning
cVd the COMAND controller and press W
to confirm.
In both cases, the station presets appear.
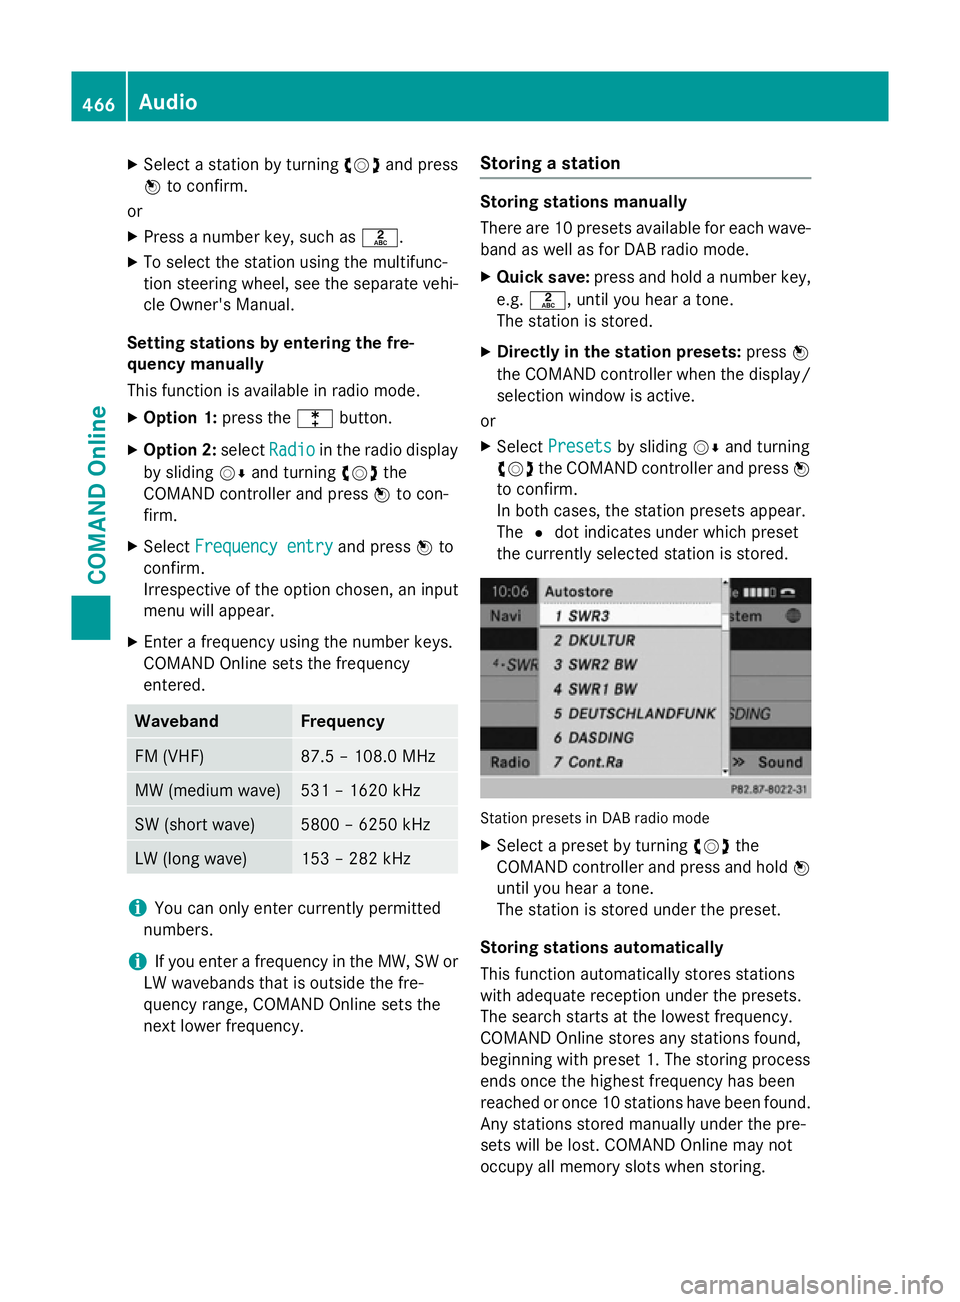
The #dot indicates under which preset
the currently selected station is stored. Station presets in DAB radio mode
X Select a preset by turning cVdthe
COMAND controller and press and hold W
until you hear a tone.
The station is stored under the preset.
Storing stations automatically
This function automatically stores stations
with adequate reception under the presets.
The search starts at the lowest frequency.
COMAND Online stores any stations found,
beginning with preset 1. The storing process
ends once the highest frequency has been
reached or once 10 stations have been found.
Any stations stored manually under the pre-
sets will be lost. COMAND Online may not
occupy all memory slots when storing. 466
AudioCOMAND Online
Page 470 of 637
X
Option 1: pressWthe COMAND controller
when the display/selection window is
active.
X Select Autostore
Autostore in the presets by turning
cVd the COMAND controller and press W
to confirm.
X Option 2: selectPresets
Presets by sliding VÆ
and turning cVdthe COMAND controller
and press Wto confirm.
X Select Autostore
Autostore and pressWto confirm.
In both cases, COMAND Online searches
for stations that can be received. You will
see a message to this effect. The available
stations are automatically stored in the pre- set positions.
X To cancel storing: selectCancel
Cancel and
press Wto confirm.
Radio Data System (RDS) General notes
The Radio Data System (RDS) provides inaud-
ible additional information in the FM wave-
band. The system consists of a listening
receiver and a monitoring receiver.
The monitoring receiver permanently scans
the FM waveband and collects certain data
from all receivable stations. This includes, for
instance, reception quality and RDS data
such as programme names and alternative
frequencies. COMAND Online stores the data and constantly updates the memory. The
audio receiver is therefore able to switch
automatically to an alternative frequency with
a better signal.
i RDS only functions for stations which
transmit RDS data.
Switching RDS on/off
You can use the Frequency fix (radio mode) or Station fix (DAB mode) functions to prevent
COMAND Online from switching between the
alternative frequencies of a station. This is
useful, for example, when the same content is broadcast with a time delay, or when there is
interference on one of the frequencies.
X Select Radio
Radio in the radio display by sliding
VÆ and turning cVdthe COMAND con-
troller and press Wto confirm.
X Select Frequency Frequency fix
fixorStation
Station fix
fix by
turning cVdthe COMAND controller and
press Wto confirm.
Depending on the previous status, switch
Frequency fix Frequency fix onO or off ª.
Traffic Programme Note
Many FM stations transmit traffic announce-
ments (TA). You can also hear these in DAB
radio mode.
Switching traffic announcements on/off
X Option 1: selectRadio Radio by sliding VÆand
turning cVdthe COMAND controller and
press Wto confirm.
The tick next to TA
TAindicates that traffic
announcement reception is switched on.
You see the TA TAsymbol in the status bar.
X Select TA
TAand press Wto confirm.
TA
TA is switched on or off, depending on the
previous status.
X Option 2: on COMAND Online or on the
multifunction steering wheel, press and
hold the 8button until the TA TAicon lights
up or goes out in the status bar.
A warning tone sounds.
Once traffic announcements have been
switched on, COMAND Online selects an RDS station.
Traffic Programme is retrieved from:
R the currently selected FM station
R an RDS station from the network of the
currently selected FM station
R the RDS station with the best reception
quality
When traffic announcements are switched
on, a traffic announcement will interrupt the Audio
467COMAND Online Z
Page 471 of 637
audio signal from the currently activated
audio or video source.
i Telephone conversations and navigation
announcements are not interrupted.
A display message appears in the display in all
audio operating modes.
Interrupting a traffic announcement
During a traffic announcement:
X On COMAND Onlin eor on the multifunction
steering wheel, briefly press the 8but-
ton.
or
X Press the 9,:or9 button on the
multifunction steering wheel.
COMAND Online switches back to the
audio source that was selected before the
announcement. Any subsequent new
announcements will continue to interrupt
the audio source.
Radio text/radio text plus Messages in the display
The function is available in FM mode and in
DAB radio mode.
Radio text/radio text plus consists of addi-
tionally transmitted data, e.g. information on
the current programme, which is displayed in the COMAND display.
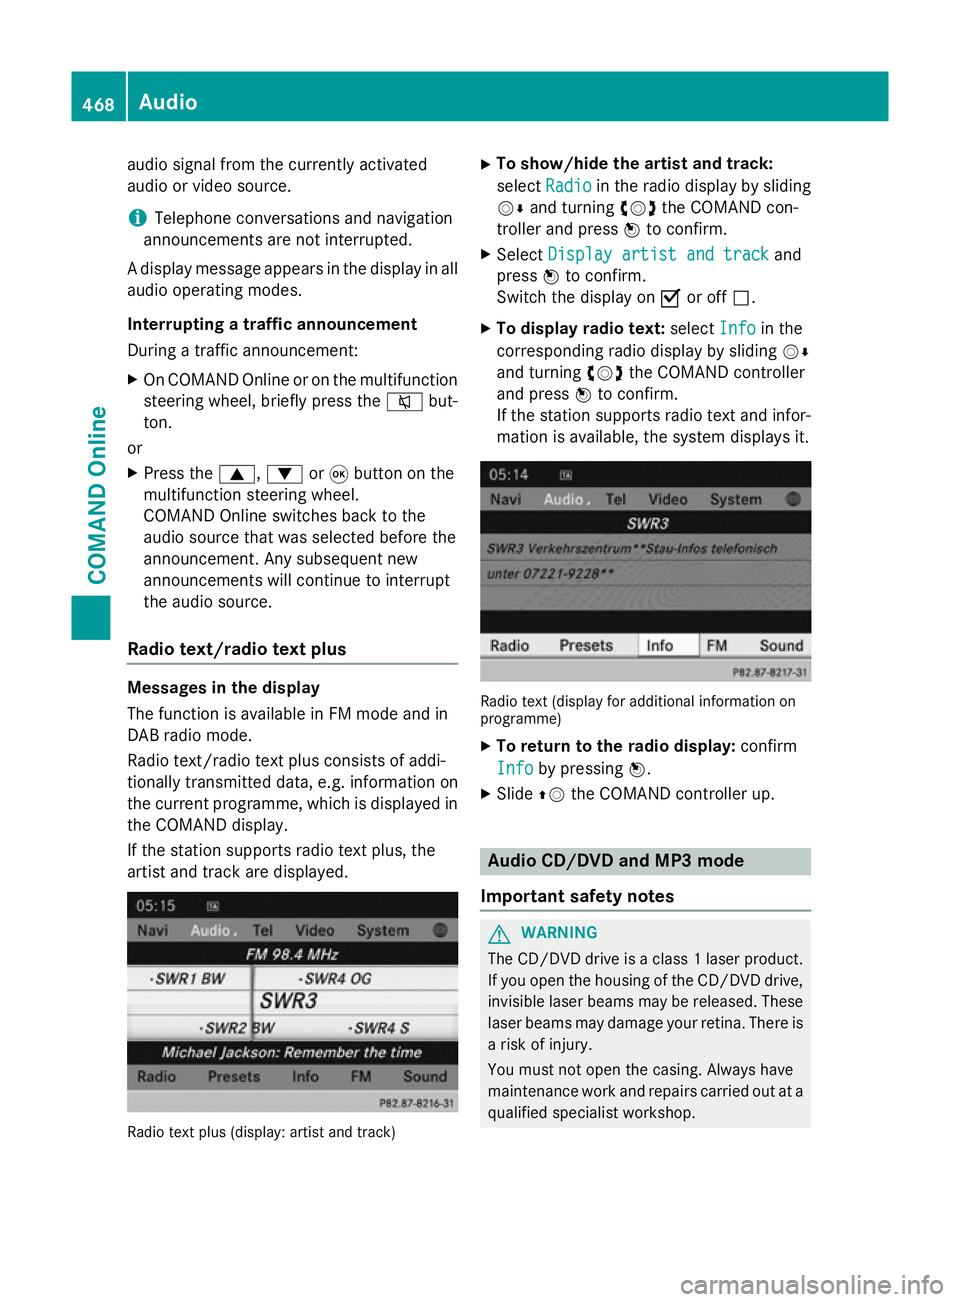
If the station supports radio text plus, the
artist and track are displayed. Radio text plus (display: artist and track) X
To show/hide the artist and track:
select Radio Radio in the radio display by sliding
VÆ and turning cVdthe COMAND con-
troller and press Wto confirm.
X Select Display artist and track
Display artist and track and
press Wto confirm.
Switch the display on Oor off ª.
X To display radio text: selectInfo
Info in the
corresponding radio display by sliding VÆ
and turning cVdthe COMAND controller
and press Wto confirm.
If the station supports radio text and infor- mation is available, the system displays it. Radio text (display for additional information on
programme)
X To return to the radio display: confirm
Info
Info by pressing W.
X Slide ZVthe COMAND controller up. Audio CD/DVD and MP3 mode
Important safety notes G
WARNING
The CD/DVD drive is a class 1 laser product. If you open the housing of the CD/DVD drive,
invisible laser beams may be released. These laser beams may damage your retina. There is
a risk of injury.
You must not open the casing. Always have
maintenance work and repairs carried out at a
qualified specialist workshop. 468
AudioCOMAND Online
Page 478 of 637
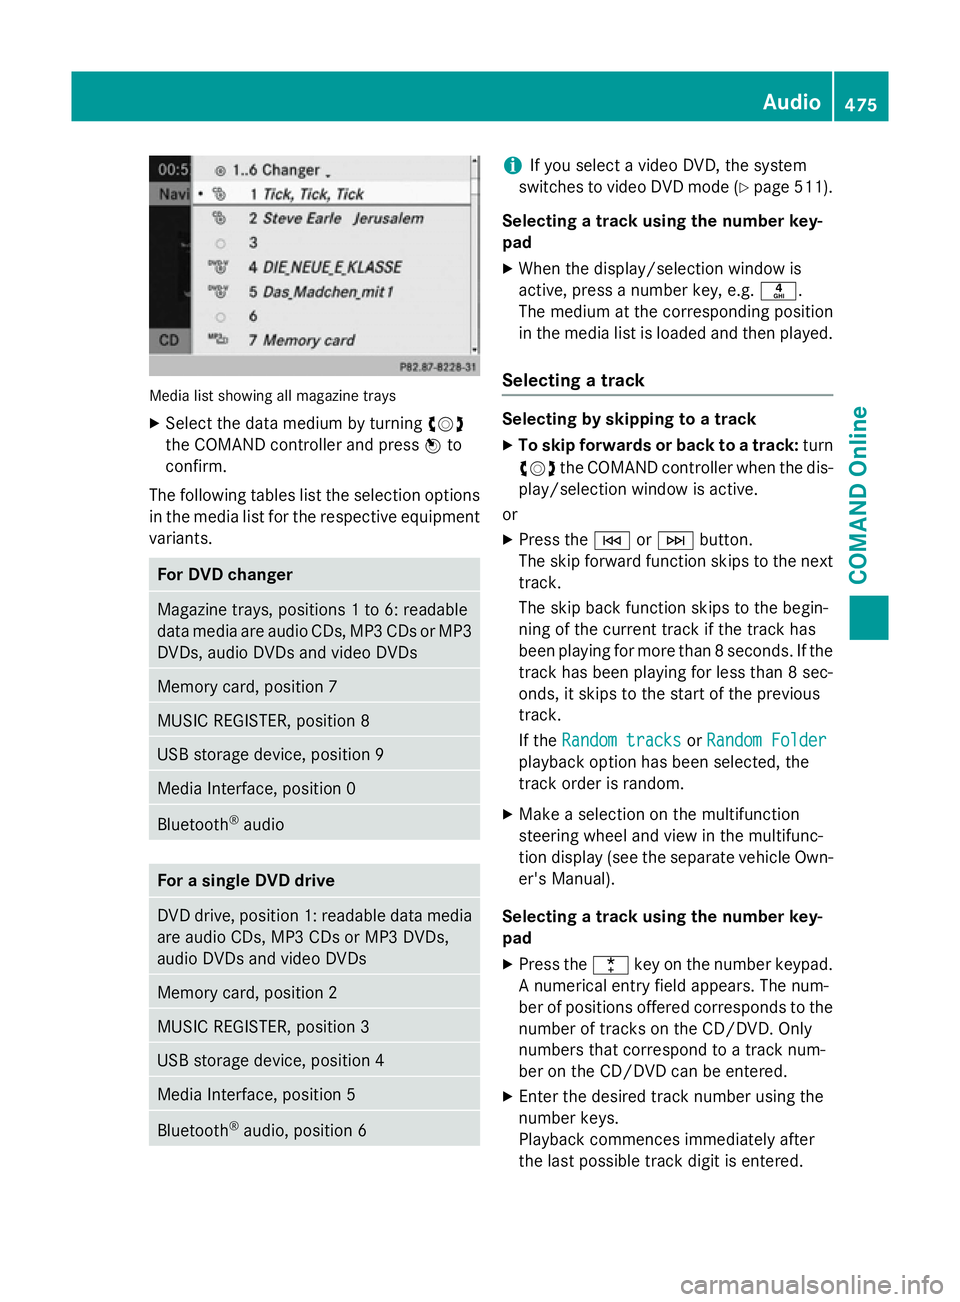
Media list showing all magazine trays
X Select the data medium by turning cVd
the COMAND controller and press Wto
confirm.
The following tables list the selection options
in the media list for the respective equipment variants. For DVD changer
Magazine trays, positions 1 to 6: readable
data media are audio CDs, MP3 CDs or MP3 DVDs, audio DVDs and video DVDs Memory card, position 7
MUSIC REGISTER, position 8
USB storage device, position 9
Media Interface, position 0
Bluetooth
®
audio For a single DVD drive
DVD drive, position 1: readable data media
are audio CDs, MP3 CDs or MP3 DVDs,
audio DVDs and video DVDs Memory card, position 2
MUSIC REGISTER, position 3
USB storage device, position 4
Media Interface, position 5
Bluetooth
®
audio, position 6 i
If you select a video DVD, the system
switches to video DVD mode (Y page 511).
Selecting a track using the number key-
pad X When the display/selection window is
active, press a number key, e.g. n.
The medium at the corresponding position
in the media list is loaded and then played.
Selecting a track Selecting by skipping to a track
X To skip forwards or back to a track: turn
cVd the COMAND controller when the dis-
play/selection window is active.
or
X Press the EorF button.
The skip forward function skips to the next track.
The skip back function skips to the begin-
ning of the current track if the track has
been playing for more than 8 seconds. If the
track has been playing for less than 8 sec-
onds, it skips to the start of the previous
track.
If the Random tracks Random tracks orRandom Folder
Random Folder
playback option has been selected, the
track order is random.
X Make a selection on the multifunction
steering wheel and view in the multifunc-
tion display (see the separate vehicle Own-
er's Manual).
Selecting a track using the number key-
pad X Press the ¯key on the number keypad.
A numerical entry field appears. The num-
ber of positions offered corresponds to the
number of tracks on the CD/DVD. Only
numbers that correspond to a track num-
ber on the CD/DVD can be entered.
X Enter the desired track number using the
number keys.
Playback commences immediately after
the last possible track digit is entered. Audio
475COMAND Online Z
Page 496 of 637
X
To start playback: selectÌby turning
cVd the COMAND controller and press W
to confirm.
Playback resumes from the beginning.
Selecting a track The function is not supported by all Blue-
tooth ®
audio devices.
X To skip forwards or backwards to a
track: press the EorF button on
COMAND Online.
or X Press the 9or: button briefly on
the multifunction steering wheel.
X Rapid scroll: press and hold the 9
or : button on the multifunction steer-
ing wheel until the desired track is reached.
If you press and hold the 9or:
button, the rapid scrolling speed increases
after a short time.
Selecting playback options If the Bluetooth
®
audio device supports the
corresponding function, the following options are available:
R Normal track sequence Normal track sequence
The tracks are played in the normal order
(e.g. track 1, 2, 3 etc.).
Audio data playback is determined by the
order in which the tracks are written to the data carrier. Alphabetical order is the most
common. Once all the tracks in a folder
have been played, the tracks in the next
folder are played.
R Random tracks Random tracks
All the tracks on the medium are played in
random order (e.g. track 3, 8, 5 etc.). X
Select BT BTAudio
Audio by sliding VÆand turning
cVd the COMAND controller and press W
to confirm.
The #dot indicates the option selected.
X Select the option by turning cVdthe
COMAND controller and press Wto con-
firm.
If you select Random Randomtracks
tracks, you will see a
corresponding symbol in the display/
selection window.
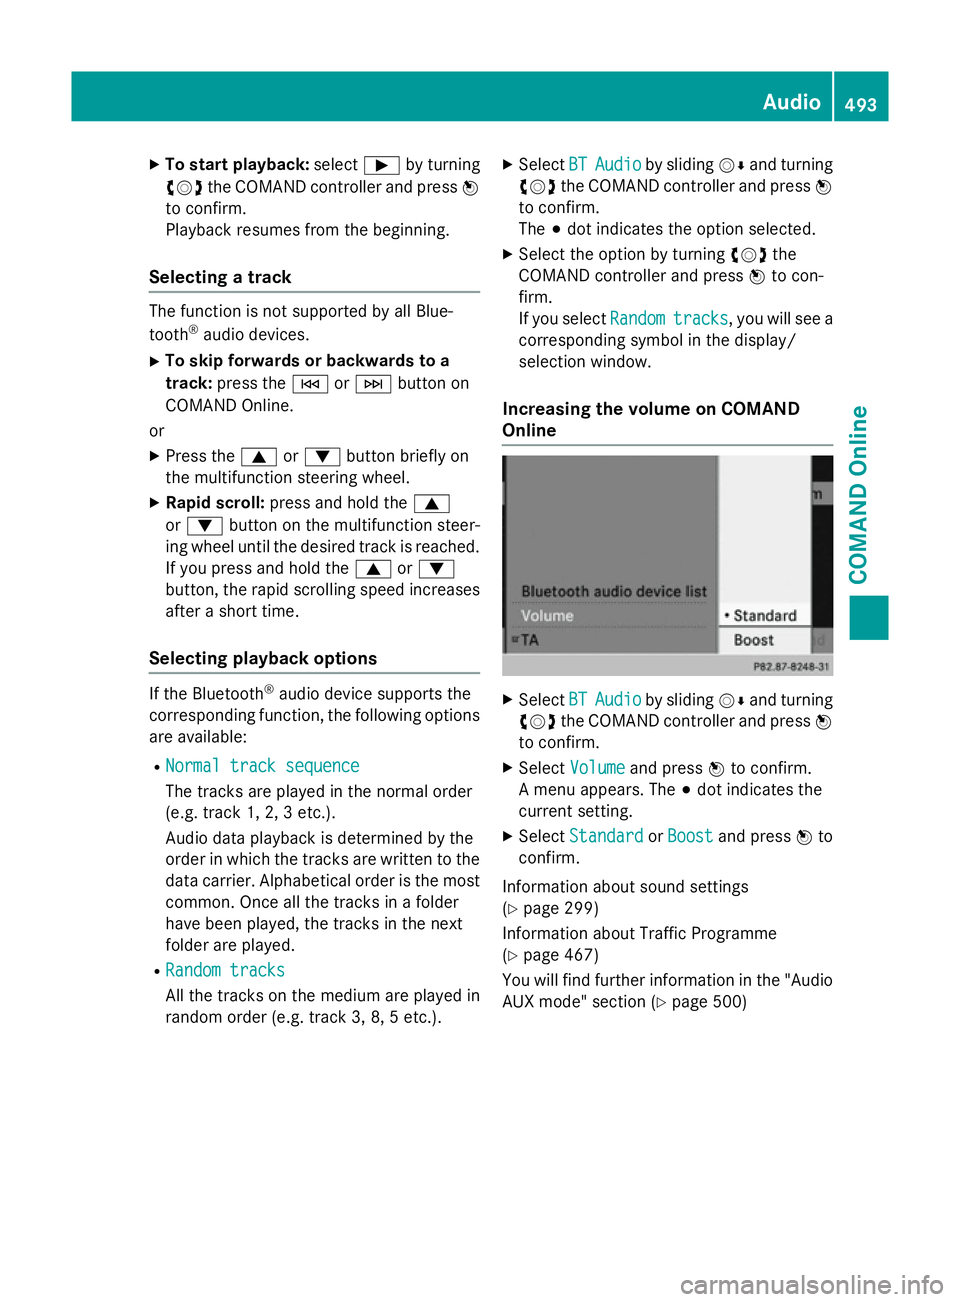
Increasing the volume on COMAND
Online X
Select BT BTAudio
Audio by sliding VÆand turning
cVd the COMAND controller and press W
to confirm.
X Select Volume
Volume and press Wto confirm.
A menu appears. The #dot indicates the
current setting.
X Select Standard
Standard orBoost
Boost and press Wto
confirm.
Information about sound settings
(Y page 299)
Information about Traffic Programme
(Y page 467)
You will find further information in the "Audio
AUX mode" section (Y page 500) Audio
493COMAND Online Z
Page 499 of 637
=
Elapsed track time (also in format
00:00:00 for audio books)
? Track name
A Graphic time display
B Track position in playlist
C Album name (if available)
D Artist (if available)
E Music search
F Position in the media list
G Data medium type
H Playback options
X Select the entry under position 0 (DVD
changer) or position 5 (single DVD drive) in
the media list by turning cVdthe COMAND
controller and press Wto confirm
(Y page 474).
COMAND Online activates the connected
device. You will see a message to this
effect. The basic display then appears.
If no device is connected, you will see the
Media Interface
Media Interface entry instead of a
device name.
The type of device connected is indicated by
the corresponding symbol for iPod ®
(iPhone ®
) or MP3 player.
The current playback option is shown with a
symbol behind album name (no display for
Normal track sequence Normal track sequence) (Y page 499).
i If the device connected does not contain
any playable tracks, a message appears to
this effect.
Selecting music files Note
COMAND Online displays the data stored on
the iPod
®
, iPhone ®
or MP3 player according
to the file structure used in the respective
medium. Selecting by skipping to a track
X To skip forwards or back to a track: turn
cVd the COMAND controller when the dis-
play/selection window is active.
or
X Press the EorF button.
The skip forward function skips to the next track. The skip back function skips to the
beginning of the current track if the track
has been playing for more than eight sec-
onds. If the track has been playing for less
than eight seconds, it skips to the start of
the previous track. If you have selected a
playback option other than Normal Normaltrack
track
sequence
sequence, the track sequence is random.
X On the multifunction steering wheel:
switch to Media Interface mode in
COMAND Online (Y page 495).
X On the multifunction steering wheel, press
the = or; button to select the
Audio
Audio menu.
X Press the 9or: button briefly.
If you hold down the 9or: button,
the system scrolls through the list more
quickly. Not all media players support this
function.
If track information is available on the
media player, the multifunction display
shows the number and name of the track.
Selecting using the number keypad X To make an entry: press thelbutton.
An input menu appears. The number of
characters available for input depends on
the number of stored tracks.
X To enter a track number: press a number
key, e.g. q.
The digit is entered in the first position in
the input line.
i COMAND Online will ignore and not dis-
play an invalid digit. 496
AudioCOMAND Online
Page 507 of 637
Setting a channel from the channel list
After starting the vehicle or switching on
COMAND Online, all receivable TV and radio
stations are listed by the reception function.
The respective channel list contains the fol-
lowing information, if it is transmitted and can be received:
R the names of the channels/stations with
adequate reception
R for each channel: the titles of the current
and upcoming programmes via the elec-
tronic programme guide (EPG)
The TV tuner requires a certain amount of
time to update this information.
The information can be displayed if:
R channels are transmitting this information
and
R the reception conditions are adequate
The order of the channel list is country-spe-
cific.
X To set a channel using COMAND Online:
press Wthe COMAND controller while in
full-screen mode.
The menu is shown.
X Select TV
TV by sliding XVYor turning cVd
the COMAND controller and press Wto
confirm.
X Select Channel list (TV) Channel list (TV) orStation
Station
list (Radio)
list (Radio) and pressWto confirm.
The channel list appears. A dot #indicates
the currently selected channel. A number
shows the memory position in the station
memory.
X Select the channel and press Wto confirm.
X To set a channel using the multifunc-
tion steering wheel: switch on TV mode in
COMAND Online (Y page 502).
X Press the =or; button to select the
Audio Audio menu.
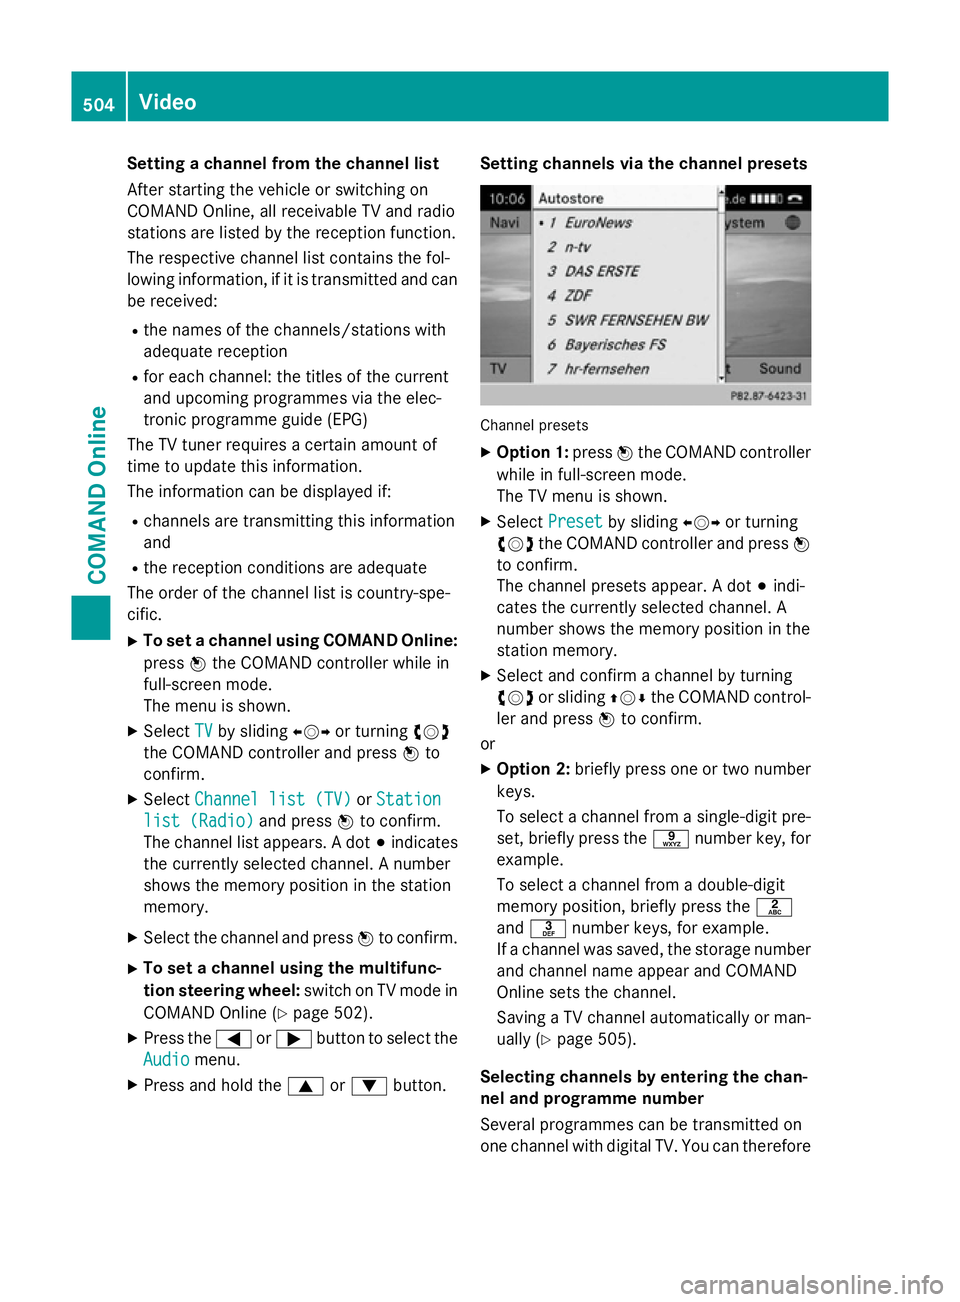
X Press and hold the 9or: button. Setting channels via the channel presets
Channel presets
X Option 1: pressWthe COMAND controller
while in full-screen mode.
The TV menu is shown.
X Select Preset Preset by sliding XVYor turning
cVd the COMAND controller and press W
to confirm.
The channel presets appear. A dot #indi-
cates the currently selected channel. A
number shows the memory position in the
station memory.
X Select and confirm a channel by turning
cVd or sliding ZVÆthe COMAND control-
ler and press Wto confirm.
or
X Option 2: briefly press one or two number
keys.
To select a channel from a single-digit pre-
set, briefly press the snumber key, for
example.
To select a channel from a double-digit
memory position, briefly press the l
and m number keys, for example.
If a channel was saved, the storage number
and channel name appear and COMAND
Online sets the channel.
Saving a TV channel automatically or man- ually (Y page 505).
Selecting channels by entering the chan-
nel and programme number
Several programmes can be transmitted on
one channel with digital TV. You can therefore 504
VideoCOMAND Online
Page 517 of 637
X
On the multifunction steering wheel:
switch to video DVD mode in
COMAND Online (Y page 512).
X Use the =or; button to select the
Audio Audio menu.
X Press the 9or: button to select a
scene/chapter.
If you press and hold the 9or:
button for an extended period, rapid scroll-
ing begins.
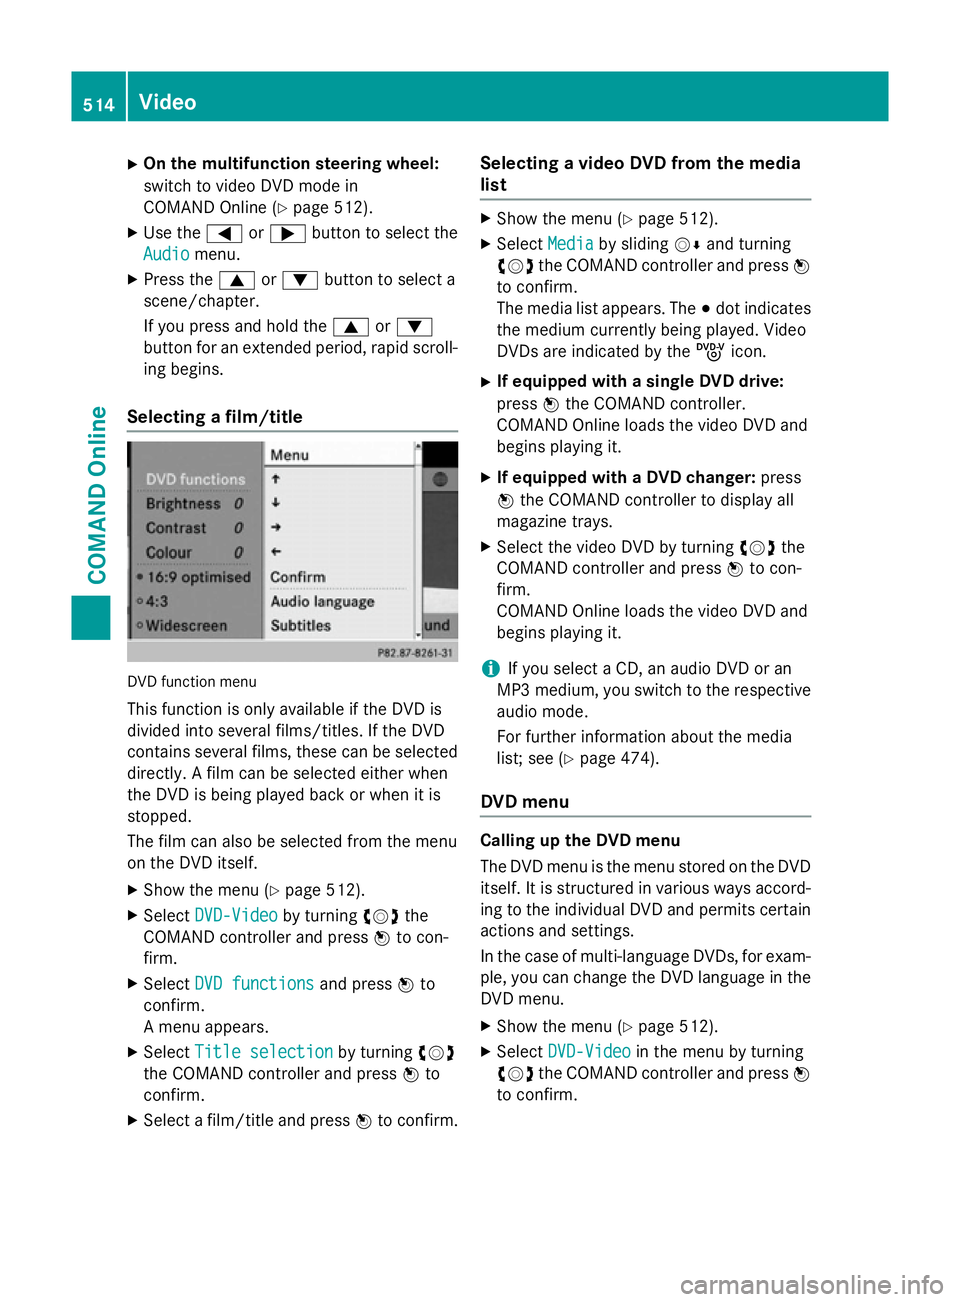
Selecting a film/title DVD function menu
This function is only available if the DVD is
divided into several films/titles. If the DVD
contains several films, these can be selected
directly. A film can be selected either when
the DVD is being played back or when it is
stopped.
The film can also be selected from the menu
on the DVD itself.
X Show the menu (Y page 512).
X Select DVD-Video DVD-Video by turningcVdthe
COMAND controller and press Wto con-
firm.
X Select DVD functions
DVD functions and pressWto
confirm.
A menu appears.
X Select Title selection
Title selection by turningcVd
the COMAND controller and press Wto
confirm.
X Select a film/title and press Wto confirm. Selecting a video DVD from the media
list X
Show the menu (Y page 512).
X Select Media Mediaby sliding VÆand turning
cVd the COMAND controller and press W
to confirm.
The media list appears. The #dot indicates
the medium currently being played. Video
DVDs are indicated by the ýicon.
X If equipped with a single DVD drive:
press Wthe COMAND controller.
COMAND Online loads the video DVD and
begins playing it.
X If equipped with a DVD changer: press
W the COMAND controller to display all
magazine trays.
X Select the video DVD by turning cVdthe
COMAND controller and press Wto con-
firm.
COMAND Online loads the video DVD and
begins playing it.
i If you select a CD, an audio DVD or an
MP3 medium, you switch to the respective
audio mode.
For further information about the media
list; see (Y page 474).
DVD menu Calling up the DVD menu
The DVD menu is the menu stored on the DVD
itself. It is structured in various ways accord-
ing to the individual DVD and permits certain actions and settings.
In the case of multi-language DVDs, for exam-
ple, you can change the DVD language in the DVD menu.
X Show the menu (Y page 512).
X Select DVD-Video DVD-Video in the menu by turning
cVd the COMAND controller and press W
to confirm. 514
VideoCOMAND Online