Page 33 of 210

=
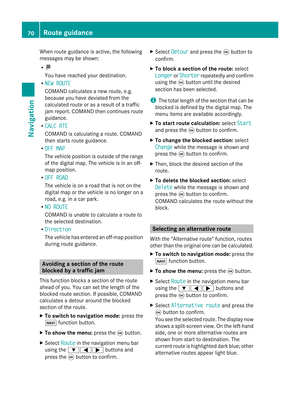
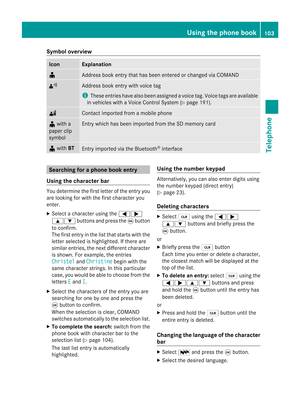
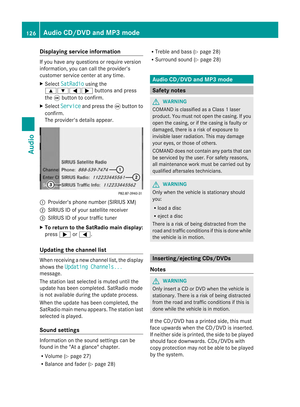
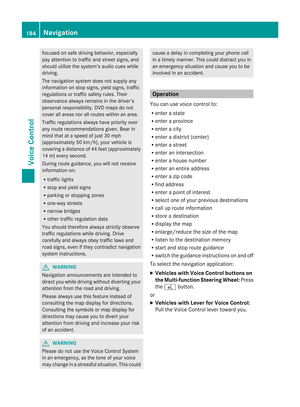
Selects thescre enfor the remo tecontrol
? Selects amenu ormenu item
A Confirm sa sel ecti onorsetti ng
B Switches soundon/of f(for corded
hea dpho nes)
C Adjusts thevolu me(for corded
hea dpho nes)
D Skips toatrack, fast-forwa rd/fast-rew ind
E Selects atrack; directentry
F Exits amenu (back)
Sel ecting thescre enfor the remote
co ntrol You
canusetheremote controltoopera te
one ofthe two rear screens atatime. Todo
so, you must switch the remote controltothe
desi redscreen.
X To sele ctthe left-hand screen:turn
thumbw heel=until "REAR L"is
high lighted inthe windo w.
X To sele ctthe right-hand screen:turn
thumbw heel=until "REAR R"is
high lighted inthe windo w.
Swi tching thescre enon/ off If
the SmartKey isin posi tion 0or 1in the
ignitio nlock (see thevehicle Operator's
Manual), orthe Smart Keyisnot insert ed,the
screen sin the rear willswitch offafter 30
minutes. Beforethescreen sswitch off,they
show amessage tothis effect .
You canswitch thescreen sback on.
How ever,this will disc harg eth est art er
bat tery.
X Poin tth erem oteco ntrol attherear -
co mpar tments cree nwhich hasbeen
selected forremote operation.
X Press button :onthe remote control.
The respective rearscreen switches onor
off.
i You canonly switch thescreens onusing
the remote controlifthe ignition is
switched on. Switching
thebutt onlighting on/off X
Press button ;onthe remote control.
Depending onthe previous status,the
button lighting isswitched onoroff.
i Ifyou donot use theremote controlfor
about 15seconds, thebutton lighting
switches offautomatically .
Switching thesound on/off(corded
headph onesonly) X
Press button Bonthe remote control.
The sound isswitched on/off.
Selec tingamenu/m enuitem and
confir mingyour select ion X
Sele ctamen u/m enuitemusin gth e
=;9 :buttonsand pres s
th e9 butt ontocon firm. CD/DVD
drive and AUX jacks
The CD/ DVDdriv eis locat edinthecen ter
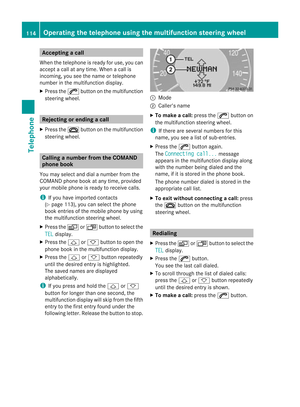
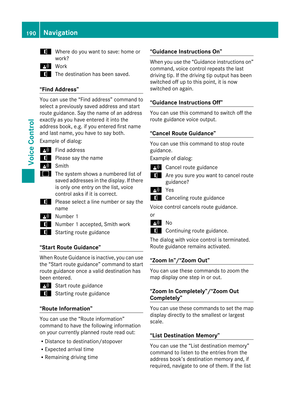
behin dth efron tseats. :
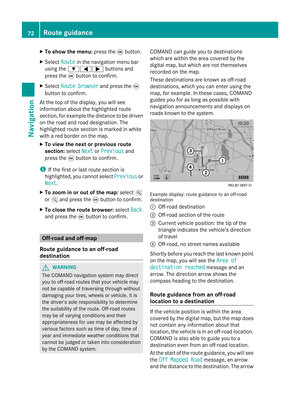
CD/D VDslot
; AUX, right-hand (R)jack foraudio signal
= AUX, left-hand (L)jack foraudio signal
? AUX, jackforvideo signal (V)
A CD/D VDejec tbutton
The AUX jacksshown areforthe AUX drive.
Ident icaljack scan befound onthe right- hand
side ofthe rear-c ompartm entscreen s
(display AUX),(Ypage 30). Rear
Entert ainment System
31Ataglance Z
Page 34 of 210

Cord
lessheadphones
Over view :
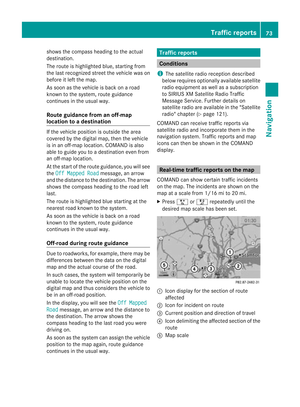
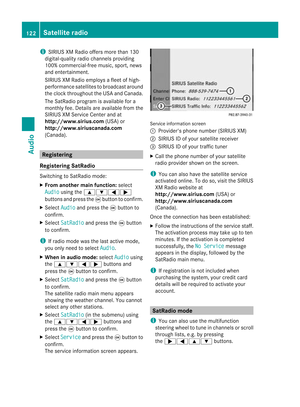
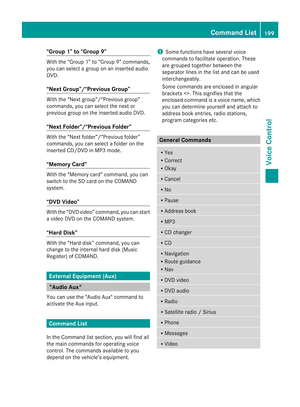
Volum eco ntrol
; Select sa sc ree nfor the headphones
= Batt erycompart mentcover
? Switches thecordless headphones on/off
A Indicat orlamp, differing displays(Y page 32)
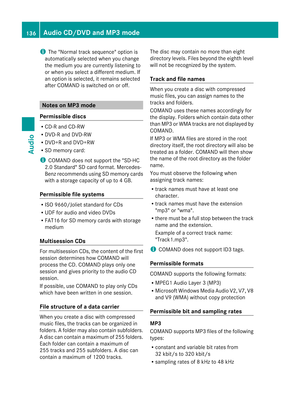
X Open bothsides ofthe headphones andadjust thefitofthe headphones bypulling the
headphone bandinthe direction ofthe arrow.
Switching thecordless headphones
on/off X
Press button ?.
Dependin gon the previous status,the
headphones areswitched onoroff. To
preserve thebatteries, theheadphones
automatically switchoffifthey have not
received anIRsignal forapproximately
three minutes.
Adjust ingthe volume ofthe
headp hones X
Turn volume control: until thedesired
volume hasbeen set. i
Ifyou have connected corded
headphones toarear-com partment
screen ,you can adjust thevolume by
pressing buttonsC onthe remote control
(Y page 30).
Selecting ascree nfor thehea dphones X
Mov epush slider; toL(lef t-han dsc ree n)
or R(rig ht-hand scree n).
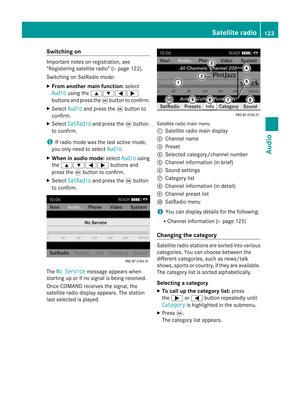
Ind icat orlam pdis pla ys The
color oftheind icat orlamp shows
whet hertheheadp honesare swit ched on or
off and indicat esthech arge levelof the
bat teries inserted. 32
Rea
rEnt ertain men tSys temAtaglan ce
Page 35 of 210

Disp
lay St
atus Gree
n The
head phonesare swit ched
on and thebat terie sare fully
ch arg ed. Red The
head phonesare swit ched
on and thebat terie sare
almo stdisc harged. No
disp lay
(dar k) The
head phonesare swit ched
of f,or thebat terie sare
emp ty,inco rrec tly in ser tedor
no tinser ted. Co
nnectin gadditi onalhea dpho nes Yo
ucan conne ctone additio nal set ofcord ed
hea dphone sto each ofthe two rearscree ns
(Y page 30). Theconnecti onsocke tis for
hea dph ones with 1/8 inch stere ojack plug s
and animp edance of32 ohms . Chan
ging batte ries
Batter iesare required forthe remo tecontrol
and forthe two sets ofcord less hea dph ones .
For changing batterie s,see (Ypage 160). Rear
viewcame ra
The rearview came raisonly available forthe
M-Class andtheR-Class. G
WARN
ING
The rear view came raismere lyan aid.
Please observethe correspo ndingnotes in
your vehicle's Operator's Manual.
If your vehicle isequipped witharear view
camera, itsimage isautomatically relayedto
the COMAND displayifthe funct ionis
activated andyouengage reverse gear.
If the funct ionisactivated, theCOMAND
display willautomatically switchbacktothe
previously selecteddisplayassoon asyou
shift outofreverse gear. X
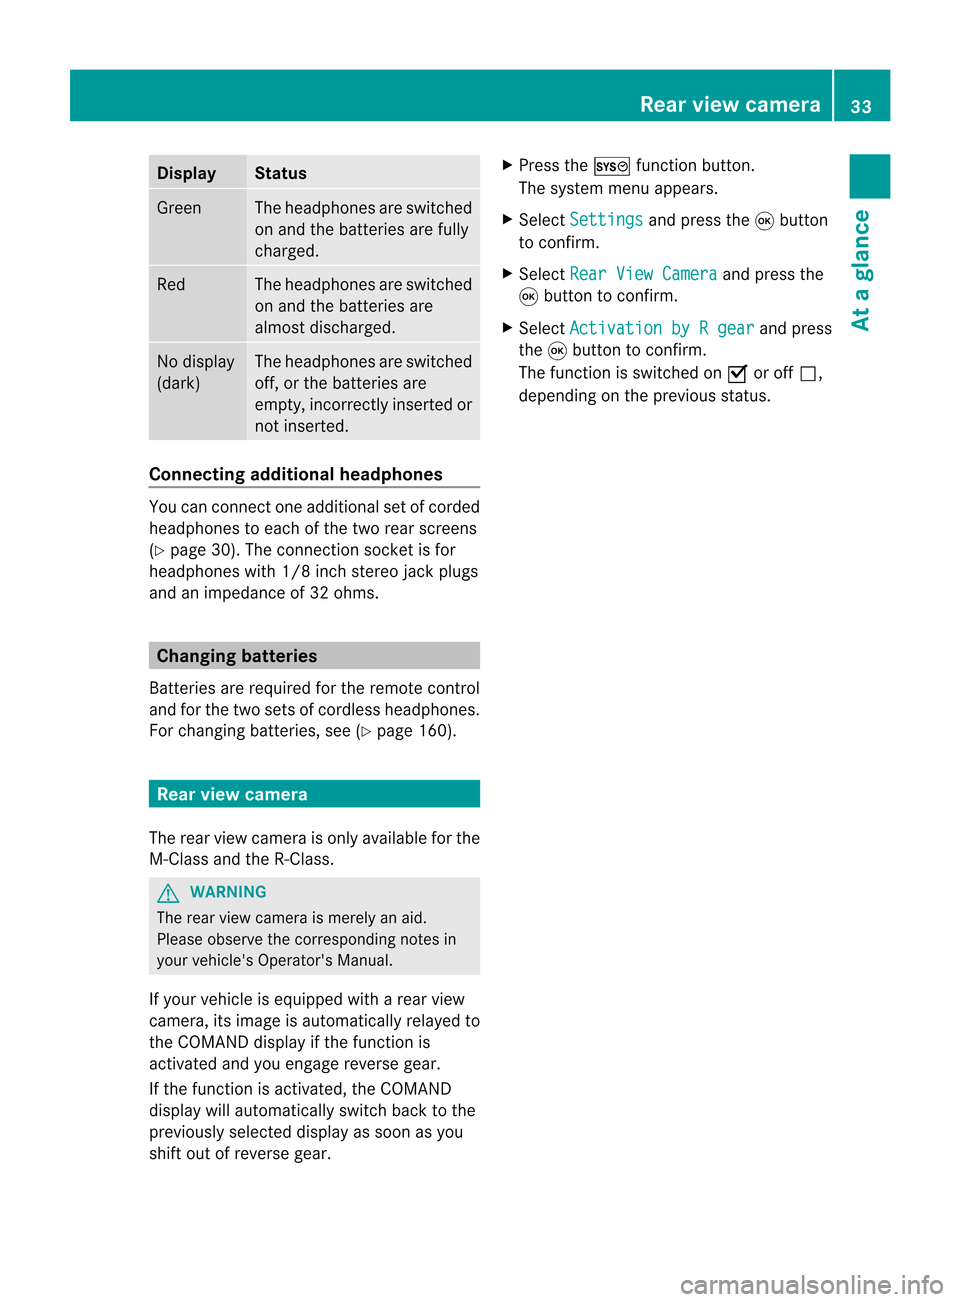
Press theW functionbutton .
The system menuappears.
X Select Settings and
press the9button
to conf irm.
X Select RearViewCamera and
press the
9 button toconf irm.
X Select Activation byRgear and
press
the 9button toconf irm.
The funct ionisswitched onO oroff ª,
depending onthe previous status. Rear
view camera
33Ataglance Z
Page 36 of 210
Page 37 of 210
COMAN
Dfea tures <0023002300230023002300230023002300230023002300230023002300230023
002300230023002300230023002300230023002300230023002300230023> 36
Display settings <0023002300230023002300230023002300230023002300230023002300230023
0023002300230023002300230023002300230023002300230023002300230023
00230023> 36
Tim esett ings .................. .................. ... 36
Text readersett ings ........ .......... .......... 38
Voice Control System settings .......... 38
Bluet ooth®
sett ings <0023002300230023002300230023002300230023002300230023002300230023
002300230023002300230023002300230023002300230023> 40
System language settings <0023002300230023002300230023002300230023002300230023002300230023
00230023> 43
Reset function <0023002300230023002300230023002300230023002300230023002300230023
0023002300230023002300230023002300230023002300230023002300230023
00230023002300230023> 43 35System
settings
Page 38 of 210

COMAN
Dfea tures
Thes eOper atingIn st ruc tions desc ribeall
st andar dand optionalequipm enta vail able
for you rCOMAND systematthe time of
purcha se.Cou ntry-specifi cdeviation sare
possible. Pleasenotethat your COMAND
system maynotbeequipped withallthe
features described. Display
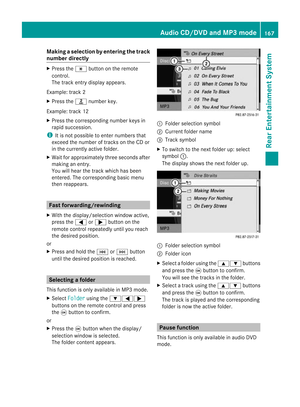
settings Sett
ingthe bright ness
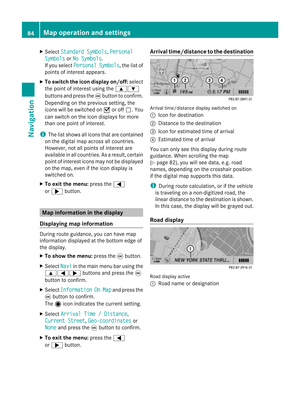
The brightn essdetec tedbythe COMAND
light sensor affectsthe sett ingoption sfor this
func tion.
X Press theW button .
X Select Setting s using
the :=; buttonsand press the
9 button tocon firm.
X Select Display and
press the9button to
con firm.
X Select Brightn ess and
press the9
button tocon firm. :
Current setting
X Adj ust the brightn essusing the9:
button sand press the9, = ork
button tocon firm. Display
design
X Press theW button . X
Select Setting s using
the :=; buttonsand press the
9 button tocon firm.
X Select Display and
press the9button to
con firm.
X Select DayMode ,
Night Mode or
Automat ic using
the9: buttons
and press the9button tocon firm.
The äicon indicat esthe curren tsett ing.
i When theAutomat ic sett
ingisselect ed,
COMAND evaluatesthereadings fromthe
automatic vehiclelightsensor and
switch esbetween thedisplay designs
automatic ally. Tim
esettings General
information
If COMAND isequipped withanavigation
system andhasGPS recept ion,COMAND
automatic allysets thetime anddate. Youcan
also adjust thetime yourself in30- minut e
incr ement s,but thedate cannotbe changed.
i Ifyou setthe time in30- minut e
incr ement s,any time zonesett ings and
sett ings forchangin gbetween summerand
stan dard timearelost (Ypage 37).
If your vehicle isnot equipped witha
navigation system,youcan setthe minut es
exact ly.
i The following functionsrequire thetime,
time zoneand summer/ standard timeto
be set corr ectlyin order towork properly:
R route guidance onroutes withtime-
dependen ttraffic guidance
R calcu lation ofexpected timeofarriva l
R time informati onfor receive dand
outgoi ngphone calls 36
Time
setting sSystem settings
Page 39 of 210

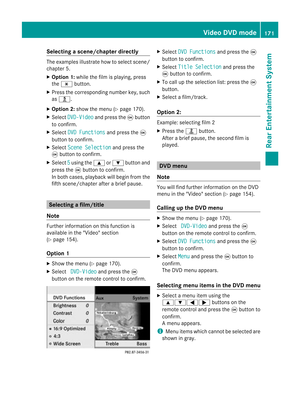
To
setthe time
X Pre ssthe W button.
X Sel ect Time us
ing the :=;
bu ttons andpressthe 9button toconfi rm.
X Sel ect Set Time and
pressthe 9button
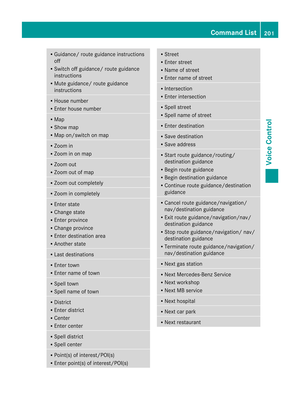
to confi rm. :
Tosetthe time
; Current date
X Set thetime using the9: buttons
and press the9button toconfirm .
The following operational stepsdepend on
whether thenavigation systemhasGPS
reception. Setting
thetime/dat eforma t
X Press theW button.
X Select Time using
the:=;
buttons andpress the9button toconfirm .
X Select Format and
press the9button to
confirm . Abbreviation Meaning
DD /MM /YYYY Day/Month/
Year
(date format) HH /MM Hours/Minutes
(time format) You
cansetthe 24-hour orthe AM/PM
format. X
Select aformat usingthe9:
buttons andpress the9button toconfirm . Setting
thetime zone andswitching
betwee nsumm erand standa rdtime
X To set atime zone: presstheW button.
X Selec tTime using
the:=;
butt onsand press the9butt ontocon firm .
X Selec tTime Zone and
press the9butt on
to con firm .
The coun try list appears. The#dot
indic ates thecurr entsetting.
X Selec tthe countr yyou arepresently in
using the9: buttonsandpress the
9 button toconfirm .
Depending onthe countr yyou select, a
time zonelist may alsoappear.
X Select atime zoneusing the9:
button sand press the9button toconf irm.
Further stepsdepend onwhether the
navigation systemcurrentlyhas GPS
reception andonwhich countryyou have
selected.
You have thefollowing twooptions:
X To change manually:select Daylight Saving
Time(Summer) or
Standard Time (Winter) and
press the9button to
conf irm.
X To switch automat icchangeover on/
off: select Auto. Daylight Saving Time
On or
Auto. Daylight Saving Time Off using
the9: buttonsand
press the9button toconf irm.
The #dot indicates thecurrent setting.
i Ifyou have switched offthe automatic
changeover function,youmust change
from summer tostandard timeandvice
versa manually using"Settime"
(Y page 37). Tim
esettings
37Systemsettings
Page 40 of 210

Tex
tread ersettin gs Se
ttin gthe read -alou dspe ed
X Pre ssthe W button.
X Sel ect Settings us
ing
the :=; buttons andpressthe
9 button toconfi rm.
X Sel ect TextRea der Speed and
pressthe
9 button toconfi rm.
Al ist appears. The#dot indic ates the
curr entsetting.
X Selec tasetting usingthe9:
buttons andpress the9button toconfirm. Voice
Control System settings General
notes
This function isavail able ifCOMAND features
an integrated harddisk.
To protect theintegrated harddisk, COMAND
deactivates itat very high temperatures and
at extreme altitudes. TheVoice Control
System willthen betemporarily unavailable. Opening/
closingthe help window
X Press theW button.
X Select Settings using
the :=; buttonsandpress the
9 button toconfirm.
X Select Voice Control and
press the9
button toconfirm.
X Select Helpwindow and
press the9
button toconfirm.
You have switched thehelp window on
O oroff ª.
i The help window provides information in
addition tothe audi bleinstruct ionsduring
individua lizationaswell aslater, when you
are using voicecontrol. <001F000E0004000900160009000400150001000C0009001D000100140009000F
000EB
Introduction Using
individua lization,youcan fine tune the
Voice Control System toyour ownvoice and
thus improve voicerecognition. Thismeans
that other users' voices willnotberecognized
as easil y,and therefore thisfunction canbe
deactivated (Ypage 39).
Individual izationcomprises twoparts and
takes approximately 5minut es.Itcon sistsof
tr ainin gthe syst emtorec ogn izeacer tain
numb erofdigit sequen cesand voice
com mand s.
Sta rting new indiv idualiz ation In
dividualiz ationcanonly bestart ed when the
vehic leisstation ary.Before start ing, switc h
off alldevic esorfunc tionswhich could
int erf ere, such asthe radio orthe navig ation
syst em. After start ing the sessio n,the syst em
guides youthrough thetrainin gwith spoken
inst ruct ions .
X Press theW button.
X Selec tSett ings using
the :=; buttons and press the
9 butt ontocon firm .
X Selec tVoic eCont rol and
press the9
butt ontocon firm .
X Selec tStar tnew individualization and
press the9butt ontocon firm .
You willsee and hear aprom pt,askin g
whet heryou would likefurther inform ation .
X Selec tYes or
No and
press the9butt on
to con firm .
If you selec tNo ,
the firstpart of
indiv idualizat ionbegin s.You willbeasked
whet heryou would liketotrain digit sor
voic ecom mand s.
If you selec tYes ,
you willsee and hear
inf orm ation onthe indiv idualizat ion 38
Voice
ControlSyst emsett ingsSyst emsett ings