2012 MERCEDES-BENZ GLK SUV lights
[x] Cancel search: lightsPage 199 of 381
i
You will achieve the best results by wait-
ing for the steering procedure to complete
before pulling away.
If you reverse after activation, the steering
wheel is moved to the straight-ahead posi-
tion.
X Drive forwards or reverse the vehicle, being
ready to brake at all times.
X Stop as soon as PARKTRONIC sounds the
continuous warning tone, if not before.
X Drive forwards and reverse as instructed by
the PARKTRONIC warning displays.
Once you have exited the parking space com-
pletely, the steering wheel is moved to the
straight-ahead position. You hear a tone and
the message Park Assist switched off
Park Assist switched off
appears in the multifunction display. You will
then have to steer and merge into traffic on
your own. PARKTRONIC is still available.
Cancelling Active Parking Assist You can cancel Active Parking Assist at any
time.
X Stop the movement of the multifunction
steering wheel or steer yourself.
Active Parking Assist will be cancelled at
once. The Park Assist cancelled
Park Assist cancelled mes-
sage appears in the multifunction display.
or
X Press the PARKTRONIC button on the
centre console (Y page 190).
PARKTRONIC is switched off and Active
Parking Assist is immediately cancelled.
The Park Assist cancelled
Park Assist cancelled message
appears in the multifunction display.
Active Parking Assist is cancelled automati-
cally if:
R a gear is changed/the transmission is shif-
ted too early.
R parking using Active Parking Assist is no
longer possible. R
you are driving faster than 10 km/h.
R a wheel spins and ESP ®
intervenes or fails.
The ÷ warning lamp lights up in the
instrument cluster.
A warning tone sounds. The parking space
symbol disappears and the multifunction dis-
play shows the Park Assist cancelled
Park Assist cancelled
message.
When Active Parking Assist is cancelled, you
must steer again yourself.
Towing a trailer For vehicles with a trailer tow hitch, the min-
imum length for parking spaces is slightly
increased.
If you have attached a trailer to your vehicle,
you should not use Active Parking Assist.
Once the electrical connection is established
between your vehicle and the trailer, Active
Parking Assist is no longer available. PARK-
TRONIC is deactivated for the rear area.
Reversing camera
Important safety notes G
WARNING
Make sure that no persons or animals are in
the manoeuvring range. Otherwise, they
could be injured. G
WARNING
The reversing camera is only an aid and may
display obstacles in a distorted or incorrect
manner, or may not even display them at all.
The reversing camera does not relieve you of
the responsibility to pay attention. The cam-
era cannot show objects:
R very near to the rear bumper
R below the rear bumper
R in the area immediately above the boot lid
handle/tailgate handle recess
You are always responsible for safety and
must continue to pay attention to your imme-
diate surroundings when parking and 196
Driving systemsDriving and parking
Page 208 of 381
Indicator and warning display
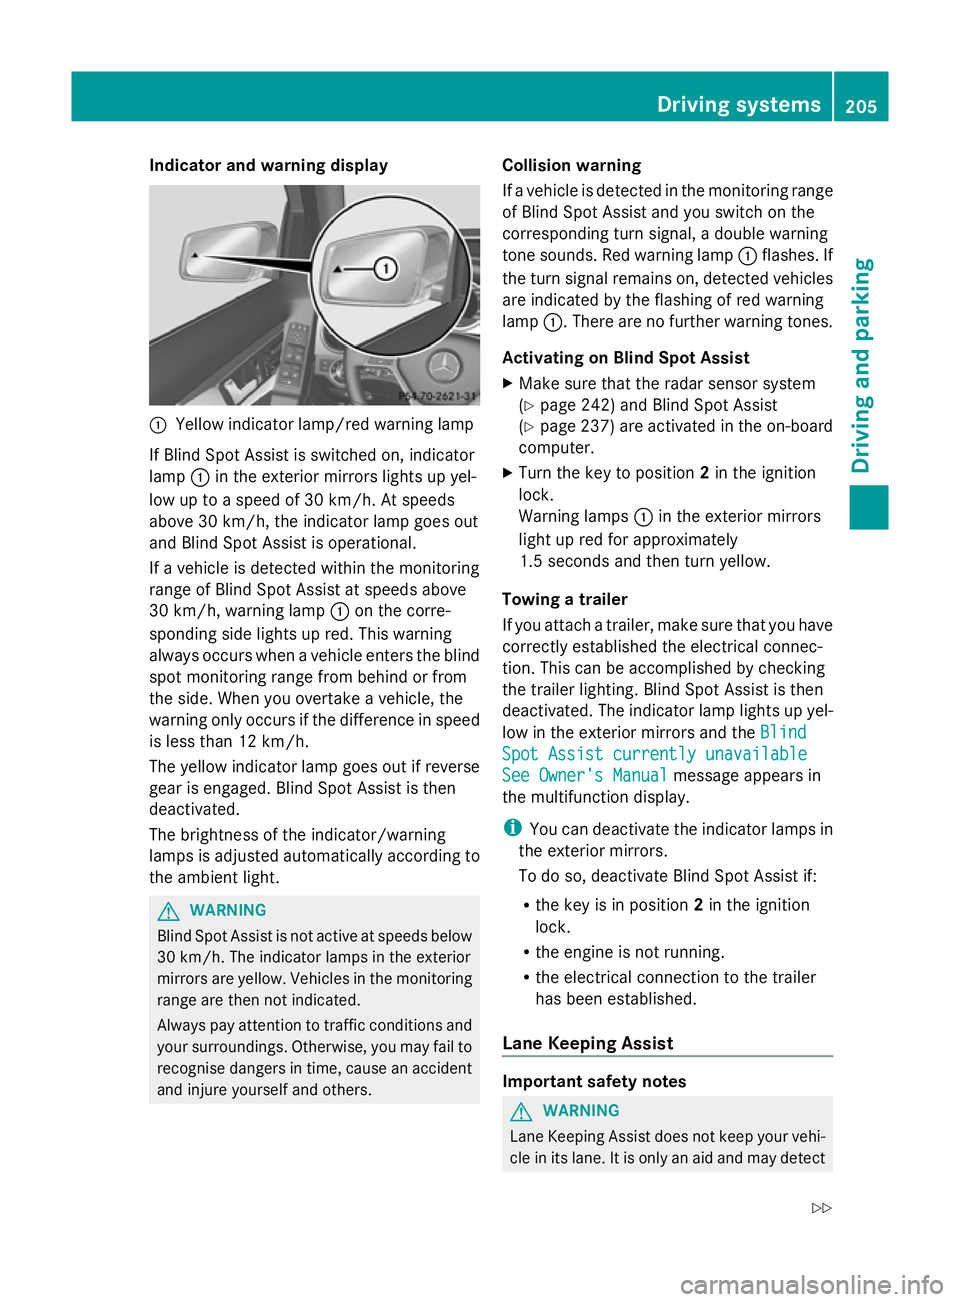
:
Yellow indicator lamp/red warning lamp
If Blind Spot Assist is switched on, indicator
lamp :in the exterior mirrors lights up yel-
low up to a speed of 30 km/h. At speeds
above 30 km/h, the indicator lamp goes out
and Blind Spot Assist is operational.
If a vehicle is detected within the monitoring
range of Blind Spot Assist at speeds above
30 km/h, warning lamp :on the corre-
sponding side lights up red. This warning
always occurs when a vehicle enters the blind
spot monitoring range from behind or from
the side. When you overtake a vehicle, the
warning only occurs if the difference in speed
is less than 12 km/h.
The yellow indicator lamp goes out if reverse
gear is engaged. Blind Spot Assist is then
deactivated.
The brightness of the indicator/warning
lamps is adjusted automatically according to
the ambient light. G
WARNING
Blind Spot Assist is not active at speeds below
30 km/h. The indicator lamps in the exterior
mirrors are yellow. Vehicles in the monitoring
range are then not indicated.
Always pay attention to traffic conditions and
your surroundings. Otherwise, you may fail to
recognise dangers in time, cause an accident
and injure yourself and others. Collision warning
If a vehicle is detected in the monitoring range
of Blind Spot Assist and you switch on the
corresponding turn signal, a double warning
tone sounds. Red warning lamp
:flashes. If
the turn signal remains on, detected vehicles
are indicated by the flashing of red warning
lamp :. There are no further warning tones.
Activating on Blind Spot Assist
X Make sure that the radar sensor system
(Y page 242) and Blind Spot Assist
(Y page 237) are activated in the on-board
computer.
X Turn the key to position 2in the ignition
lock.
Warning lamps :in the exterior mirrors
light up red for approximately
1.5 seconds and then turn yellow.
Towing a trailer
If you attach a trailer, make sure that you have
correctly established the electrical connec-
tion. This can be accomplished by checking
the trailer lighting. Blind Spot Assist is then
deactivated. The indicator lamp lights up yel-
low in the exterior mirrors and the Blind
Blind
Spot Assist currently unavailable Spot Assist currently unavailable
See Owner's Manual See Owner's Manual message appears in
the multifunction display.
i You can deactivate the indicator lamps in
the exterior mirrors.
To do so, deactivate Blind Spot Assist if:
R the key is in position 2in the ignition
lock.
R the engine is not running.
R the electrical connection to the trailer
has been established.
Lane Keeping Assist Important safety notes
G
WARNING
Lane Keeping Assist does not keep your vehi-
cle in its lane. It is only an aid and may detect Driving systems
205Driving and parking
Z
Page 212 of 381
Indicator and warning display
G
WARNING
Active Blind Spot Assist is not active at speeds
below 30 km/h. The indicator lamps in the
exterior mirrors are yellow. Vehicles in the
monitoring range are then not indicated.
Always pay attention to traffic conditions and
your surroundings. Otherwise, you may fail to
recognise dangers in time and cause an acci-
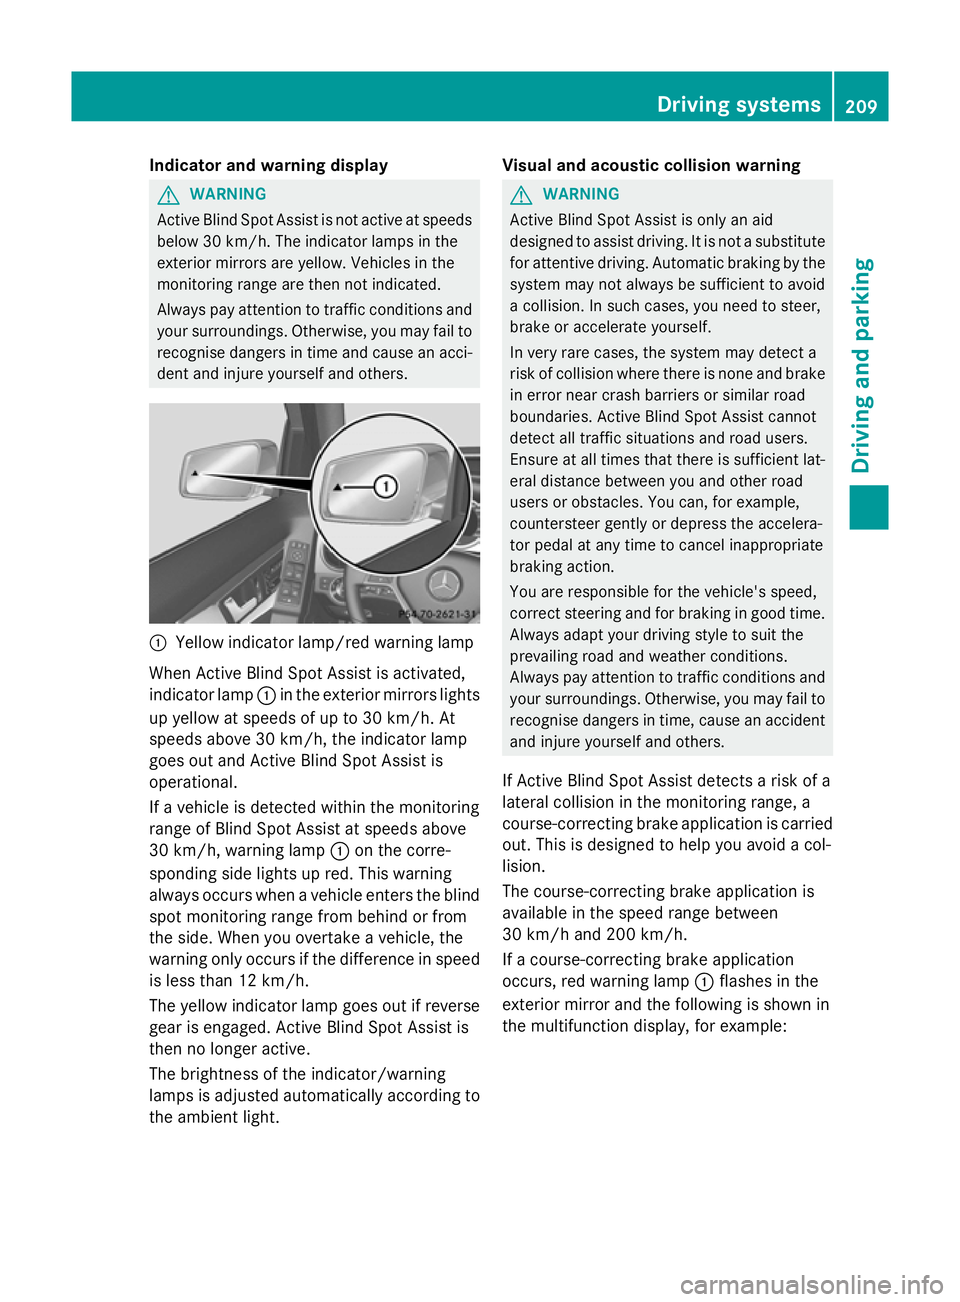
dent and injure yourself and others. :
Yellow indicator lamp/red warning lamp
When Active Blind Spot Assist is activated,
indicator lamp :in the exterior mirrors lights
up yellow at speeds of up to 30 km/h. At
speeds above 30 km/h, the indicator lamp
goes out and Active Blind Spot Assist is
operational.
If a vehicle is detected within the monitoring
range of Blind Spot Assist at speeds above
30 km/h, warning lamp :on the corre-
sponding side lights up red. This warning
always occurs when a vehicle enters the blind
spot monitoring range from behind or from
the side. When you overtake a vehicle, the
warning only occurs if the difference in speed
is less than 12 km/h.
The yellow indicator lamp goes out if reverse
gear is engaged. Active Blind Spot Assist is
then no longer active.
The brightness of the indicator/warning
lamps is adjusted automatically according to
the ambient light. Visual and acoustic collision warning G
WARNING
Active Blind Spot Assist is only an aid
designed to assist driving. It is not a substitute
for attentive driving. Automatic braking by the
system may not always be sufficient to avoid
a collision. In such cases, you need to steer,
brake or accelerate yourself.
In very rare cases, the system may detect a
risk of collision where there is none and brake
in error near crash barriers or similar road
boundaries. Active Blind Spot Assist cannot
detect all traffic situations and road users.
Ensure at all times that there is sufficient lat-
eral distance between you and other road
users or obstacles. You can, for example,
countersteer gently or depress the accelera-
tor pedal at any time to cancel inappropriate
braking action.
You are responsible for the vehicle's speed,
correct steering and for braking in good time.
Always adapt your driving style to suit the
prevailing road and weather conditions.
Always pay attention to traffic conditions and
your surroundings. Otherwise, you may fail to
recognise dangers in time, cause an accident
and injure yourself and others.
If Active Blind Spot Assist detects a risk of a
lateral collision in the monitoring range, a
course-correcting brake application is carried
out. This is designed to help you avoid a col-
lision.
The course-correcting brake application is
available in the speed range between
30 km/h and 200 km/h.
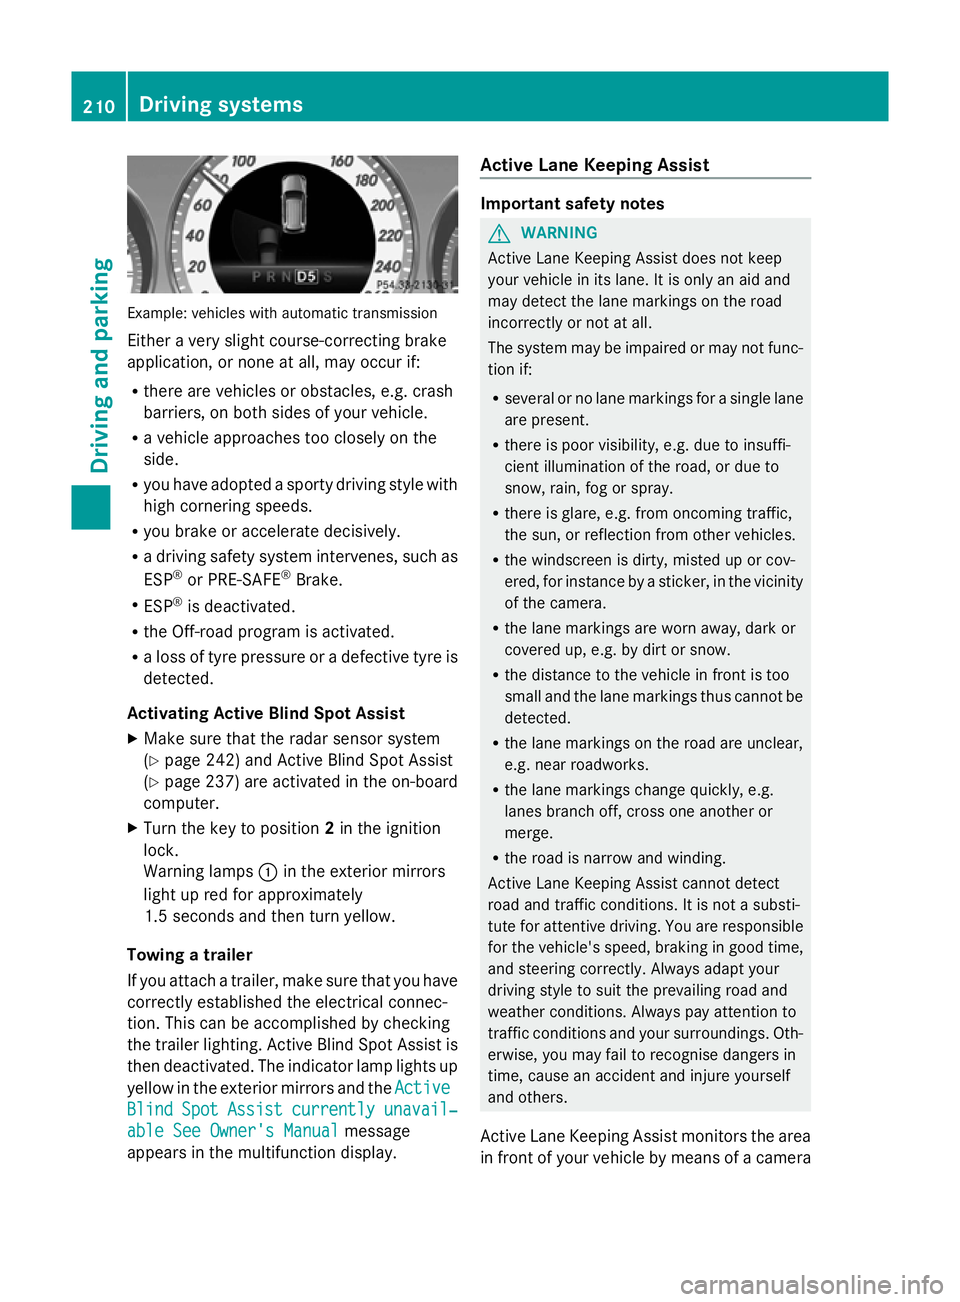
If a course-correcting brake application
occurs, red warning lamp :flashes in the
exterior mirror and the following is shown in
the multifunction display, for example: Driving systems
209Driving and parking Z
Page 213 of 381
Example: vehicles with automatic transmission
Either a very slight course-correcting brake
application, or none at all, may occur if:
R there are vehicles or obstacles, e.g. crash
barriers, on both sides of your vehicle.
R a vehicle approaches too closely on the
side.
R you have adopted a sporty driving style with
high cornering speeds.
R you brake or accelerate decisively.
R a driving safety system intervenes, such as
ESP ®
or PRE-SAFE ®
Brake.
R ESP ®
is deactivated.
R the Off-road program is activated.
R a loss of tyre pressure or a defective tyre is
detected.
Activating Active Blind Spot Assist
X Make sure that the radar sensor system
(Y page 242) and Active Blind Spot Assist
(Y page 237) are activated in the on-board
computer.
X Turn the key to position 2in the ignition
lock.
Warning lamps :in the exterior mirrors
light up red for approximately
1.5 second s andthen turn yellow.
Towing a trailer
If you attach a trailer, make sure that you have
correctly established the electrical connec-
tion. This can be accomplished by checking
the trailer lighting. Active Blind Spot Assist is
then deactivated. The indicator lamp lights up
yellow in the exterior mirrors and the Active
Active
Blind Blind Spot
SpotAssist
Assist currently
currently unavail‐
unavail‐
able See Owner's Manual
able See Owner's Manual message
appears in the multifunction display. Active Lane Keeping Assist Important safety notes
G
WARNING
Active Lane Keeping Assist does not keep
your vehicle in its lane. It is only an aid and
may detect the lane markings on the road
incorrectly or not at all.
The system may be impaired or may not func-
tion if:
R several or no lane markings for a single lane
are present.
R there is poor visibility, e.g. due to insuffi-
cient illumination of the road, or due to
snow, rain, fog or spray.
R there is glare, e.g. from oncoming traffic,
the sun, or reflection from other vehicles.
R the windscreen is dirty, misted up or cov-
ered, for instance by a sticker, in the vicinity
of the camera.
R the lane markings are worn away, dark or
covered up, e.g. by dirt or snow.
R the distance to the vehicle in front is too
small and the lane markings thus cannot be
detected.
R the lane markings on the road are unclear,
e.g. near roadworks.
R the lane markings change quickly, e.g.
lanes branch off, cross one another or
merge.
R the road is narrow and winding.
Active Lane Keeping Assist cannot detect
road and traffic conditions. It is not a substi-
tute for attentive driving. You are responsible
for the vehicle's speed, braking in good time,
and steering correctly. Always adapt your
driving style to suit the prevailing road and
weather conditions. Always pay attention to
traffic conditions and your surroundings. Oth-
erwise, you may fail to recognise dangers in
time, cause an accident and injure yourself
and others.
Active Lane Keeping Assist monitors the area
in front of your vehicle by means of a camera 210
Driving systemsDriving an
d parking
Page 217 of 381
always drive at a higher or a lower speed than
that set on the on-board computer. G
WARNING
If you depress the accelerator pedal with DSR
activated, then the set speed can be excee-
ded. Drive downhill with special care and
always keep in mind that DSR brakes the vehi-
cle as soon as you remove your foot from the
accelerator pedal. The vehicle may brake sud-
denly due to DSR intervening, depending on
the downhill gradient and the difference
between the current speed and the set speed.
You could lose control of the vehicle and
cause an accident.
For information about driving off-road, see
(Y page 170).
Activating/deactivating DSR Activating
You can only activate DSR when driving at
speeds below 30 km/h.
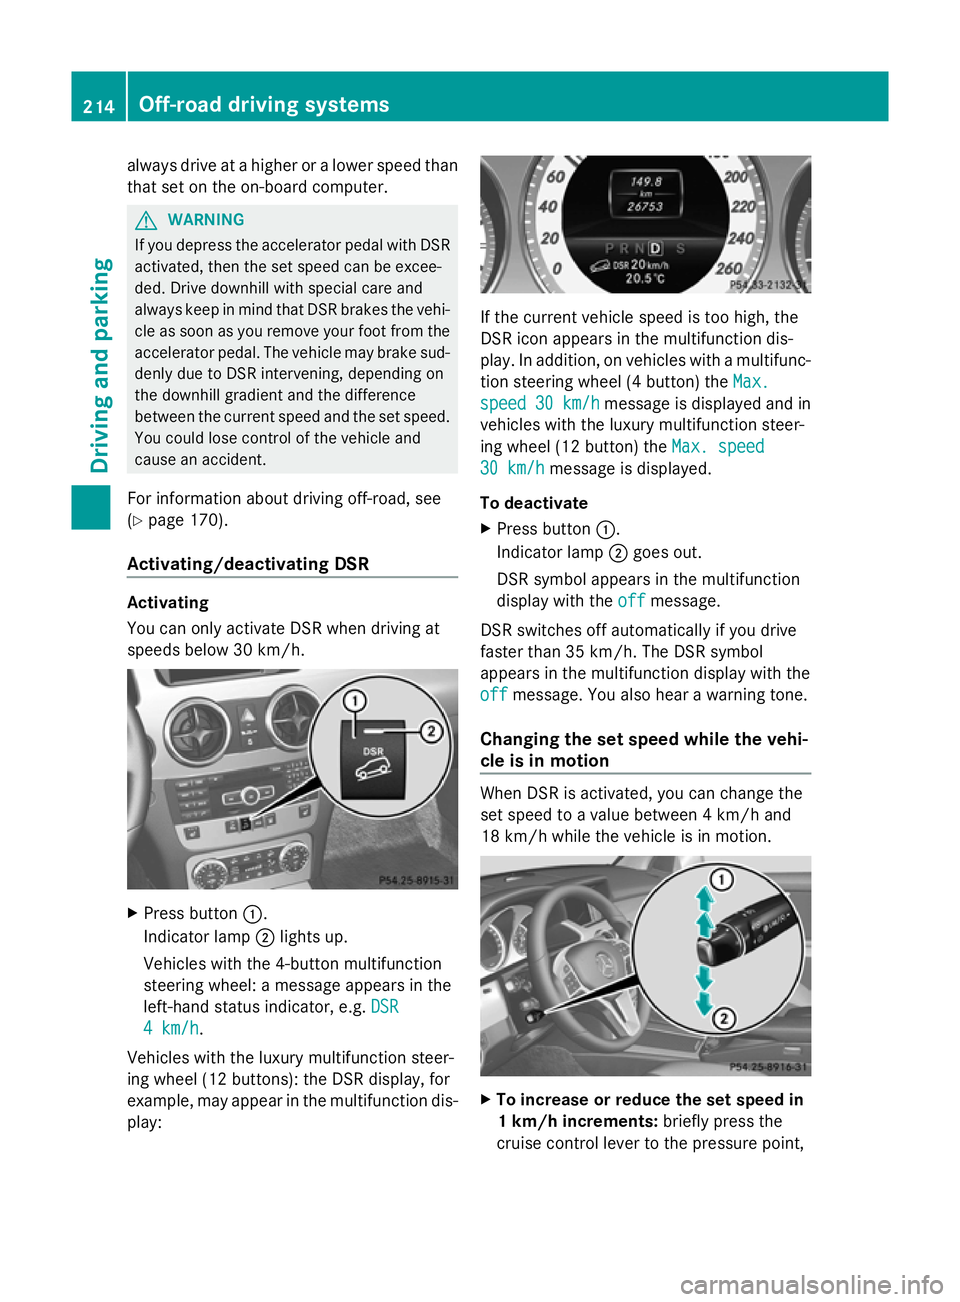
X
Press button :.
Indicator lamp ;lights up.
Vehicles with the 4-button multifunction
steering wheel: a message appears in the
left-hand status indicator, e.g. DSR DSR
4 km/h
4 km/h.
Vehicles with the luxury multifunction steer-
ing wheel (12 buttons): the DSR display, for
example, may appear in the multifunction dis-
play: If the current vehicle speed is too high, the
DSR icon appears in the multifunction dis-
play. In addition, on vehicles with a multifunc-
tion steering wheel (4 button) the
Max. Max.
speed
speed 30 km/h
30 km/h message is displayed and in
vehicles with the luxury multifunction steer-
ing wheel (12 button) the Max. speed Max. speed
30 km/h
30 km/h message is displayed.
To deactivate
X Press button :.
Indicator lamp ;goes out.
DSR symbol appears in the multifunction
display with the off offmessage.
DSR switches off automatically if you drive
faster than 35 km/h. The DSR symbol
appears in the multifunction display with the
off off message. You also hear a warning tone.
Changing the set speed while the vehi-
cle is in motion When DSR is activated, you can change the
set speed to a value between 4 km/h and
18 km/h while the vehicle is in motion.
X
To increase or reduce the set speed in
1 km/h increments: briefly press the
cruise control lever to the pressure point, 214
Off-road driving systemsDriving and parking
Page 218 of 381
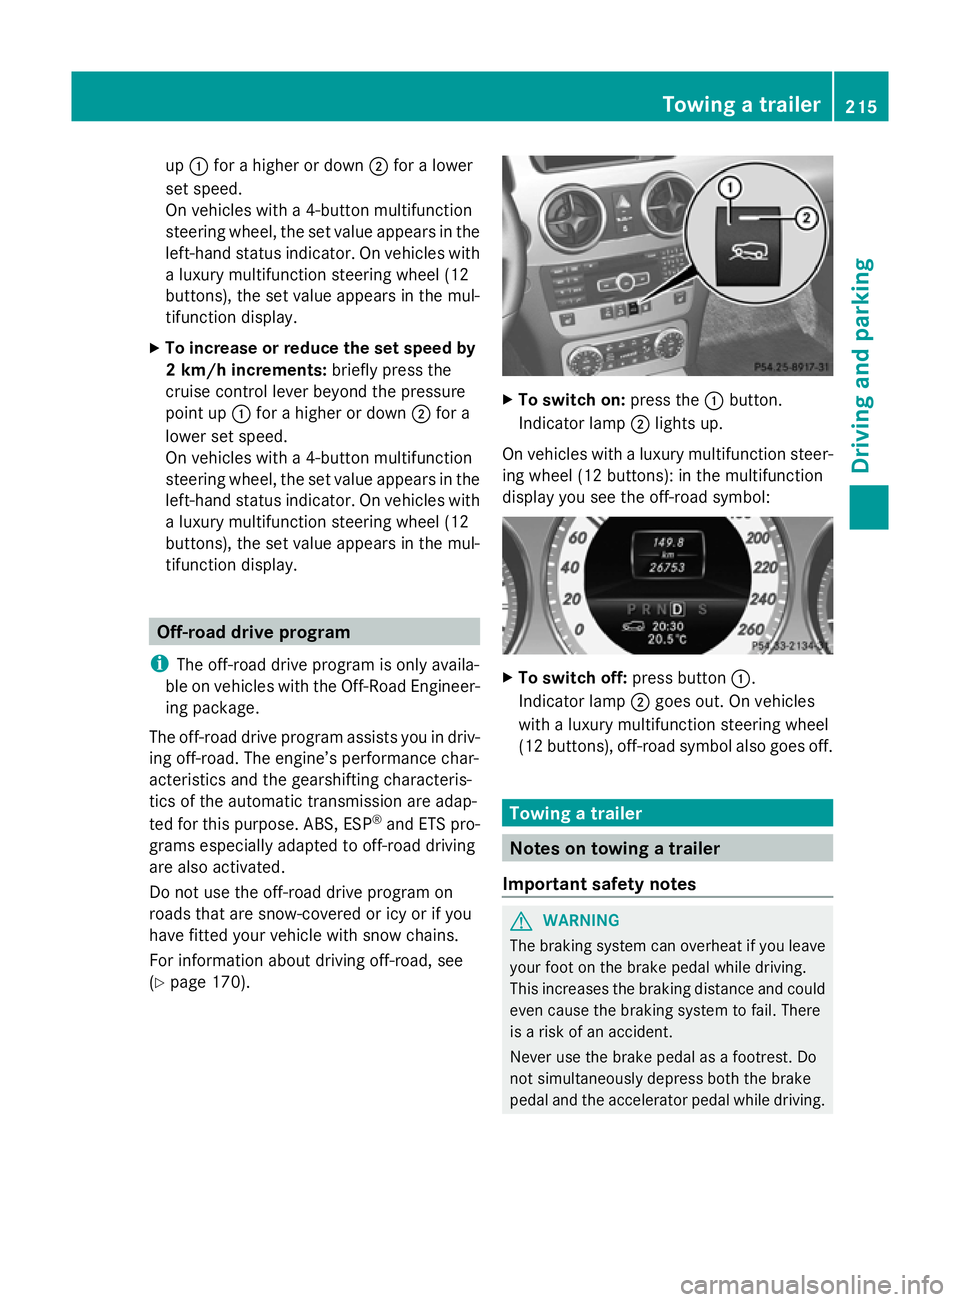
up
: for a higher or down ;for a lower
set speed.
On vehicles with a 4-button multifunction
steering wheel, the set value appears in the
left-hand status indicator. On vehicles with
a luxury multifunction steering wheel (12
buttons), the set value appears in the mul-
tifunction display.
X To increase or reduce the set speed by
2 km/h increments: briefly press the
cruise control lever beyond the pressure
point up :for a higher or down ;for a
lower set speed.
On vehicles with a 4-button multifunction
steering wheel, the set value appears in the
left-hand status indicator. On vehicles with
a luxury multifunction steering wheel (12
buttons), the set value appears in the mul-
tifunction display. Off-road drive program
i The off-road drive program is only availa-
ble on vehicles with the Off-Road Engineer-
ing package.
The off-road drive program assists you in driv-
ing off-road. The engine’s performance char-
acteristics and the gearshifting characteris-
tics of the automatic transmission are adap-
ted for this purpose. ABS, ESP ®
and ETS pro-
grams especially adapted to off-road driving
are also activated.
Do not use the off-road drive program on
roads that are snow-covered or icy or if you
have fitted your vehicle with snow chains.
For information about driving off-road, see
(Y page 170). X
To switch on: press the:button.
Indicator lamp ;lights up.
On vehicles with a luxury multifunction steer-
ing wheel (12 buttons): in the multifunction
display you see the off-road symbol: X
To switch off: press button:.
Indicator lamp ;goes out. On vehicles
with a luxury multifunction steering wheel
(12 buttons), off-road symbol also goes off. Towing a trailer
Notes on towing a trailer
Important safety notes G
WARNING
The braking system can overheat if you leave
your foot on the brake pedal while driving.
This increases the braking distance and could
even cause the braking system to fail. There
is a risk of an accident.
Never use the brake pedal as a footrest. Do
not simultaneously depress both the brake
pedal and the accelerator pedal while driving. Towing a trailer
215Driving and parking Z
Page 228 of 381
Under normal operating conditions and with
the specified coolant level, the coolant tem-
perature may rise to 120 †.
At high outside temperatures and when driv-
ing uphill, the coolant temperature may rise
to the end of the scale. Rev counter
The red band in the rev counter indicates the
engine's overrevving range.
! Do not drive in the overrevving range.
Doing so will damage the engine.
The fuel supply is interrupted to protect the
engine when the red band is reached. Outside temperature display
The outside temperature display is in the
instrument cluster (Y page 31).G
WARNING
At temperatures just above freezing point, the
street may be icy, especially in wooded areas
or on bridges. If you do not adapt your driving
style to the conditions, the vehicle could skid.
For this reason, adapt your driving style and
speed to the weather conditions.
Changes in the outside temperature are dis-
played after a short delay. Operating the on-board computer
The on-board computer is activated as soon
as you turn the key to position 1in the ignition
lock. You can use the on-board computer to
call up information relating to your vehicle
and to make and adjust settings.
i You can have certain functions set at a
qualified specialist workshop, e.g. a
Mercedes-Benz Service Centre. Examples:
R
automatic door locking
R speed limit for winter tyres
You can obtain information about this at
any Mercedes-Benz Service Centre.
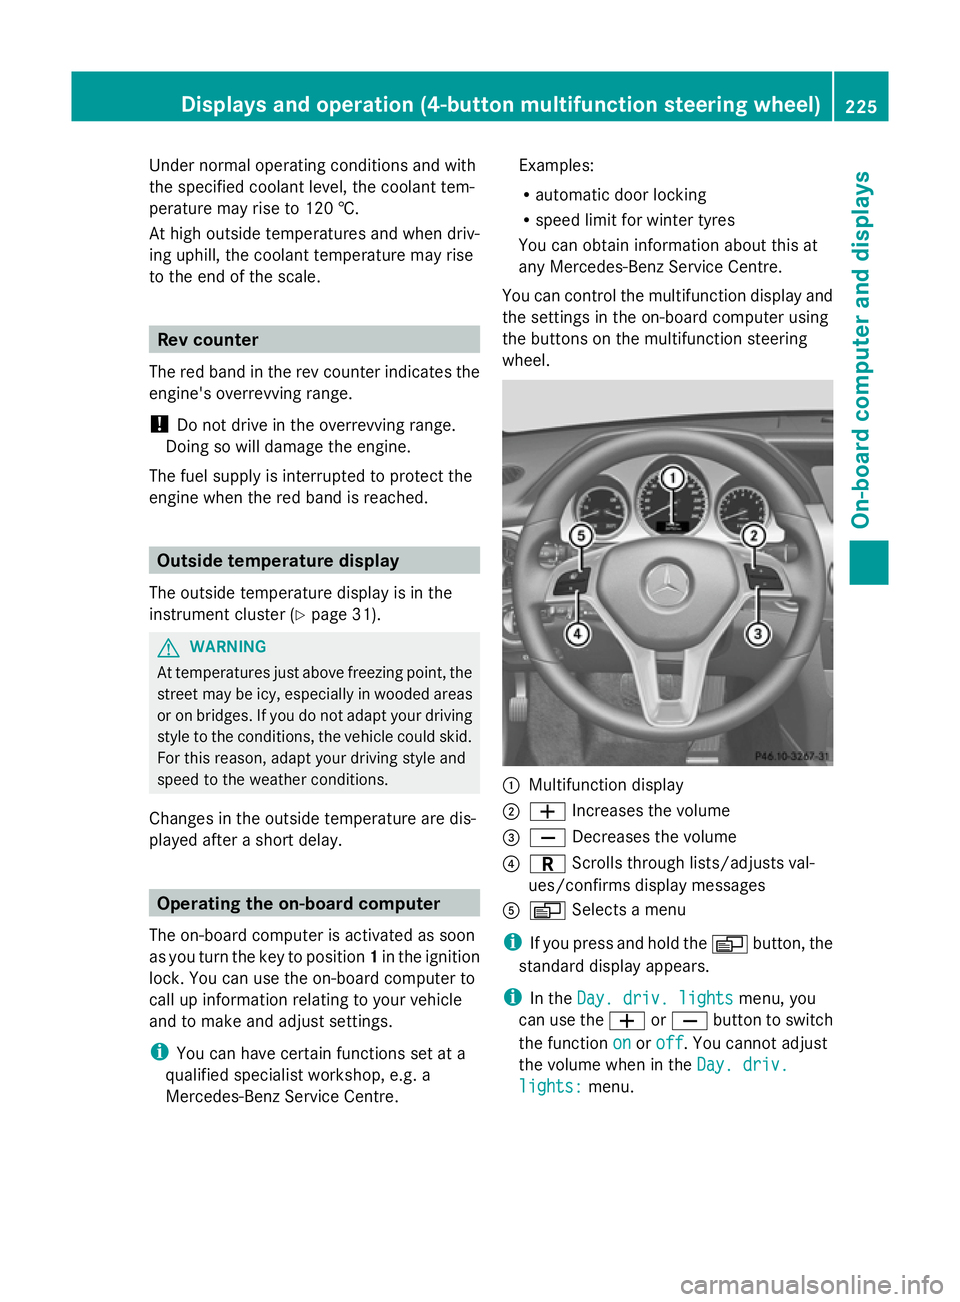
You can control the multifunction display and
the settings in the on-board computer using
the buttons on the multifunction steering
wheel. :
Multifunction display
; W Increases the volume
= X Decreases the volume
? C Scrolls through lists/adjusts val-
ues/confirms display messages
A V Selects a menu
i If you press and hold the Vbutton, the
standard display appears.
i In the Day. driv. lights Day. driv. lights menu, you
can use the WorX button to switch
the function on
onoroff
off. You cannot adjust
the volume when in the Day. driv.
Day. driv.
lights:
lights: menu. Displays and operation (4-button multifunction steering wheel)
225On-board computer and displays Z
Page 229 of 381
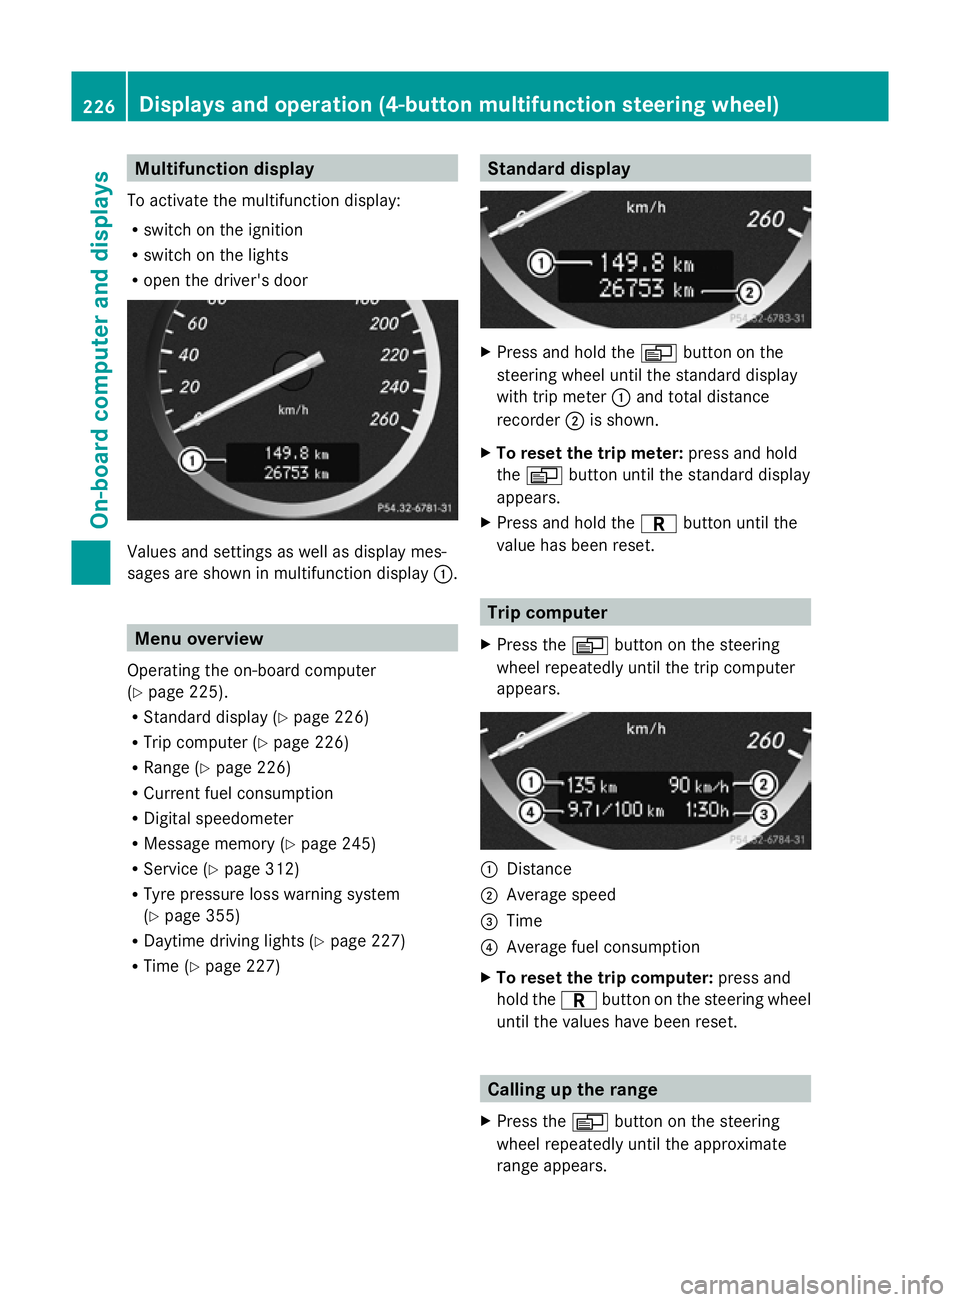
Multifunction display
To activate the multifunction display:
R switch on the ignition
R switch on the lights
R open the driver's door Values and settings as well as display mes-
sages are shown in multifunction display :.Menu overview
Operating the on-board computer
(Y page 225).
R Standard display (Y page 226)
R Trip computer (Y page 226)
R Range (Y page 226)
R Current fuel consumption
R Digital speedometer
R Message memory (Y page 245)
R Service (Y page 312)
R Tyre pressure loss warning system
(Y page 355)
R Daytime driving lights (Y page 227)
R Time (Y page 227) Standard display
X
Press and hold the Vbutton on the
steering wheel until the standard display
with trip meter :and total distance
recorder ;is shown.
X To reset the trip meter: press and hold
the V button until the standard display
appears.
X Press and hold the Cbutton until the
value has been reset. Trip computer
X Press the Vbutton on the steering
wheel repeatedly until the trip computer
appears. :
Distance
; Average speed
= Time
? Average fuel consumption
X To reset the trip computer: press and
hold the Cbutton on the steering wheel
until the values have been reset. Calling up the range
X Press the Vbutton on the steering
wheel repeatedly until the approximate
range appears. 226
Displays and operation (4-button multifunction steering wheel)On-board computer and displays