2012 MERCEDES-BENZ GLK SUV change wheel
[x] Cancel search: change wheelPage 235 of 381
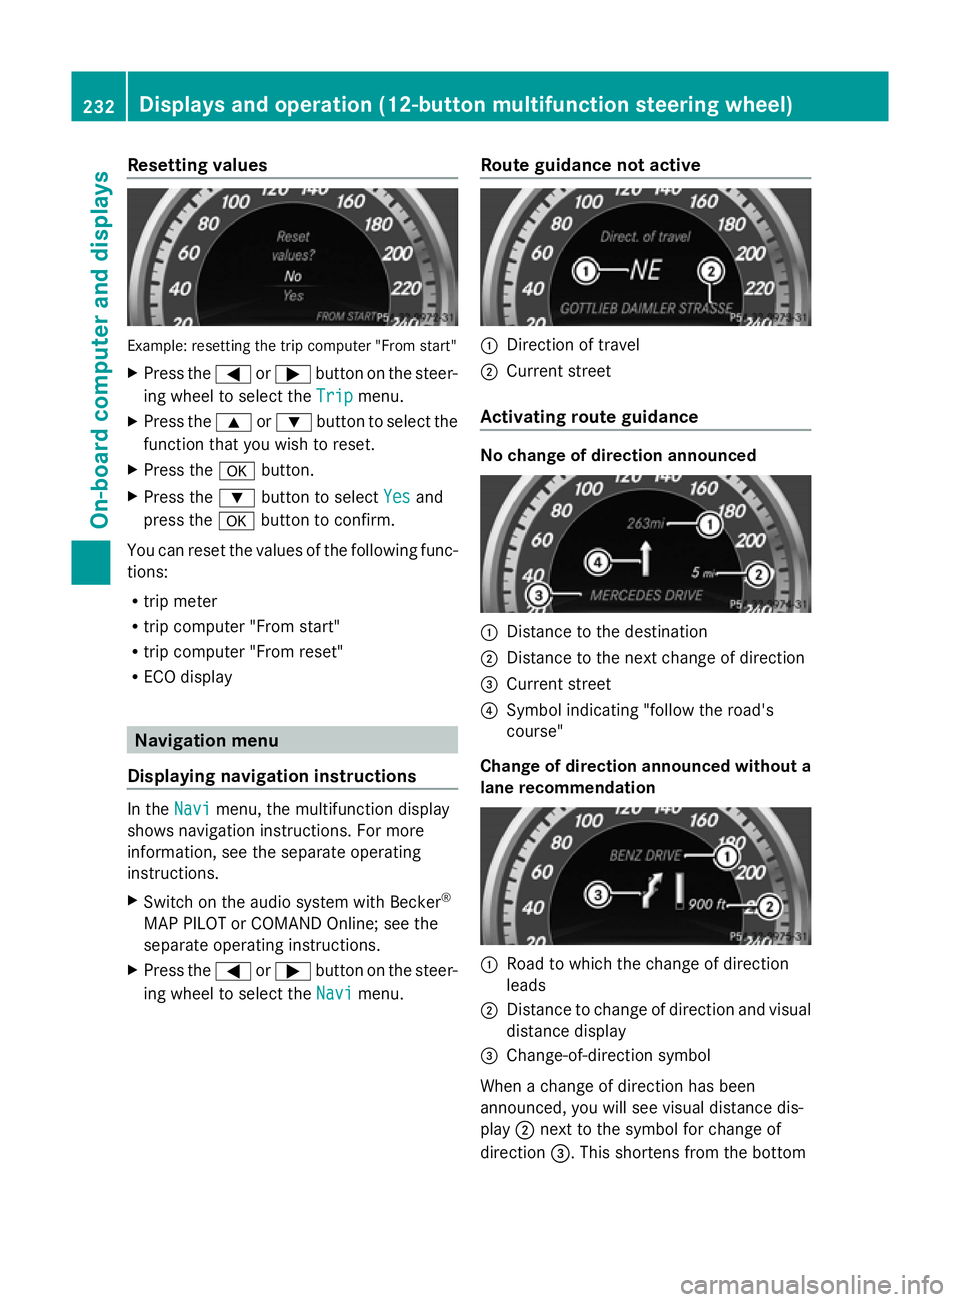
Resetting values
Example: resetting the trip computer "From start"
X Press the =or; button on the steer-
ing wheel to select the Trip
Trip menu.
X Press the 9or: button to select the
function that you wish to reset.
X Press the abutton.
X Press the :button to select Yes
Yes and
press the abutton to confirm.
You can reset the values of the following func-
tions:
R trip meter
R trip computer "From start"
R trip computer "From reset"
R ECO display Navigation menu
Displaying navigation instructions In the
Navi Navimenu, the multifunction display
shows navigation instructions. For more
information, see the separate operating
instructions.
X Switch on the audio system with Becker ®
MAP PILOT or COMAND Online; see the
separate operating instructions.
X Press the =or; button on the steer-
ing wheel to select the Navi
Navi menu. Route guidance not active :
Direction of travel
; Current street
Activating route guidance No change of direction announced
:
Distance to the destination
; Distance to the next change of direction
= Current street
? Symbol indicating "follow the road's
course"
Change of direction announced without a
lane recommendation :
Road to which the change of direction
leads
; Distance to change of direction and visual
distance display
= Change-of-direction symbol
When a change of direction has been
announced, you will see visual distance dis-
play ;next to the symbol for change of
direction =. This shortens from the bottom 232
Displays and operation (12-button multifunction steering wheel)On-board computer and displays
Page 236 of 381
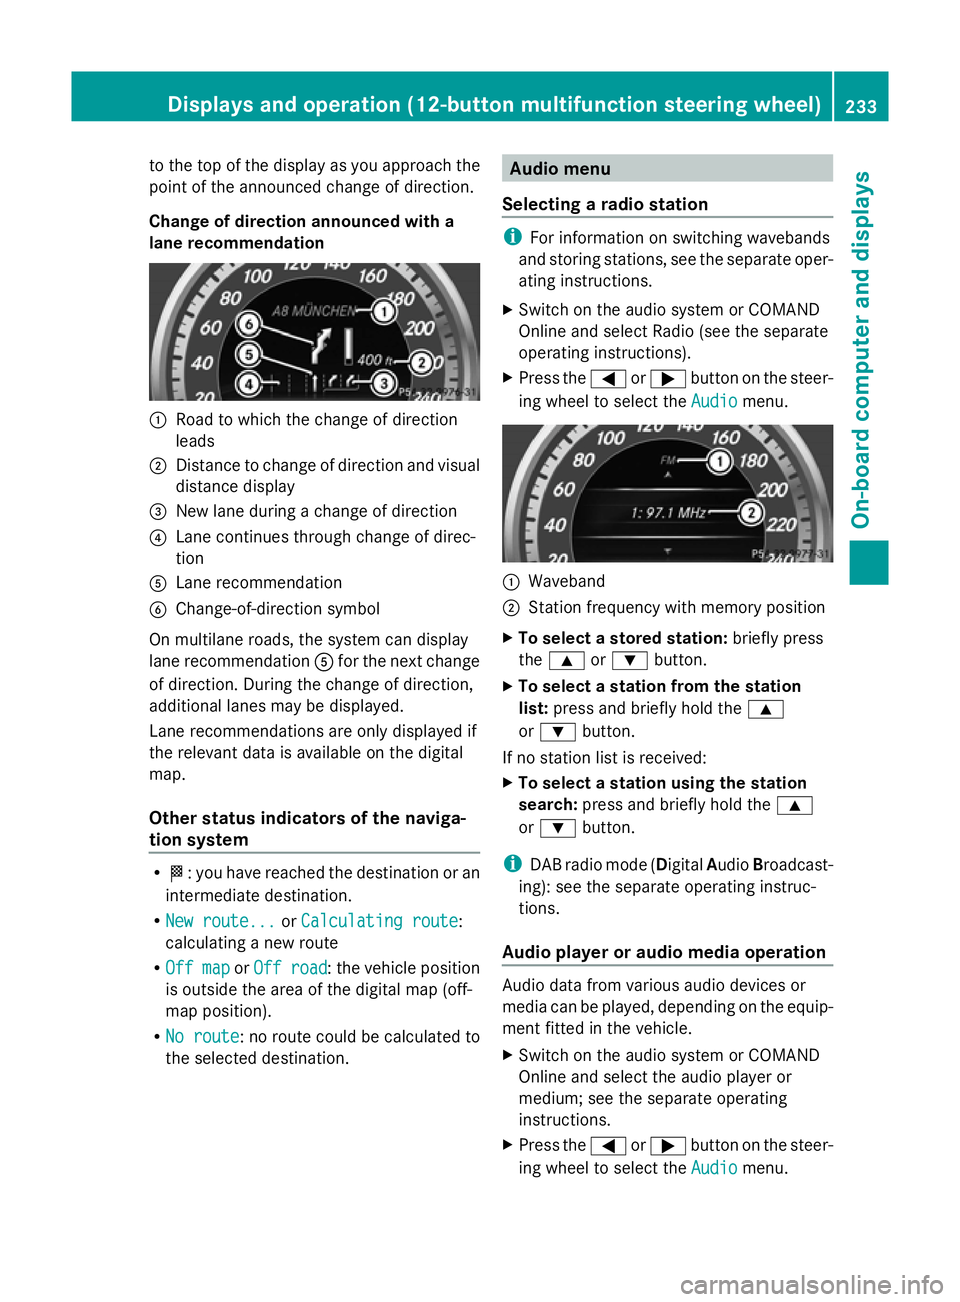
to the top of the display as you approach the
point of the announced change of direction.
Change of direction announced with a
lane recommendation :
Road to which the change of direction
leads
; Distance to change of direction and visual
distance display
= New lane during a change of direction
? Lane continues through change of direc-
tion
A Lane recommendation
B Change-of-direction symbol
On multilane roads, the system can display
lane recommendation Afor the next change
of direction. During the change of direction,
additional lanes may be displayed.
Lane recommendations are only displayed if
the relevant data is available on the digital
map.
Other status indicators of the naviga-
tion system R
O: you have reached the destination or an
intermediate destination.
R New route...
New route... orCalculating route Calculating route :
calculating a new route
R Off map
Off map orOff road
Off road : the vehicle position
is outside the area of the digital map (off-
map position).
R No route
No route : no route could be calculated to
the selected destination. Audio menu
Selecting a radio station i
For information on switching wavebands
and storing stations, see the separate oper-
ating instructions.
X Switch on the audio system or COMAND
Online and select Radio (see the separate
operating instructions).
X Press the =or; button on the steer-
ing wheel to select the Audio Audiomenu. :
Waveband
; Station frequency with memory position
X To select a stored station: briefly press
the 9 or: button.
X To select a station from the station
list: press and briefly hold the 9
or : button.
If no station list is received:
X To select a station using the station
search: press and briefly hold the 9
or : button.
i DAB radio mode ( DigitalAudioBroadcast-
ing): see the separate operating instruc-
tions.
Audio player or audio media operation Audio data from various audio devices or
media can be played, depending on the equip-
ment fitted in the vehicle.
X
Switch on the audio system or COMAND
Online and select the audio player or
medium; see the separate operating
instructions.
X Press the =or; button on the steer-
ing wheel to select the Audio Audiomenu. Displays and operation (12-bu
tton multifunction steeringwheel)
233On-boardcompu ter and displays Z
Page 237 of 381
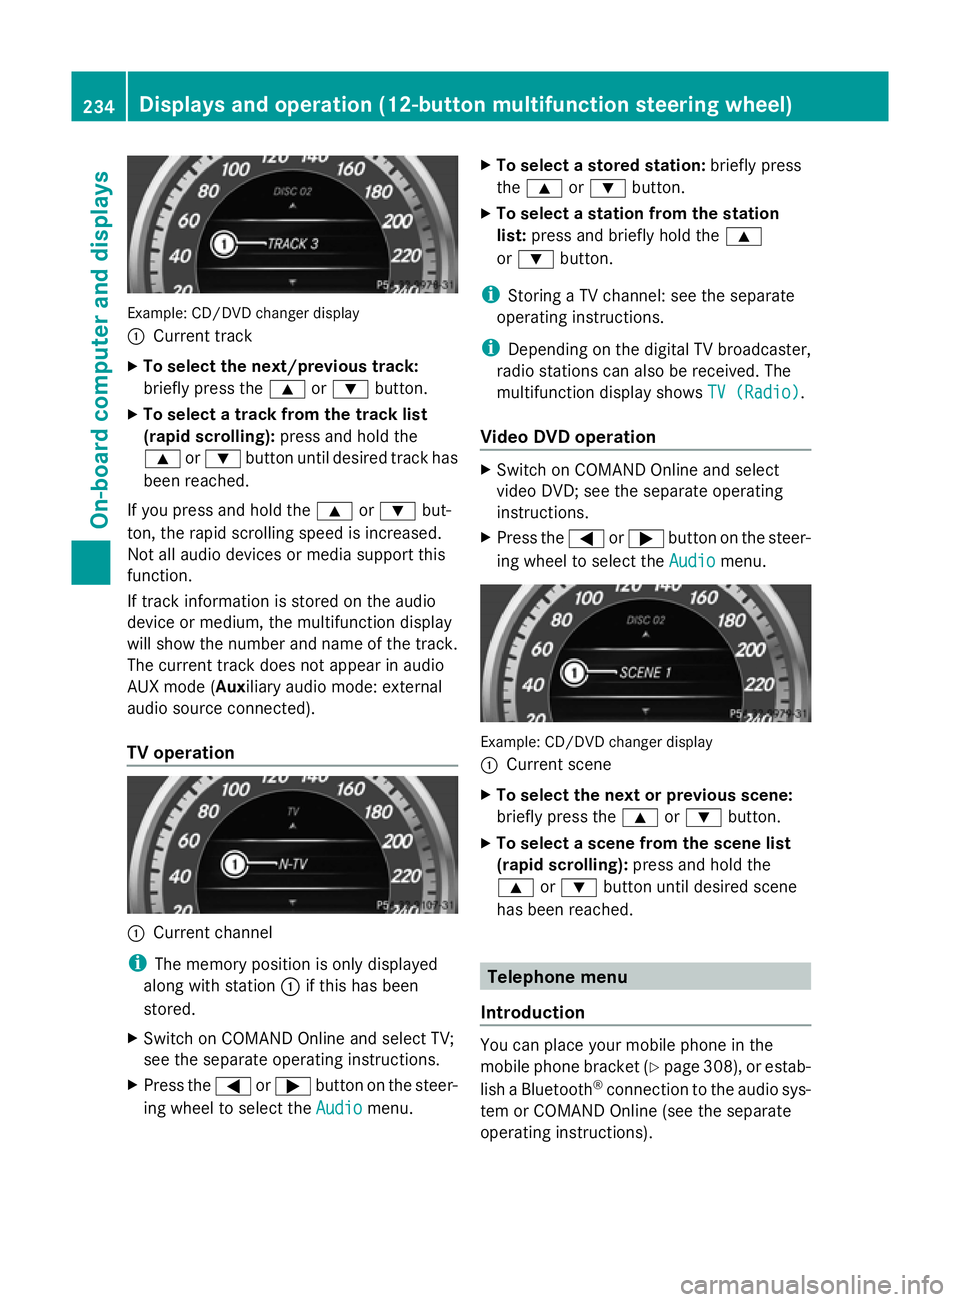
Example: CD/DVD changer display
:
Current track
X To select the next/previous track:
briefly press the 9or: button.
X To select a track from the track list
(rapid scrolling): press and hold the
9 or: button until desired track has
been reached.
If you press and hold the 9or: but-
ton, the rapid scrolling speed is increased.
Not all audio devices or media support this
function.
If track information is stored on the audio
device or medium, the multifunction display
will show the number and name of the track.
The current track does not appear in audio
AUX mode (Auxiliary audio mode: external
audio source connected).
TV operation :
Current channel
i The memory position is only displayed
along with station :if this has been
stored.
X Switch on COMAND Online and select TV;
see the separate operating instructions.
X Press the =or; button on the steer-
ing wheel to select the Audio
Audio menu. X
To select a stored station: briefly press
the 9 or: button.
X To select a station from the station
list: press and briefly hold the 9
or : button.
i Storing a TV channel: see the separate
operating instructions.
i Depending on the digital TV broadcaster,
radio stations can also be received. The
multifunction display shows TV (Radio) TV (Radio).
Video DVD operation X
Switch on COMAND Online and select
video DVD; see the separate operating
instructions.
X Press the =or; button on the steer-
ing wheel to select the Audio Audiomenu. Example: CD/DVD changer display
:
Current scene
X To select the next or previous scene:
briefly press the 9or: button.
X To select a scene from the scene list
(rapid scrolling): press and hold the
9 or: button until desired scene
has been reached. Telephone menu
Introduction You can place your mobile phone in the
mobile phone bracket (Y
page 308), or estab-
lish a Bluetooth ®
connection to the audio sys-
tem or COMAND Online (see the separate
operating instructions). 234
Displays and operation (12-button multifunction steering wheel)On-board computer and displays
Page 241 of 381
For further information about Blind Spot
Assist, see (Y page 203).
For further information about Active Blind
Spot Assist, see (Y page 203).
Activating/deactivating Lane Keeping
Assist X
Press the =or; button on the steer-
ing wheel to select the Assist. Assist.menu.
X Press the 9or: button to select
Lane Keep. Asst.
Lane Keep. Asst.
X Press the abutton.
The current selection is displayed.
X Press ato confirm.
X Press the :or9 button to set Off
Off ,
Standard
Standard orAdaptive
Adaptive .
X Press the abutton to save the setting.
When Lane Keeping Assist or Active Lane
Keeping Assist is activated, the Ãsymbol
appears in the multifunction display when the
ignition is on.
For further information about Lane Keeping
Assist, see (Y page 205).
For further information about Active Lane
Keeping Assist, see (Y page 210).Service menu
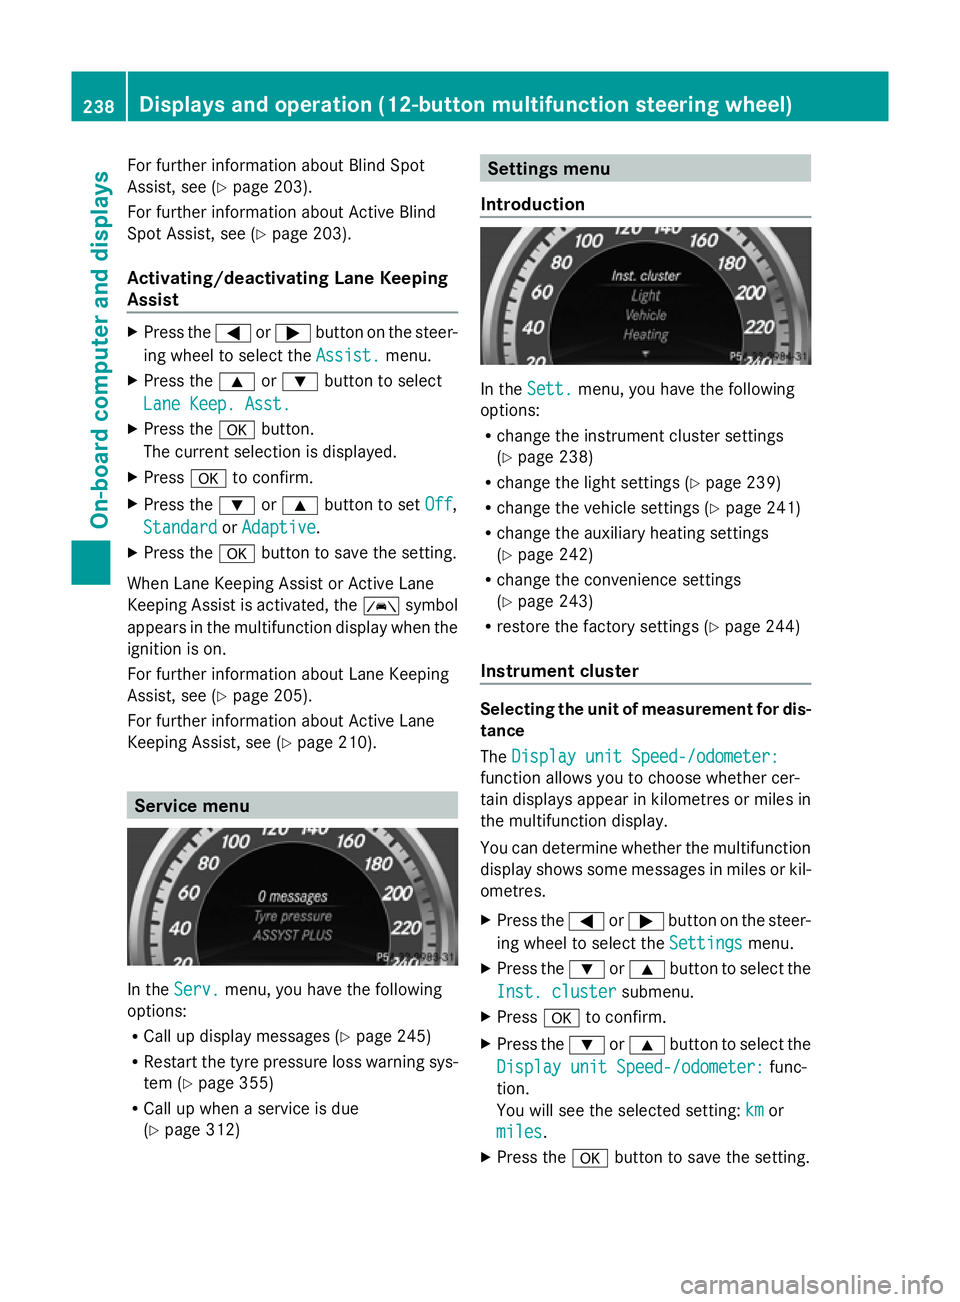
In the
Serv. Serv. menu, you have the following
options:
R Call up display messages (Y page 245)
R Restart the tyre pressure loss warning sys-
tem (Y page 355)
R Call up when a service is due
(Y page 312) Settings menu
Introduction In the
Sett. Sett. menu, you have the following
options:
R change the instrument cluster settings
(Y page 238)
R change the light settings ( Ypage 239)
R change the vehicle settings (Y page 241)
R change the auxiliary heating settings
(Y page 242)
R change the convenience settings
(Y page 243)
R restore the factory settings (Y page 244)
Instrument cluster Selecting the unit of measurement for dis-
tance
The Display unit Speed-/odometer: Display unit Speed-/odometer:
function allows you to choose whether cer-
tain displays appear in kilometres or miles in
the multifunction display.
You can determine whether the multifunction
display shows some messages in miles or kil-
ometres.
X Press the =or; button on the steer-
ing wheel to select the Settings Settingsmenu.
X Press the :or9 button to select the
Inst. cluster
Inst. cluster submenu.
X Press ato confirm.
X Press the :or9 button to select the
Display unit Speed-/odometer:
Display unit Speed-/odometer: func-
tion.
You will see the selected setting: km kmor
miles
miles.
X Press the abutton to save the setting. 238
Displays and operation (12-button multifunction steering wheel)On-board computer and displays
Page 245 of 381
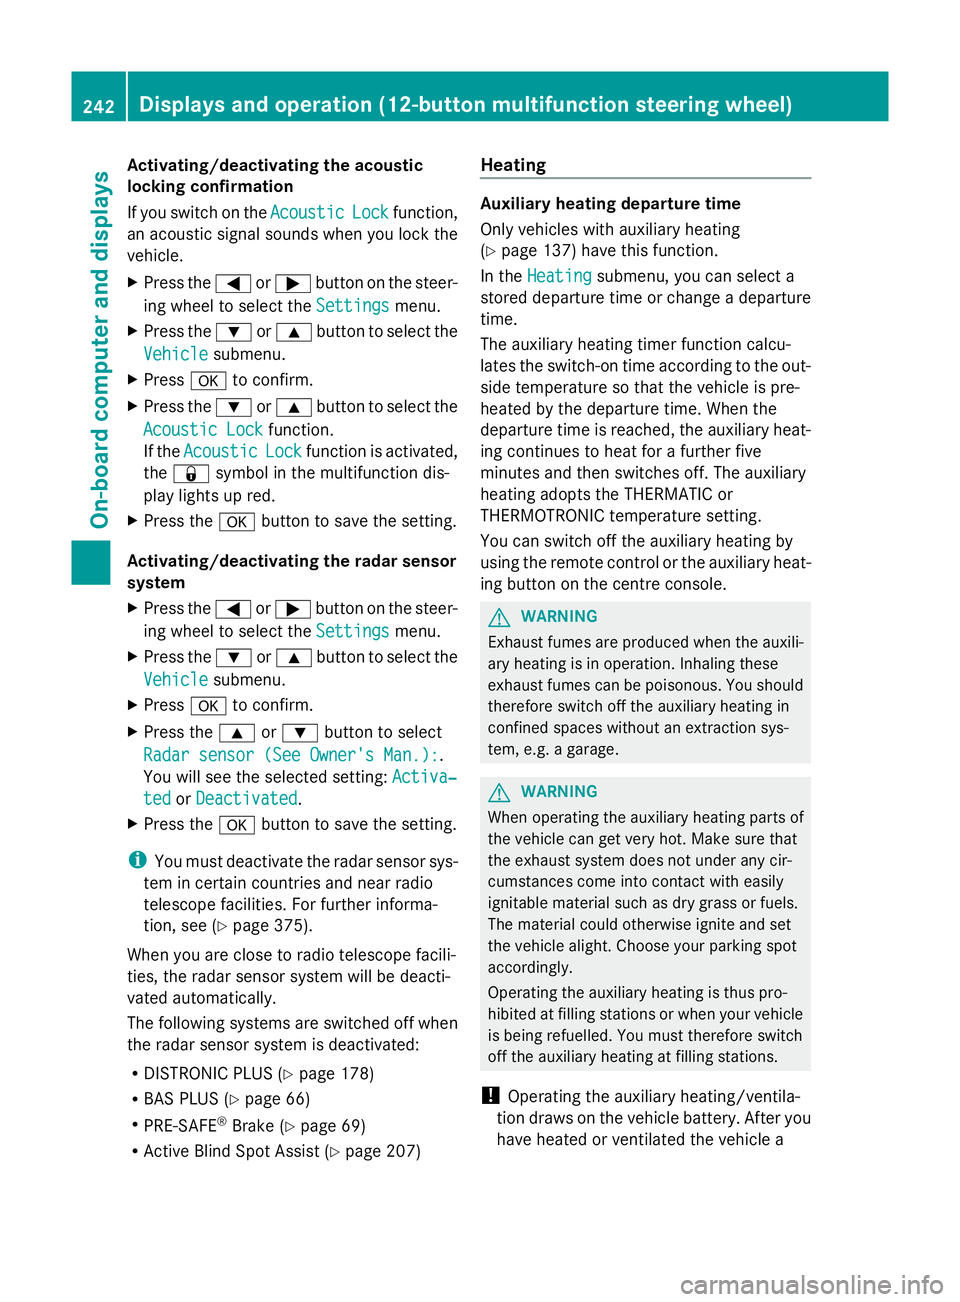
Activating/deactivating the acoustic
locking confirmation
If you switch on the Acoustic
Acoustic Lock Lockfunction,
an acoustic signal sounds when you lock the
vehicle.
X Press the =or; button on the steer-
ing wheel to select the Settings Settingsmenu.
X Press the :or9 button to select the
Vehicle
Vehicle submenu.
X Press ato confirm.
X Press the :or9 button to select the
Acoustic Lock
Acoustic Lock function.
If the Acoustic
Acoustic Lock
Lockfunction is activated,
the & symbol in the multifunction dis-
play lights up red.
X Press the abutton to save the setting.
Activating/deactivating the radar sensor
system
X Press the =or; button on the steer-
ing wheel to select the Settings
Settings menu.
X Press the :or9 button to select the
Vehicle Vehicle submenu.
X Press ato confirm.
X Press the 9or: button to select
Radar sensor (See Owner's Man.):
Radar sensor (See Owner's Man.): .
You will see the selected setting: Activa‐
Activa‐
ted
ted orDeactivated
Deactivated .
X Press the abutton to save the setting.
i You must deactivate the radar sensor sys-
tem in certain countries and near radio
telescope facilities. For further informa-
tion, see (Y page 375).
When you are close to radio telescope facili-
ties, the radar sensor system will be deacti-
vated automatically.
The following systems are switched off when
the radar sensor system is deactivated:
R DISTRONIC PLUS (Y page 178)
R BAS PLUS (Y page 66)
R PRE-SAFE ®
Brake (Y page 69)
R Active Blind Spot Assist (Y page 207)Heating Auxiliary heating departure time
Only vehicles with auxiliary heating
(Y
page 137) have this function.
In the Heating Heating submenu, you can select a
stored departure time or change a departure
time.
The auxiliary heating timer function calcu-
lates the switch-on time according to the out-
side temperature so that the vehicle is pre-
heated by the departure time. When the
departure time is reached, the auxiliary heat-
ing continues to heat for a further five
minutes and then switches off. The auxiliary
heating adopts the THERMATIC or
THERMOTRONIC temperature setting.
You can switch off the auxiliary heating by
using the remote control or the auxiliary heat-
ing button on the centre console. G
WARNING
Exhaust fumes are produced when the auxili-
ary heating is in operation. Inhaling these
exhaust fumes can be poisonous. You should
therefore switch off the auxiliary heating in
confined spaces without an extraction sys-
tem, e.g. a garage. G
WARNING
When operating the auxiliary heating parts of
the vehicle can get very hot. Make sure that
the exhaust system does not under any cir-
cumstances come into contact with easily
ignitable material such as dry grass or fuels.
The material could otherwise ignite and set
the vehicle alight. Choose your parking spot
accordingly.
Operating the auxiliary heating is thus pro-
hibited at filling stations or when your vehicle
is being refuelled. You must therefore switch
off the auxiliary heating at filling stations.
! Operating the auxiliary heating/ventila-
tion draws on the vehicle battery. After you
have heated or ventilated the vehicle a 242
Displays and operation (12-button multifunction steering wheel)On-board computer and displays
Page 246 of 381
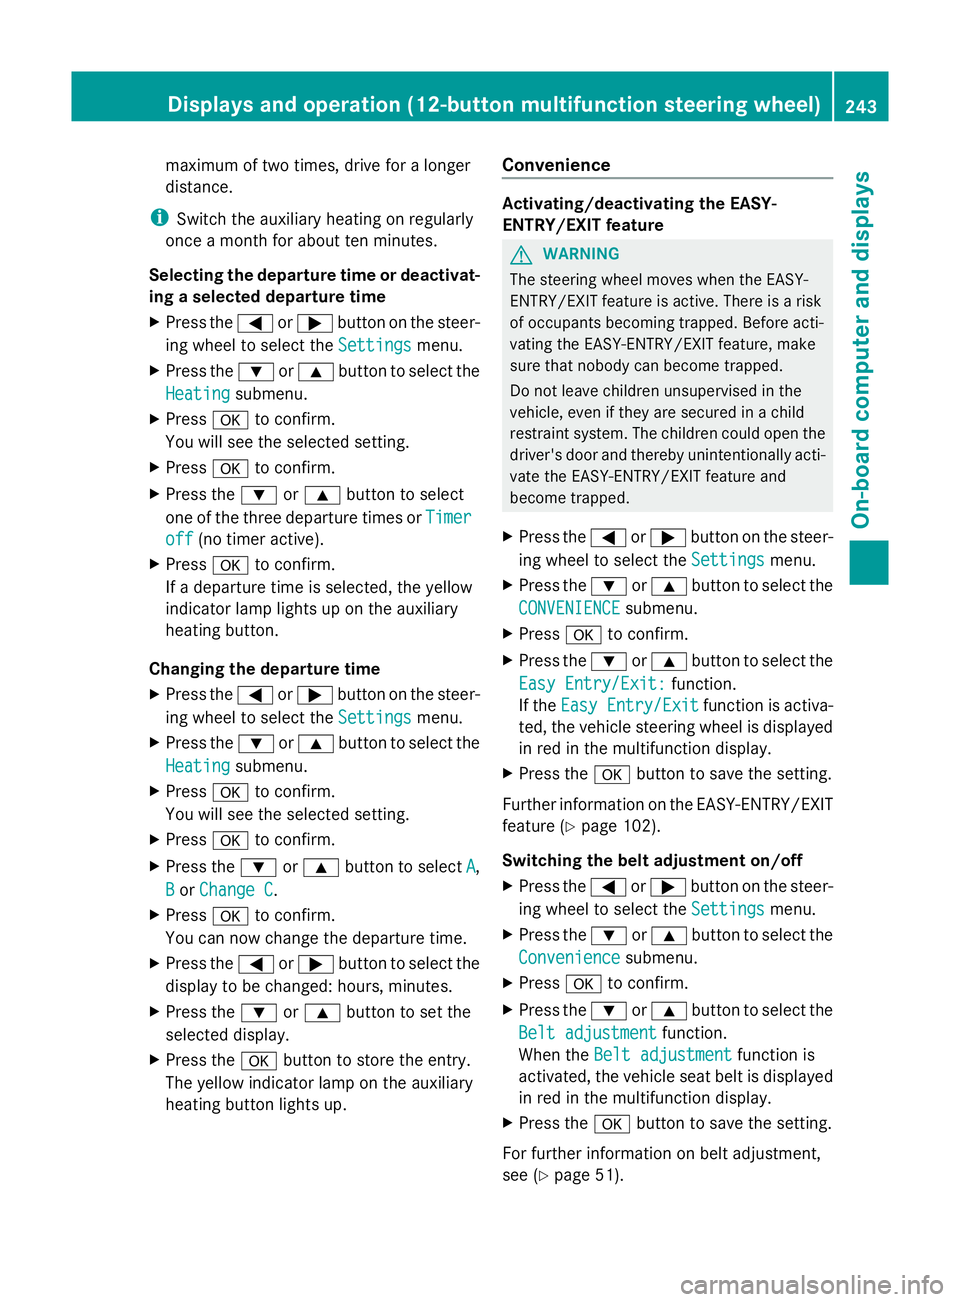
maximum of two times, drive for a longer
distance.
i Switch the auxiliary heating on regularly
once a month for about ten minutes.
Selecting the departure time or deactivat-
ing a selected departure time
X Press the =or; button on the steer-
ing wheel to select the Settings Settingsmenu.
X Press the :or9 button to select the
Heating
Heating submenu.
X Press ato confirm.
You will see the selected setting.
X Press ato confirm.
X Press the :or9 button to select
one of the three departure times or Timer
Timer
off
off (no timer active).
X Press ato confirm.
If a departure time is selected, the yellow
indicator lamp lights up on the auxiliary
heating button.
Changing the departure time
X Press the =or; button on the steer-
ing wheel to select the Settings
Settings menu.
X Press the :or9 button to select the
Heating
Heating submenu.
X Press ato confirm.
You will see the selected setting.
X Press ato confirm.
X Press the :or9 button to select A
A,
B B or Change C
Change C.
X Press ato confirm.
You can now change the departure time.
X Press the =or; button to select the
display to be changed: hours, minutes.
X Press the :or9 button to set the
selected display.
X Press the abutton to store the entry.
The yellow indicator lamp on the auxiliary
heating button lights up. Convenience Activating/deactivating the EASY-
ENTRY/EXIT feature
G
WARNING
The steering wheel moves when the EASY-
ENTRY/EXIT feature is active. There is a risk
of occupants becoming trapped. Before acti-
vating the EASY-ENTRY/EXIT feature, make
sure that nobody can become trapped.
Do not leave children unsupervised in the
vehicle, even if they are secured in a child
restraint system. The children could open the
driver's door and thereby unintentionally acti-
vate the EASY-ENTRY/EXIT feature and
become trapped.
X Press the =or; button on the steer-
ing wheel to select the Settings Settingsmenu.
X Press the :or9 button to select the
CONVENIENCE
CONVENIENCE submenu.
X Press ato confirm.
X Press the :or9 button to select the
Easy Entry/Exit:
Easy Entry/Exit: function.
If the Easy Entry/Exit
Easy Entry/Exit function is activa-
ted, the vehicle steering wheel is displayed
in red in the multifunction display.
X Press the abutton to save the setting.
Further information on the EASY-ENTRY/EXIT
feature (Y page 102).
Switching the belt adjustment on/off
X Press the =or; button on the steer-
ing wheel to select the Settings Settingsmenu.
X Press the :or9 button to select the
Convenience
Convenience submenu.
X Press ato confirm.
X Press the :or9 button to select the
Belt adjustment
Belt adjustment function.
When the Belt adjustment
Belt adjustment function is
activated, the vehicle seat belt is displayed
in red in the multifunction display.
X Press the abutton to save the setting.
For further information on belt adjustment,
see (Y page 51). Displays and operation (12-button multifunction steering wheel)
243On-board computer and displays Z
Page 284 of 381
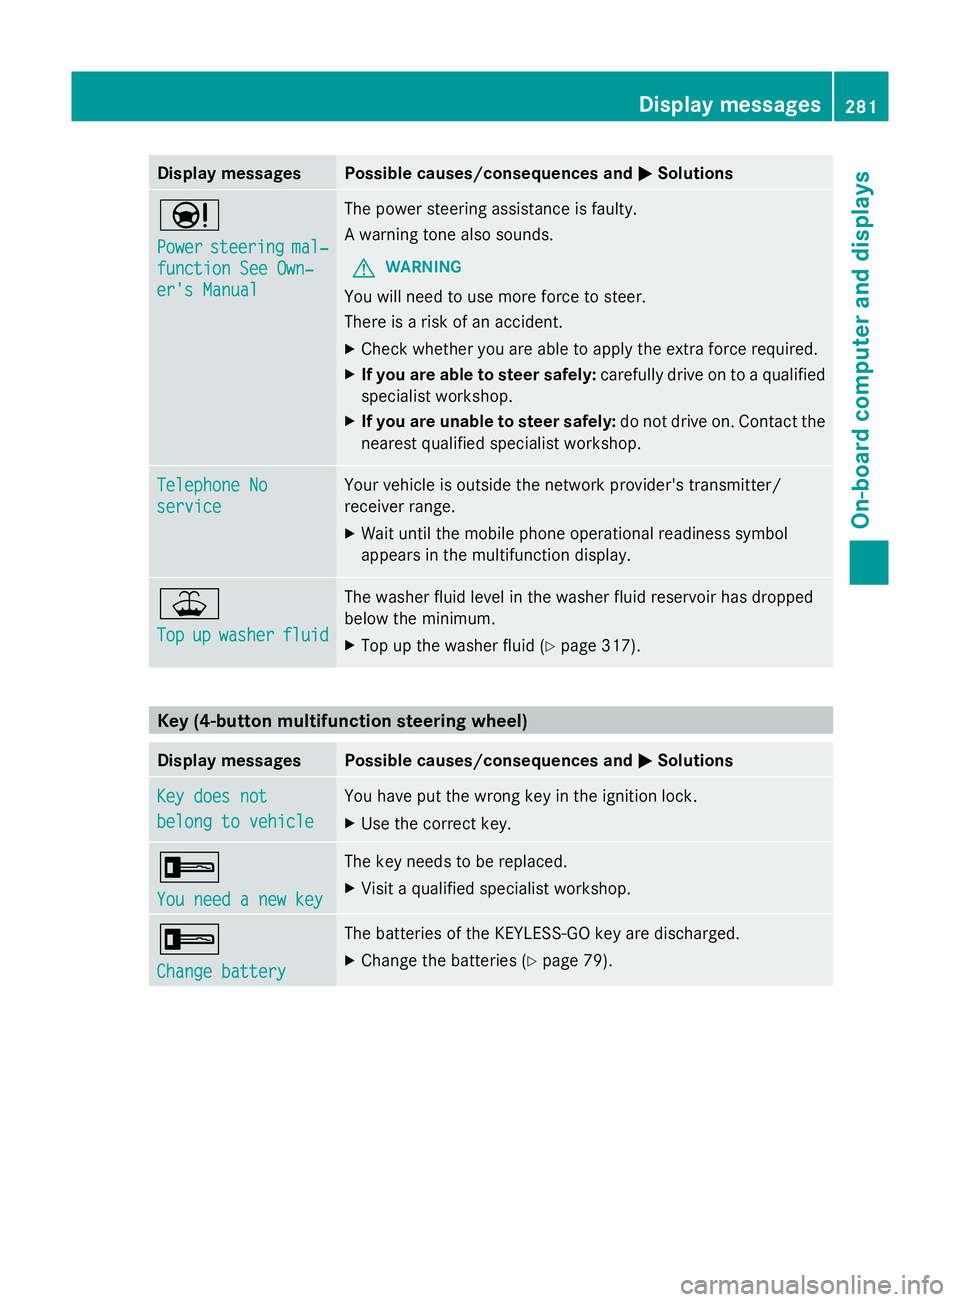
Display messages Possible causes/consequences and
M
MSolutions Ð
Power Power
steering steering mal‐
mal‐
function See Own‐
function See Own‐
er's Manual er's Manual The power steering assistance is faulty.
A warning tone also sounds.
G WARNING
You will need to use more force to steer.
There is a risk of an accident.
X Check whether you are able to apply the extra force required.
X If you are able to steer safely: carefully drive on to a qualified
specialist workshop.
X If you are unable to steer safely: do not drive on. Contact the
nearest qualified specialist workshop. Telephone No Telephone No
service service Your vehicle is outside the network provider's transmitter/
receiver range.
X
Wait until the mobile phone operational readiness symbol
appears in the multifunction display. ¥
Top Top
up
upwasher
washer fluid
fluid The washer fluid level in the washer fluid reservoir has dropped
below the minimum.
X
Top up the washer fluid ( Ypage 317). Key (4-button multifunction steering wheel)
Display messages Possible causes/consequences and
M MSolutions Key does not
Key does not
belong to vehicle belong to vehicle You have put the wrong key in the ignition lock.
X
Use the correct key. +
You need a new key You need a new key The key needs to be replaced.
X
Visit a qualified specialist workshop. +
Change battery Change battery The batteries of the KEYLESS-GO key are discharged.
X
Change the batteries ( Ypage 79). Display
messages
281On-board computer and displays Z
Page 286 of 381
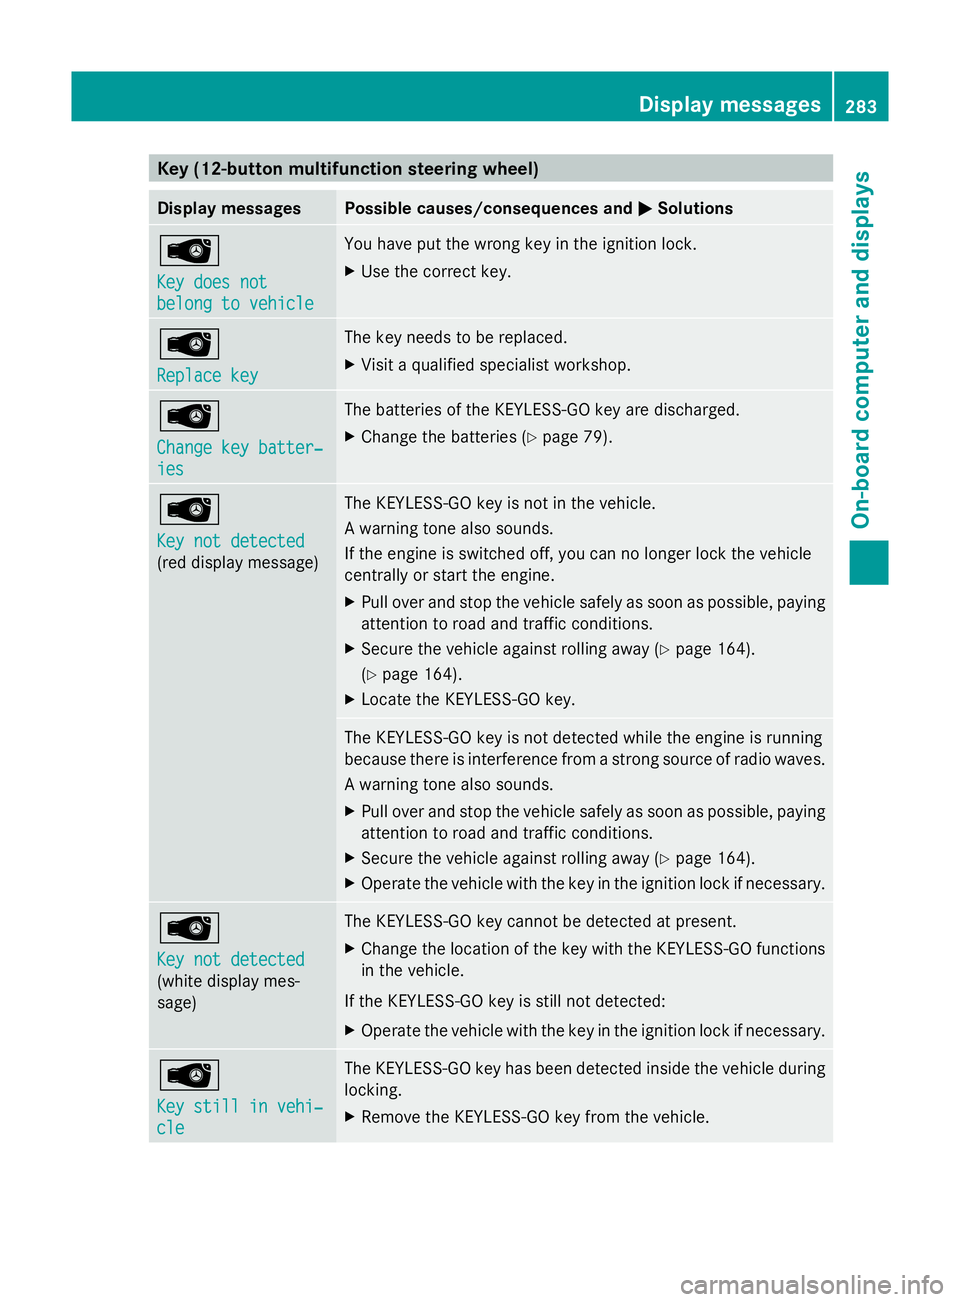
Key (12-button multifunction steering wheel)
Display messages Possible causes/consequences and
M
MSolutions Â
Key does not Key does not
belong to vehicle belong to vehicle You have put the wrong key in the ignition lock.
X
Use the correct key. Â
Replace key Replace key The key needs to be replaced.
X
Visit a qualified specialist workshop. Â
Change key batter‐ Change key batter‐
ies ies The batteries of the KEYLESS-GO key are discharged.
X
Change the batteries ( Ypage 79). Â
Key not detected Key not detected
(red display message) The KEYLESS-GO key is not in the vehicle.
A warning tone also sounds.
If the engine is switched off, you can no longer lock the vehicle
centrally or start the engine.
X
Pull over and stop the vehicle safely as soon as possible, paying
attention to road and traffic conditions.
X Secure the vehicle against rolling away ( Ypage 164).
(Y page 164).
X Locate the KEYLESS-GO key. The KEYLESS-GO key is not detected while the engine is running
because there is interference from a strong source of radio waves.
A warning tone also sounds.
X
Pull over and stop the vehicle safely as soon as possible, paying
attention to road and traffic conditions.
X Secure the vehicle against rolling away ( Ypage 164).
X Operate the vehicle with the key in the ignition lock if necessary. Â
Key not detected Key not detected
(white display mes-
sage) The KEYLESS-GO key cannot be detected at present.
X
Change the location of the key with the KEYLESS-GO functions
in the vehicle.
If the KEYLESS-GO key is still not detected:
X Operate the vehicle with the key in the ignition lock if necessary. Â
Key still in vehi‐ Key still in vehi‐
cle cle The KEYLESS-GO key has been detected inside the vehicle during
locking.
X
Remove the KEYLESS-GO key from the vehicle. Display
messages
283On-board computer and displays Z