2012 MERCEDES-BENZ GLK SUV four wheel drive
[x] Cancel search: four wheel drivePage 7 of 381

1, 2, 3 ...
12-button multifunction steering
wheel Operating the on-board computer .228
Overview .......................................... 36
12 V socket
see Socket
4-button multifunction steering
wheel
Operating the on-board computer .225
Overview .......................................... 35
4ETS
see ETS/4ETS (Electronic Trac-
tion System)
4MATIC (permanent four-wheel
drive) .................................................. 213A
ABS (Anti-lock Braking System) Display message (12-button mul-
tifunction steering wheel) ..............252
Display message (4-button multi-
function steering wheel) ................247
Function/notes ................................ 65
Important safety notes ....................65
Warning lamp ................................. 286
Activating/deactivating air-recir-
culation mode .................................... 135
Activating/deactivating cooling
with air dehumidification .................131
Active Blind Spot Assist Function/notes ............................. 207
Switching on/off (on-board com-
puter, 12-button multifunction
steering wheel) .............................. 237
Towing a trailer .............................. 210
Active Driving Assistance package .207
Active Lane Keeping Assist Display message (12-button mul-
tifunction steering wheel) ..............273
Function/notes ............................. 210
Switching on/off (on-board com-
puter, 12-button multifunction
steering wheel) .............................. 238
Towing a trailer ......................207, 213
Active light function .........................114Active Park Assist
Display message ............................ 273
Active Parking Assist
Important safety notes ..................192
Towing a trailer .............................. 196
Active Service System
see ASSYST PLUS
Adaptive brake lamps .........................67
Adaptive Highbeam Assist Display message (12-button mul-
tifunction steering wheel) ..............263
Function/notes ............................. 116
Adaptive Main-beam Assist
Switching on/off (on-board com-
puter) ............................................. 240
AdBlue ®
Display message (12-button mul-
tifunction steering wheel) ..............269
Display message (4-button multi-
function steering wheel) ................266
Filling capacity ............................... 369
Notes ............................................. 368
Service indicator ............................ 313
AdBlue ®
service indicator ................313
Additional speedometer ...................239
Additives (engine oil) ........................370
Adjusting the headlamp range .........112
Airbags Front airbag (driver, front
passenger) ....................................... 46
Important safety guidelines .............44
Kneebag .......................................... .46
Pelvis airbag .................................... 47
Sidebag ............................................ 47
Triggering ......................................... 43
Windowba g...................................... 48
Air-conditioning system
see Climate control
Air filter
Display message (12-button mul-
tifunction steering wheel) ..............268
Display message (4-button multi-
function steering wheel) ................265
Air pressure
see Tyre pressure 4
Index
Page 168 of 381

Using KEYLESS-GO
X
Press the Start/Stop button (Y page 147).
The engine stops and all the indicator
lamps in the instrument cluster go out.
i When the driver's door is closed, this cor-
responds to key position 1. When the driv-
er's door is open, this corresponds to key
position 0, i.e. key removed.
i The engine can be switched off while the
vehicle is in motion by pressing and holding
the Start/Stop button for approximately
3 seconds. This function operates inde-
pendently of the ECO start/stop automatic
engine switch-off function. Parking brake
G
WARNING
If you must brake the vehicle with the parking
brake, the braking distance is considerably
longer and the wheels could lock. This increa-
ses the risk of skidding and an accident.
Only use the parking brake to brake the vehi-
cle when the service brake is faulty. Do not
apply the parking brake too firmly. If the
wheels lock, release the parking brake until
the wheels begin turning again. G
WARNING
If you leave children unsupervised in the vehi-
cle, they could set it in motion by, for example:
R releasing the parking brake
R shifting the automatic transmission out of
the parking position P
R starting the engine.
They could also operate the vehicle's equip-
ment. There is a risk of an accident and injury.
When leaving the vehicle, always take the key
with you and lock the vehicle. Never leave
children unsupervised in the vehicle. X
To apply: depress parking brake ;firmly.
The J indicator lamp in the instrument
cluster lights up if the engine is running.
X To release: depress the brake pedal and
keep it depressed.
X Pull release handle :.
The J indicator lamp in the instrument
cluster goes out. Parking up the vehicle
If you leave the vehicle parked up for longer
than four weeks, the battery may be damaged
by exhaustive discharging.
X Disconnect the battery or connect it to a
trickle charger.
i You can obtain information about trickle
chargers from a qualified specialist work-
shop.
If you leave the vehicle parked up for longer
than six weeks, the vehicle may suffer dam-
age as a result of lack of use.
X Visit a qualified specialist workshop and
seek advice. Driving tips
General driving tips
Important safety notes G
WARNING
If you switch off the ignition while driving,
safety-relevant functions are only available Driving tips
165Driving and parking
Z
Page 216 of 381
Towing a trailer
If you attach a trailer, make sure that you have
correctly established the electrical connec-
tion. This can be accomplished by checking
the trailer lighting.
Off-road driving systems
4MATIC (permanent all-wheel drive)
G
WARNING
4MATIC cannot reduce the risk of an accident
if you drive too fast.
If a drive wheel spins due to insufficient grip:
R only depress the accelerator pedal as far as
necessary when pulling away.
R accelerate less when driving.
R adapt your driving style to suit road and
traffic conditions.
! Never tow the vehicle with one axle
raised. This may damage the transfer case.
Damage of this sort is not covered by the
Mercedes-Benz implied warranty. All
wheels must remain either on the ground
or be fully raised. Observe the instructions
for towing the vehicle with all wheels in full
contact with the ground.
4MATIC ensures that all four wheels are per-
manently driven. Together with ESP ®
and
ETS, it improves the traction of your vehicle
whenever a drive wheel spins due to insuffi-
cient grip.
i In wintry driving conditions, the maximum
effect of 4MATIC can only be achieved if
you use winter tyres (M+S tyres), with snow
chains if necessary.
! When testing the parking brake, operate
the vehicle only briefly (for a maximum of
ten seconds) on a brake test dynamometer.
When doing this, turn the key to position
0 or 1in the ignition. Failure to do this can
cause damage to the drive train or the
brake system. !
A function or performance test should
only be carried out on a twin-axle dyna-
mometer. Before you operate the vehicle
on such a dynamometer, please consult a
qualified workshop. You could otherwise
damage the drive train or the brake system.
For information about "Driving off-road", see
(Y page 170). DSR (Downhill Speed Regulation)
Important safety notes i
DSR (Downhill Speed Regulation) is only
available for vehicles with the Off-Road
Engineering package.
DSR is an aid to assist you when driving down-
hill. It keeps the speed of travel at the speed
selected on the on-board computer. The
steeper the downhill gradient, the greater the
DSR braking effect on the vehicle. When driv-
ing on flat stretches of road or on an uphill
gradient, the DSR braking effect is minimal or
non-existent. G
WARNING
DSR is only an aid designed to assist you when
driving downhill. You are responsible for keep-
ing control of the vehicle and for assessing
whether the downhill gradient can be man-
aged.
When activating DSR the vehicle may brake
suddenly due to DSR intervening. This is
dependent on the downhill gradient and the
difference between the current speed and the
speed set. DSR may not always be able to
keep to the set speed, depending on road sur-
face and tyre conditions. You could lose con-
trol of the vehicle and cause an accident.
Select a set speed suitable for the prevailing
conditions and when necessary, apply the
brakes manually.
DSR controls the vehicle’s speed when it is
activated and the transmission is in position
D, Ror N. By accelerating or braking, you can Off-road driving systems
213Driving and parking Z
Page 335 of 381
number, e.g. on the B-pillar on the driver's
side.
X Correct the tyre pressure if it is still at least
130 kPa (1.3 ba r/19 psi) (see the fuel filler
flap for values).
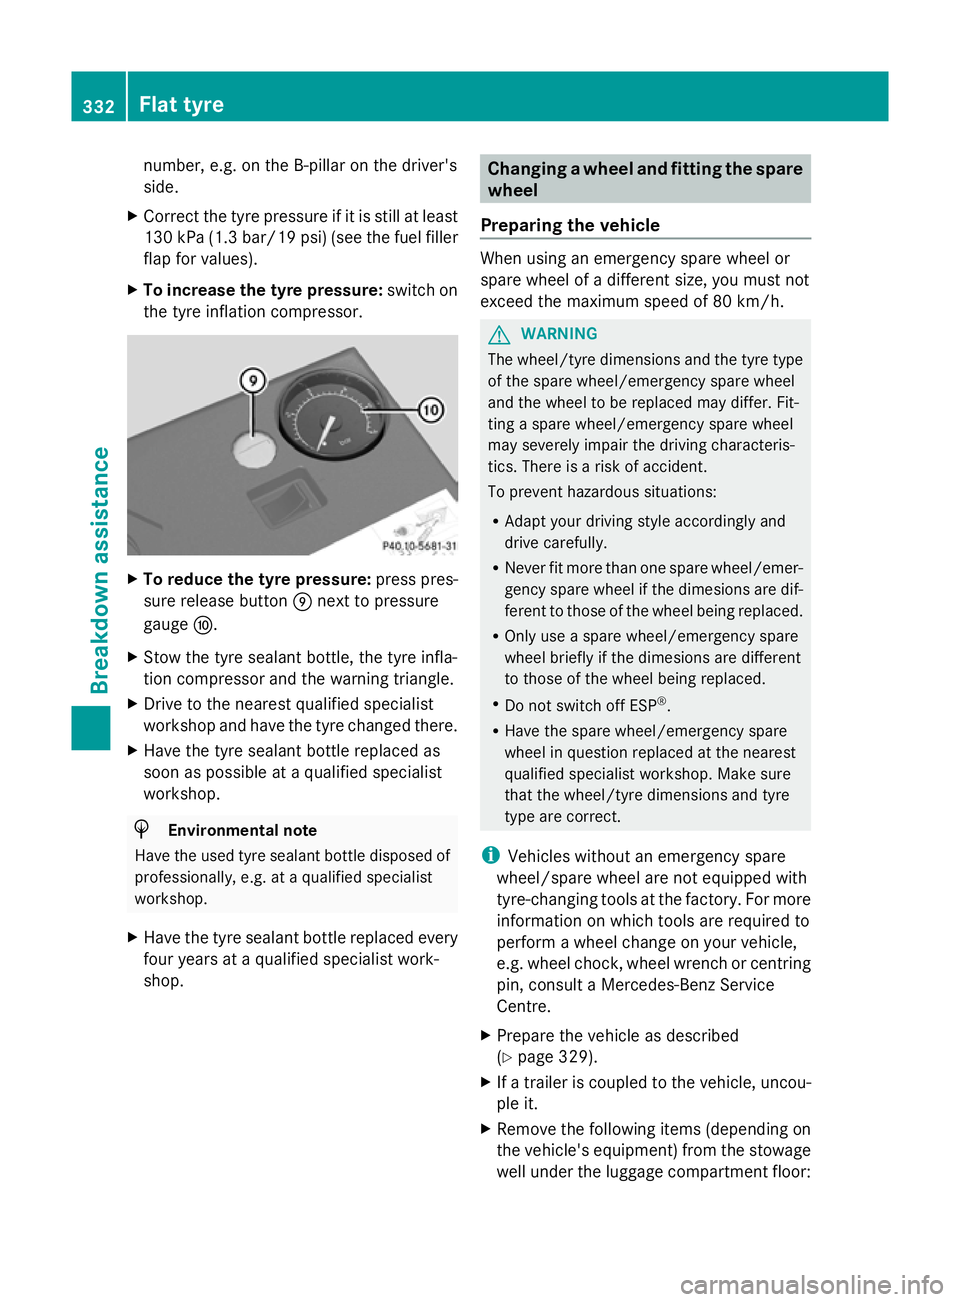
X To increase the tyre pressure: switch on
the tyre inflation compressor. X
To reduce the tyre pressure: press pres-
sure release button Enext to pressure
gauge F.
X Stow the tyre sealant bottle, the tyre infla-
tion compressor and the warning triangle.
X Drive to the nearest qualified specialist
workshop and have the tyre changed there.
X Have the tyre sealant bottle replaced as
soon as possible at a qualified specialist
workshop. H
Environmental note
Have the used tyre sealant bottle disposed of
professionally, e.g. at a qualified specialist
workshop.
X Have the tyre sealant bottle replaced every
four years at a qualified specialist work-
shop. Changing a wheel and fitting the spare
wheel
Preparing the vehicle When using an emergency spare wheel or
spare wheel of a different size, you must not
exceed the maximum speed of 80 km/h.
G
WARNING
The wheel/tyre dimensions and the tyre type
of the spare wheel/emergency spare wheel
and the wheel to be replaced may differ. Fit-
ting a spare wheel/emergency spare wheel
may severely impair the driving characteris-
tics. There is a risk of accident.
To prevent hazardous situations:
R Adapt your driving style accordingly and
drive carefully.
R Never fit more than one spare wheel/emer-
gency spare wheel if the dimesions are dif-
ferent to those of the wheel being replaced.
R Only use a spare wheel/emergency spare
wheel briefly if the dimesions are different
to those of the wheel being replaced.
R Do not switch off ESP ®
.
R Have the spare wheel/emergency spare
wheel in question replaced at the nearest
qualified specialist workshop. Make sure
that the wheel/tyre dimensions and tyre
type are correct.
i Vehicles without an emergency spare
wheel/spare wheel are not equipped with
tyre-changing tools at the factory. For more
information on which tools are required to
perform a wheel change on your vehicle,
e.g. wheel chock, wheel wrench or centring
pin, consult a Mercedes-Benz Service
Centre.
X Prepare the vehicle as described
(Y page 329).
X If a trailer is coupled to the vehicle, uncou-
ple it.
X Remove the following items (depending on
the vehicle's equipment) from the stowage
well under the luggage compartment floor: 332
Flat tyreBreakdown assistance