2012 MERCEDES-BENZ GLK SUV traction control
[x] Cancel search: traction controlPage 13 of 381
Important safety notes
....................82
Opening (from the inside) ................83
Downhill Speed Regulation
see DSR (Downhill Speed Regulation)
Drive program
Automatic ...................................... 159
Display ........................................... 156
Display (DIRECT SELECT lever) ......156
Manual .......................................... .160
Driver's door
see Door
Drive system
Active Blind Spot Assist .................207
Driving abroad
Service24h .................................... 313
Symmetrical dipped bea m............. 110
Driving in mountainous terrain
Approach/departure angl e............ 172
Driving off-road
see Off-road driving
Driving safety system
BAS PLUS (Brake Assist System
PLUS) .............................................. .66
Electronic Brake-force Distribu-
tion .................................................. 69
ESP ®
(Electronic Stability Pro-
gram) ............................................... 67
ETS/4ETS (Electronic Traction
System) ........................................... 68
Important safety guidelines .............65
Driving safety systems
ABS (Anti-lock Braking System) .......65
Adaptive brake lamps ......................67
BAS (Brake Assist System) ..............66
Overview .......................................... 65
PRE-SAFE ®
Brake ............................ .69
Driving system
Active Lane Keeping Assis t............ 210
Active Parking Assist .....................192
Display message (12-button mul-
tifunction steering wheel) ..............271
Display message (4-button multi-
function steering wheel) ................270
Driving systems
Active Driving Assistance pack-
age ................................................. 207
ATTENTION ASSIST ........................201Blind Spot Assist ............................ 203
Cruise control
................................ 173
Distronic Plus ................................ 178
HOLD function ............................... 186
Lane Keeping Assist ......................205
Lane package ................................ 203
PARKTRONIC ................................. 188
Reversing camera ..........................196
Speed Limit Assist .........................202
SPEEDTRONIC ............................... 176
Driving tips
Aquaplaning ................................... 168
Automatic transmission .................157
Brakes ........................................... 167
DISTRONIC PLUS ........................... 185
Downhill gradient ........................... 167
Driving abroad ............................... 110
Driving in winter ............................ .169
Driving on flooded roads ................168
Driving on sand .............................. 172
Driving on wet roads ......................168
Driving over obstacles ...................172
General .......................................... 165
Icy road surfaces ........................... 170
Limited braking efficiency on sal-
ted roads ....................................... 168
New brake pads/linings ................168
Off-road driving .............................. 170
Off-road fording ............................. 169
Running-in tips ............................... 146
Snow chains .................................. 353
Symmetrical dipped bea m............. 110
Towing a trailer .............................. 215
Travelling uphill .............................. 172
Tyre ruts ........................................ 172
Wet road surface ........................... 167
DSR (Downhill Speed Regulation)
Display message (12-button mul-
tifunction steering wheel) ..............271
Function/notes ............................. 21310
Index
Page 71 of 381
!
Switch the ignition off when:
R the parking brake is being tested using a
dynamometer
R the vehicle is being towed with the front/
rear axle raised
Application of the brakes by ESP ®
may oth-
erwise destroy the brake system.
! Do not tow vehicles with 4MATIC with the
front or rear axle raised.
ESP ®
is deactivated if the åwarning lamp
in the instrument cluster lights up continu-
ously when the engine is running.
If the ÷ warning lamp and the åwarn-
ing lamp are lit continuously, ESP ®
is not
available due to a malfunction.
Observe the information on warning lamps
(Y page 288) and any display messages that
appear in the instrument cluster
(Y page 247) or (Y page 252).
If ESP ®
detects that the vehicle is deviating
from the direction desired by the driver, one
or more wheels are braked to stabilise the
vehicle. If necessary, the engine output is also
modified to keep the vehicle on the desired
course within physical limits. ESP ®
assists
the driver when pulling away on wet or slip-
pery roads. ESP ®
can also stabilise the vehi-
cle during braking.
If ESP ®
intervenes, the ÷ESP®
warning
lamp flashes in the instrument cluster.
If ESP ®
intervenes:
X Do not deactivate ESP ®
under any circum-
stances.
X When pulling away, only depress the accel-
erator pedal as far as is necessary.
X Adapt your driving style to suit the prevail-
ing road and weather conditions.
i Only use wheels with the recommended
tyre sizes. Only then will ESP ®
function
properly. ETS/4ETS (Electronic Traction System) i
Observe the "Important safety notes" sec-
tion (Y page 65).
Traction control is part of ESP ®
.
Traction control brakes the drive wheels indi-
vidually if they spin. This enables you to pull
away and accelerate on slippery surfaces, for
example if the road surface is slippery on one
side. On vehicles with 4MATIC, more drive
torque is also transferred to the wheel or
wheels with traction.
Traction control remains active if you deacti-
vate ESP ®
.
Deactivating/activating ESP ® i
Observe the "Important safety notes" sec-
tion (Y page 65). G
WARNING
If you deactivate ESP ®
, ESP ®
no longer sta-
bilises the vehicle. There is an increased risk
of skidding and an accident.
Only deactivate ESP ®
in the situations descri-
bed in the following. X
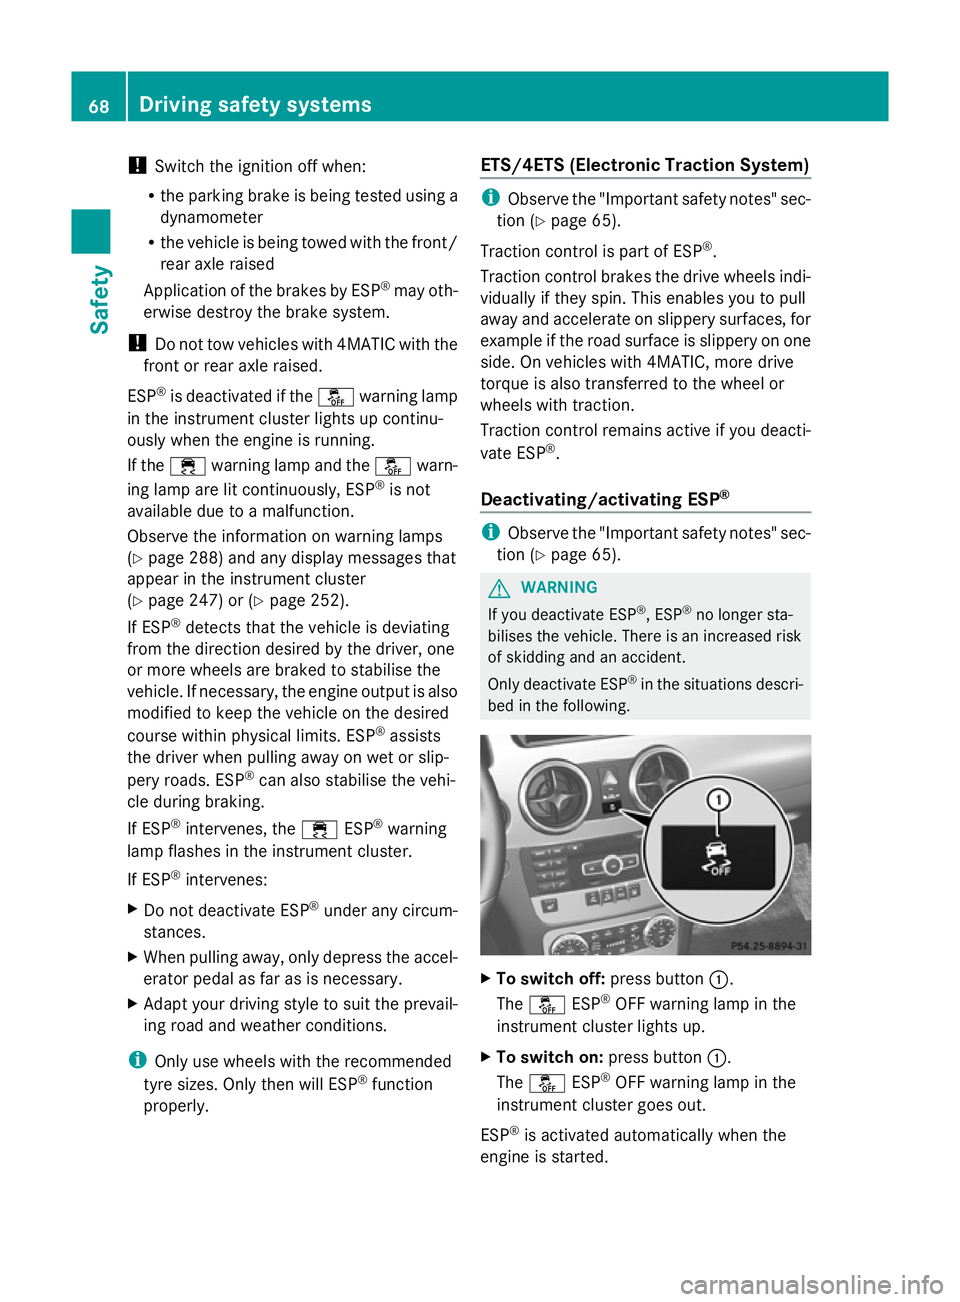
To switch off: press button:.
The å ESP®
OFF warning lamp in the
instrument cluster lights up.
X To switch on: press button:.
The å ESP®
OFF warning lamp in the
instrument cluster goes out.
ESP ®
is activated automatically when the
engine is started. 68
Driving safety systemsSafety
Page 72 of 381
If ESP
®
is deactivated and one or more wheels
start to spin, the ÷ESP®
warning lamp in
the instrument cluster flashes. In such situa-
tions, ESP ®
will not stabilise the vehicle.
It may be best to deactivate ESP ®
in the fol-
lowing situations:
R when using snow chains
R in deep snow
R on sand or gravel
If you deactivate ESP ®
:
R ESP ®
no longer improves driving stability.
R the engine's torque is no longer limited, and
the drive wheels can spin. The spinning of
the wheels results in a cutting action, which
provides better grip.
R traction control is still activated.
R ESP ®
still provides support when you
brake.
Off-road ESP ®
(vehicles with off-road
engineering package) An ESP
®
system specifically suited to off-road
terrain is activated automatically once the off-
road drive program (Y page 215) is activated.
The off-road ESP ®
intervenes with a delay if
there is oversteering or understeering, thus
improving traction.
ESP ®
trailer stabilisation G
WARNING
If road and weather conditions are poor,
trailer stabilisation will not be able to prevent
the vehicle/trailer combination from swerv-
ing. Trailers with a high centre of gravity can
tip over before ESP ®
can detect this. There is
a risk of an accident.
Always adapt your driving style to the prevail-
ing road and weather conditions.
If your vehicle/trailer combination begins to
lurch, you can only stabilise the vehicle/
trailer combination by depressing the brake
firmly. In this situation, ESP
®
assists you and can
detect if the vehicle/trailer combination
begins to lurch. ESP ®
slows the vehicle down
by braking and limiting the engine output until
the vehicle/trailer combination has stabi-
lised.
Trailer stabilisation is active above speeds of
about 65 km/h.
Trailer stabilisation does not work if ESP ®
is
deactivated or disabled because of a mal-
function. EBD (electronic brake force distribu-
tion)
i Observe the "Important safety notes" sec-
tion (Y page 65). G
WARNING
If EBD has malfunctioned, the rear wheels can
still lock, e.g. under full braking. This increa-
ses the risk of skidding and an accident.
You should therefore adapt your driving style
to the different handling characteristics. Have
the brake system checked at a qualified spe-
cialist workshop.
Observe the notes on warning and indicator
lamps (Y page 286) as well as display mes-
sages (Y page 248) (4-button multifunction
steering wheel) and (Y page 253) (12-button
multifunction steering wheel).
EBD monitors and controls the brake pres-
sure on the rear wheels to improve driving
stability while braking. PRE-SAFE
®
Brake
i Observe the "Important safety notes" sec-
tion (Y page 65).
PRE-SAFE ®
Brake is only available in vehicles
with DISTRONIC PLUS.
PRE-SAFE ®
Brake can help you to minimise
the risk of a collision with a vehicle ahead or
reduce the effects of such a collision. If PRE- Driving safety systems
69Safety Z
Page 140 of 381
Auxiliary heating
Important safety notes G
WARNING
Exhaust fumes are produced when the auxili-
ary heating is in operation. Inhaling these
exhaust fumes can be poisonous. You should
therefore switch off the auxiliary heating in
confined spaces without an extraction sys-
tem, e.g. a garage. G
WARNING
When operating the auxiliary heating parts of
the vehicle can get very hot. Make sure that
the exhaust system does not under any cir-
cumstances come into contact with easily
ignitable material such as dry grass or fuels.
The material could otherwise ignite and set
the vehicle alight. Choose your parking spot
accordingly.
Operating the auxiliary heating is thus pro-
hibited at filling stations or when your vehicle
is being refuelled. You must therefore switch
off the auxiliary heating at filling stations.
! Operating the auxiliary heating/ventila-
tion draws on the vehicle battery. After you
have heated or ventilated the vehicle a
maximum of two times, drive for a longer
distance.
i Switch the auxiliary heating on regularly
once a month for about ten minutes.
The auxiliary heating heats the air in the
passenger compartment to the selected tem-
perature. It does not use the heat of the run-
ning engine to do this. The auxiliary heating
is operated directly using the vehicle's fuel.
For this reason, the tank content must be at
least at reserve fuel level to ensure that the
auxiliary heating functions.
The auxiliary heating/ventilation automati-
cally adjusts to changes in temperature and
weather conditions. For this reason, the aux-
iliary heating could switch from ventilation
mode to heating mode or from heating mode
to ventilation mode. The auxiliary heating switches off automati-
cally after 50 minutes. This time limit can be
altered. To do this, visit a qualified specialist
workshop.
You cannot use the auxiliary ventilation to
cool the vehicle interior to a temperature
lower than the outside temperature.
Before switching on
X
Turn the key to position 2in the ignition
lock.
X Set the temperature.
The auxiliary heating/ventilation can be acti-
vated even when climate control is set to
manual. Optimum comfort can be attained
when the system is set to automatic mode.
Set the temperature to 22 †.
The auxiliary heating/ventilation can be acti-
vated or deactivated using the remote control
or the button on the centre console.
The on-board computer can be used to spec-
ify up to three departure times, one of which
may be preselected (Y page 242).
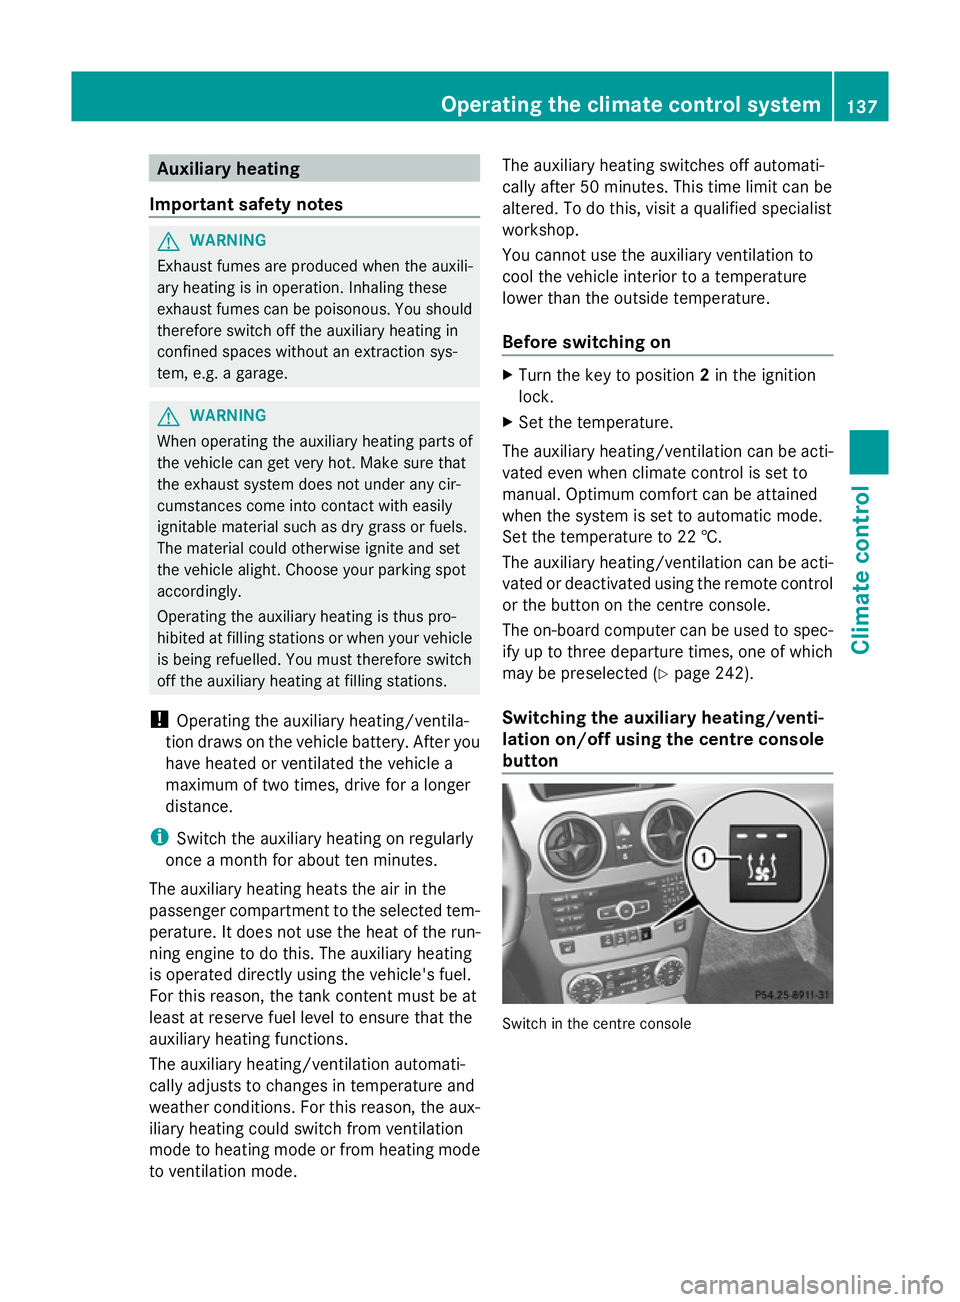
Switching the auxiliary heating/venti-
lation on/off using the centre console
button Switch in the centre consoleOperating the climate control system
137Climate control Z
Page 216 of 381
Towing a trailer
If you attach a trailer, make sure that you have
correctly established the electrical connec-
tion. This can be accomplished by checking
the trailer lighting.
Off-road driving systems
4MATIC (permanent all-wheel drive)
G
WARNING
4MATIC cannot reduce the risk of an accident
if you drive too fast.
If a drive wheel spins due to insufficient grip:
R only depress the accelerator pedal as far as
necessary when pulling away.
R accelerate less when driving.
R adapt your driving style to suit road and
traffic conditions.
! Never tow the vehicle with one axle
raised. This may damage the transfer case.
Damage of this sort is not covered by the
Mercedes-Benz implied warranty. All
wheels must remain either on the ground
or be fully raised. Observe the instructions
for towing the vehicle with all wheels in full
contact with the ground.
4MATIC ensures that all four wheels are per-
manently driven. Together with ESP ®
and
ETS, it improves the traction of your vehicle
whenever a drive wheel spins due to insuffi-
cient grip.
i In wintry driving conditions, the maximum
effect of 4MATIC can only be achieved if
you use winter tyres (M+S tyres), with snow
chains if necessary.
! When testing the parking brake, operate
the vehicle only briefly (for a maximum of
ten seconds) on a brake test dynamometer.
When doing this, turn the key to position
0 or 1in the ignition. Failure to do this can
cause damage to the drive train or the
brake system. !
A function or performance test should
only be carried out on a twin-axle dyna-
mometer. Before you operate the vehicle
on such a dynamometer, please consult a
qualified workshop. You could otherwise
damage the drive train or the brake system.
For information about "Driving off-road", see
(Y page 170). DSR (Downhill Speed Regulation)
Important safety notes i
DSR (Downhill Speed Regulation) is only
available for vehicles with the Off-Road
Engineering package.
DSR is an aid to assist you when driving down-
hill. It keeps the speed of travel at the speed
selected on the on-board computer. The
steeper the downhill gradient, the greater the
DSR braking effect on the vehicle. When driv-
ing on flat stretches of road or on an uphill
gradient, the DSR braking effect is minimal or
non-existent. G
WARNING
DSR is only an aid designed to assist you when
driving downhill. You are responsible for keep-
ing control of the vehicle and for assessing
whether the downhill gradient can be man-
aged.
When activating DSR the vehicle may brake
suddenly due to DSR intervening. This is
dependent on the downhill gradient and the
difference between the current speed and the
speed set. DSR may not always be able to
keep to the set speed, depending on road sur-
face and tyre conditions. You could lose con-
trol of the vehicle and cause an accident.
Select a set speed suitable for the prevailing
conditions and when necessary, apply the
brakes manually.
DSR controls the vehicle’s speed when it is
activated and the transmission is in position
D, Ror N. By accelerating or braking, you can Off-road driving systems
213Driving and parking Z
Page 245 of 381
Activating/deactivating the acoustic
locking confirmation
If you switch on the Acoustic
Acoustic Lock Lockfunction,
an acoustic signal sounds when you lock the
vehicle.
X Press the =or; button on the steer-
ing wheel to select the Settings Settingsmenu.
X Press the :or9 button to select the
Vehicle
Vehicle submenu.
X Press ato confirm.
X Press the :or9 button to select the
Acoustic Lock
Acoustic Lock function.
If the Acoustic
Acoustic Lock
Lockfunction is activated,
the & symbol in the multifunction dis-
play lights up red.
X Press the abutton to save the setting.
Activating/deactivating the radar sensor
system
X Press the =or; button on the steer-
ing wheel to select the Settings
Settings menu.
X Press the :or9 button to select the
Vehicle Vehicle submenu.
X Press ato confirm.
X Press the 9or: button to select
Radar sensor (See Owner's Man.):
Radar sensor (See Owner's Man.): .
You will see the selected setting: Activa‐
Activa‐
ted
ted orDeactivated
Deactivated .
X Press the abutton to save the setting.
i You must deactivate the radar sensor sys-
tem in certain countries and near radio
telescope facilities. For further informa-
tion, see (Y page 375).
When you are close to radio telescope facili-
ties, the radar sensor system will be deacti-
vated automatically.
The following systems are switched off when
the radar sensor system is deactivated:
R DISTRONIC PLUS (Y page 178)
R BAS PLUS (Y page 66)
R PRE-SAFE ®
Brake (Y page 69)
R Active Blind Spot Assist (Y page 207)Heating Auxiliary heating departure time
Only vehicles with auxiliary heating
(Y
page 137) have this function.
In the Heating Heating submenu, you can select a
stored departure time or change a departure
time.
The auxiliary heating timer function calcu-
lates the switch-on time according to the out-
side temperature so that the vehicle is pre-
heated by the departure time. When the
departure time is reached, the auxiliary heat-
ing continues to heat for a further five
minutes and then switches off. The auxiliary
heating adopts the THERMATIC or
THERMOTRONIC temperature setting.
You can switch off the auxiliary heating by
using the remote control or the auxiliary heat-
ing button on the centre console. G
WARNING
Exhaust fumes are produced when the auxili-
ary heating is in operation. Inhaling these
exhaust fumes can be poisonous. You should
therefore switch off the auxiliary heating in
confined spaces without an extraction sys-
tem, e.g. a garage. G
WARNING
When operating the auxiliary heating parts of
the vehicle can get very hot. Make sure that
the exhaust system does not under any cir-
cumstances come into contact with easily
ignitable material such as dry grass or fuels.
The material could otherwise ignite and set
the vehicle alight. Choose your parking spot
accordingly.
Operating the auxiliary heating is thus pro-
hibited at filling stations or when your vehicle
is being refuelled. You must therefore switch
off the auxiliary heating at filling stations.
! Operating the auxiliary heating/ventila-
tion draws on the vehicle battery. After you
have heated or ventilated the vehicle a 242
Displays and operation (12-button multifunction steering wheel)On-board computer and displays
Page 292 of 381
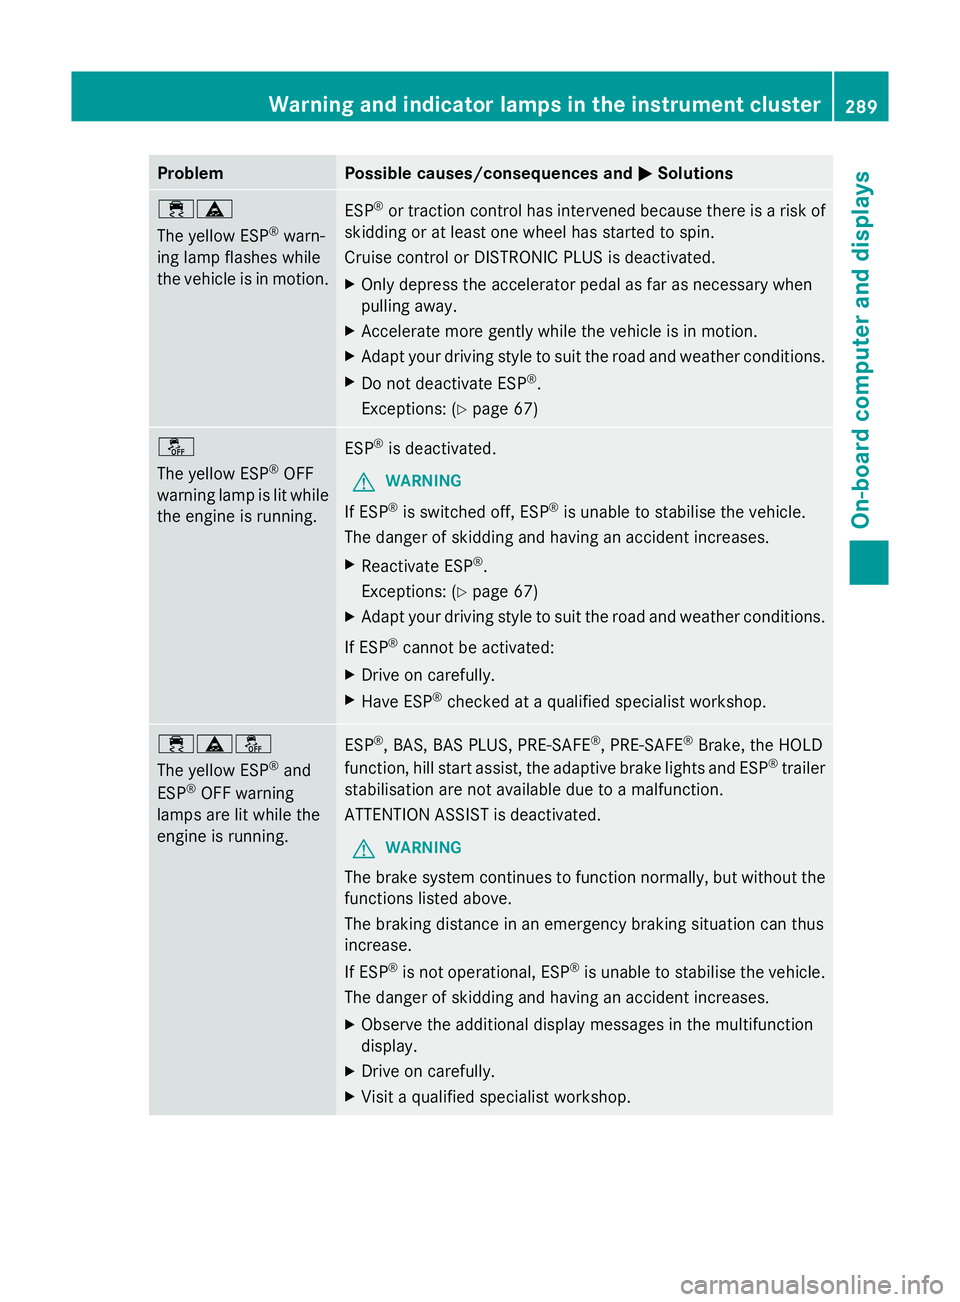
Problem Possible causes/consequences and
M
MSolutions ֊
The yellow ESP
®
warn-
ing lamp flashes while
the vehicle is in motion. ESP
®
or traction control has intervened because there is a risk of
skidding or at least one wheel has started to spin.
Cruise control or DISTRONIC PLUS is deactivated.
X Only depress the accelerator pedal as far as necessary when
pulling away.
X Accelerate more gently while the vehicle is in motion.
X Adapt your driving style to suit the road and weather conditions.
X Do not deactivate ESP ®
.
Exceptions: (Y page 67) å
The yellow ESP
®
OFF
warning lamp is lit while
the engine is running. ESP
®
is deactivated.
G WARNING
If ESP ®
is switched off, ESP ®
is unable to stabilise the vehicle.
The danger of skidding and having an accident increases.
X Reactivate ESP ®
.
Exceptions: (Y page 67)
X Adapt your driving style to suit the road and weather conditions.
If ESP ®
cannot be activated:
X Drive on carefully.
X Have ESP ®
checked at a qualified specialist workshop. ÷äå
The yellow ESP
®
and
ESP ®
OFF warning
lamps are lit while the
engine is running. ESP
®
, BAS, BAS PLUS, PRE-SAFE ®
, PRE-SAFE ®
Brake, the HOLD
function, hill start assist, the adaptive brake lights and ESP ®
trailer
stabilisation are not available due to a malfunction.
ATTENTION ASSIST is deactivated.
G WARNING
The brake system continues to function normally, but without the
functions listed above.
The braking distance in an emergency braking situation can thus
increase.
If ESP ®
is not operational, ESP ®
is unable to stabilise the vehicle.
The danger of skidding and having an accident increases.
X Observe the additional display messages in the multifunction
display.
X Drive on carefully.
X Visit a qualified specialist workshop. Warning and indicator lamps in the instrument cluster
289On-board computer and displays Z
Page 354 of 381
wheels and tyres for damage. Hidden tyre
damage could also be causing the unusual
handling characteristics. If you find no
signs of damage, have the tyres and wheels
checked at a qualified specialist workshop.
R When parking your vehicle, make sure that
the tyres do not get deformed by the kerb
or other obstacles. If it is necessary to drive
over kerbs, speed humps or similar eleva-
tions, try to do so at an obtuse angle. Oth-
erwise, the tyres, particularly the sidewalls,
can get damaged. Notes on regularly inspecting wheels
and tyres G
WARNING
Damaged tyres can cause tyre inflation pres-
sure loss. As a result, you could lose control
of your vehicle. There is a risk of accident.
Check the tyres regularly for signs of damage
and replace any damaged tyres immediately.
R Regularly check the wheels and tyres of
your vehicle for damage (e.g. cuts, punctu-
res, tears, bulges on tyres and deformation,
cracks or severe corrosion on wheels), at
least every 14days, as well as after driving
off-road or on rough roads. Damaged
wheels can cause a loss of tyre pressure.
R Regularly check the tyre tread depth and
the condition of the tread across the whole
width of the tyre (Y page 351). If neces-
sary, turn the front wheels to full lock in
order to inspect the inner side of the tyre
surface.
R All wheels must have a valve cap to protect
the valve against dirt and moisture. Do not
fit anything onto the valve other than the
standard valve cap or other valve caps
approved by Mercedes-Benz for your vehi-
cle. Do not fit any other valve caps or sys-
tems, e.g. tyre pressure monitoring sys-
tems.
R Regularly check the pressure of all the tyres
including the emergency spare wheel or the spare wheel, particularly prior to long trips,
and correct the pressure as necessary
(Y
page 353). Tyre tread
G
WARNING
Insufficient tyre tread will reduce tyre trac-
tion. The tyre is no longer able to dissipate
water. This means that on wet road surfaces,
the risk of aquaplaning increases, in particular
where speed is not adapted to suit the driving
conditions. There is a risk of accident.
If the tyre pressure is too high or too low, tyres
may exhibit different levels of wear at differ-
ent locations on the tyre tread. Thus, you
should regularly check the tread depth and
the condition of the tread across the entire
width of all tyres.
Minimum tyre tread depth for:
R summer tyres: 3 mm
R M+S tyres: 4 mm
For safety reasons, replace the tyres before
the legally prescribed limit for the minimum
tyre tread depth is reached.. Notes on selecting, fitting and replac-
ing tyres
R Only fit tyres and wheels of the same type
and make.
R Only fit tyres of the correct size onto the
wheels.
R After fitting new tyres, run them in at mod-
erate speeds for the first 100 km, as they
only reach their full performance after this
distance.
R Do not drive with tyres which have too little
tread depth, as this significantly reduces
the traction on wet roads (aquaplaning).
R Replace the tyres after six years at the lat-
est, regardless of wear. This also applies to
the emergency spare wheel/spare wheel. Operation
351Wheels and tyres Z