2012 MERCEDES-BENZ CLS SHOOTING BRAKE ESP
[x] Cancel search: ESPPage 222 of 405
Notes on towing
atrailer
General notes !
Use a drawbar noseweigh tas close as
possible to the maximum permissible nose-
weight. Do not use a noseweight of less
than 50kg, otherwise the trailer may come
loose.
Note that the payload and the rear axle load
are reduced by the actual payload.
i When towing a trailer, set the tyre pres-
sure on the rear axle of the towing vehicle
for a maximum load; see the tyre pressure
table in the fuel filler flap (Y page 357).
You will find installation dimensions and loads
in the "Technical data" section
(Y page 396).
The maximum noseweight of the trailer draw-
bar on the ball coupling is 84 kg. The actual
noseweight may however not be higher than
the value which is given on the trailer tow
hitch or trailer identification plates. The low-
est weight applies.
Please note that when towing a trailer, PARK-
TRONIC (Y page 191), Active Parking Assist
(Y page 194) and Blind Spot Assist
(Y page 208) are only available with limita-
tions, or not at all.
i On vehicles without level control, the
height of the ball coupling will alter accord-
ing to the load placed on the vehicle. If nec-
essary, use a trailer with a height-adjusta-
ble drawbar.
Driving tips i
Observe the notes on ESP ®
trailer stabi-
lisation (Y page 69).
The maximum permissible speed for vehicle/
trailer combinations depends on the type of
trailer. Before beginning the journey, check
the trailer's documents to see what the max-
imum permitted speed is. Observe the legally
prescribed maximum speed in the relevant
country. For certain Mercedes-Benz vehicles, the max-
imum permissible rear axle load is increased
when towing a trailer. Refer to the "Technical
data" section to find out whether this applies
to your vehicle. If you utilise any of the added
maximum rear axle load when towing a trailer,
the vehicle/trailer combination may not
exceed a maximum speed of 100 km/h for
reasons concerning the operating permit.
This also applies in countries in which the
permissible maximum speed for vehicle/
trailer combinations is above 100 km/h.
When towing a trailer, your vehicle's handling
characteristics will be different in comparison
to when driving without a trailer and it will
consume more fuel.
Change into a lower gear in good time on long
and steep downhill gradients.
On long and steep downhill gradients, espe-
cially if the vehicle is laden or towing a trailer,
you must select shift range 1,2or 3.
i This also applies if you have activated
cruise control, SPEEDTRONIC or DIS-
TRONIC PLUS.
This will use the braking effect of the engine,
so less braking will be required to prevent the
vehicle from gaining speed. This relieves the
load on the brake system and prevents the
brakes from overheating and wearing too
quickly. If you need additional braking,
depress the brake pedal repeatedly rather
than continuously.
Driving tips If the trailer swings from side to side:
X
Do not accelerate.
X Do not countersteer.
X Brake if necessary. Towing
atrailer
219Driving an d parking Z
Page 225 of 405
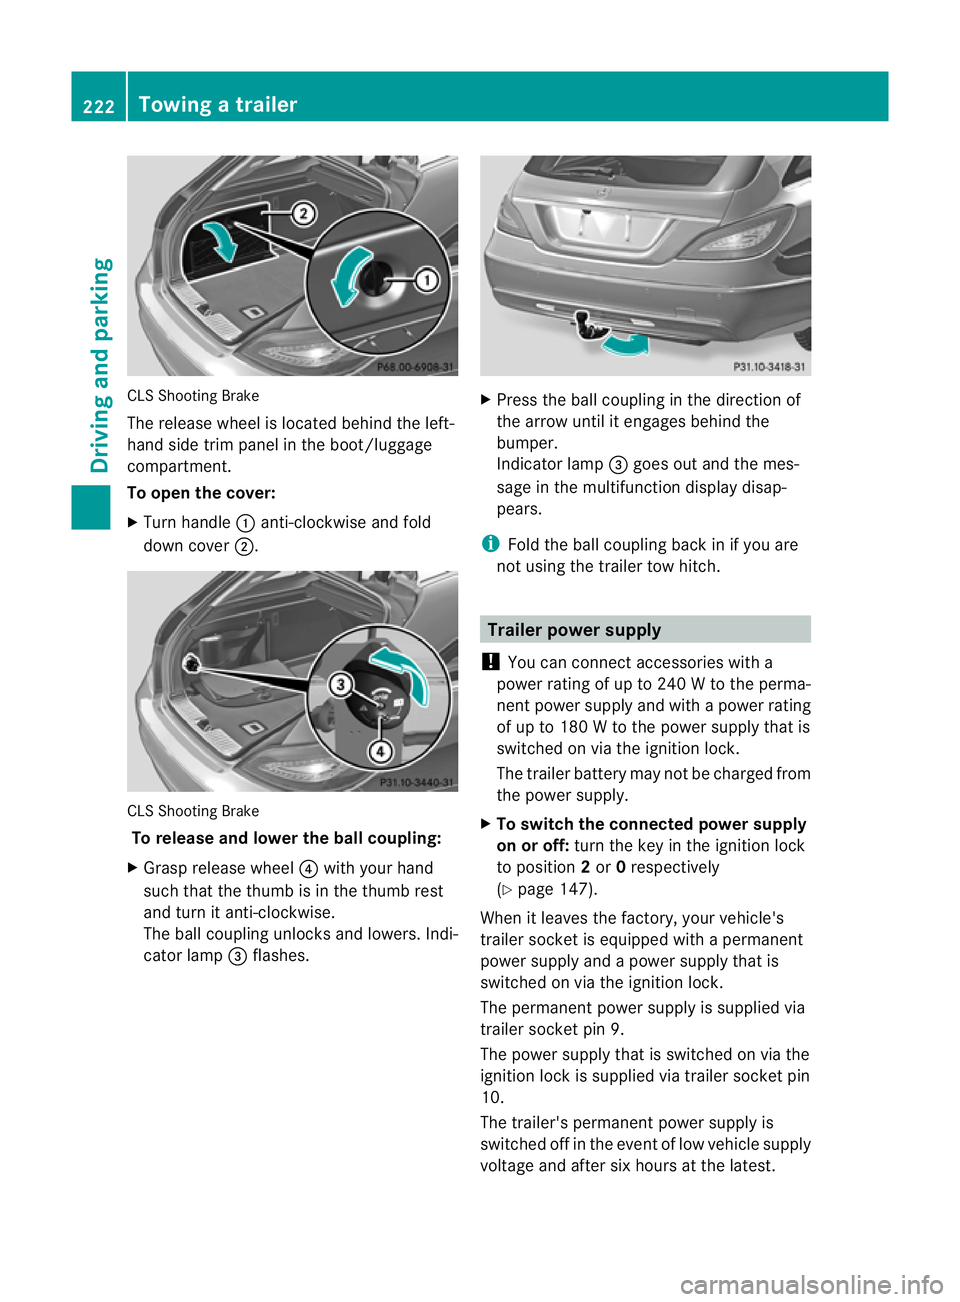
CLS Shooting Brake
The release wheel is located behind the left-
hand side trim panel in the boot/luggage
compartment.
To open the cover:
X
Turn handle :anti-clockwise and fold
down cover ;. CLS Shooting Brake
To release and lower the ball coupling:
X Grasp release wheel ?with your hand
such that the thumb is in the thumb rest
and turn it anti-clockwise.
The ball coupling unlocks and lowers. Indi-
cator lamp =flashes. X
Press the ball coupling in the direction of
the arrow until it engages behind the
bumper.
Indicator lamp =goes out and the mes-
sage in the multifunction display disap-
pears.
i Fold the ball coupling back in if you are
no tu sing the trailer tow hitch. Trailer power supply
! You can connect accessories with a
power rating of up to 240 W to the perma-
nent power supply and with a power rating
of up to 180 W to the power supply that is
switched on via the ignition lock.
The trailer battery may not be charged from
the power supply.
X To switch the connected power supply
on or off: turn the key in the ignition lock
to position 2or 0respectively
(Y page 147).
When it leaves the factory, your vehicle's
trailer socket is equipped with a permanent
power supply and a power supply that is
switched on via the ignition lock.
The permanent power supply is supplied via
trailer socket pin 9.
The power supply that is switched on via the
ignition lock is supplied via trailer socket pin
10.
The trailer's permanent power supply is
switched off in the event of low vehicle supply
voltage and after six hours at the latest. 222
Towing
atrailerDriving an d parking
Page 231 of 405
?
Coolan ttemperature (Y page 228)
A Fuel gauge Coolant temperature gauge
The coolant temperature gauge is in the
instrument cluster on the left-hand side
(Y page 30).
Under normal operating conditions and with
the specified coolant level, the coolant tem-
perature may rise to 120 †.
At high outside temperatures and when driv-
ing uphill, the coolant temperature may rise
to the end of the scale. Rev counter
! Do not drive in the overrevving range.
Doing so will damage the engine.
The red band in the rev counter indicates the
engine's overrevving range.
The fuel supply is interrupted to protec tthe
engine when the red band is reached. Outside temperature display
G
WARNING
At temperatures just above freezing point, the
street may be icy, especially in wooded areas
or on bridges. If you do not adapt your driving
style to the conditions, the vehicle could skid.
For this reason, adapt your driving style and
speed to the weather conditions.
The outside temperature displayi s in the mul-
tifunction display (Y page 229).
Changes in the outside temperature are dis-
played after a short delay. Speedometer with segments
The segments in the speedometer indicate
which speed range is available.
R Cruise control activated (Y page 171):The segments light up from the stored
speed to the maximum speed.
R Variable SPEEDTRONIC activated
(Y page 174):
The segments light up from the start of the
scale to the selected limit speed.
R DISTRONIC PLUS activated (Y page 177):
One or two segments in the set speed
range light up.
R DISTRONIC PLUS detects avehicle in front:
The segments between the speed of the
vehicle in fron tand the stored speed light
up. Operating the on-board computer
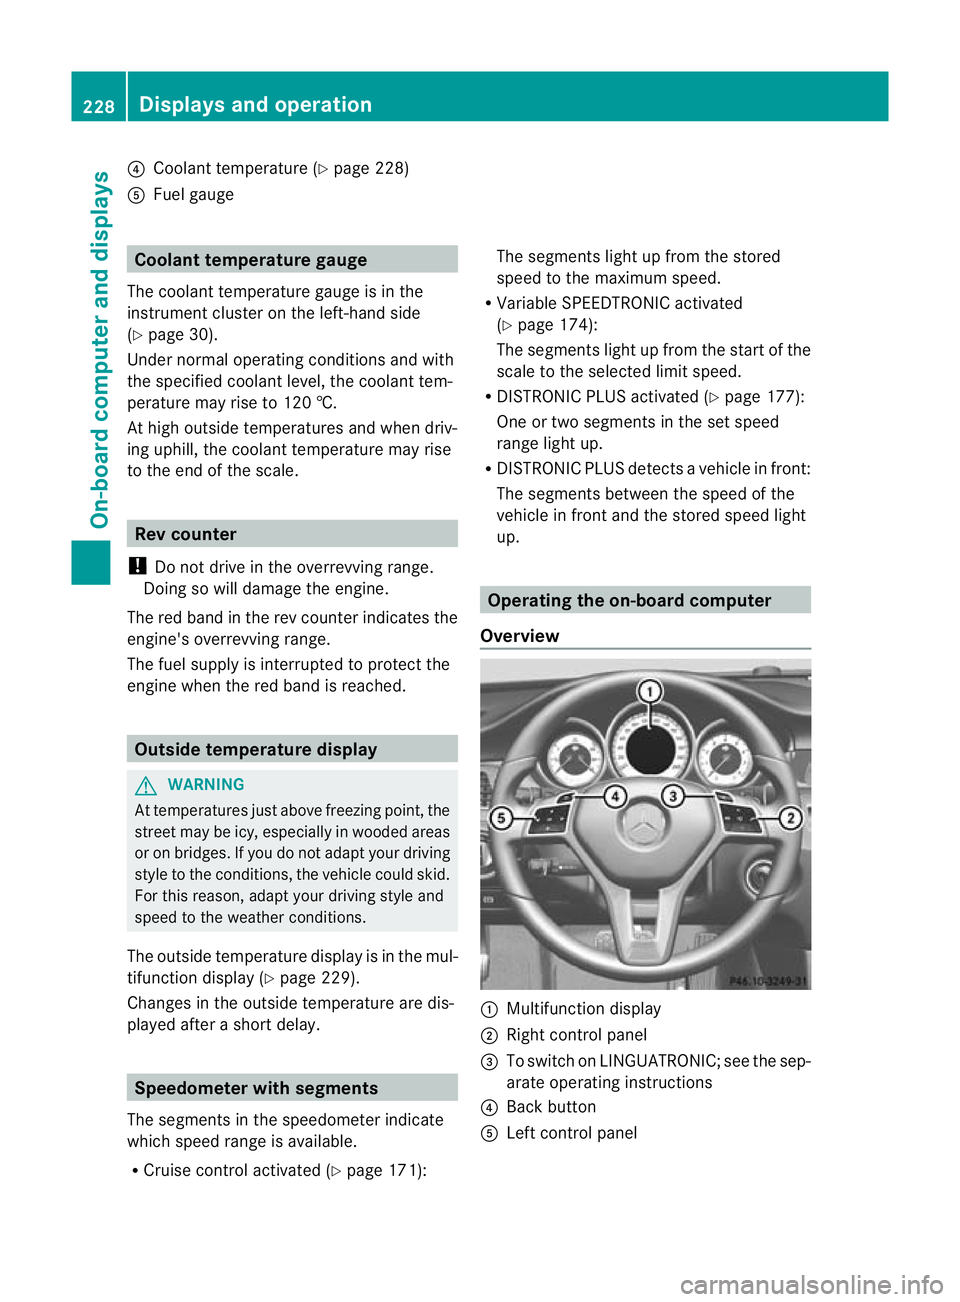
Overview :
Multifunctio ndisplay
; Right control panel
= To switch on LINGUATRONIC; see the sep-
arate operating instructions
? Back button
A Left control panel 228
Displays and operationOn-board computer and displays
Page 239 of 405
X
Press the 9or: button to select the
desired name.
or
X To begin rapid scrolling: press and hold
the 9 or: button for longer than
one second.
Rapid scrolling stops when you release the
button or reach the end of the list.
X If only one telephone number is stored
for a name: press the6ora button
to start dialling.
or
X If there is more than one number for a
particular name: press the6ora
button to display the numbers.
X Press the 9or: button to select the
number you want to dial.
X Press the 6ora button to start dial-
ling.
or
X To exit the telephone book: press the
~ or% button.
Redialling The on-board computer saves the last names
or numbers dialled in the redial memory.
X
Press the =or; button on the steer-
ing wheel to select the Tel menu.
X Press the 6button to switch to the
redial memory.
X Press the 9or: button to select the
desired name or number.
X Press the 6ora button to start dial-
ling.
or
X To exit the redial memory: press the
~ or% button. Assistance menu
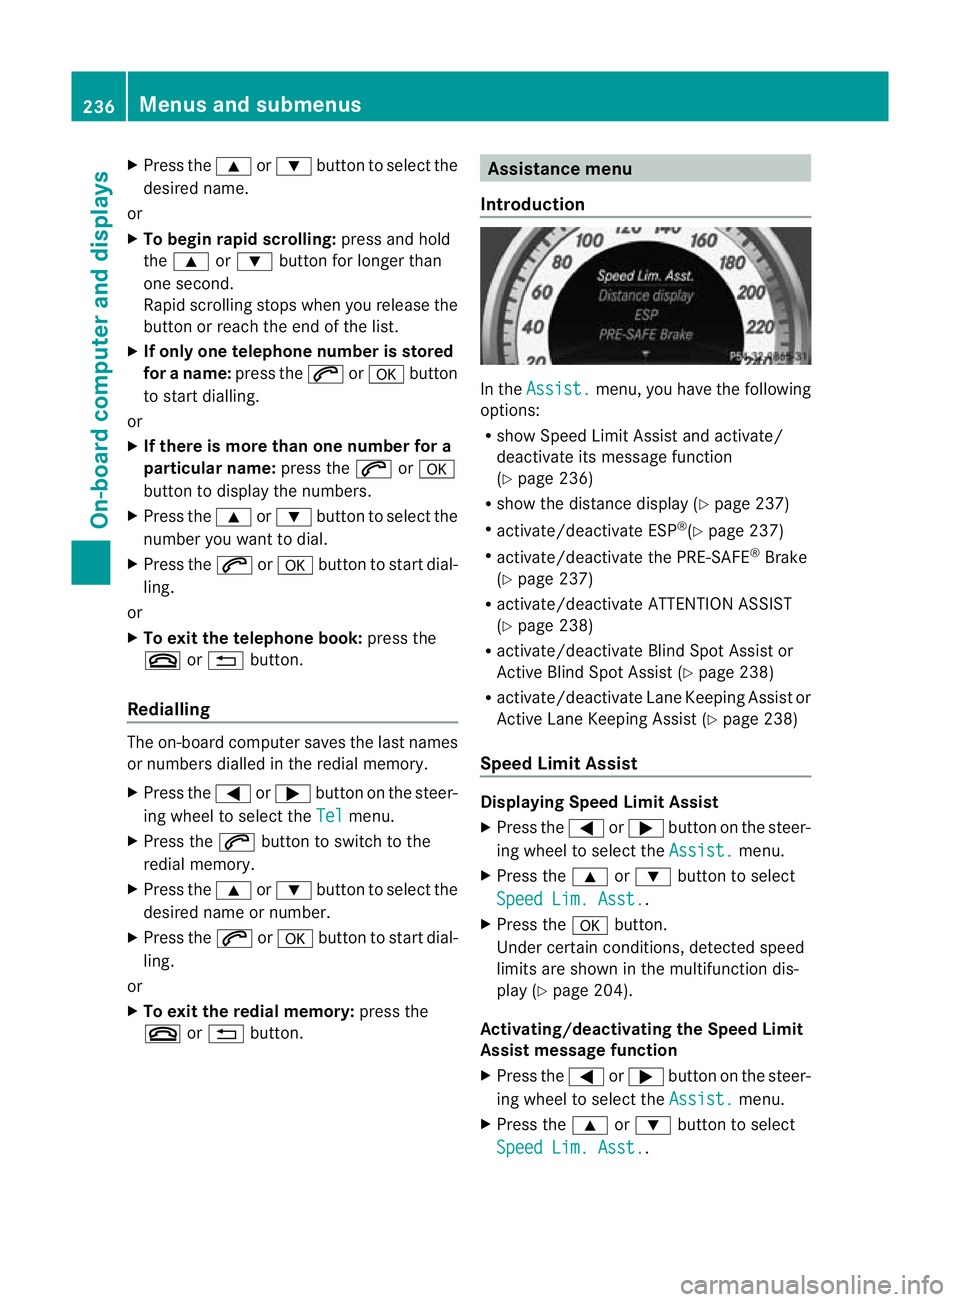
Introduction In the
Assist. menu, you have the following
options:
R show Speed Limit Assist and activate/
deactivate its message function
(Y page 236)
R show the distance display ( Ypage 237)
R activate/deactivate ESP ®
(Y page 237)
R activate/deactivate the PRE-SAFE ®
Brake
(Y page 237)
R activate/deactivate ATTENTION ASSIST
(Y page 238)
R activate/deactivate Blind Spot Assist or
Active Blind Spot Assist (Y page 238)
R activate/deactivate Lane Keeping Assist or
Active Lane Keeping Assist (Y page 238)
Speed Limit Assist Displaying Speed Limit Assist
X
Press the =or; button on the steer-
ing wheel to select the Assist. menu.
X Press the 9or: button to select
Speed Lim. Asst. .
X Press the abutton.
Under certain conditions, detected speed
limits are shown in the multifunction dis-
play (Y page 204).
Activating/deactivating the Speed Limit
Assist message function
X Press the =or; button on the steer-
ing wheel to select the Assist. menu.
X Press the 9or: button to select
Speed Lim. Asst. .236
Menus and submenusOn-board computer and displays
Page 240 of 405
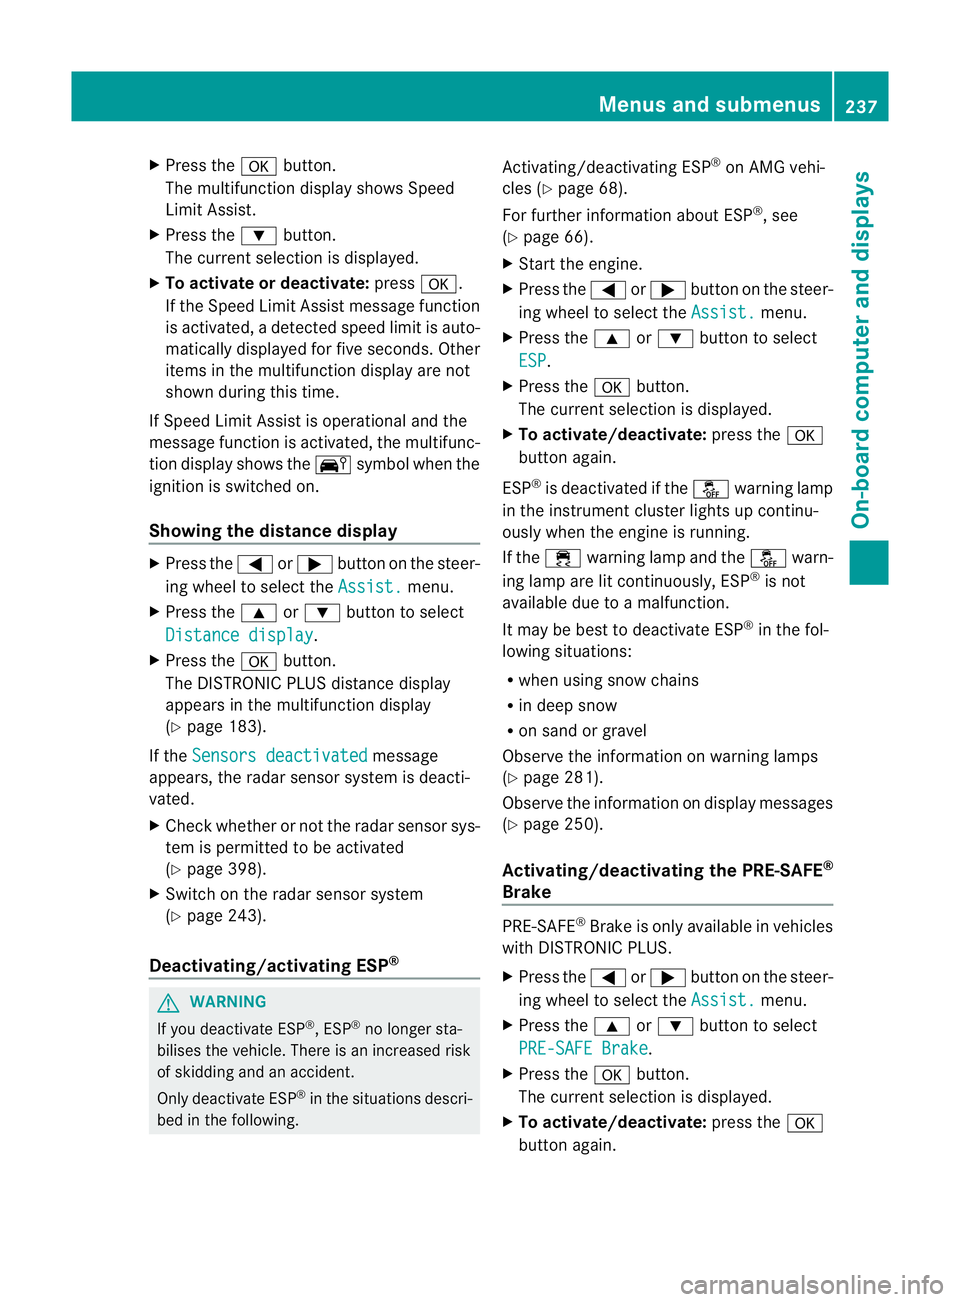
X
Press the abutton.
The multifunction display shows Speed
Limit Assist.
X Press the :button.
The curren tselection is displayed.
X To activate or deactivate: pressa.
If the Speed Limit Assist message function
is activated, a detected speed limit is auto-
matically displayed for five seconds. Other
items in the multifunction display are not
shown during this time.
If Speed Limit Assist is operational and the
message function is activated, the multifunc-
tion display shows the Äsymbol when the
ignition is switched on.
Showing the distance display X
Press the =or; button on the steer-
ing wheel to select the Assist. menu.
X Press the 9or: button to select
Distance display .
X Press the abutton.
The DISTRONIC PLUS distance display
appears in the multifunction display
(Y page 183).
If the Sensors deactivated message
appears, the radar sensor system is deacti-
vated.
X Check whether or not the radar sensor sys-
tem is permitted to be activated
(Y page 398).
X Switch on the radar sensor system
(Y page 243).
Deactivating/activating ESP ®G
WARNING
If you deactivate ESP ®
, ESP ®
no longer sta-
bilises the vehicle. There is an increased risk
of skidding and an accident.
Only deactivate ESP ®
in the situations descri-
bed in the following. Activating/deactivating ESP
®
on AMG vehi-
cles (Y page 68).
For further information about ESP ®
, see
(Y page 66).
X Start the engine.
X Press the =or; button on the steer-
ing wheel to select the Assist. menu.
X Press the 9or: button to select
ESP .
X Press the abutton.
The curren tselection is displayed.
X To activate/deactivate: press thea
button again.
ESP ®
is deactivated if the åwarning lamp
in the instrument cluster lights up continu-
ously when the engine is running.
If the ÷ warning lamp and the åwarn-
ing lamp are lit continuously, ESP ®
is not
available due to a malfunction.
It may be best to deactivate ESP ®
in the fol-
lowing situations:
R when using snow chains
R in deep snow
R on sand or gravel
Observe the information on warning lamps
(Y page 281).
Observe the information on display messages
(Y page 250).
Activating/deactivating the PRE-SAFE ®
Brake PRE-SAFE
®
Brake is only available in vehicles
with DISTRONIC PLUS.
X Press the =or; button on the steer-
ing wheel to select the Assist. menu.
X Press the 9or: button to select
PRE-SAFE Brake .
X Press the abutton.
The curren tselection is displayed.
X To activate/deactivate: press thea
button again. Menus and submenus
237On-board computer and displays Z
Page 249 of 405
submenu, you must turn the key to position
1
in the ignition lock. AMG menu in AMG vehicles
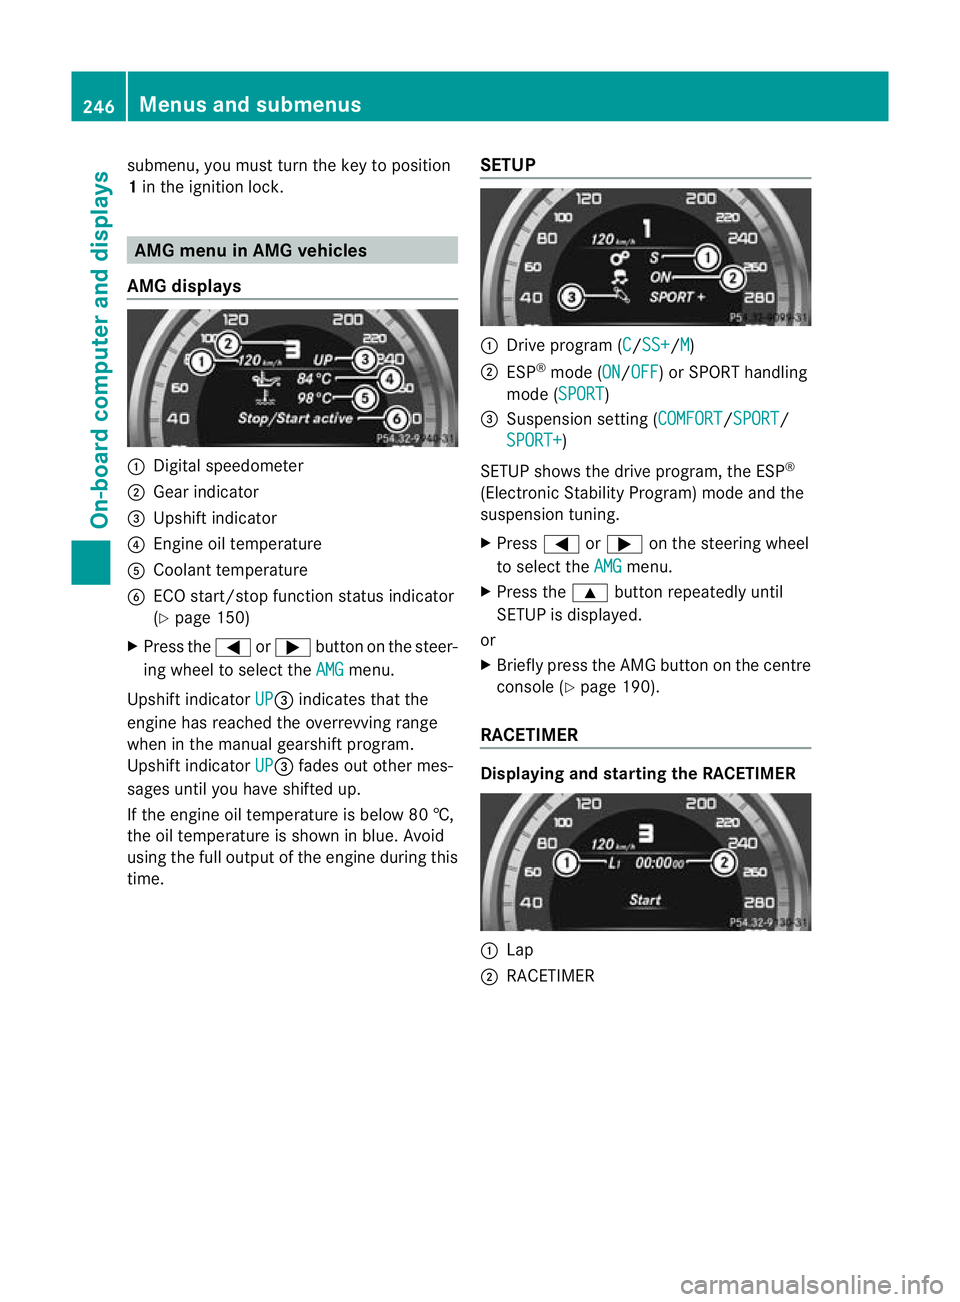
AMG displays :
Digital speedometer
; Gear indicator
= Upshift indicator
? Engine oil temperature
A Coolant temperature
B ECO start/stop function status indicator
(Y page 150)
X Press the =or; button on the steer-
ing wheel to select the AMG menu.
Upshift indicator UP =
indicates that the
engine has reached the overrevving range
when in the manual gearshift program.
Upshift indicator UP =
fades out other mes-
sages until you have shifted up.
If the engine oil temperature is below 80 †,
the oil temperature is shown in blue. Avoid
using the full output of the engine during this
time. SETUP :
Drive program (C /SS+ /M )
; ESP ®
mode (ON /OFF ) or SPORT handling
mode (SPORT )
= Suspension setting (COMFORT /SPORT /
SPORT+ )
SETUP shows the drive program, the ESP ®
(Electronic Stability Program) mode and the
suspension tuning.
X Press =or; on the steering wheel
to select the AMG menu.
X Press the 9button repeatedly until
SETUP is displayed.
or
X Briefly press the AMG button on the centre
console (Y page 190).
RACETIMER Displaying and starting the RACETIMER
:
Lap
; RACETIMER 246
Menus and submenusOn-board computer and displays
Page 252 of 405
Display messages
Introduction
General notes Display messages appear in th
emultifunction display.
Display messages with graphic symbols are simplified in th eOwner's Manual and may differ
fro mt he symbols in the multifunction display.
Please respond in accordance with the display messages and follow the additional notes in
this Owner's Manual.
Certain display messages are accompanied by an audible warning tone or a continuous tone.
When the ignition is switched off, all display messages are deleted apart from some high-
priority display messages. Once the causes of the high-priority display messages have been
rectified, the corresponding display messages are also deleted.
When you stop and park the vehicle, please observe the notes on:
R HOLD function (Y page 186)
R Parking (Y page 165)
Hiding display messages X
Press the aor% button on the steering wheel to hide the display message.
The display message is cleared.
The multifunction display shows high-priority display messages in red. Some high-priority dis-
play messages cannot be hidden.
The multifunction display shows these messages continuously until the causes for the mes-
sages have been remedied.
Message memory The on-board computer saves certain display messages in the
message memory.You can
call up the display messages:
X Press the =or; button on the steering wheel to select the Serv. menu.
If there are display messages, the multifunction display shows 2 messages , for example.
X Press the 9or: button to select the entry, e.g. 2 messages .
X Press ato confirm.
X Press the 9or: button to scroll through the display messages. Display messages
249On-board computer and displays Z
Page 253 of 405
Safety systems
Display messages Possible causes/consequences and
M Solutions
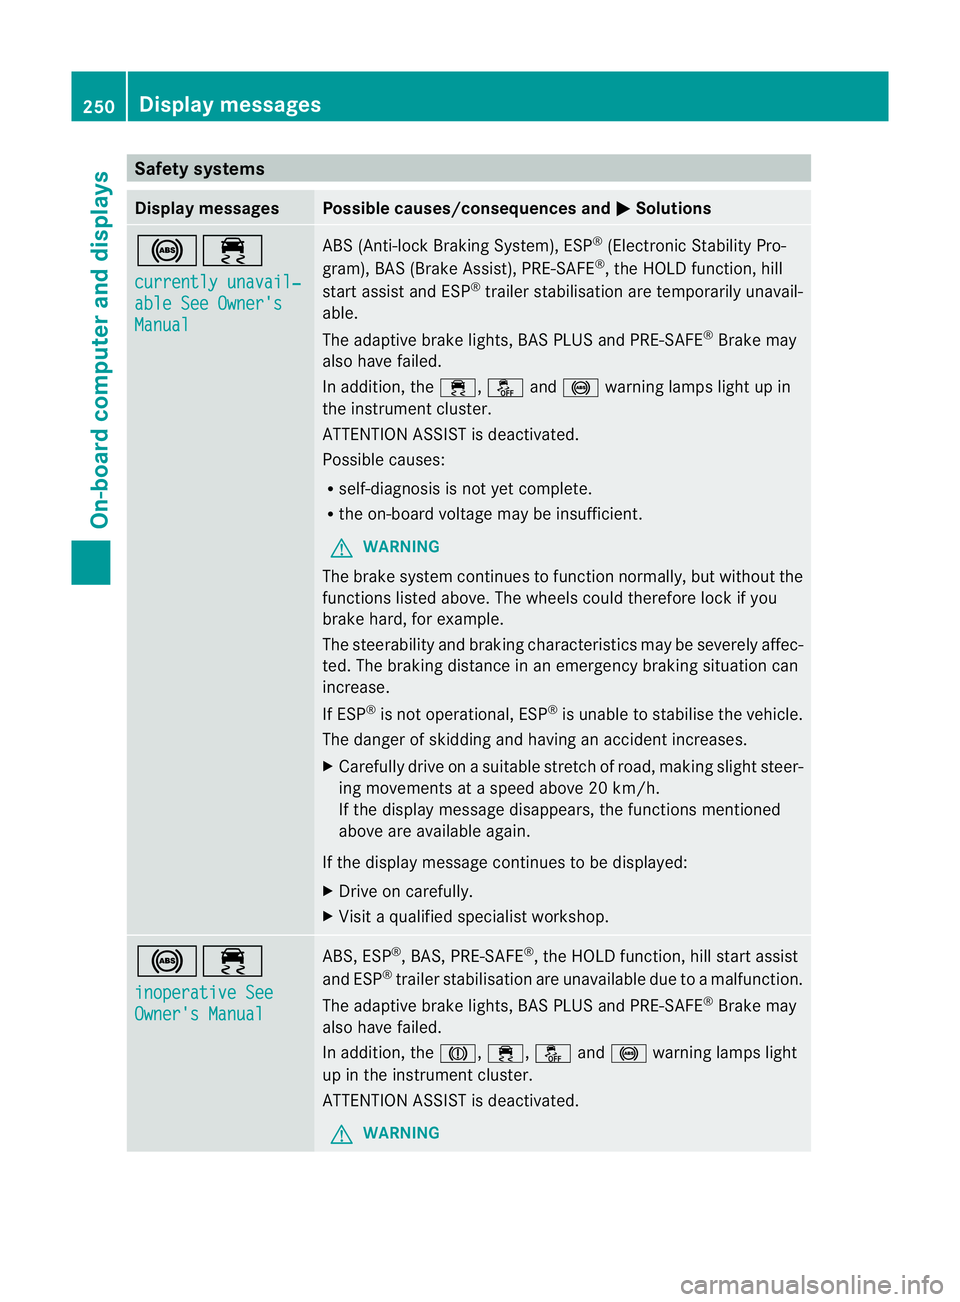
!÷
currently unavail‐
able See Owner's
Manual ABS (Anti-lock Braking System), ESP
®
(Electronic Stability Pro-
gram), BAS (Brake Assist), PRE-SAFE ®
, the HOLD function, hill
start assist and ESP ®
trailer stabilisation are temporarily unavail-
able.
The adaptive brake lights, BAS PLUS and PRE-SAFE ®
Brake may
also have failed.
In addition, the ÷,åand! warning lamps light up in
the instrument cluster.
ATTENTION ASSIST is deactivated.
Possible causes:
R self-diagnosis is not yet complete.
R the on-board voltage may be insufficient.
G WARNING
The brake system continues to function normally, but without the
functions listed above. The wheels could therefore lock if you
brake hard, for example.
The steerability and braking characteristics may be severely affec-
ted. The braking distance in an emergency braking situation can
increase.
If ESP ®
is not operational, ESP ®
is unable to stabilise the vehicle.
The danger of skidding and having an accident increases.
X Carefully drive on a suitable stretch of road, making slight steer-
ing movements at a speed above 20 km/h.
If the display message disappears, the functions mentioned
above are available again.
If the display message continues to be displayed:
X Drive on carefully.
X Visit a qualified specialist workshop. !÷
inoperative See
Owner's Manual ABS, ESP
®
, BAS, PRE-SAFE ®
, the HOLD function, hill start assist
and ESP ®
trailer stabilisation are unavailable due to a malfunction.
The adaptive brake lights, BAS PLUS and PRE-SAFE ®
Brake may
also have failed.
In addition, the J,÷,åand! warning lamps light
up in the instrument cluster.
ATTENTION ASSIST is deactivated.
G WARNING 250
Display messagesOn-board computer and displays