2012 MERCEDES-BENZ CLS COUPE climate control
[x] Cancel search: climate controlPage 137 of 373
The remote control has
amaximum range of
approximately 300 metres. This range is
reduced by:
R sources of radio interference
R solid object sbetween the remote control
and the vehicle
R the remote control being in an unfavoura-
ble position in relation to the vehicle
R transmitting from an enclosed space
i The optimum range can be achieved if you
hold the remote control vertically, pointing
upwards when you press one of the but-
tons.
i Abattery symbol appear sinthedisplay
when th ebattery in th eremot econtro lis
low. Replac ethe remot econtro lbattery
(Y page 135).
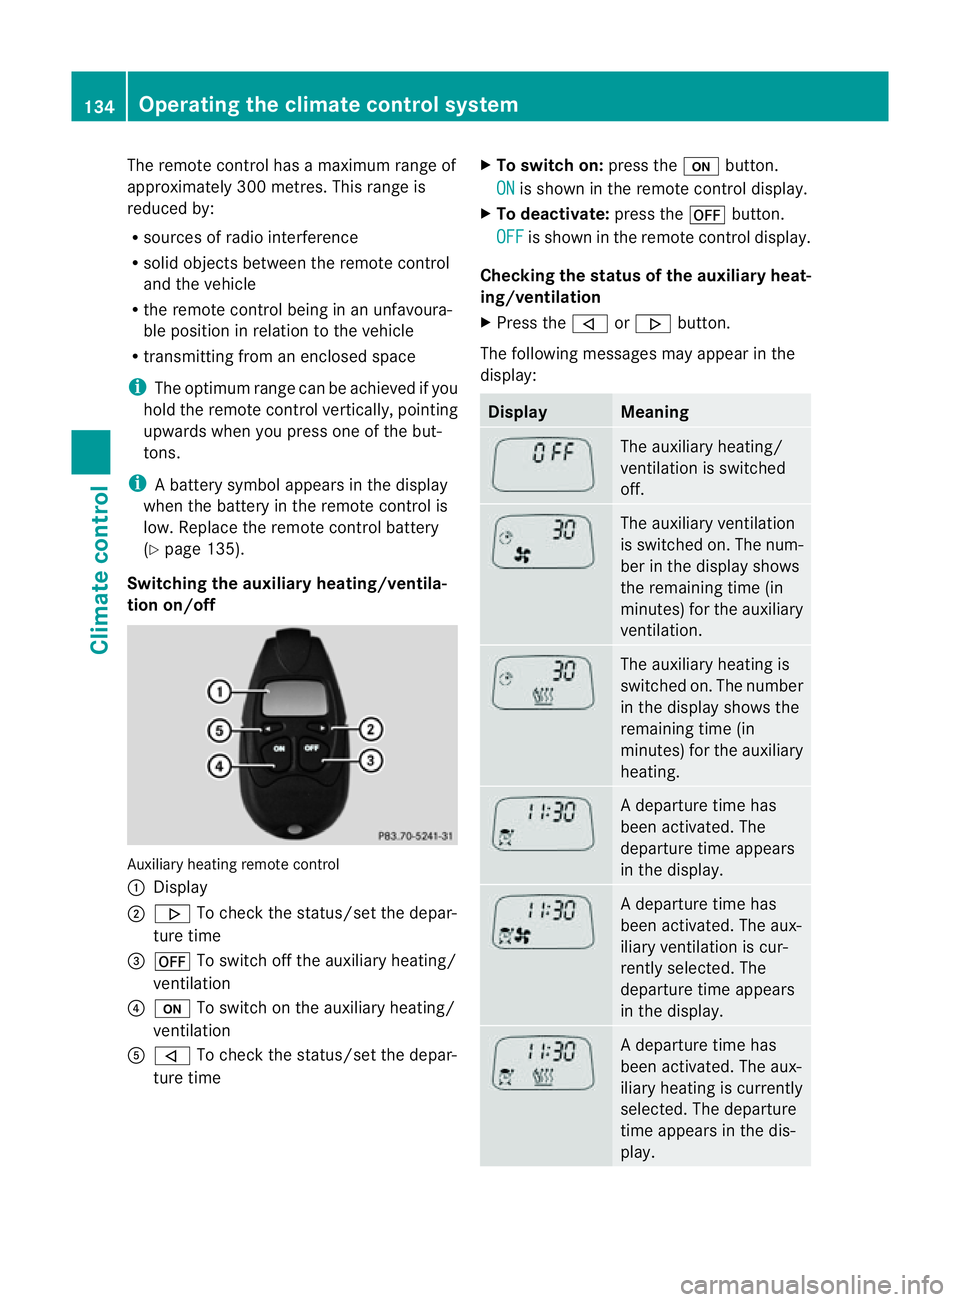
Switching th eauxiliary heating/ventila-
tion on/off Auxiliary heating remot
econtrol
: Display
; . To check th estatus/set th edepar-
tur etime
= ^ To switch off th eauxiliary heating/
ventilation
? u To switch on th eauxiliary heating/
ventilation
A , To check th estatus/set th edepar-
tur etime X
To switch on: pressthe u button.
ON is shown in th
eremot econtro ldisplay.
X To deactivate: pressthe ^ button.
OFF is shown in th
eremot econtro ldisplay.
Checking th estatus of the auxiliary heat-
ing/ventilation
X Press the ,or. button.
The following message smayappear in the
display: Display Meaning
The auxiliary heating/
ventilatio
nisswitched
off. The auxiliary ventilation
is switched on. The num-
ber in the displays
hows
the remaining time (in
minutes) for the auxiliary
ventilation. The auxiliary heating is
switched on. The number
in the displays
hows the
remaining time (in
minutes) for the auxiliary
heating. Ad
eparture time has
been activated. The
departure time appears
in the display. Ad
eparture time has
been activated. The aux-
iliary ventilation is cur-
rently selected. The
departure time appears
in the display. Ad
eparture time has
been activated. The aux-
iliary heating is currently
selected. The departure
time appears in the dis-
play. 134
Operating thec
limatecontrol systemClimatecontrol
Page 138 of 373
Setting the departuret
ime
X Press the ,or. button repeatedly
until the time to be changed appears in the
display.
X Press the uand^ buttons simulta-
neously.
The Îsymbol in the remote control dis-
play flashes.
X Press the ,or. button to set the
desired departure time.
i The longer you press the ,or.
button, the faster the time changes.
X Press the uand^ buttons simulta-
neously.
The new departure time is stored.
Activating the set departuret ime
X Press the ,or. button repeatedly
until the desired departure time appears in
the display.
X Press the ubutton.
The Ísymbol and the departure time
appearint he display.
Deactivating aset departuret ime
X Press the ,or. button.
The status of the auxiliary heating is shown
in the display.
X Press the .button.
The first departure time stored appears in
the display.
X Press the ^button.
The displaym essageOFF appears in the
display.
Replacing the remote control battery G
WARNING
Batteries contain poisonous substances.
Swallowing/ingesting batteries can result in
serious personal injury or death.
Always keep batteries away from children. If
ab attery is swallowed, seek immediate med-
ical attention. H
Environmental note Batteries contain pollutants.
It is illegaltod
ispose of them
with the household rubbish.
They must be collected sep-
arately and disposed of in an
environmentally responsible
recycling system. Dispose of batteries in an
environmentally responsible
manner. Take discharged
batteries to aqualified spe-
cialist workshop or to acol-
lection point for used batter-
ies. One
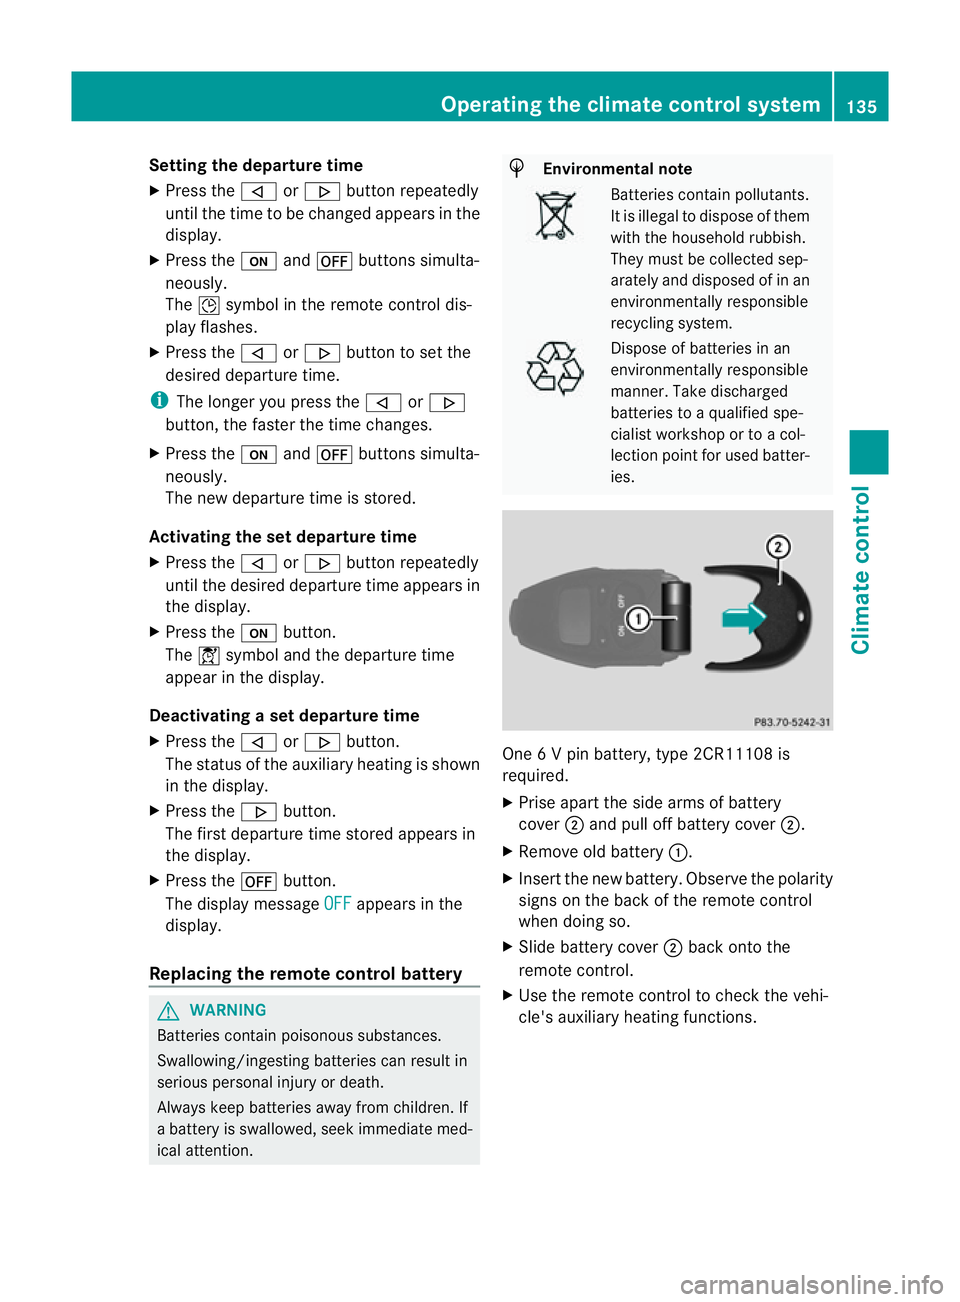
6Vp in battery, type 2CR11108 is
required.
X Prise apart the side arms of battery
cover ;and pull off battery cover ;.
X Remove old battery :.
X Insert the new battery. Observe the polarity
signs on the back of the remote control
when doing so.
X Slide battery cover ;back onto the
remote control.
X Use the remote control to check the vehi-
cle's auxiliary heating functions. Operating the climate control system
135Climatecontrol Z
Page 139 of 373
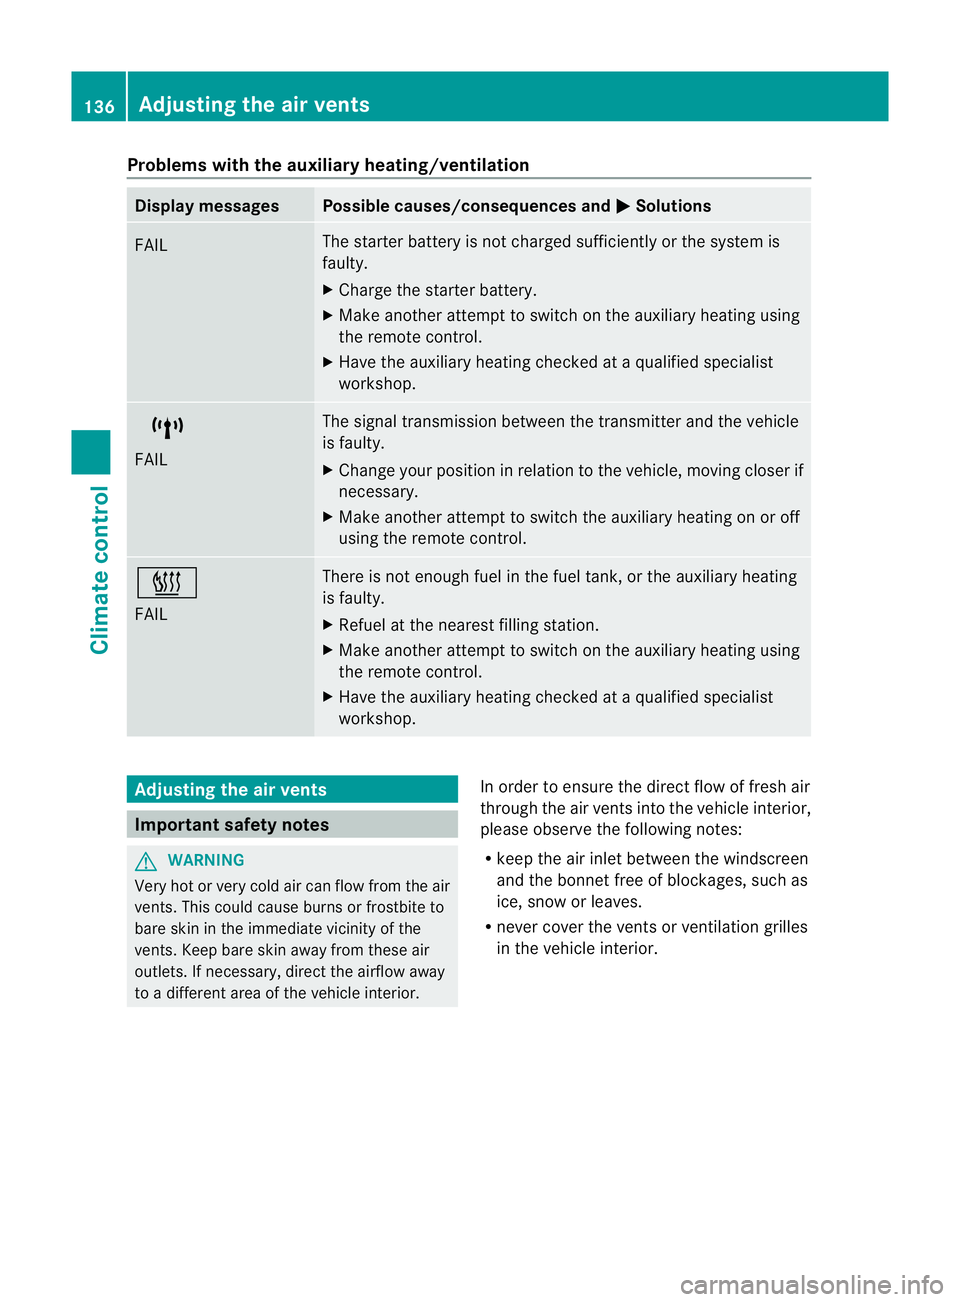
Problems with the auxiliary heating/ventilation
Display messages Possible causes/consequences and
M Solutions
FAIL The starter battery is not charged sufficiently or the system is
faulty.
X
Charge the starter battery.
X Make another attempt to switch on the auxiliary heating using
the remote control.
X Have the auxiliary heating checked at aqualified specialist
workshop. $
FAIL The signal transmission between the transmitter and the vehicle
is faulty.
X
Change your position in relation to the vehicle, moving closer if
necessary.
X Make another attempt to switch the auxiliary heating on or off
using the remote control. ©
FAIL There is not enough fuel in the fuel tank,ort
he auxiliary heating
is faulty.
X Refuel at the nearest filling station.
X Make another attempt to switch on the auxiliary heating using
the remote control.
X Have the auxiliary heating checked at aqualified specialist
workshop. Adjusting the air vents
Important safety notes
G
WARNING
Very hot or very cold air can flow from the air
vents. This could cause burns or frostbit eto
bare skin in the immediate vicinity of the
vents. Keep bare skin away from these air
outlets. If necessary, direct the airflow away
to ad ifferent area of the vehicle interior. In order to ensure the direct flow of fresh air
through the air ventsi
nto the vehicle interior,
please observe the following notes:
R keep the air inlet between the windscreen
and the bonnet free of blockages, such as
ice, snow or leaves.
R never cover the ventsorv entilation grilles
in the vehicle interior. 136
Adjusting the air ventsClimate control
Page 140 of 373
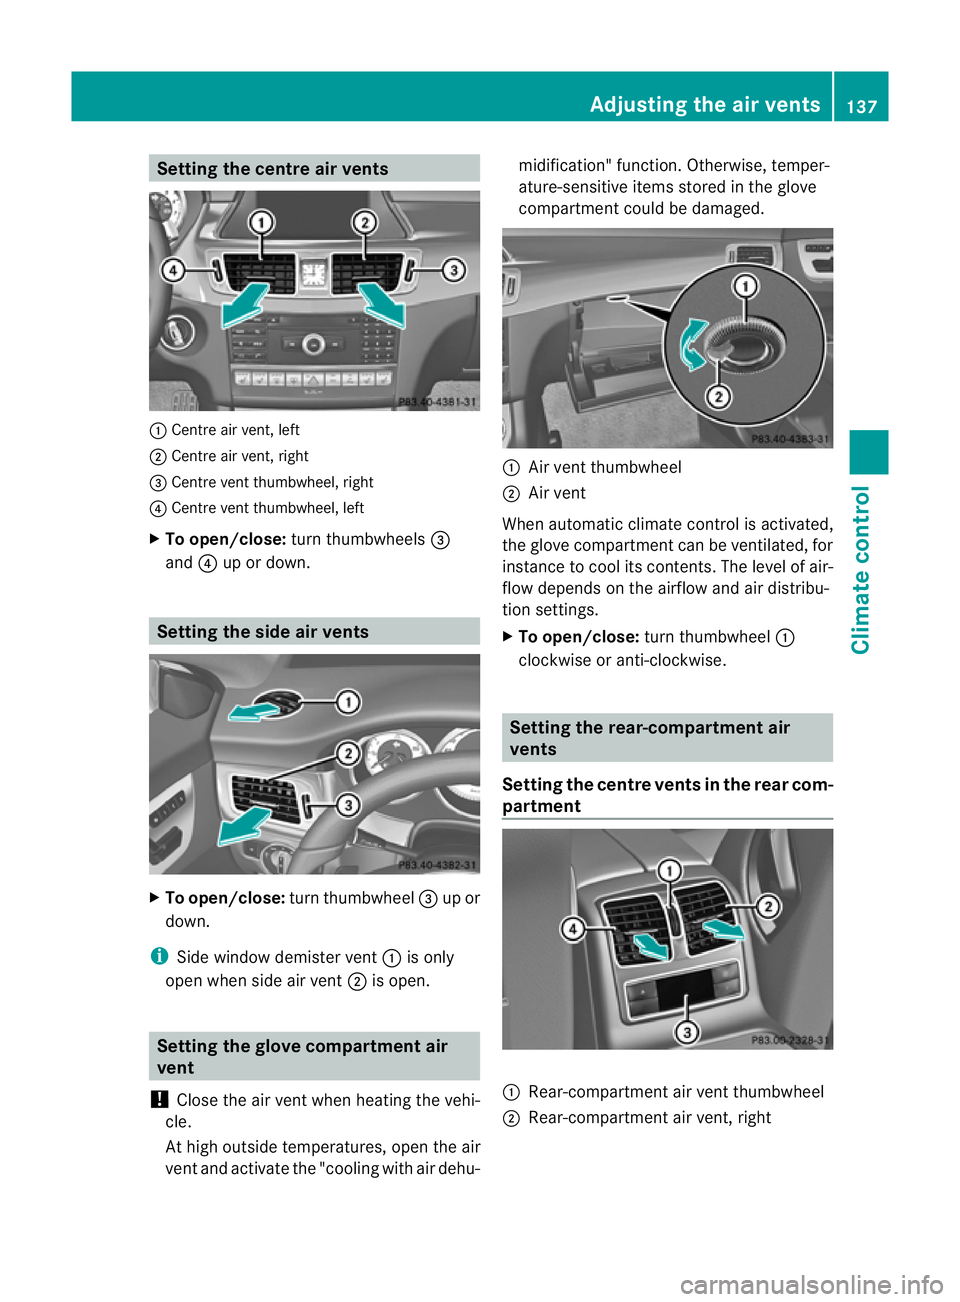
Setting the centre air vents
:
Centre air vent, left
; Centre air vent, right
= Centre vent thumbwheel, right
? Centre vent thumbwheel, left
X To open/close: turn thumbwheels =
and ?up or down. Setting the side air vents
X
To open/close: turn thumbwheel =up or
down.
i Side window demister vent :is only
open when side air vent ;is open. Setting the glove compartment air
vent
! Close the air vent when heating the vehi-
cle.
At high outside temperatures, open the air
vent and activate the "cooling with air dehu- midification" function. Otherwise, temper-
ature-sensitive items stored in the glove
compartmen
tcould be damaged. :
Air vent thumbwheel
; Air vent
When automatic climate control is activated,
the glove compartment can be ventilated, for
instance to cool its contents.T he level of air-
flow depends on the airflow and air distribu-
tion settings.
X To open/close: turn thumbwheel :
clockwise or anti-clockwise. Setting the rear-compartment air
vents
Setting the centre vents in the rear com-
partment :
Rear-compartment air vent thumbwheel
; Rear-compartment air vent,r ight Adjusting the air vents
137Climatecontrol Z
Page 141 of 373
=
Rear control unit, only with
THERMOTRONI Cautomatic climat econ-
trol
? Rear-compartmen tair vent, left
X To open/close: turnthumbwheel :up or
down. 138
Adjusting the air ventsClimatec
ontrol
Page 149 of 373
R
the se ttemperature for the vehicle interior
has been reached.
R the batter yissufficiently charged.
R the system detects that the windscreen is
not misted up when the air-conditioning
system is switched on.
R the bonnet is closed.
R the driver's door is closed and the driver's
seat belt is fastened.
If conditions for automatic engin eswitch-off
have not been fulfilled, the ¤symbol will
be shown in yellow.
AMG vehicles: the AMG menu in the multi-
function display additionally shows the Stop/Start inactive message.
i If you shift the transmission from Rto D,
the ECO start/stop function is available
again oncet he¤ symbol reappears in
green in the multifunction display.
i All vehicles (except AMG vehicles):
automatic engin eswitch-off can take place
am aximum of four times consecutively (ini-
tial stop and three subsequent stops). The
¤ symbol is shown in yellow in the mul-
tifunction display after the engin ehas been
started automatically for the fourt htime.
The automatic engin eswitch-off is availa-
ble oncea gain when the ¤symbol is
shown in green in the multifunction display.
i AMG vehicles: times which the engine
can be automatically switched off.
i You can also activat ethe HOLD function
when the vehicle is stationary if the engine
has been switched off automatically. It is
then not necessary to continue applying
the brakes during the automatic stop
phase. When you depress the accelerator
pedal, the engin estart sautomatically and
the brakin geffec toft he HOLD function is
deactivated. Depress the accelerator pedal
gently, as the engin emust be started first.
i Durin gautomatic engin eswitch-off ,the
climate control system only operates at a
reduced capacity. If you require full climate control capacity, the ECO start/stop func-
tion can be deactivated by pressing the
ECO button (Y
page 145).
Automatic engine start The engin
eisstarted automatically if:
R you switch off the ECO start/stop function
by pressing the ECO button.
R you release the brakes when in transmis-
sion position Dor N,w hen the HOLD func-
tion is not active.
R you depress the accelerator pedal.
R you engage revers egear R.
R you move the transmission out of position
P.
R you switch to drive program S,S+ orM
(AMG vehicles).
R you unfasten your seat belt or open the
driver's door.
R the vehicle start storoll.
R the brake system requires this.
R the temperature in the vehicle interior devi-
ates from the set range.
R the system detects moisture on the wind-
screen when the air-conditionin gsystem is
switched on.
R the battery's charge status is too low.
i Shifting the transmission to position P
does not start the engine. 146
DrivingDriving and parking
Page 363 of 373
Service products includ
ethe following:
R fuels (e.g. petrol ,diesel)
R lubricants (e.g. engine oil, transmissio noil)
R coolant
R brak efluid
R windscreen washer fluid
R climate control system refrigerant
Component sand service products must be
matched .Mercedes-Ben zrecommends that
you use products tested and approved by
Mercedes-Benz. They are listed in this
Mercedes-Ben zOwner's Manual in th eappro-
priat esection.
You can identif yservice product sapproved
by Mercedes-Ben zbythefollowing inscrip-
tion sont hecontainer:
R MB-Freigabe (e.g. MB-Freigabe 229.51)
R MB Approval (e.g. MB Approval 229.51)
Other designation sorrecommendation sind i-
cat eal evel of qualit yoras pecification in
accordance wit hanMBSheet Number (e.g.
MB 229.5). The yhave no tnecessarily been
approved by Mercedes-Benz.
Further information can be obtained from any
Mercedes-Benz Service Centr eoronthe
Internet at http://bevo.mercedes-benz.com. Fuel
Important safety notes G
WARNING
Fuel is highly flammable. Fire, naked flames
and smokin gare therefor eprohibited when
handlin gfuels.
Switc hoff th eenginea nd th eauxiliary heating
before refuelling. G
WARNING
Avoid contact wit hfuels.
It is hazardous to your healt hifyour skin
comes int odirect contact wit hfuel sory ou
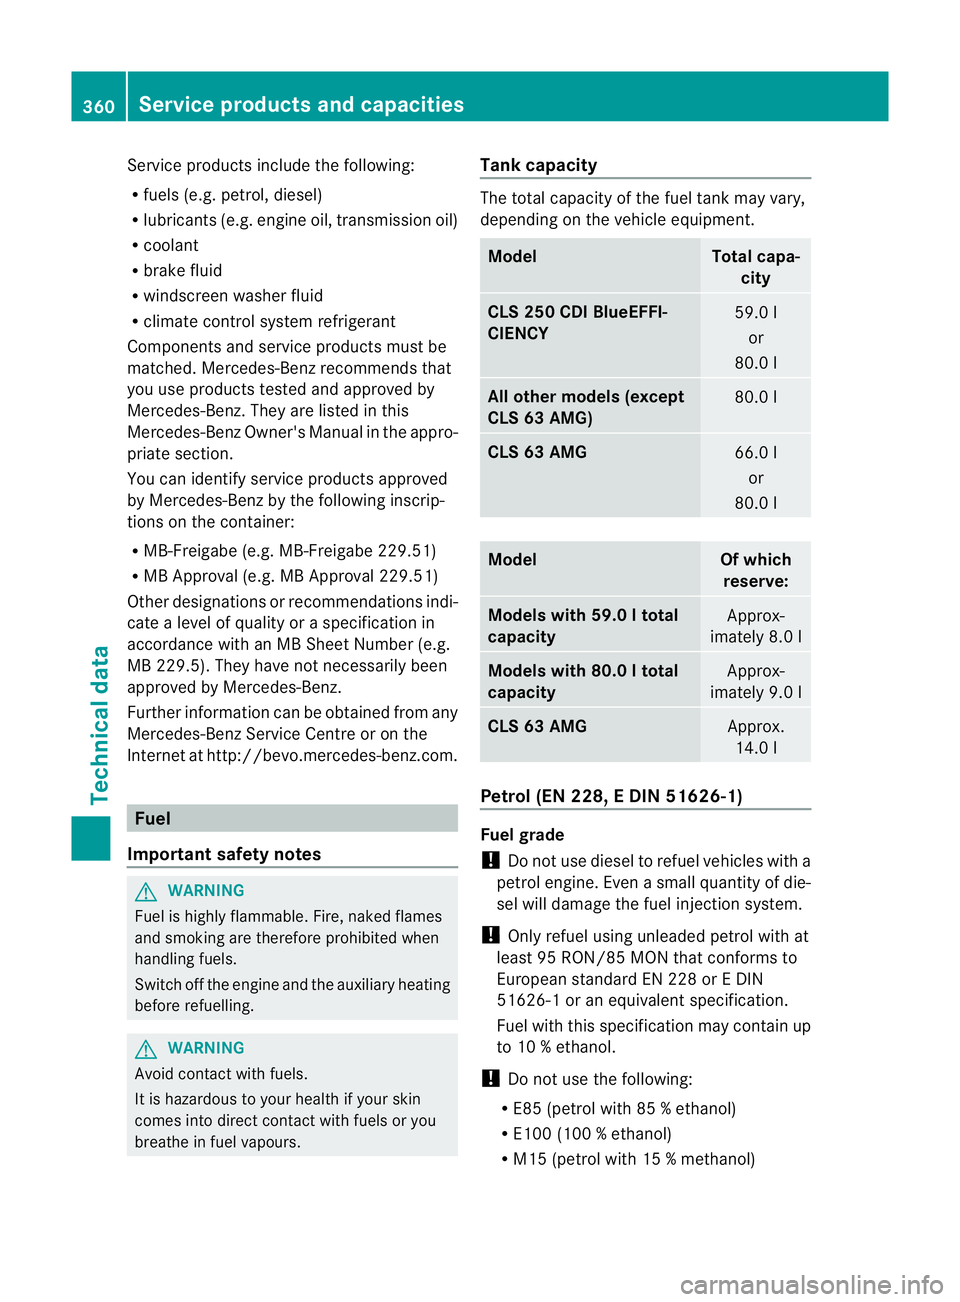
breath einfuel vapours. Tank capacity The total capacit
yofthe fuel tan kmay vary,
dependin gonthevehicle equipment. Model Total capa-
city CLS 250 CDI BlueEFFI-
CIENCY
59.0 l
or
80.0 l All other models (except
CLS 63 AMG)
80.0 l
CLS 63 AMG
66.0 l
or
80.0 l Model Of which
reserve: Models with 59.
0ltotal
capacity Approx-
imately 8. 0l Models with 80.
0ltotal
capacity Approx-
imately 9. 0l CLS 63 AMG
Approx.
14.0 l Petrol (EN 228,
EDIN 51626-1) Fuel grade
!
Do no tuse diesel to refuel vehicles with a
petrol engine. Even asmall quantity of die-
sel willd amage the fuel injection system.
! Only refue lusing unleaded petrol with at
least 95 RON/85 MON that conforms to
European standard EN 228 or EDIN
51626-1 or an equivalent specification.
Fuel with this specification may contain up
to 10 %ethanol.
! Do not use the following:
R E85 (petrol with 85 %ethanol)
R E100 (100 %ethanol)
R M15 (petrol with 15 %methanol) 360
Service products and capacitiesTechnical data