2012 MERCEDES-BENZ CLS COUPE key battery
[x] Cancel search: key batteryPage 107 of 373
Problems with the steering wheel heat-
ing If steering wheel heating indicator lamp
=is
flashing, the steering wheel heating has
switched off automatically. The vehicle's
electrical system voltage is too low because
too many electrical consumers are switched
on.
X Switch off electrical consumers that you do
not need, such as the rear window heating
or interior lighting.
Once the battery is sufficiently charged, the
steering wheel heating will switch back on
automatically. EASY-ENTRY/EXIT feature
Important safety notes G
WARNING
Make sure that nobody can become trapped
when you activate the EASY-ENTRY/EXIT fea-
ture.
If there is arisk of someone becoming trap-
ped, stop the adjustment procedure. To halt
the procedure:
R press the steering column adjustment but-
ton.
R briefly press one of the memory function
position buttons.
The steering column stops moving immedi-
ately.
Do not keep the memory function position
button pressed down, otherwise the memory
function will start and the steering wheel and
seat will begin to move.
Never leave children unsupervised in the vehi-
cle. They could open the driver's door and
thereby unintentionally activate the EASY-
ENTRY feature and become trapped.
The EASY-ENTRY/EXIT feature makes getting
in and out of your vehicle easier. You can activate and deactivate the EASY-
ENTRY/EXI
Tfeature in the on-board com-
puter (Y page 226).
Position of the steering wheel when the
EASY-ENTRY/EXIT featureisa ctive The steerin
gwheel tilts upwards if you:
R remove the key from the ignition lock
R open the driver's door and KEYLESS-GO is
in position 1
R open the driver's door and the key is in
position 0or 1in the ignition lock
i The steerin gwheel only moves upwards if
it has not already reached the upper end
stop.
Position of the steering wheel for driv-
ing The steerin
gwheel is moved to the previously
set position if:
R the driver's door is closed and
R you insert the key into the ignition lock
or
R you press the Start/Stop button onceon
vehicles with KEYLESS-GO.
If you close the driver's door with the key
inserted into the ignition lock, the steering
wheel is automatically moved to the previ-
ously set position.
The last position of the steerin gwheel is
stored when you switch off the ignition or
when you stor ethe setting with the memory
function (Y page 107).
Crash-responsive EASY-EXIT feature If the crash-responsive EASY-EXIT feature is
triggered in an accident
,the steerin gcolumn
will move upwards when the driver's door is
opened. This occurs irrespective of the posi-
tion of the key in the ignition lock. This makes
it easier to exit the vehicle and rescue the
occupants. 104
Steering wheelSeats, steering wheel and mirrors
Page 109 of 373
Setting the exterior mirrors
If the battery has been disconnected or com-
pletely discharged, the exterior mirrors must
be reset. The exterior mirrors will otherwise
not fold in when you select the "Fold in mir-
rors when locking" function in the on-board
computer (Y page 227).
X Make sure that the key is in position 1in
the ignition lock.
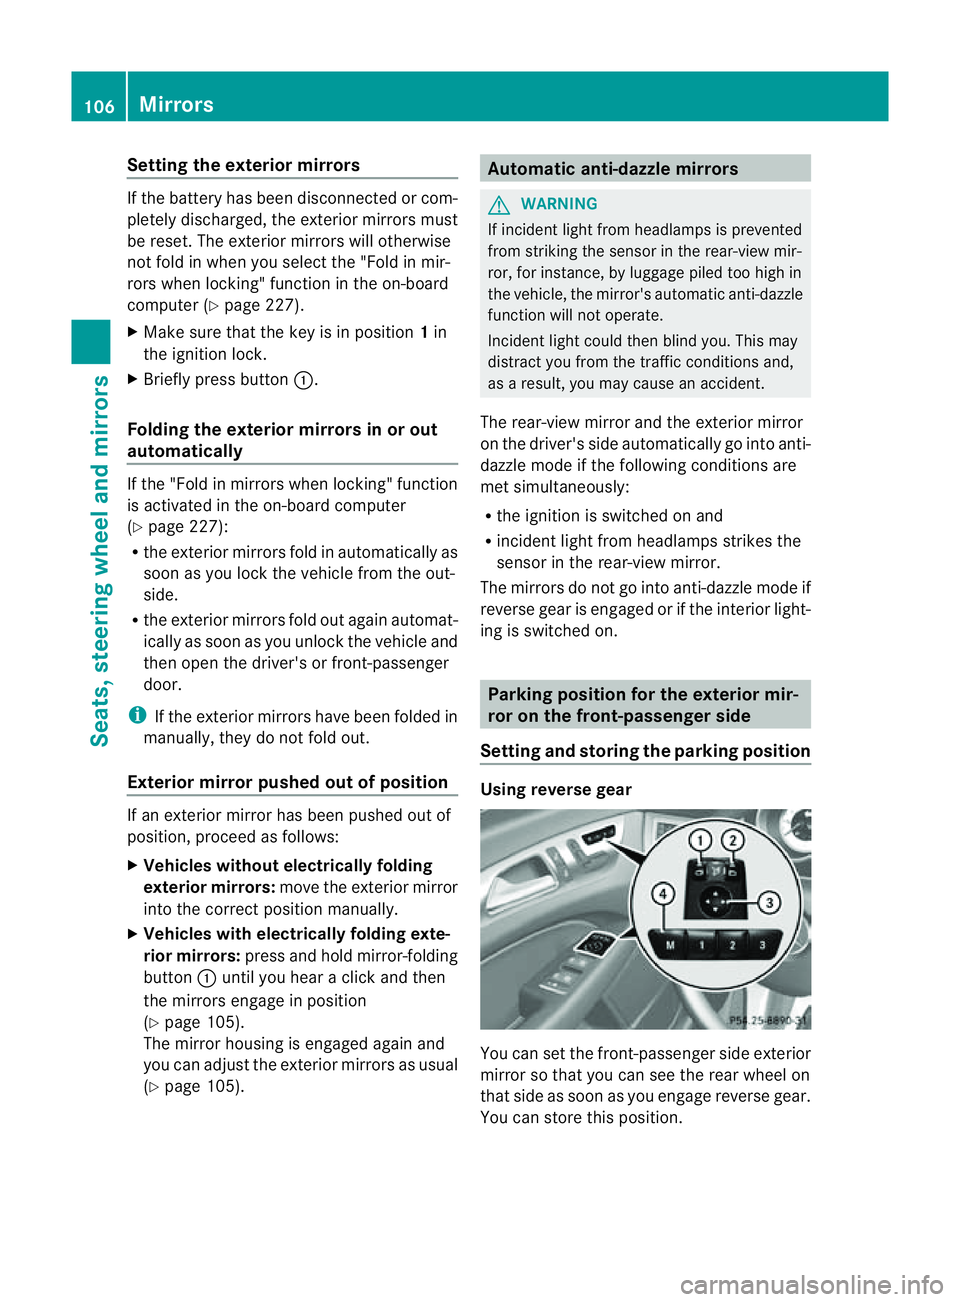
X Briefly press button :.
Folding the exterior mirrors in or out
automatically If the "Fold in mirrors when locking" function
is activated in the on-board computer
(Y page 227):
R the exterior mirrors fold in automatically as
soon as you lock the vehicle from the out-
side.
R the exterior mirrors fold out again automat-
ically as soon as you unlock the vehicle and
then open the driver's or front-passenger
door.
i If the exterior mirrors have been folded in
manually ,they do not fold out.
Exterior mirror pushed out of position If an exterior mirror has been pushed out of
position, proceed as follows:
X Vehicles without electrically folding
exterior mirrors: move the exterior mirror
into the correctp osition manually.
X Vehicles with electrically folding exte-
rior mirrors: press and hold mirror-folding
button :until you hear aclick and then
the mirrors engage in position
(Y page 105).
The mirror housing is engaged again and
you can adjust the exterior mirrors as usual
(Y page 105). Automatic anti-dazzle mirrors
G
WARNING
If incident light from headlamps is prevented
from striking the sensor in the rear-view mir-
ror, for instance, by luggage piled too high in
the vehicle, the mirror's automatic anti-dazzle
function will not operate.
Incident light could then blind you. This may
distract you from the traffic conditions and,
as aresult, you may cause an accident.
The rear-view mirror and the exterior mirror
on the driver's side automatically go into anti-
dazzle mode if the following conditions are
met simultaneously:
R the ignition is switched on and
R incident light from headlamps strikes the
sensor in the rear-view mirror.
The mirrors do not go into anti-dazzle mode if
reverse gear is engaged or if the interior light-
ing is switched on. Parking position for the exterior mir-
ror on the front-passenger side
Setting and storing the parking position Using reverse gear
You can set the front-passenger side exterior
mirror so that you can see the rear wheel on
that side as soon as you engage reverse gear.
You can store this position.106
MirrorsSeats, steering wheel and mirrors
Page 115 of 373
Even if the ligh
tsensor does not detec tthat
is dark, the side lamps and dipped-beam
headlamps switch on when the key is inserted
into the ignition lock and the light switch is
set to the Lposition. This is aparticularly
useful function in the event of rain and fog.
X To switch on the dipped-beam head-
lamps: turn the key in the ignition lock to
position 2or start the engine.
X Turn the light switch to L.
The green Lindicator lamp in the instru-
ment cluster lights up.
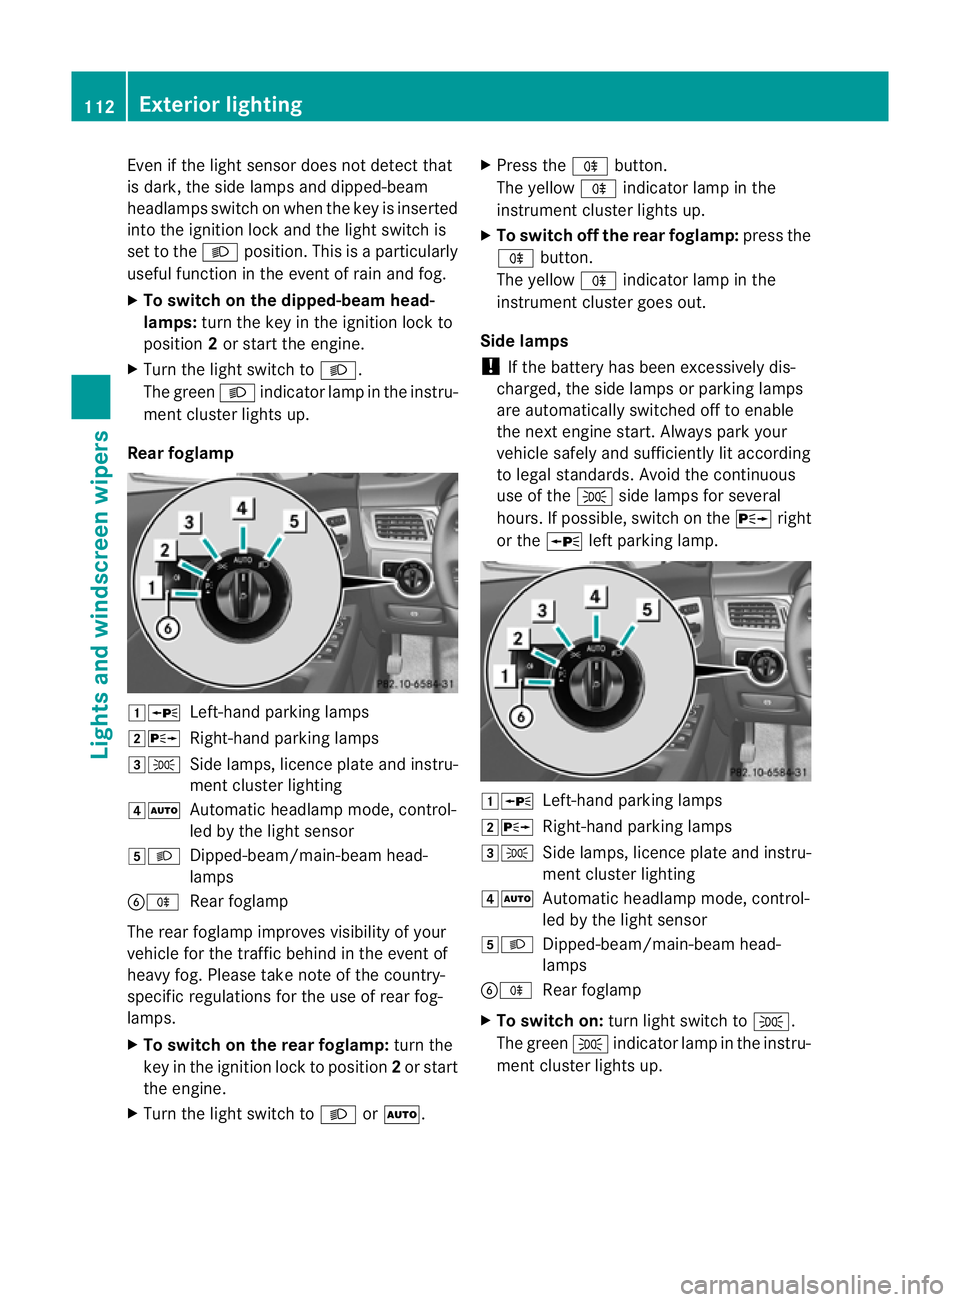
Rear foglamp 1W
Left-hand parking lamps
2X Right-hand parking lamps
3T Side lamps, licence plate and instru-
ment cluster lighting
4Ã Automatic headlamp mode, control-
led by the light sensor
5L Dipped-beam/main-beam head-
lamps
BR Rear foglamp
The rear foglamp improves visibility of your
vehicle for the traffic behind in the event of
heavy fog. Please take note of the country-
specific regulations for the use of rear fog-
lamps.
X To switch on the rear foglamp: turn the
key in the ignition lock to position 2or start
the engine.
X Turn the light switch to LorÃ. X
Press the Rbutton.
The yellow Rindicator lamp in the
instrumentc luster lightsup.
X To switch off th erear foglamp: pressthe
R button.
The yellow Rindicator lamp in the
instrumen tcluster goes out.
Side lamps
! If the battery has been excessively dis-
charged, the side lamps or parking lamps
are automatically switched off to enable
the nex tengine start. Alway sparky our
vehicl esafelya nd sufficiently li taccording
to lega lstandards. Avoi dthe continuous
us eoft heT sidelam ps for several
hours. If possible ,switch on the Xright
or the Wleft parking lamp. 1W
Left-hand parking lamps
2X Right-hand parking lamps
3T Sidelam ps,licence plate and instru-
ment cluster lighting
4Ã Automati cheadlamp mode, control-
led by the light sensor
5L Dipped-beam/main-beam head-
lamps
BR Rear foglamp
X To switch on: turn light switch to T.
The green Tindicator lamp in the instru-
ment cluster lights up. 112
Exterior lightingLights and windscreen wipers
Page 121 of 373
Interior lighting
Overview of interior lighting
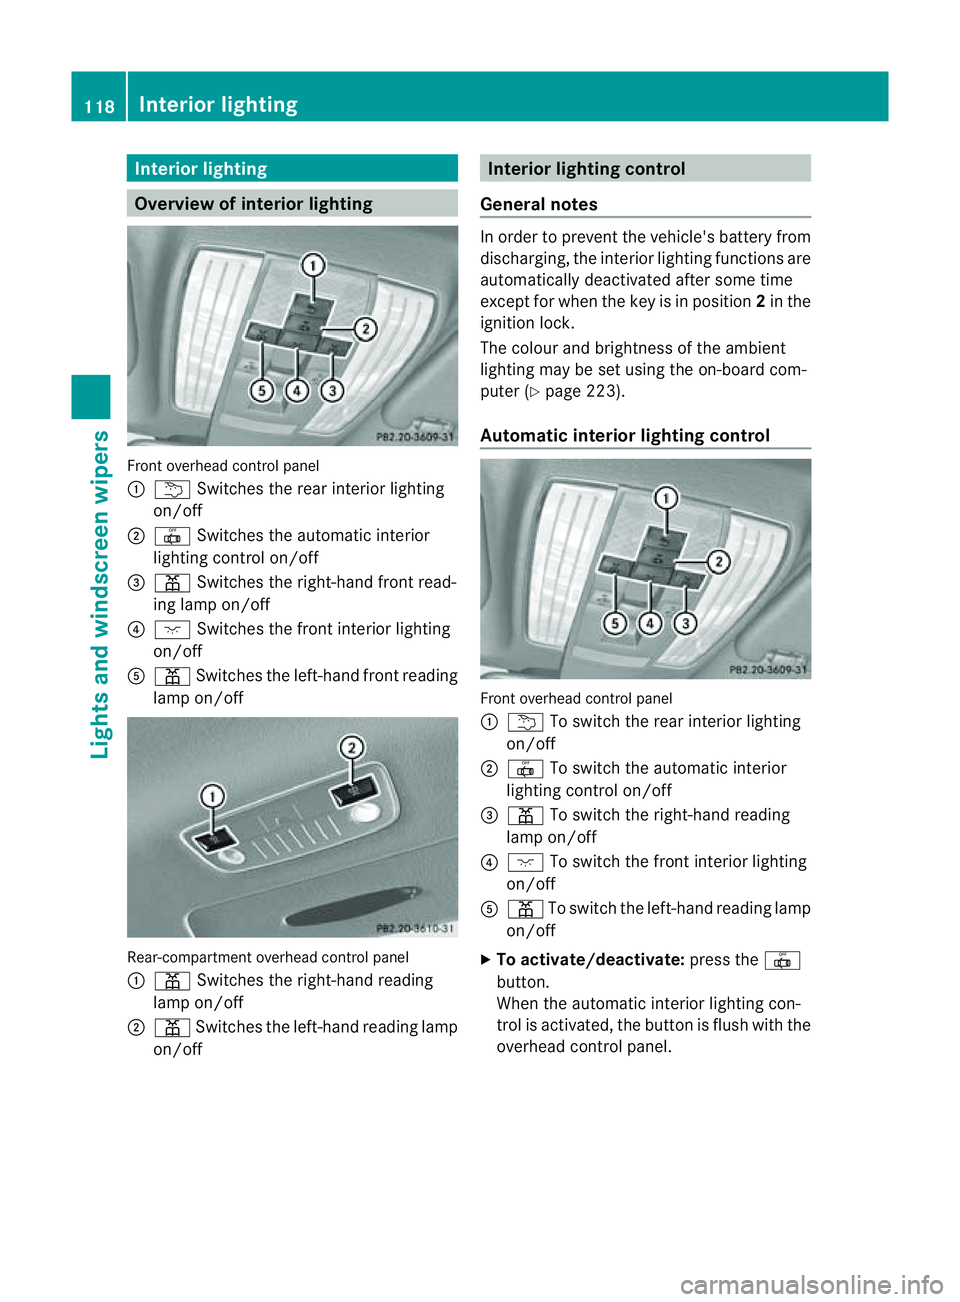
Fron
toverhead control panel
: u Switches th erear interio rlighting
on/off
; | Switches the automatic interior
lighting control on/off
= p Switches the right-han dfront read-
ing lamp on/off
? c Switches the front interior lighting
on/off
A p Switches the left-han dfront reading
lamp on/off Rear-compartment overhead control panel
:
p Switches the right-han dreading
lamp on/off
; p Switches the left-han dreadin glamp
on/off Interior lighting control
General notes In order to prevent the vehicle's battery from
discharging, the interior lighting function
sare
automatically deactivated after some time
except for when the key is in position 2in the
ignition lock.
The colour and brightnes softhe ambient
lighting may be set using the on-board com-
puter (Y page 223).
Automatic interior lighting control Front overhead control panel
:
u To switc hthe rear interior lighting
on/off
; | To switc hthe automatic interior
lighting control on/off
= p To switc hthe right-han dreading
lamp on/off
? c To switch the fron tinterior lighting
on/off
A p To switch the left-hand reading lamp
on/off
X To activate/deactivate: press the|
button.
When the automatic interior lighting con-
trol is activated, the button is flush with the
overhead control panel. 118
Interior lightingLights and windscreen wipers
Page 134 of 373
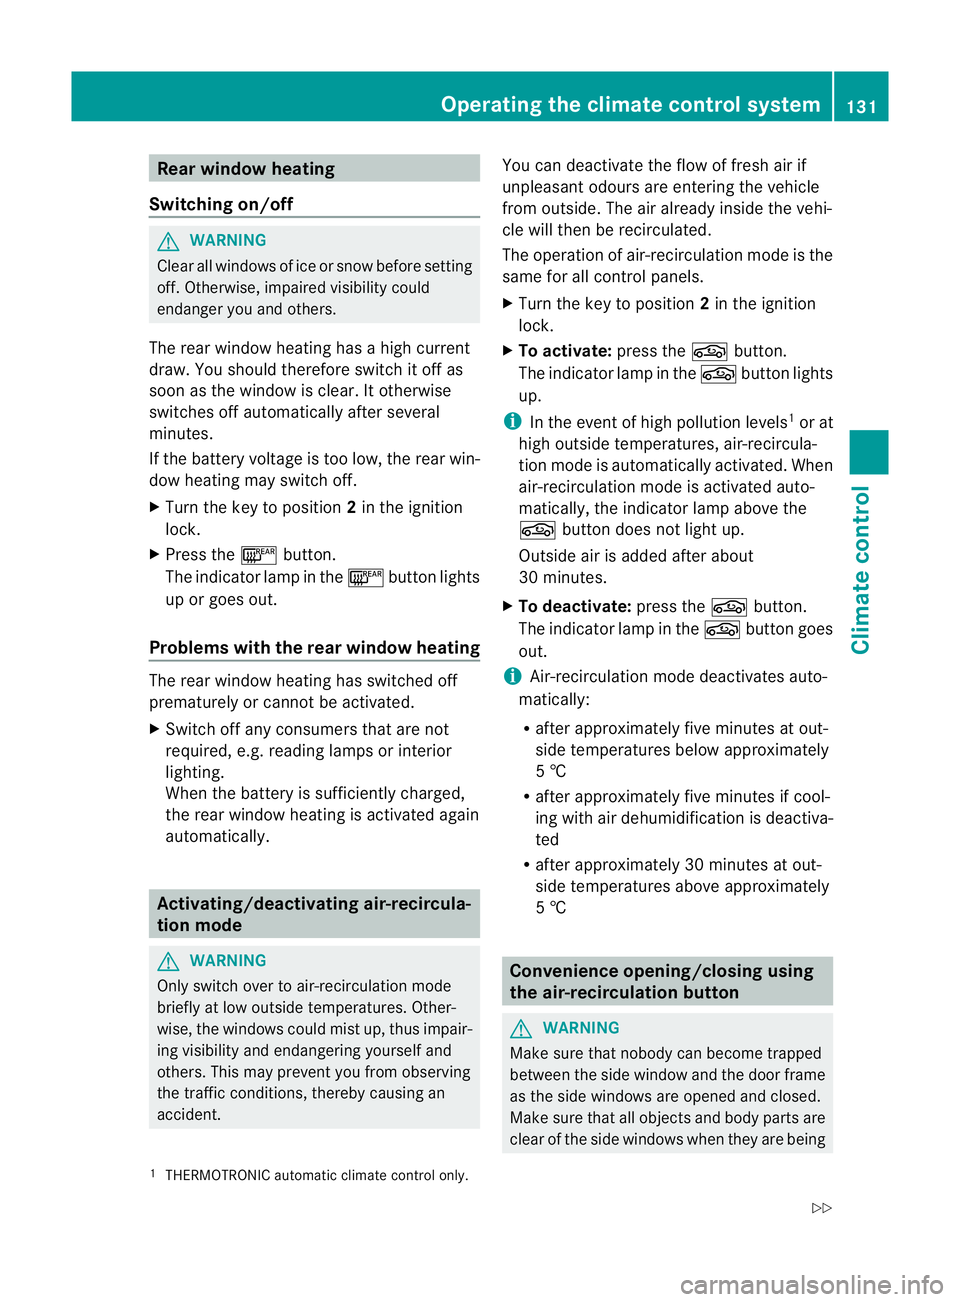
Rear windo
wheating
Switchin gon/off G
WARNING
Clea rall windows of ice or sno wbefor esetting
off .O therwise, impaire dvisibility could
endanger yo uand others.
Th er earw indow heatin ghasah igh current
draw. You should therefore switc hitoff as
soon as the window is clear .Itotherwise
switches off automaticall yafter several
minutes.
If the battery voltag eistoo low, the rea rwin-
dow heatin gmay switc hoff.
X Turn the key to position 2in the ignition
lock.
X Press the ¤button.
The indicator lamp in the ¤button lights
up or goes out.
Problems with th erearw indow heating The rear window heatin
ghas switched off
prematurely or cannot be activated.
X Switch off any consumers that are not
required, e.g. readin glamps or interior
lighting.
When the battery is sufficiently charged,
the rear window heatin gisactivate dagain
automatically. Activating/deactivating air-recircula-
tion mode G
WARNING
Only switc hover to air-recirculatio nmode
briefly at low outside temperatures. Other-
wise, the windows could mist up, thus impair-
ing visibility and endangering yourself and
others. This may prevent you from observing
the traffic conditions, thereby causing an
accident. You can deactivate the flow of fresh air if
unpleasant odours are entering the vehicle
from outside. The air already inside the vehi-
cle will then be recirculated.
The operation of air-recirculation mode is the
same for all control panels.
X
Turn the key to position 2in the ignition
lock.
X To activate: press thegbutton.
The indicator lamp in the gbutton lights
up.
i In the event of high pollution levels 1
or at
high outside temperatures, air-recircula-
tion mode is automatically activated. When
air-recirculation mode is activated auto-
matically, the indicator lamp above the
g button does not light up.
Outside air is added after about
30 minutes.
X To deactivate: press thegbutton.
The indicator lamp in the gbutton goes
out.
i Air-recirculation mode deactivates auto-
matically:
R after approximately five minutes at out-
side temperatures below approximately
5†
R after approximately five minutes if cool-
ing with air dehumidification is deactiva-
ted
R after approximately 30 minutes at out-
side temperatures above approximately
5† Convenience opening/closing using
the air-recirculation button
G
WARNING
Make sure that nobody can become trapped
between the side window and the door frame
as the side windows are opened and closed.
Make sure that all object sand body parts are
clear of the side windows when they are being
1 THERMOTRONIC automatic climate contro lonly. Operatin
gthe climate contro lsystem
131Climate control
Z
Page 135 of 373
opened or closed. You or the object
scould be
drawn in or become trapped between the side
window and the door frame as the window
moves. If there is arisk of entrapment, oper-
ate the Wswitchtom ove the side window
in the opposit edirection.
Make sure that nobody can becom etrapped
as the slidin gsunroof/panorama slidin gsun-
roof is opened and closed. If there is arisk of
entrapment, operat ethe 3 switchtom ove
the slidin gsunroof/panorama slidin gsunroof
in the opposit edirection.
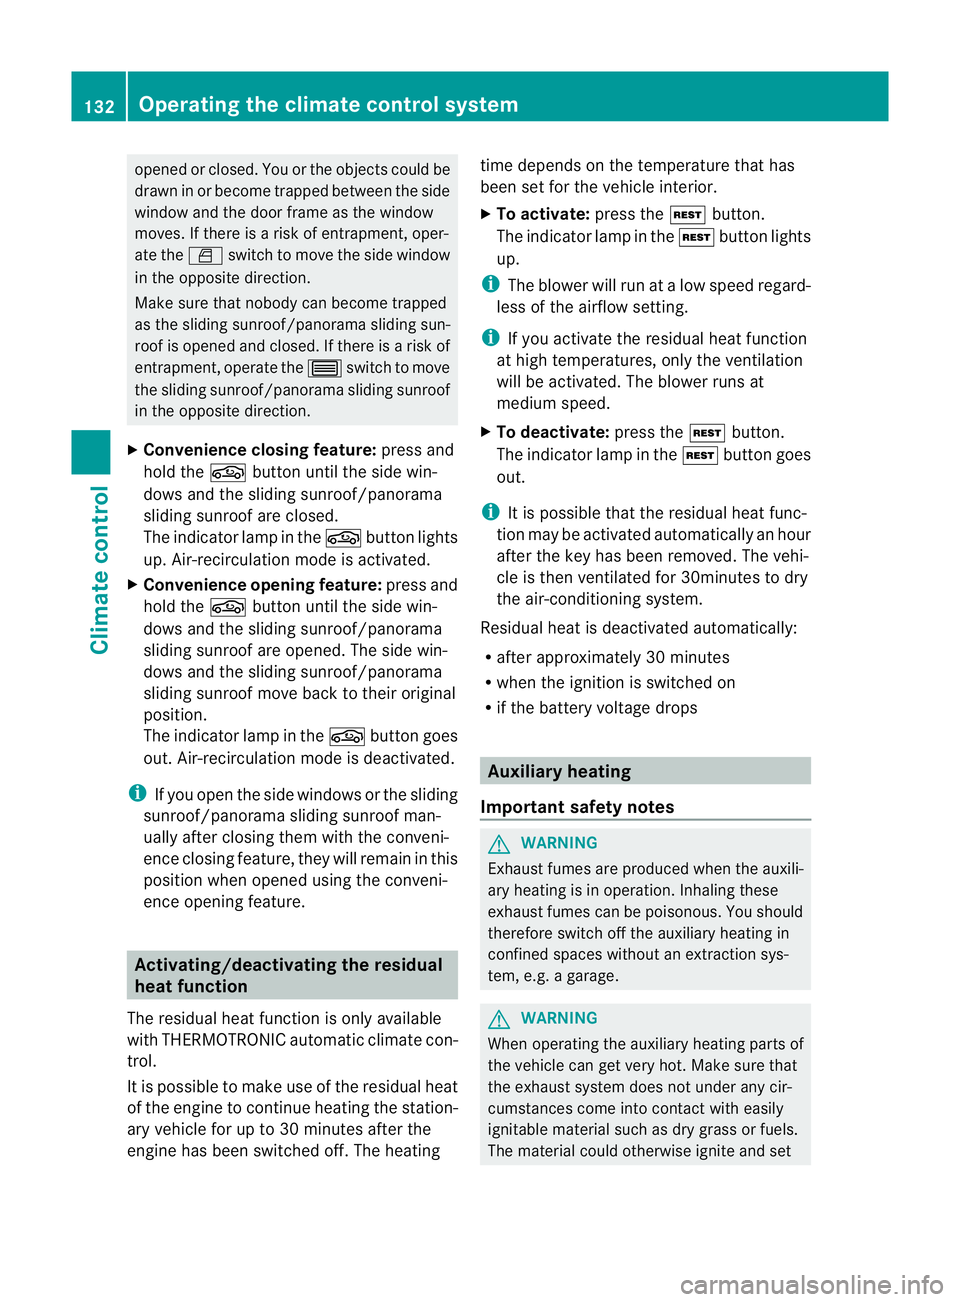
X Convenience closing feature: press and
hold the gbutton until the side win-
dows and the sliding sunroof/panorama
sliding sunroof are closed.
The indicator lamp in the gbutton lights
up. Air-recirculation mode is activated.
X Convenience opening feature: press and
hold the gbutton until the side win-
dows and the sliding sunroof/panorama
sliding sunroof are opened. The side win-
dows and the sliding sunroof/panorama
sliding sunroof move back to their original
position.
The indicator lamp in the gbutton goes
out. Air-recirculation mode is deactivated.
i If you open the side windows or the sliding
sunroof/panorama sliding sunroof man-
ually after closing the mwith the conveni-
enc eclosing feature, the ywill remain in this
position when opened using the conveni-
enc eopening feature. Activating/deactivating th
eresidual
heat function
The residual heat function is only available
with THERMOTRONI Cautomatic climate con-
trol.
It is possible to mak euse of the residual heat
of the engine to continue heatin gthe station-
ary vehicle for up to 30 minutes after the
engine has been switched off .The heating time depends on the temperature that has
been set for the vehicle interior.
X
To activate: press theÌbutton.
The indicator lamp in the Ìbutton lights
up.
i The blower will run at alow speed regard-
less of the airflow setting.
i If you activate the residual heat function
at high temperatures, only the ventilation
will be activated. The blower runs at
medium speed.
X To deactivate: press theÌbutton.
The indicator lamp in the Ìbutton goes
out.
i It is possible that the residual heat func-
tion may be activated automatically an hour
after the key has been removed. The vehi-
cle is then ventilated for 30minutes to dry
the air-conditioning system.
Residual heat is deactivated automatically:
R after approximately 30 minutes
R when the ignition is switched on
R if the battery voltage drops Auxiliary heating
Important safety notes G
WARNING
Exhaust fumes are produced when the auxili-
ary heating is in operation. Inhaling these
exhaust fumes can be poisonous. You should
therefore switch off the auxiliary heating in
confined spaces without an extraction sys-
tem, e.g. agarage. G
WARNING
When operating the auxiliary heating parts of
the vehicle can get very hot. Make sure that
the exhaust system does not under any cir-
cumstances come into contact with easily
ignitable material such as dry grass or fuels.
The material could otherwise ignite and set 132
Operating the climate control systemClimatec
ontrol
Page 136 of 373
the vehicl
ealigh t. Choose your parking spot
accordingly.
Operating the auxiliary heating is thu spro-
hibited at filling stations or when your vehicle
is being refuelled .You must therefor eswitch
off the auxiliary heating at filling stations.
! Operating the auxiliary heating/ventila-
tion draws on the vehicle battery. After you
have heated or ventilated the vehicle a
maximum of two times, drive for alonger
distance.
i Switch the auxiliary heating on regularly
once amonthf or about ten minutes.
The auxiliary heating heats the air in the
passenger compartment to the selected tem-
perature. It does not use the heat of the run-
ning engine to do this. The auxiliary heating
is operated directly using the vehicle's fuel.
For this reason, the tank content must be at
least at reserve fuel level to ensure that the
auxiliary heating functions.
The auxiliary heating/ventilation automati-
cally adjusts to changes in temperature and
weather conditions. For this reason, the aux-
iliary heating could switch from ventilation
mode to heating mode or from heating mode
to ventilation mode.
The auxiliary heating switches off automati-
cally after 50 minutes. This time limit can be
altered. To do this, visit aqualified specialist
workshop.
You cannot use the auxiliary ventilation to
cool the vehicle interior to atemperature
lower than the outside temperature.
Before switching on X
Turn the key to position 2in the ignition
lock.
X Set the temperature.
The auxiliary heating/ventilation can be acti-
vated even when climate control is set to
manual. Optimum comfor tcan be attained
when the system is set to automatic mode.
Set the temperature to 22 †. The auxiliary heating/ventilation can be acti-
vated or deactivated using the remote control
or the button on the centre console.
The on-board computer can be used to spec-
ify up to three departure times, one of which
may be preselected (Y page 225).
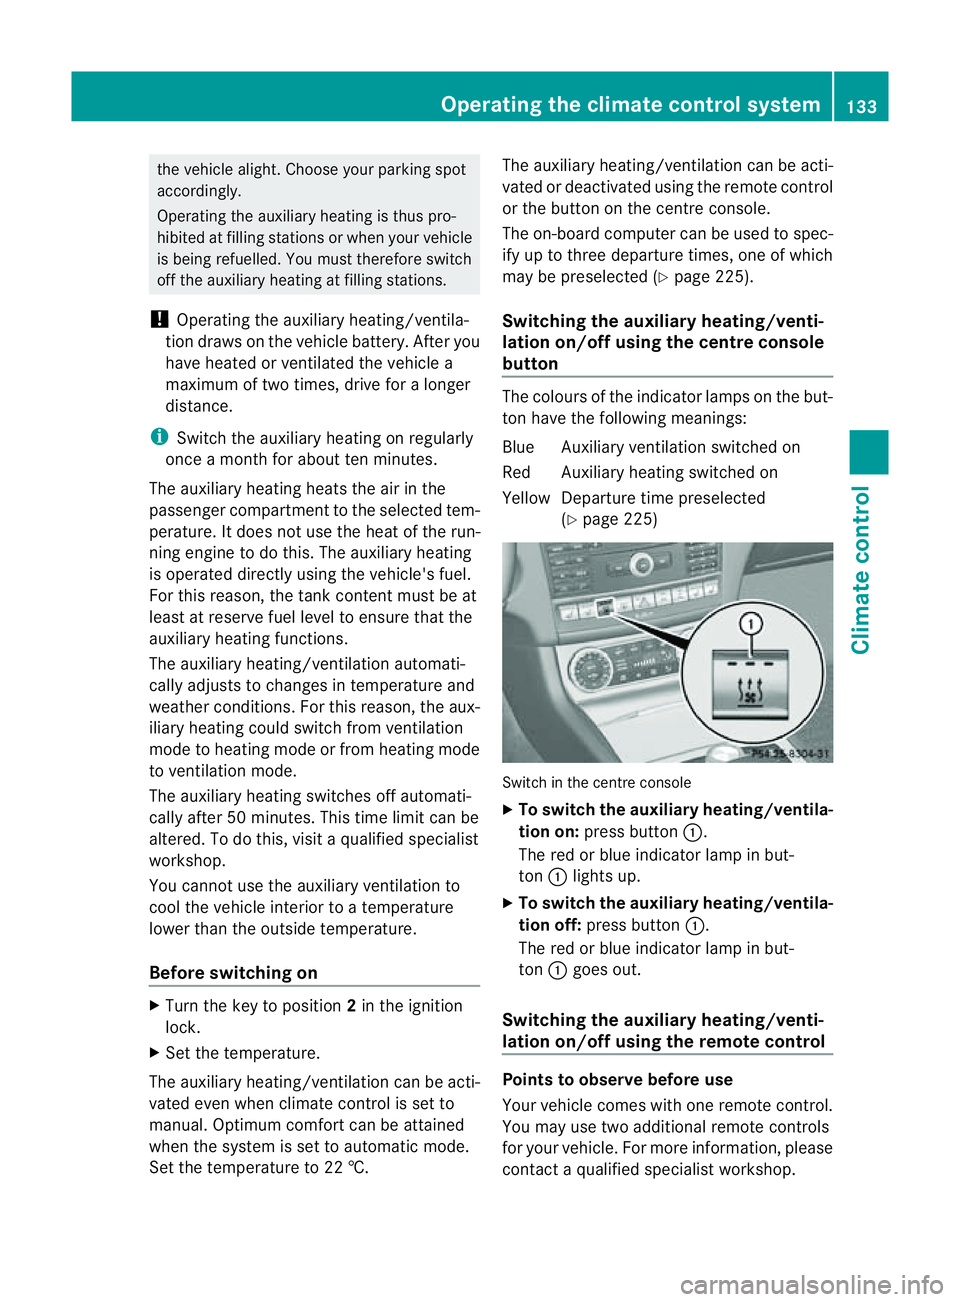
Switching the auxiliary heating/venti-
lation on/off using the centre console
button The colours of the indicator lamps on the but-
ton have the following meanings:
Blue Auxiliary ventilation switched on
Red Auxiliary heating switched on
Yellow Departure time preselected
(Ypage 225) Switch in the centre console
X
To switch the auxiliary heating/ventila-
tion on: press button :.
The red or blue indicator lamp in but-
ton :lights up.
X To switch the auxiliary heating/ventila-
tion off: press button :.
The red or blue indicator lamp in but-
ton :goes out.
Switching the auxiliary heating/venti-
lation on/off using the remotec ontrol Points to observe before use
Your vehicle comes with one remote control.
You may use two additional remote controls
for your vehicle. For more information, please
contact
aqualified specialist workshop. Operating the climate control system
133Climate control Z
Page 150 of 373
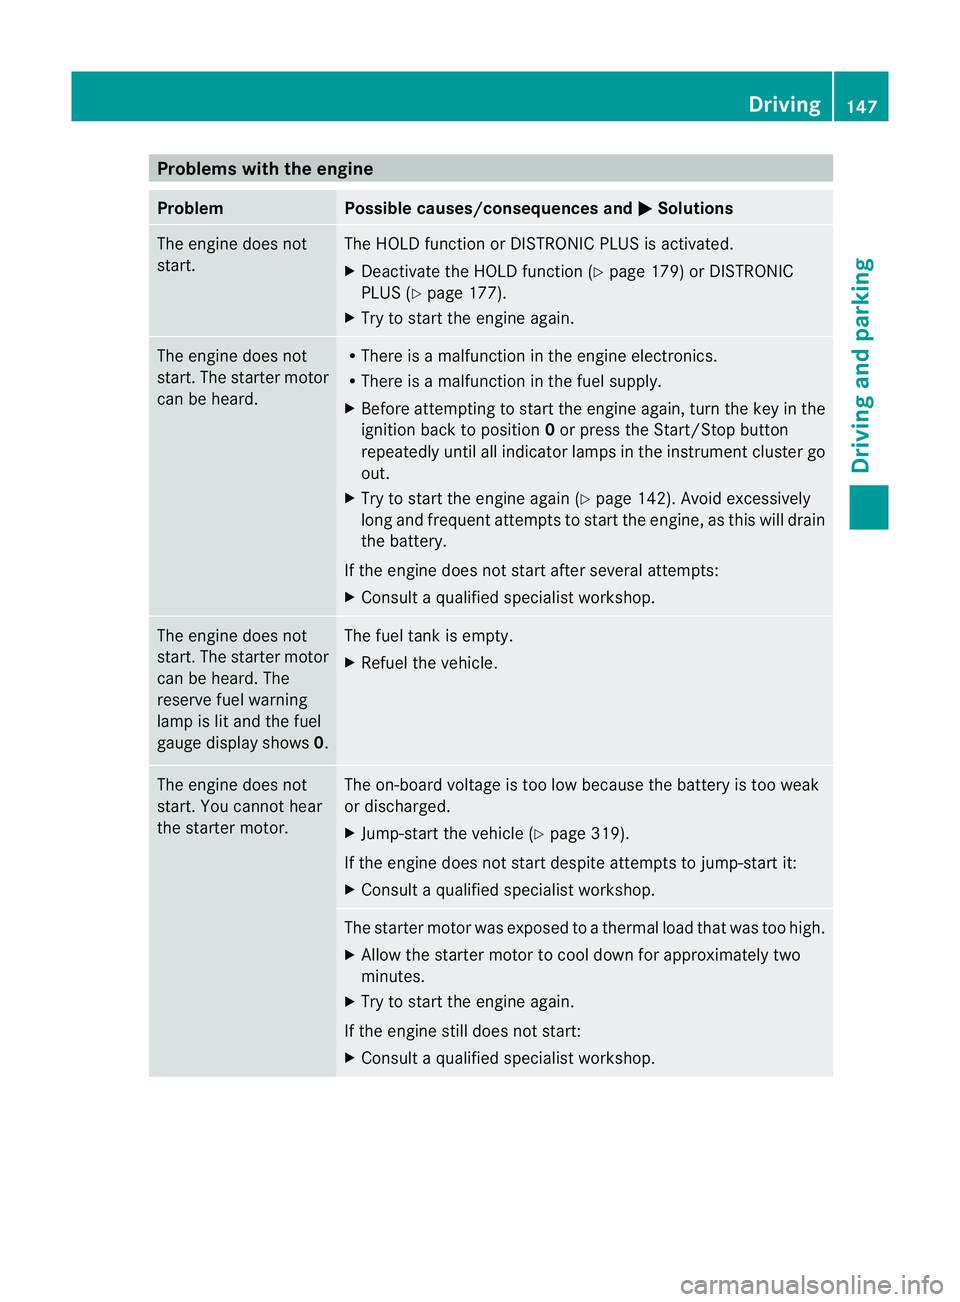
Problems with the engine
Problem Possible causes/consequences and
M Solutions
The engine does not
start. The HOLD function or DISTRONIC PLUS is activated.
X
Deactivat ethe HOLD function (Y page 179) or DISTRONIC
PLUS (Y page 177).
X Try to start the engine again. The engine does not
start. The starter motor
can be heard. R
There is amalfunction in the engine electronics.
R There is amalfunction in the fuel supply.
X Before attempting to start the engine again, turn the key in the
ignition back to position 0or press the Start/Stop button
repeatedly until all indicator lamps in the instrumen tcluster go
out.
X Try to start the engine again (Y page 142). Avoid excessively
long and frequent attempt stostart the engine, as this will drain
the battery.
If the engine does not start after several attempts:
X Consult aqualified specialist workshop. The engine does not
start
.The starter motor
can be heard. The
reserve fuel warning
lamp is lit and the fuel
gauge displays hows0. The fuel tank is empty.
X
Refuel the vehicle. The engine does not
start. You cannot hear
the starter motor. The on-board voltage is too low because the battery is too weak
or discharged.
X
Jump-start the vehicle (Y page 319).
If the engine does not start despite attemptstoj ump-start it:
X Consult aqualified specialist workshop. The starter motor was exposed to
athermal load that was too high.
X Allow the starter motor to cool down for approximately two
minutes.
X Try to start the engine again.
If the engine still does not start:
X Consult aqualified specialist workshop. Driving
147Driving and parking Z