Page 99 of 454
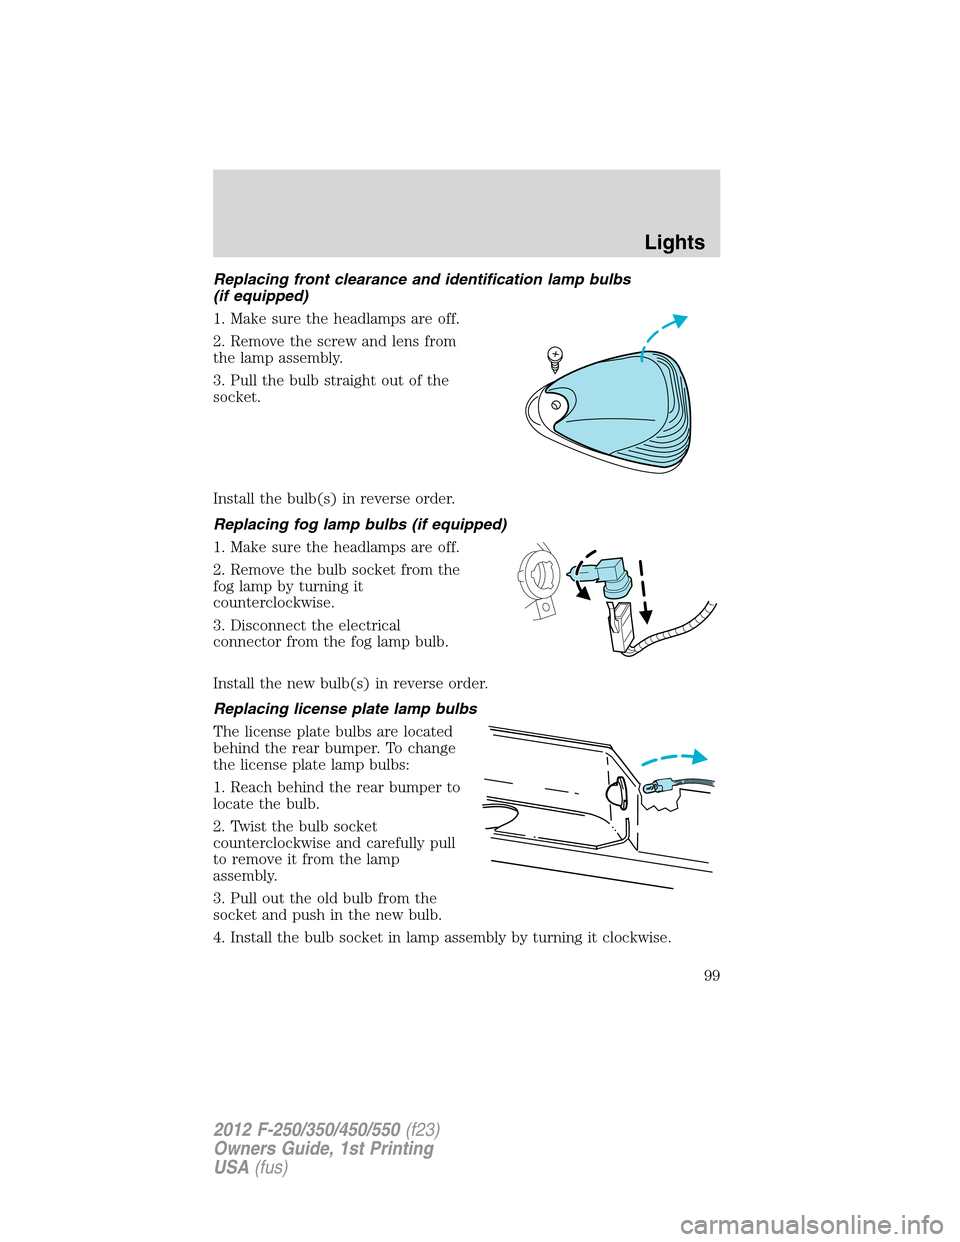
Replacing front clearance and identification lamp bulbs
(if equipped)
1. Make sure the headlamps are off.
2. Remove the screw and lens from
the lamp assembly.
3. Pull the bulb straight out of the
socket.
Install the bulb(s) in reverse order.
Replacing fog lamp bulbs (if equipped)
1. Make sure the headlamps are off.
2. Remove the bulb socket from the
fog lamp by turning it
counterclockwise.
3. Disconnect the electrical
connector from the fog lamp bulb.
Install the new bulb(s) in reverse order.
Replacing license plate lamp bulbs
The license plate bulbs are located
behind the rear bumper. To change
the license plate lamp bulbs:
1. Reach behind the rear bumper to
locate the bulb.
2. Twist the bulb socket
counterclockwise and carefully pull
to remove it from the lamp
assembly.
3. Pull out the old bulb from the
socket and push in the new bulb.
4. Install the bulb socket in lamp assembly by turning it clockwise.
Lights
99
2012 F-250/350/450/550(f23)
Owners Guide, 1st Printing
USA(fus)
Page 101 of 454
TILT/TELESCOPE STEERING WHEEL
To adjust the steering wheel:
1. Pull the lever down to unlock the
steering column.
2. While the lever is in the down
position, move the steering wheel
up or down and in or out until you
find the desired position.
3. While holding the steering wheel
in place, pull the lever up to its
original position to lock the steering
column.
WARNING:Never adjust the steering wheel when the vehicle is
moving.
ILLUMINATED VISOR MIRROR (IF EQUIPPED)
Lift the mirror cover to turn on the
visor mirror lamps.
Slide-on-rod feature (if
equipped)
Rotate the visor towards the side
window and extend it rearward for
additional sunlight coverage.
Note:To stow the visor back into
the headliner, visor must be
retracted before moving it back
towards the windshield.
Driver Controls
101
2012 F-250/350/450/550(f23)
Owners Guide, 1st Printing
USA(fus)
Page 102 of 454
OVERHEAD CONSOLE (IF EQUIPPED)
The appearance of your vehicle’s overhead console will vary according to
your option package.
Storage compartment (if equipped)
Press the release tab on the rear
edge of the bin door to open the
storage compartment. The door will
open to the full open position.
The storage compartment may be
used to secure sunglasses or a
similar object.
CENTER CONSOLE (IF EQUIPPED)
Your vehicle may be equipped with a variety of console features. These
include:
•Locking storage compartment
with hanging file folder supports
•Storage for laptop computer,
binder or book between the
hanging file folder support and
the passenger side of the console
bin
•One 12V power point inside the
storage compartment and one on
the rear of the console
•110V AC power point outlet on the rear of the console
•Rear cupholders
Driver Controls
102
2012 F-250/350/450/550(f23)
Owners Guide, 1st Printing
USA(fus)
Page 107 of 454
Note:This feature can be disabled or enabled by your authorized dealer
or through the message center. Refer toMessage centerin the
Instrument Clusterchapter.
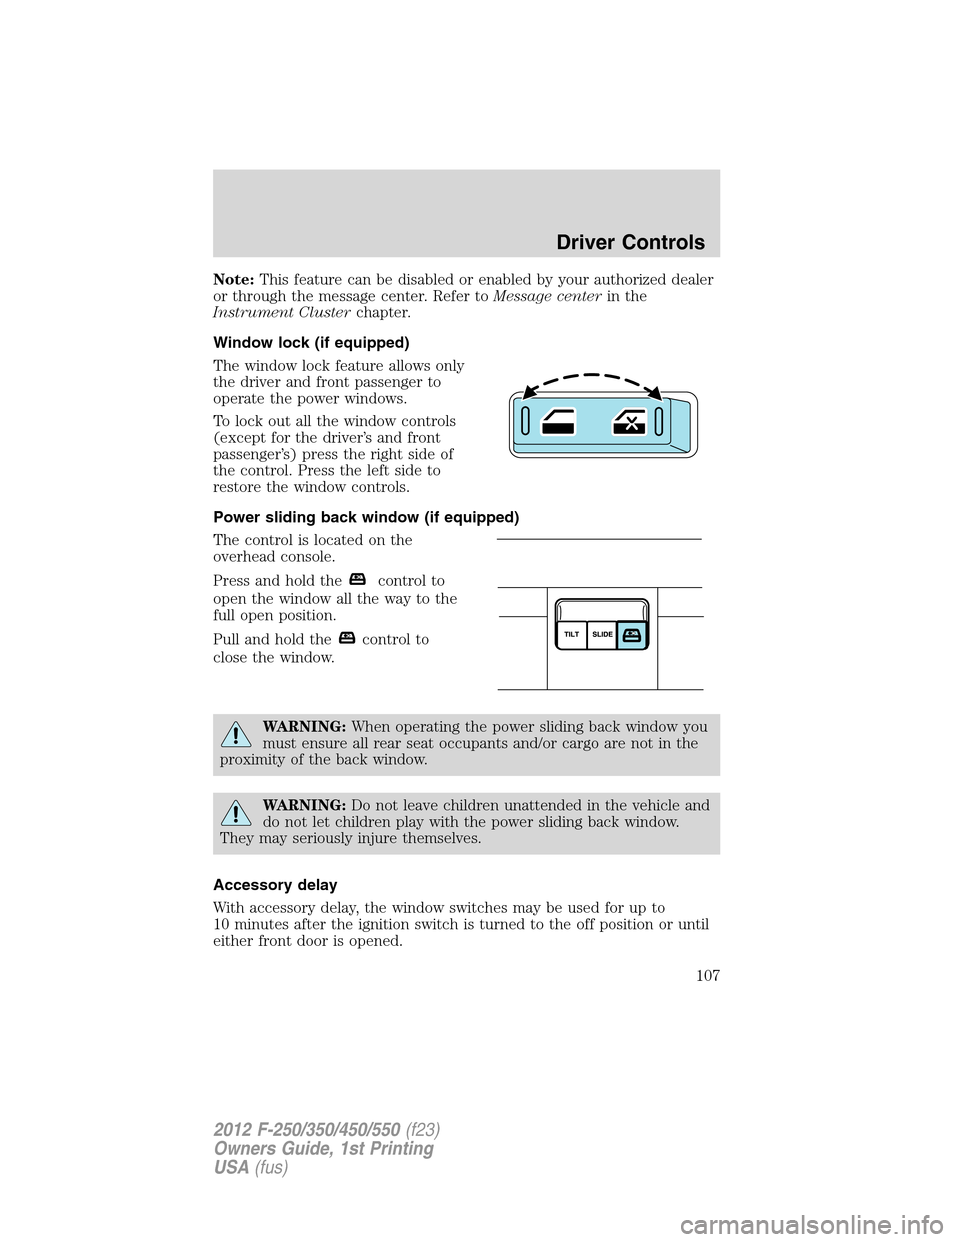
Window lock (if equipped)
The window lock feature allows only
the driver and front passenger to
operate the power windows.
To lock out all the window controls
(except for the driver’s and front
passenger’s) press the right side of
the control. Press the left side to
restore the window controls.
Power sliding back window (if equipped)
The control is located on the
overhead console.
Press and hold the
control to
open the window all the way to the
full open position.
Pull and hold the
control to
close the window.
WARNING:When operating the power sliding back window you
must ensure all rear seat occupants and/or cargo are not in the
proximity of the back window.
WARNING:Do not leave children unattended in the vehicle and
do not let children play with the power sliding back window.
They may seriously injure themselves.
Accessory delay
With accessory delay, the window switches may be used for up to
10 minutes after the ignition switch is turned to the off position or until
either front door is opened.
Driver Controls
107
2012 F-250/350/450/550(f23)
Owners Guide, 1st Printing
USA(fus)
Page 108 of 454

INTERIOR MIRROR
The interior rearview mirror has two pivot points on the support arm
which lets you adjust the mirror up or down and from side to side.
WARNING:Do not adjust the mirror while the vehicle is in
motion.
Automatic dimming interior rear view mirror (if equipped)
The interior rear view mirror has an auto-dimming function. The
electronic day/night mirror will change from the normal (high reflective)
state to the non-glare (darkened) state when bright lights (glare) reach
the mirror. When the mirror detects bright light from behind the vehicle,
it will automatically adjust (darken) to minimize glare.
The mirror will automatically return to the normal state whenever the
vehicle is placed in R (Reverse) to ensure a bright clear view when
backing up.
Do not block the sensors on the front and back of the interior
rear view mirror since this may impair proper mirror
performance.
Note:A rear center passenger and/or raised rear center headrest (if
equipped) may also block the light from reaching the sensor.
Do not clean the housing or glass of any mirror with harsh
abrasives, fuel or other petroleum-based cleaning products.
Note:If equipped with a rearview camera system, a video image will
display in the mirror or the navigation system display (if equipped) when
the vehicle is put in R (Reverse). As you shift into any other gear from R
(Reverse), the image will remain for a few seconds and then turn off.
Refer toRearview camera systemin theDrivingchapter.
Driver Controls
108
2012 F-250/350/450/550(f23)
Owners Guide, 1st Printing
USA(fus)
Page 109 of 454
EXTERIOR MIRRORS
Power side view mirrors (if equipped)
WARNING:Do not adjust the mirror while the vehicle is in
motion.
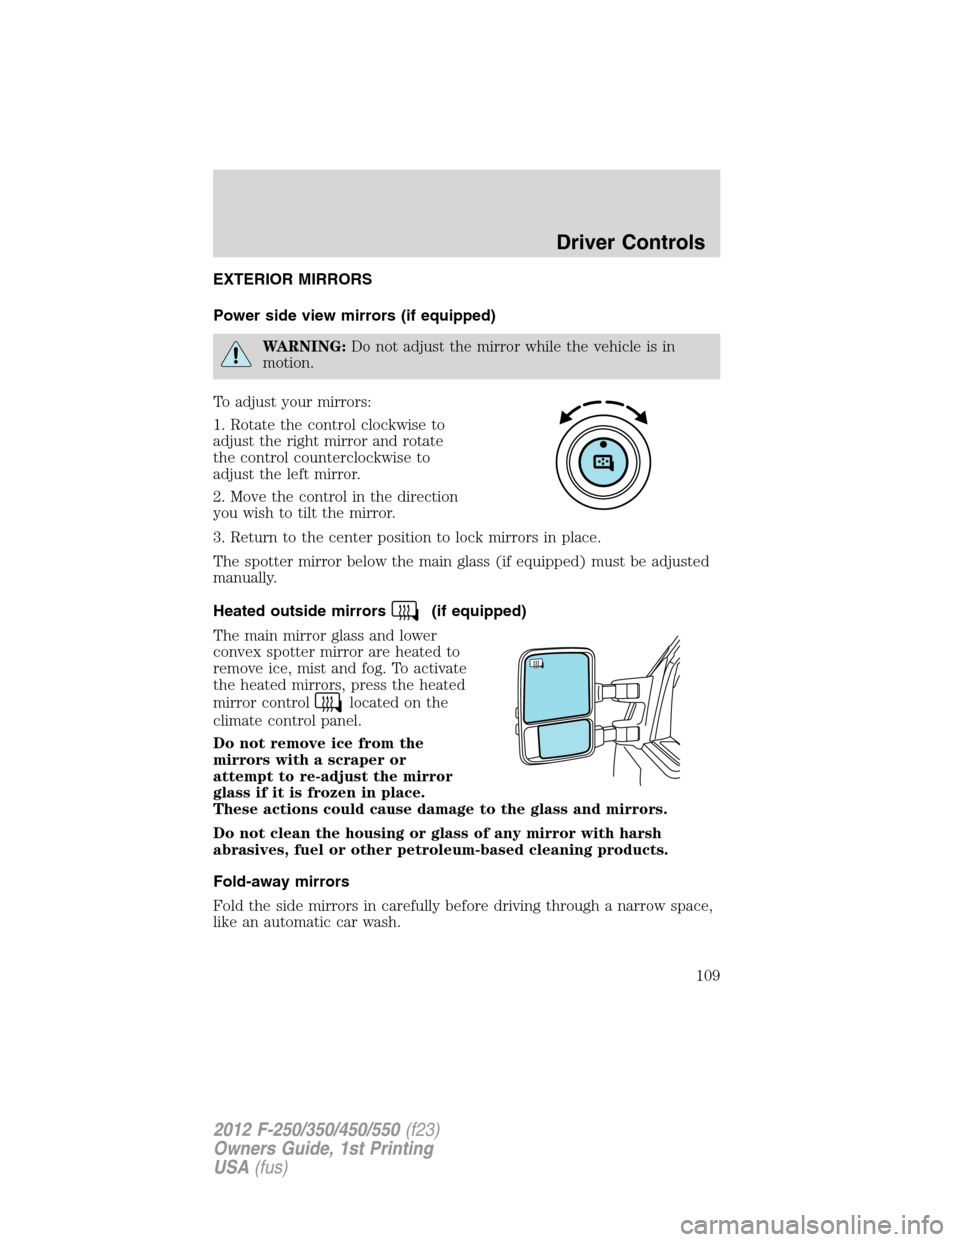
To adjust your mirrors:
1. Rotate the control clockwise to
adjust the right mirror and rotate
the control counterclockwise to
adjust the left mirror.
2. Move the control in the direction
you wish to tilt the mirror.
3. Return to the center position to lock mirrors in place.
The spotter mirror below the main glass (if equipped) must be adjusted
manually.
Heated outside mirrors
(if equipped)
The main mirror glass and lower
convex spotter mirror are heated to
remove ice, mist and fog. To activate
the heated mirrors, press the heated
mirror control
located on the
climate control panel.
Do not remove ice from the
mirrors with a scraper or
attempt to re-adjust the mirror
glass if it is frozen in place.
These actions could cause damage to the glass and mirrors.
Do not clean the housing or glass of any mirror with harsh
abrasives, fuel or other petroleum-based cleaning products.
Fold-away mirrors
Fold the side mirrors in carefully before driving through a narrow space,
like an automatic car wash.
Driver Controls
109
2012 F-250/350/450/550(f23)
Owners Guide, 1st Printing
USA(fus)
Page 127 of 454
WARNING (Continued)
•Failure to properly follow floor mat installation or attachment
instructions can potentially cause interference with pedal operation
causing loss of control of vehicle.
•To install floor mats, position the floor mat so that the eyelet is over
the retention post and press down to lock in.
•To remove the floor mat, reverse the installation procedure.
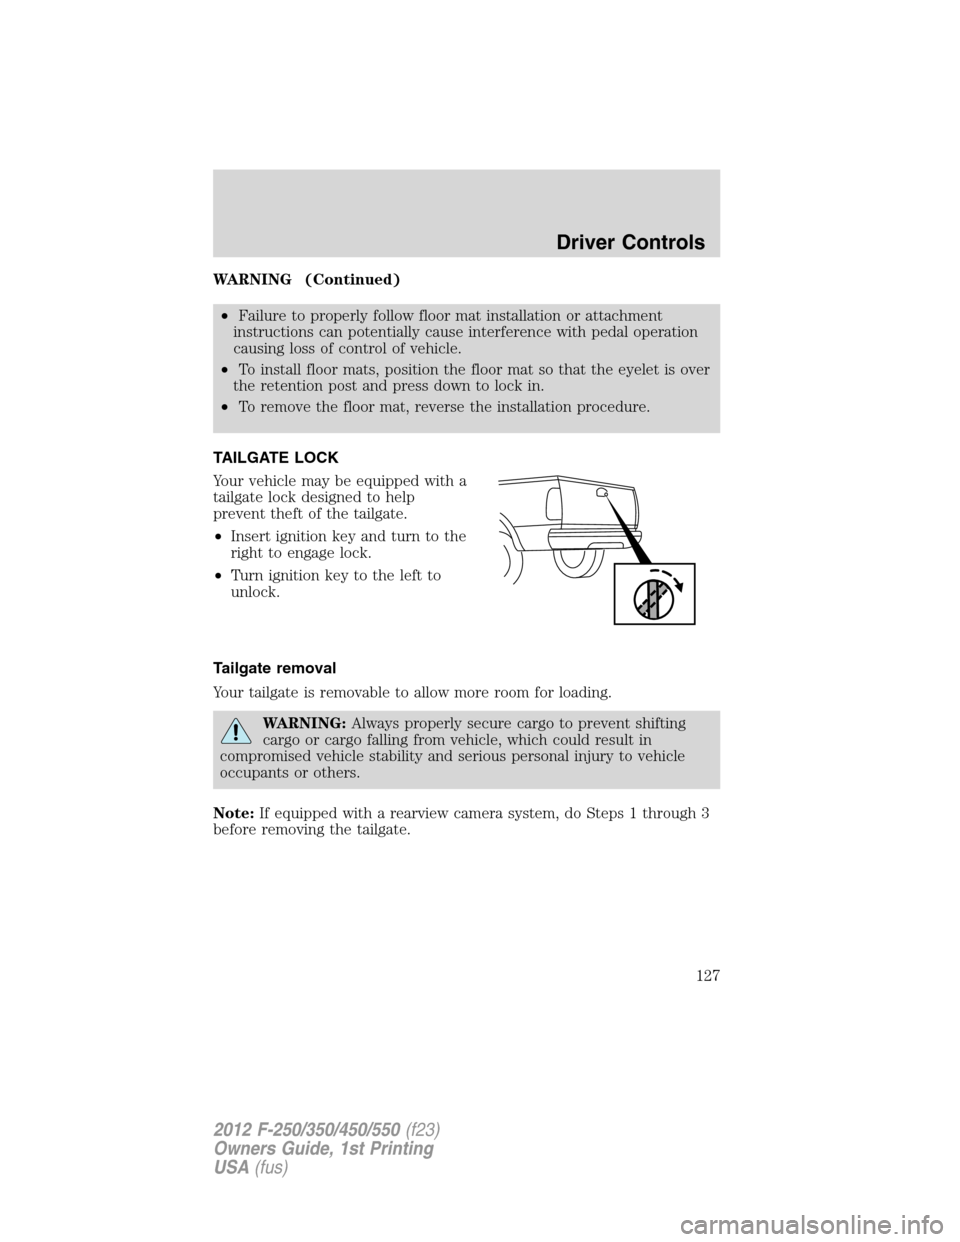
TAILGATE LOCK
Your vehicle may be equipped with a
tailgate lock designed to help
prevent theft of the tailgate.
•Insert ignition key and turn to the
right to engage lock.
•Turn ignition key to the left to
unlock.
Tailgate removal
Your tailgate is removable to allow more room for loading.
WARNING:Always properly secure cargo to prevent shifting
cargo or cargo falling from vehicle, which could result in
compromised vehicle stability and serious personal injury to vehicle
occupants or others.
Note:If equipped with a rearview camera system, do Steps 1 through 3
before removing the tailgate.
Driver Controls
127
2012 F-250/350/450/550(f23)
Owners Guide, 1st Printing
USA(fus)
Page 129 of 454
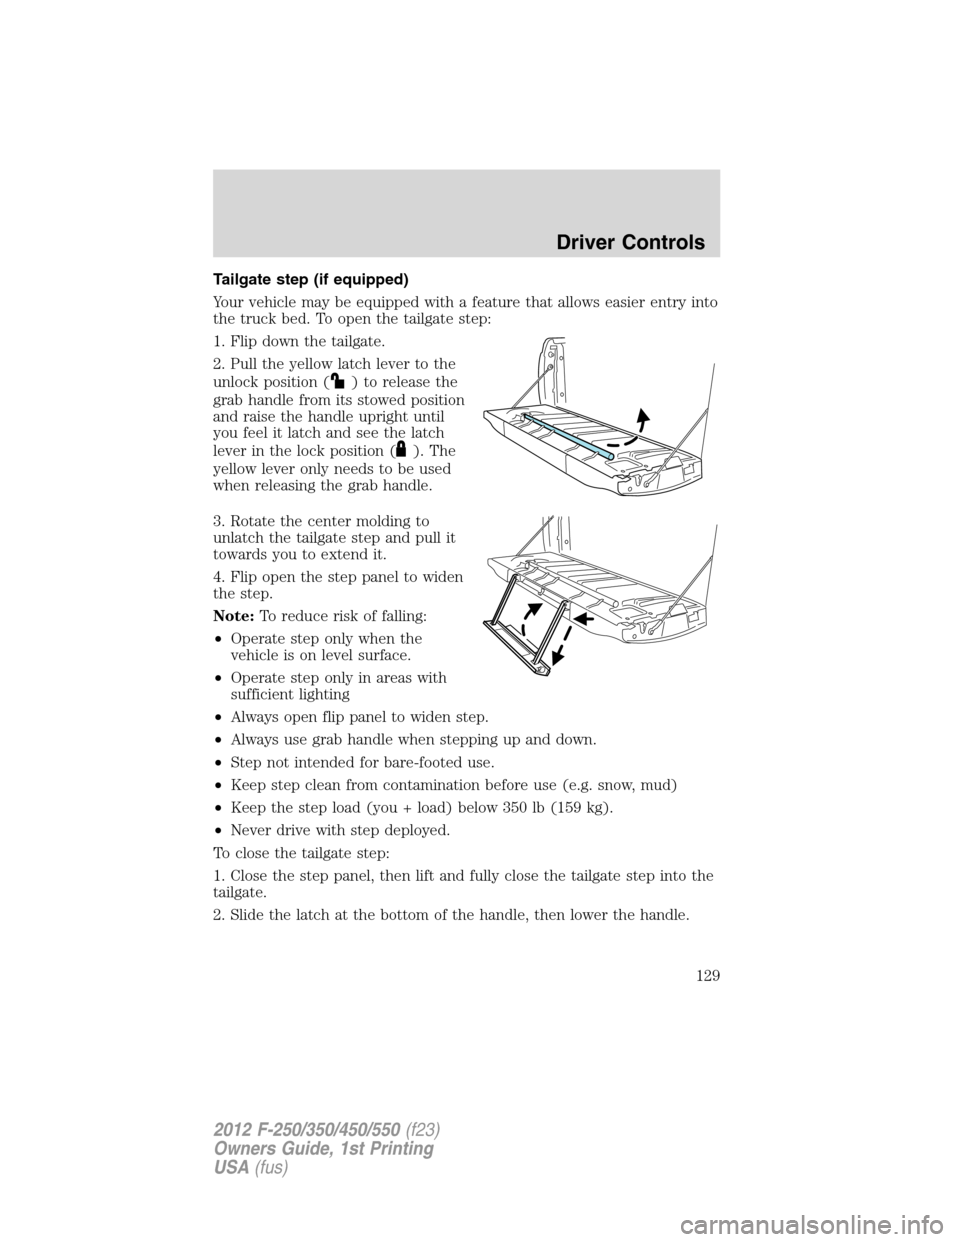
Tailgate step (if equipped)
Your vehicle may be equipped with a feature that allows easier entry into
the truck bed. To open the tailgate step:
1. Flip down the tailgate.
2. Pull the yellow latch lever to the
unlock position (
) to release the
grab handle from its stowed position
and raise the handle upright until
you feel it latch and see the latch
lever in the lock position (
). The
yellow lever only needs to be used
when releasing the grab handle.
3. Rotate the center molding to
unlatch the tailgate step and pull it
towards you to extend it.
4. Flip open the step panel to widen
the step.
Note:To reduce risk of falling:
•Operate step only when the
vehicle is on level surface.
•Operate step only in areas with
sufficient lighting
•Always open flip panel to widen step.
•Always use grab handle when stepping up and down.
•Step not intended for bare-footed use.
•Keep step clean from contamination before use (e.g. snow, mud)
•Keep the step load (you + load) below 350 lb (159 kg).
•Never drive with step deployed.
To close the tailgate step:
1. Close the step panel, then lift and fully close the tailgate step into the
tailgate.
2. Slide the latch at the bottom of the handle, then lower the handle.
Driver Controls
129
2012 F-250/350/450/550(f23)
Owners Guide, 1st Printing
USA(fus)