Page 49 of 118

Music library:Press to access all of your saved music. You can choose
to view/play the material in the following ways:
•Play all tracks:Select to play all
tracks saved in the jukebox.
•Playlist:Select to play your own
playlist.
•Play genre:Select to have the
system play only music from a
specific genre.
•Play artist:Select to have the
system play only music by a
specific artist.
•Play album:Select to have the system play only music from a specific
album.
Options:Select to view your other
options:
•Edit Playlists:Select to edit your playlists.
•Edit Music Library Contents:Select to make changes to the
content in your music library.
•Update Album Information from CD Database:Select to update
the residing album information from the Gracenote�database if a
recent software update was performed.
•Hard Disk Drive Information:Select to access the system’s hard
drive disc information such as used/free space and total capacity.
•CD Database Information:Select to access the CD database
information.
Audio features
49
2012 Centerstack(ng1)
Supplement, 1st Printing
Arabic_(LHD)(gc_lhd)
Page 50 of 118
Creating a playlist
1. Press the MEDIA hard button.
2. Select the ‘Jukebox’ tab on the
touchscreen.
3. Select ‘Options’.
4. Select ‘Edit Playlists’.
5. Select which playlist you would
like to create.
6. Select which category you would
like to access from your saved
music.
Audio features
50
2012 Centerstack(ng1)
Supplement, 1st Printing
Arabic_(LHD)(gc_lhd)
Page 51 of 118
For example, say you chose one
saved album from which to select
songs.
7. Select the desired songs and then
press ‘Add’.
The system will show you your
currently selected songs. You can
choose to add more tracks to your
playlist, Sort the Playlist, Delete the
playlist or to edit the name of the
playlist.
8. When you are done making any
adjustment to the playlist, select
‘Edit Name’ to rename your playlist.
You can then access your playlist by
that name.
Audio features
51
2012 Centerstack(ng1)
Supplement, 1st Printing
Arabic_(LHD)(gc_lhd)
Page 52 of 118

Replacing fields when they are listed as ’unknown’
Your navigation system uses the Gracenote�music title and album art
database to recognize and display CD/DVD information. If a disc is
inserted into the system that it does not recognize, it will display
Unknown Artist, Title, and Album on the Jukebox, CD, or DVD screens.
If you have your home screen configured to display the audio, the
unknown labels will also appear on your home screen. You can manually
fill in the labels by doing the following:
1. Press the MEDIA hard button.
2. Select ‘Jukebox’ on the touchscreen.
3. Press ‘Options’.
4. Press ‘Edit Music Library Contents’.
5. Press ‘Artist’ to edit artist names or ‘Tracks’ to edit song titles.
6. Select the track or artist to be edited and use the on-screen keyboard
to type in the correct listing.
7. Press ‘Enter’ to complete the entry.
8. Repeat this procedure for each song title and artist name.
Jukebox voice commands
While listening to the music stored in the jukebox, press
or VOICE
on the steering wheel controls. When prompted, you may say any of the
following commands:
•Play•Pause
•Shuffle•Shuffle off
•Repeat•Repeat off
•Play next track•Play previous track
•Play genre •Play artist
•Play album •Play track
•Play playlist •Play playlist <1–5>
•Help
Note:If you are not listening to the jukebox, press
or VOICE on the
steering wheel controls. When prompted, say, “Jukebox” and then any of
the above commands.
Audio features
52
2012 Centerstack(ng1)
Supplement, 1st Printing
Arabic_(LHD)(gc_lhd)
Page 53 of 118

Search commands
Your jukebox has advanced search commands which allow you to have
the system search the stored music in your jukebox for a specific artist,
album or track. You can search for and play a specific type (genre) of
music, a specific album, a specific artist or a specific track.
To use the search commands
When listening to the jukebox, press
or VOICE on the steering wheel
controls. When prompted, you may say any of the following commands:
•Search genre •Search artist
•Search album •Search track
Once the system is done searching for the type of music, artist, album,
or track, you can say any of the following commands:
•Play•Play album
•Play track •Play artist
‘Refining’ your search
You can choose to ’refine’ your search even farther. For example, if you
told the system to search and play all music by a certain artist, you can
then tell the system to “Refine album” and choose a specific album when
prompted. If you then say “Play”, the system will only play music from
that specific album.
To refine your search, say any of the following commands after system
has finished searching for the type of music, artist, album, or track:
•Refine album •Refine artist
You can then select to:
•Play•Play track
Audio features
53
2012 Centerstack(ng1)
Supplement, 1st Printing
Arabic_(LHD)(gc_lhd)
Page 54 of 118

USER DEVICE
If your vehicle is equipped with
SYNC�, there will be a ‘User Device’
tab in your media options. For more
information, please refer to the
SYNC�media featureschapter
later in this supplement.
LINE IN (AUXILIARY INPUT JACK)
Your vehicle is equipped with an audio input jack which will allow a
portable audio device to be listened to through your vehicle’s audio
system. To activate this feature:
1. Press the MEDIA hard button on the navigation system.
2. Select the ‘Line In’ tab.
Once a 3.5 mm input jack is plugged into the Line in jack, ensure that
the playing device is turned on with the volume set at the maximum
level. Press the play button and sound from the device will be emitted
through the vehicle speakers. Adjust the volume using the volume
control on the navigation system.
For information on the auxiliary input jack location, please refer to the
Auxiliary input jack (Line in)in theEntertainmentchapter of your
Owner’s Guide.
Audio features
54
2012 Centerstack(ng1)
Supplement, 1st Printing
Arabic_(LHD)(gc_lhd)
Page 55 of 118
REAR DVD SYSTEM (IF EQUIPPED)
Note:The dual DVD headrest screens will only appear if the DVD
system was ordered on the vehicle prior to delivery. If the system was
added to the vehicle after delivery, these screens will not appear.
Your navigation system allows you to access the dual DVD headrest
system (if equipped). To access:
1. Press the MEDIA hard button on the navigation system.
2. Select the ‘Rear DVD A’ tab on
the touchscreen to access the
Monitor A headrest system:
: Press to access the previous track. Press and hold to reverse in
the current track.
: Press to access the next track. Press and hold to advance within
the current track.
/(Play/Pause): Press to play or pause the current track.
3. Select the ‘Rear DVD B’ tab on
the touchscreen to view the status
of the Monitor B headrest system.
Audio features
55
2012 Centerstack(ng1)
Supplement, 1st Printing
Arabic_(LHD)(gc_lhd)
Page 56 of 118

If the rear DVD�A�is the only audio source playing, press
or VOICE
on the steering wheel controls. When prompted, you may say any of the
following commands.
Note:")
Rear DVD voice commands (if equipped)
If the rear DVD�A�is the only audio source playing, press
or VOICE
on the steering wheel controls. When prompted, you may say any of the
following commands.
Note:These commands will not function with the audio source in DVD
�B�.
•Play•Pause
•Play previous chapter•Play next chapter
•Play previous track•Play next track
•Play previous folder•Play next folder
•Folder mode (if equipped)•Folder mode off (if equipped)
•Shuffle•Shuffle off
•Headphones•Headphones off
•Help
Note:If the Rear DVD is not the only audio source (i.e., the radio is on
also), then press
or VOICE on the steering wheel controls. When
prompted, say, “Rear DVD” and then any of the above commands. Each
command will be applied based on the type of media in the player. For
example, if a DVD movie is playing as DVD�A�, then the command�Play
previous folder�will not be functional, because a DVD video disc does
not have folders. Similarly, if a DVD movie is playing as DVD�A�, saying
the command�Play Previous Chapter�will command the DVD player to
jump to the previous chapter.
REAR ZONE (IF EQUIPPED)
This screen allows front seat passengers to select/listen to a different
audio/video source than the back seat passengers. The only restriction is
that the front and back seat passengers cannot both listen to a different
frequency band (AM/FM1/FM2). The frequency band selected by the
driver is the band accessible by the rear passenger. To access:
1. Ensure that the system is ON.
2. Press the MEDIA or RADIO hard button on the system.
3. Select the ‘Rear Zone’ tab on the touchscreen.
Audio features
56
2012 Centerstack(ng1)
Supplement, 1st Printing
Arabic_(LHD)(gc_lhd)
 1
1 2
2 3
3 4
4 5
5 6
6 7
7 8
8 9
9 10
10 11
11 12
12 13
13 14
14 15
15 16
16 17
17 18
18 19
19 20
20 21
21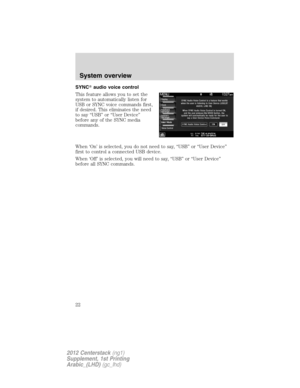 22
22 23
23 24
24 25
25 26
26 27
27 28
28 29
29 30
30 31
31 32
32 33
33 34
34 35
35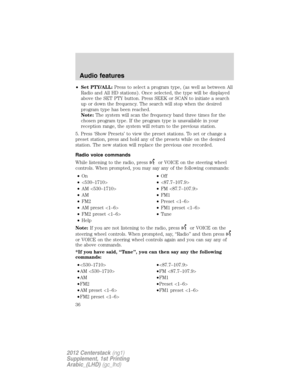 36
36 37
37 38
38 39
39 40
40 41
41 42
42 43
43 44
44 45
45 46
46 47
47 48
48 49
49 50
50 51
51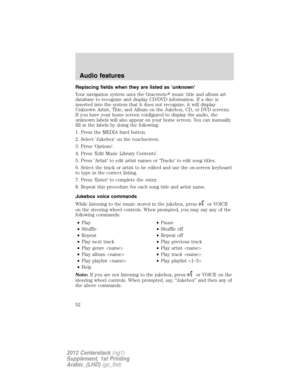 52
52 53
53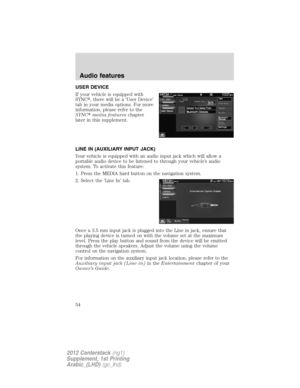 54
54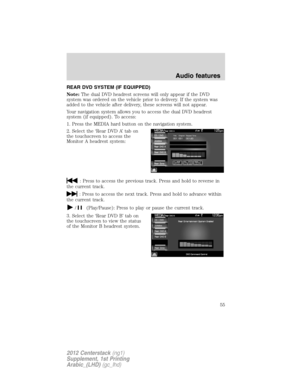 55
55 56
56 57
57 58
58 59
59 60
60 61
61 62
62 63
63 64
64 65
65 66
66 67
67 68
68 69
69 70
70 71
71 72
72 73
73 74
74 75
75 76
76 77
77 78
78 79
79 80
80 81
81 82
82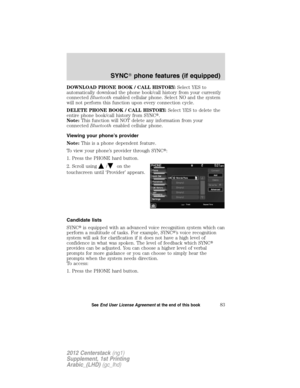 83
83 84
84 85
85 86
86 87
87 88
88 89
89 90
90 91
91 92
92 93
93 94
94 95
95 96
96 97
97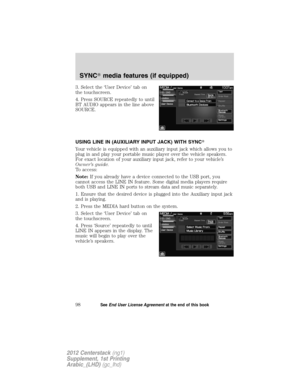 98
98 99
99 100
100 101
101 102
102 103
103 104
104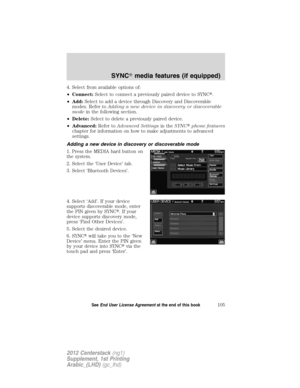 105
105 106
106 107
107 108
108 109
109 110
110 111
111 112
112 113
113 114
114 115
115 116
116 117
117


Note:The dual DVD headrest screens will only appear if the DVD
system was ordered on the vehicle prior to delivery. If the system was
added to the vehicle after delivery,")