Page 9 of 118
FORD SYSTEM
LINCOLN SYSTEM
System overview
9
2012 Centerstack(ng1)
Supplement, 1st Printing
Arabic_(LHD)(gc_lhd)
Page 10 of 118

WARNING:Driving while distracted can result in loss of vehicle
control, accident and injury. Ford strongly recommends that
drivers use extreme caution when using any device or feature that may
take their focus off the road. Your primary responsibility is the safe
operation of the vehicle. We recommend against the use of any
handheld device while driving and that you comply with all applicable
laws.
1.I (Information):Press I to
access the information menu. Press
while the information menu is active
to step through the information tabs of: Calendar, System Info (System
Information) and Help.
2.PHONE:Press PHONE to access
the phone menu (if equipped with
SYNC�).
3.CLIMATE:Press CLIMATE to
access the climate menu. Press the
button while the climate menu is
active to step through the climate menu tabs of Front Zone and Rear
Zone (if equipped).
4.
(Eject):Press(Eject) to
eject the disc in the slot.
5.TUNE: In radio or satellite
radio mode (if activated),turn to
advance in individual increments
up/down the frequency/channel
listing.
In MP3 mode,turn to advance to the next/previous folder.
6.DISP:Press the DISP button to
step through the following display
modes: On, Status Bar Only, and
Off.
System overview
10
2012 Centerstack(ng1)
Supplement, 1st Printing
Arabic_(LHD)(gc_lhd)
Page 11 of 118
, DSP
(Digital Signal")
7.SOUND:Press SOUND to access
the sound menu. Press while the
sound menu is active to step
through the sound menu tabs of
Bass/Treble, Balance/Fade, SCV (Speed compensated volume), DSP
(Digital Signal Processing) and the Visualizer.
8.SEEK:In radio and satellite
radio mode (if activated),
press
/to seek to the
previous/next available station or channel within the currently selected
Category/Genre.
In CD/DVD mode,press
/to access the previous/next track or
chapter.
9.MEDIA:Press MEDIA to access
the media menu. Press while the
media menu is active to step
through the available media sources of CD/DVD, Jukebox, User Device,
Rear DVD (Rear overhead mounted DVD), if equipped, and Rear AUX
(Rear overhead mounted AUX inputs), if equipped.
10.RADIO:Press RADIO to access
the radio menu. Press while the
radio menu is active to step through
the available radio sources of AM, FM1, FM2, SAT1, SAT2, and SAT3
(satellite radio, if activated).
11.VOL (On/off/volume):Press to turn the audio system on/off. Press
and hold to turn the radio completely off. Turn to adjust the volume of
the audio system.
12.Memory presets:In radio and
satellite radio mode (if
activated):Press 1-6 to access
your previously saved preset
stations/channels.To save to a preset:Tune to the desired
station/channel. Press and hold the desired preset button in which you
would like to store the station/channel. The sound will momentarily mute
and then return when the preset is saved.
13.MENU:Press MENU to access
the system menu. Press while the
system menu is active to step
through the system menu tabs of
Display, Clock, Feedback Settings, System Settings and Valet Mode.
System overview
11
2012 Centerstack(ng1)
Supplement, 1st Printing
Arabic_(LHD)(gc_lhd)
Page 12 of 118

14.MAP:Press to access the
navigation map. Please see the
separate Navigation operating
instruction manual for more information.
15.DEST:Press to access the
navigation map. Please see the
separate Navigation operating
instruction manual for more information.
16.N AV:Press to access the
navigation map. Please see the
separate Navigation operating
instruction manual for more information.
17.CD/DVD slot:Insert a CD or DVD, label side up.
After the system initializes, the screen will be divided in two sections:
•Status bars:This is the top and bottom portion of the screen that
displays the clock or date and useful information, depending on the
current mode.
•Display area:The interactive screen that is activated by finger touch
and changes depending on current system operation. Graphical
buttons are displayed in this area depending on the current screen for
you to make choices.
SCREEN DIFFERENCES
Depending on your vehicle line and option package, your screen may
vary in appearance from the screens shown in this supplement. These
differences could include: background color, tab options, climate controls
and other features. Your features may also be limited depending on your
market. (For example, SIRIUS�Travel Link™ is only available in the
continental United States). Please check with your authorized dealer for
availability.
Display options
You can choose to turn your screen on/off and also if you would like to
view the status bars on the top and bottom of the screen. To access:
Press DISP repeatedly to cycle through these options.
System overview
12
2012 Centerstack(ng1)
Supplement, 1st Printing
Arabic_(LHD)(gc_lhd)
Page 13 of 118

While in display mode, press
or VOICE on the steering wheel
controls. When prompted, you may say any of the following commands:
•Display on•Auto
•Day")
Voice commands in display mode (if equipped)
While in display mode, press
or VOICE on the steering wheel
controls. When prompted, you may say any of the following commands:
•Display on•Auto
•Day•Night
•Status bar•Display off
•Brighter•Dimmer
•Help
Note:If you are not in display mode, press
or VOICE on the steering
wheel controls. When prompted, say, “Display mode” and then any of the
above commands.
STATUS BARS
Your screens may have status bars on the top and bottom of each screen.
The status bar on the top of the
screen will tell your current mode,
the exterior temperature, the time
as well as display icons if you have
enabledBluetooth,or are using headphones with your Rear overhead
mounted Family entertainment DVD system among other options.
The status bar on the bottom of the
screen may list the Home icon, the
current temperature selected for the
Driver and Passenger as well as the fan speed and air flow direction, the
current mode being used (if equipped), the Artist and Title of the
currently playing CD (if available), Artist and Title for Jukebox (if
available) and satellite radio (if activated).
Note:As climate controls are vehicle dependent, some vehicles may not
display climate readings in the status bar.
HOME SCREEN
Your system has a Home Screen where you can save/view favorite
pictures, view your current audio and climate control settings as well as
display the audio visualizer or the hybrid fuel economy (if equipped).
You can split the screen in to two or three different sections, or you can
choose to have one main view.
To access your home screen, press the house icon (
)atthebottom
left hand corner of any screen.
System overview
13
2012 Centerstack(ng1)
Supplement, 1st Printing
Arabic_(LHD)(gc_lhd)
Page 14 of 118
The left side of the screen will
display an uploaded photo or the
map screen. The right side can also
display the uploaded photo. The
upper right panel will only display
the current audio settings. The
lower right panel displays the
vehicle’s climate settings (if
equipped), the visualizer or the
hybrid fuel economy (if equipped).
Press
on the bottom of the display to access the settings screen for
the left or right side.
Loading pictures
Your system allows you to save and view up to 32 photos. To access:
1. Ensure that you are on the Home
Screen. (Press
at the bottom
left of any screen to access.)
2. Touch the left side of the home
screen to initiate the left screen
photo display and saved photos
screen.
3. Select the ‘Add’ button on the
touchscreen. The following
disclaimer will appear, “Please
confirm the supported photo
formats”.
System overview
14
2012 Centerstack(ng1)
Supplement, 1st Printing
Arabic_(LHD)(gc_lhd)
Page 15 of 118

4. When the pop-up dialog box with
the disclaimer appears, press OK
and ensure that you are using the
proper format.
5. Insert a CD-ROM which contains
your photos as jpegs.
6. Press OK. The photos will be
listed on the right half of the screen.
7. Select either ADD or ADD ALL.
The photos are now saved to the hard drive.
Photo display limitations:
•The file must be 1.5MB or less.
•The extension of the file must be one of JPE/JPG/JPEG.
•The CD or DVD must be ISO 9660 format, UDF format is not
supported.
•The file path must be 255 characters or less.
•Up to 256 files or folders can be displayed in one folder.
•Not compatible with discs written in Packet Write mode.
•Only the photograph(s) which meet these conditions will be displayed.
Note:When burning a CD, ensure that you ‘close’ or ‘finalize’ the disc
when the CD-burning process finishes (you should select this option
before you start burning). Consult your software manual or the program’s
help files if you’re not sure how to finalize the disc. Also, write the audio
data into the first session of a multi-session CD as audio systems won’t
be able to sort through other sessions to find more audio tracks.
Editing and deleting photos
1. Press
to access the home screen.
2. Touch the current photo on the home screen.
3. To edit the photo:
•Select the Edit button.
•Adjust the photo by zooming in or out, moving right, left, up or down
and also rotating left or right.
•Press the Reset button to return to the original image.
4. To delete the photo, select the Delete button.
System overview
15
2012 Centerstack(ng1)
Supplement, 1st Printing
Arabic_(LHD)(gc_lhd)
Page 16 of 118

5. To delete all stored photos:
•Press the Menu hard button.
•Select the System Settings tab on the touchscreen.
•Press the View button for Delete Stored Items.
•Select Saved photos.
REVERSE CAMERA (IF EQUIPPED)
Your vehicle may be equipped with a reverse camera on the tailgate which
provides a video image of the area behind the vehicle. When the
transmission is in R (Reverse), an image will automatically display on the
navigation screen. Once the vehicle is back in D (Drive), the image will
continue to display until you are driving over 5 mph (8 km/h). To remove
this image from the screen, press any hard button on the navigation system.
When the vehicle is in R (Reverse),
press SETTINGS to make
adjustments to the brightness of the
display as well as the rear camera
display.
When the rear camera delay
function is ON, it extends the
display of the camera image into
Drive mode until vehicle speed is
greater than 5 mph (8 km/h). This
is useful when trying to
engage/disengage a trailer. Once you
shift out of R (Reverse), the image
will be removed from the screen.
The default for the rear camera
delay is off.
Prior to using, ensure that the camera lens is clear of any debris, mud,
etc. and that both reverse lamps are operational if using at night.
Depending on your vehicle, you may have a Zoom button (if equipped)
as well as additional selections under the Settings button.
For complete information, refer toRear-view Camera Systemin the
Driving chapterin your Owner’s Guide.
System overview
16
2012 Centerstack(ng1)
Supplement, 1st Printing
Arabic_(LHD)(gc_lhd)
 1
1 2
2 3
3 4
4 5
5 6
6 7
7 8
8 9
9 10
10 11
11 12
12 13
13 14
14 15
15 16
16 17
17 18
18 19
19 20
20 21
21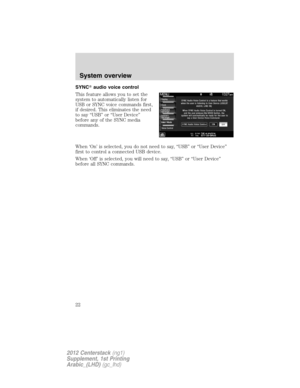 22
22 23
23 24
24 25
25 26
26 27
27 28
28 29
29 30
30 31
31 32
32 33
33 34
34 35
35 36
36 37
37 38
38 39
39 40
40 41
41 42
42 43
43 44
44 45
45 46
46 47
47 48
48 49
49 50
50 51
51 52
52 53
53 54
54 55
55 56
56 57
57 58
58 59
59 60
60 61
61 62
62 63
63 64
64 65
65 66
66 67
67 68
68 69
69 70
70 71
71 72
72 73
73 74
74 75
75 76
76 77
77 78
78 79
79 80
80 81
81 82
82 83
83 84
84 85
85 86
86 87
87 88
88 89
89 90
90 91
91 92
92 93
93 94
94 95
95 96
96 97
97 98
98 99
99 100
100 101
101 102
102 103
103 104
104 105
105 106
106 107
107 108
108 109
109 110
110 111
111 112
112 113
113 114
114 115
115 116
116 117
117
Supplement, 1st Printing
Arabic_(LHD)(gc_lhd)")
