Page 17 of 118
,
voice commands and also through your steering wheel controls. Below is
a quick listing of the functions of some")
QUICK REFERENCE CHART
SYNC�works with your navigation system, DVD system (if equipped),
voice commands and also through your steering wheel controls. Below is
a quick listing of the functions of some steering wheel controls and
navigation system controls.
Navigation
bezel controlSteering wheel
controlFunction
N/A
Press to answer an incoming call.
Press to send a call or text message
(if supported).
Press and hold to end a call.
Press it initiate a redial.
N/A VOICE
Press to activate Voice Recognition.
Press and hold to end an active
voice session.
Refer to theVoice recognition
system overviewchapter for further
information.
SEEK,
,
Press to access the previous/next
preset radio station, preset satellite
channel (if activated) or CD track.
Press and hold to seek to the next
satellite channel (if activated).
N/A OK Press to confirm your selection.
MEDIA N/A Press repeatedly to access all
available media sources in your
vehicle such as: CD, DVD, Jukebox,
Rear Zone, Rear DVD (if equipped)
Line In, and User Device (if
equipped with SYNC�).
PHONE N/A Press to access SYNC�PHONE
features.
System overview
17
2012 Centerstack(ng1)
Supplement, 1st Printing
Arabic_(LHD)(gc_lhd)
Page 18 of 118

SYSTEM MENU FEATURES
Your system has many menu features such as allowing you to adjust the
touchscreen brightness, adjusting the time and languages, adjusting the
feedback and system settings. To access, press the MENU hard button on
the navigation system.
Display options
1. Press the MENU hard button.
2. Select the ‘Display’ tab on the
touchscreen. Select from the
following display options:
Brightness:Select AUTO DIM to
manually adjust the brightness by
pressing + or —.
Contrast:Press + to increase and
— to decrease the level of contrast
on the screen.
Day/Night Mode:Select ‘Day’ to always display day mode or ‘Night’ to
always display night mode. Select ‘Auto’ for the screen to automatically
change between day and night mode.
Color Palette (Available on Lincoln vehicles only):Select between
four different background colors: 1. Black, 2. Blue, 3. Green, 4. Red.
Daytime color:Press to select Light color or Dark color for the screen
lighting.
Note:When the headlamps are on
under high ambient light conditions,
the system will remain in day mode,
even if night is selected.
System overview
18
2012 Centerstack(ng1)
Supplement, 1st Printing
Arabic_(LHD)(gc_lhd)
Page 19 of 118

Setting the clock
1. Press the MENU hard button.
2. Select the ‘Clock’ tab on the
touchscreen. Select from the
following display options:
Time set buttons:To set the time, press +, — to increase/decrease the
time and select AM or PM.
Display clock:Press to turn the clock display on/off.
Format:Press to select between 12 hour and 24 hour format.
Auto time zone:If enabled, the system will automatically adjust the
time when you enter into a new time zone. If disabled, you will have to
manually adjust the time when entering different time zones.Note:The
system does not implement daylight savings time.
Restore defaults:Select ‘Reset’ to reset to the default settings.
Note:If your vehicle is equipped with an in-dash analog clock, you can
set the time on this screen but it may not appear in status bar for
viewing purposes.
Feedback settings
1. Press the MENU hard button.
2. Select the ‘Feedback Settings’ tab
on the touchscreen. Select from the
following display options:
Voice recognition user profile:You can ‘train’ the system to better
recognize your voice. Two profiles can be created. Refer to theVoice
Recognitionsection for more information.
System overview
19
2012 Centerstack(ng1)
Supplement, 1st Printing
Arabic_(LHD)(gc_lhd)
Page 20 of 118

Button tone:Select to select/adjust when the system will sound a tone.
Press ‘Button tone’ to then select from:
•All Buttons:Select to have the system sound a tone when any hard
or soft key is touched.
•Touch Screen:Select to have the system only sound a tone when a
selection is made on the touch screen.
•Off:Select to turn off all tones.
Voice volume:Press + to increase or — to decrease the volume level of
the navigation voice. Voice volume adjustment also includes the volume
level of chimes.
Voice recognition interaction mode:This feature determines the level
of interaction/feedback you will receive from the system.
•Standard:This is the default setting. The ‘Standard setting’ provides
you with the most interaction / feedback in the form of prompts.
•Advanced:This feature has less prompts and feedback.
Voice recognition confirmation:
•On:Select to have the system always ask to confirm/verify a
command.
•Off:Select to have the system ask less frequently to confirm /verify a
command.
System settings
1. Press the MENU hard button.
2. Select the ‘System Settings’ tab
on the touchscreen. Select from the
following display options:
Language:Select between ‘English’, ‘Francais’ or ‘Espanol’.
Units:Select between ‘English’ and ‘Metric’.
Keyboard layout:Select ‘ABC’ or ‘QWERTY’ for the keyboard layout in
the display.
System overview
20
2012 Centerstack(ng1)
Supplement, 1st Printing
Arabic_(LHD)(gc_lhd)
Page 21 of 118

Delete stored items:Select ‘View’ to see what areas contain stored
items. You can then choose to delete all of the entries from these areas:
Address Book, Saved Photos and Voice Recognition Profiles.
Restore factory default settings:Press ‘Reset’ to return to the factory
default settings.
Valet Mode:Press to access Valet Mode.
•Enable Valet Mode:Select to lock the system with a four digit PIN.
The same PIN must be entered to unlock the system and disable valet
mode.
Valet mode
1. Press the MENU hard button.
2. Select the ‘Valet Mode’ tab on the
touchscreen. Press ‘Enable Valet
Mode’.
3. Enter a four digit Personal
Identification Number (PIN) and
press ‘Enter’. The system will ask
you to re-enter the PIN. Once
entered, select ‘Enable’ to activate
Valet mode. The system is then
locked until the correct four digit
PIN is entered.
Note:The PIN can be reset by simultaneously pressing and holding
presets 1 and 5 while on the PIN entry screen. After approximately five
seconds, the system will transition to the Valet mode screen indicating
that the PIN is reset. Once you have reset the PIN, the system will then
allow you to set a new PIN.
System overview
21
2012 Centerstack(ng1)
Supplement, 1st Printing
Arabic_(LHD)(gc_lhd)
Page 22 of 118
SYNC�audio voice control
This feature allows you to set the
system to automatically listen for
USB or SYNC voice commands first,
if desired. This eliminates the need
to say “USB” or “User Device”
before any of the SYNC media
commands.
When ‘On’ is selected, you do not need to say, “USB” or “User Device”
first to control a connected USB device.
When ‘Off’ is selected, you will need to say, “USB” or “User Device”
before all SYNC commands.
System overview
22
2012 Centerstack(ng1)
Supplement, 1st Printing
Arabic_(LHD)(gc_lhd)
Page 23 of 118
 system. This system allows you to perform many
operations such as operating the navigation, audio, ph")
VOICE RECOGNITION
Your vehicle may be equipped with an advanced interactive Voice
Recognition (VR) system. This system allows you to perform many
operations such as operating the navigation, audio, phone (if equipped),
media, climate (if equipped), display and voice settings by “speaking”
certain commands. The system will respond with a series of audible
tones, prompts, questions and spoken confirmations depending on the
situation and the chosen level of dialogue interaction.
Feedback through audible tones
Your VR system will respond through various audible tones. You may
hear a tone at the following times:
•When you press VOICE or
on your steering wheel controls.
•When you access the help feature.
•When the VR system does not understand your request
•When a VR session is completed successfully
•When a VR session is ended unsuccessfully
•When a speed dependent feature has been accessed
•When a new device is connected
The navigation system has five different audible tones that will play
depending on the circumstance.
•Initial: Sounds when you are entering a new mode.
•Positive: Sounds for a positive recognition or a successful VR session
completion.
•Negative: Sounds for a negative recognition, an unsuccessful VR
session, or when a speed dependent feature has been accessed.
•Listening: Sounds when the system is ready to listen for a command.
•Help: Sounds when you ask for ’Help’.
Voice recognition system overview
23
2012 Centerstack(ng1)
Supplement, 1st Printing
Arabic_(LHD)(gc_lhd)
Page 24 of 118

Confirmation prompts
Confirmation prompts are short questions asked by the system when the
system has not clearly understood your request or when there are
several possible responses to your request. For example, if you have
Confirmation prompts ON, the system may say, “Phone, is that correct?”.
The system will then listen for a “Yes” or “No” confirmation from you. If
you say “Yes”, the system will proceed. If you say “No”, the system will
ask you to say the command again. If you have Confirmation prompts
OFF, the system may assume it understood your request or may ask you
to repeat your request. If the system is unsure of what was asked, it will
prompt you to try again or ask for help.
Note:Even with Confirmation prompts turned OFF, you may be asked to
confirm certain settings occasionally.
HOW TO USE VOICE COMMANDS WITH YOUR SYSTEM
Press
or VOICE on your steering wheel controls to activate Voice
Recognition. Depending on the feedback setting, you will hear the
prompt, “Please say a command” followed by a tone, or you will hear a
tone, signaling that the system is ready to accept your command. Any
command spoken prior to the beep will not register with the system.
Speak the command clearly to ensure that the system is able to
recognize and perform the desired function. You can, at any time,
press
or VOICE and say “Help” for a list of possible commands.
The main categories of your voice commands are as follows:
•Audio•Climate (if equipped)
•Radio•Jukebox
•User profile•Display mode
•CD•Disc
•Video CD•DVD
•Rear AUX (if equipped)•Line in
•Phone (if equipped)•USB (if equipped)
•Voice settings•Tutorial
•Dial (if equipped)•Confirmations
To access a list of all available voice commands:
1. Press the i button (
) on the system.
2. Select the ‘Help’ tab on the touchscreen.
3. Select ‘Voice commands’ at the top of the screen.
4. Select the desired category.
Voice recognition system overview
24
2012 Centerstack(ng1)
Supplement, 1st Printing
Arabic_(LHD)(gc_lhd)
 1
1 2
2 3
3 4
4 5
5 6
6 7
7 8
8 9
9 10
10 11
11 12
12 13
13 14
14 15
15 16
16 17
17 18
18 19
19 20
20 21
21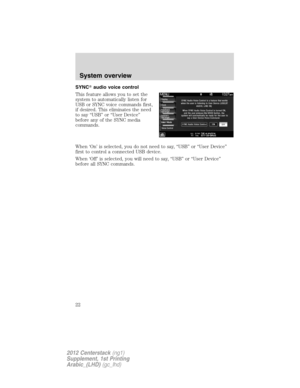 22
22 23
23 24
24 25
25 26
26 27
27 28
28 29
29 30
30 31
31 32
32 33
33 34
34 35
35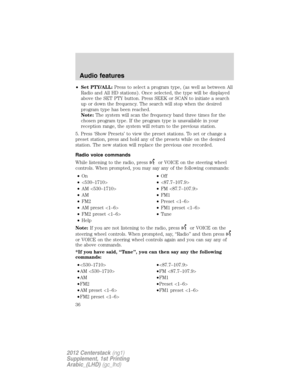 36
36 37
37 38
38 39
39 40
40 41
41 42
42 43
43 44
44 45
45 46
46 47
47 48
48 49
49 50
50 51
51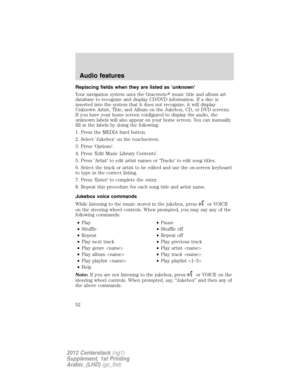 52
52 53
53 54
54 55
55 56
56 57
57 58
58 59
59 60
60 61
61 62
62 63
63 64
64 65
65 66
66 67
67 68
68 69
69 70
70 71
71 72
72 73
73 74
74 75
75 76
76 77
77 78
78 79
79 80
80 81
81 82
82 83
83 84
84 85
85 86
86 87
87 88
88 89
89 90
90 91
91 92
92 93
93 94
94 95
95 96
96 97
97 98
98 99
99 100
100 101
101 102
102 103
103 104
104 105
105 106
106 107
107 108
108 109
109 110
110 111
111 112
112 113
113 114
114 115
115 116
116 117
117