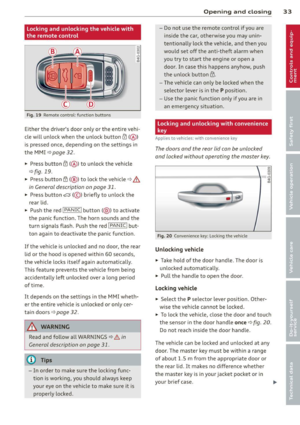
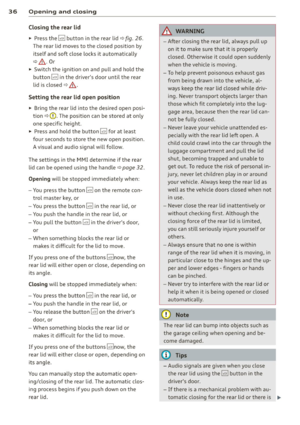
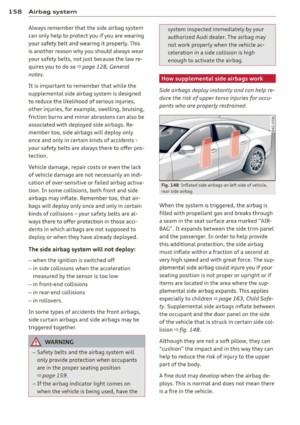
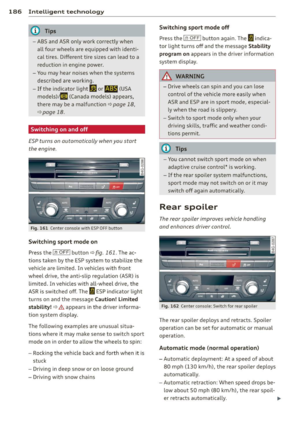
Page 105 of 294

"creep" forward or backward. When
stopped, keep the brake pedal fully de
pressed and use the park ing brake if
necessary to keep the veh icle from roll
ing.
- If the selector lever is unintentionally
moved into N wh ile you are driving, take
your foot off the accele rator pedal and
wait for the engine to return to idle speed before selecting a d riving position.
- Never shift into R or P when the vehicle is in motion.
- Never get out of the driver's seat when
the engine is running.
- If you must get out of the vehicle, move
the se lector lever securely into the P po
sit ion and apply the par king brake firm ly.
- If the engine must remain running , never
have any driv ing position engaged when
chec king under the hood. Make sure the
selector lever has securely engaged and is locked in P with the parking bra ke
firmly set ¢
page 210, Engine compart
ment .
Otherw ise, any increase in engine
speed may set the vehicle in mot ion,
even with the parki ng brake applied.
Selector lever positions
Applies to vehicles: with tiptronic
This section describes the selector lever posi
tions and driving ranges.
F ig . 1 10 D isplay in th e inst rument cluste r: selec to r
lever position
The selector lever position engaged appears
next to the selector lever as well as in the i n
strument cluster display.
Automatic Tra nsmi ssi on 10 3
P-Park
In this se lector lever posi tion the transm is
s ion is mechanica lly locked. Engage
P only
when the vehicle is
completely stopped ¢ &
in Driving the automatic transmission on
page 102.
To shift in or out of posit ion P , you mus t first
press and ho ld the brake pedal and then press
the re lease button in the selector lever hand le
whi le moving the selector lever to or from
P.
You can shift out of this position only with the
ignition on.
You must release the parking lock man ua lly
before towing the vehicle
c:> page 107.
R -Reverse
Se lect R o nl y when the vehi cle is at a full s top
and the engine is running at idle speed ¢ A in
Driving the automatic transmission on
page 102.
Be fore you move the se lector lever to R , press
both the button in the hand le of th e selector
lever
and the brake pedal at the same ti me .
When the igni tion is on, the backup lights illu
minate when the selec tor lever is moved into
R.
N -Neutral
The transm iss ion is in neut ral in this pos ition .
S hi ft to th is position for standing with the
brakes a pplied
¢ page 104.
When the vehicle is stat ionary or at speeds
below 3 mph (5 km/h), yo u must always apply
the foo tbrake before and w hile mov ing the
lever o ut of
N .
D/S - Normal posit ion for driving forward
In the D/S pos ition, the transmission can be
operated either in the no rmal D mode o r in
the S spo rt mode . To select the S spo rt mode,
pull the selector lever bac k br iefly . Pul ling the
lever b ack again will se lect the norma l D
mode. The inst rument cl uster display shows
the selected driving mode.
II>
Page 106 of 294

104 Automatic Transmission
In the normal mode D , the transmission auto
matica lly selects the best gear ratio. It de
pends on eng ine load, veh icle speed and the
dynamic control program (DRP).
Select the
sport mode S for sporty driving .
The vehicle makes full use of the engine's
power. Shifting is more not iceable when accel
erating.
When the vehicle is stationary or at speeds
be low 3 mph (5 km/h), you must always apply
the foot brake before and while mov ing the
lever to
D/S out of N.
In certain circumstances it may be advanta
geous to temporarily switch to the manual
shift program to manually se lect gear ratios
to match specific driving conditions
¢page 105.
A WARNING
Read and follow all WARNINGS c> .&. in
Driving the automatic transmission on
page
102.
Q) Note
-
Coasting downh ill with the transmission in
N and the engine not running will result in
damage to the automatic transmission
and possibly the catalytic converter.
Automatic Shift Lock (ASL)
Applies to vehicles: with tiptronic
The Automatic Shift Lock safeguards you
against accidentally shifting into a forward or the reverse gear and causing the vehicle to
move unintentionally.
')
I
Fig. 111 Shift gate: se lector lever lock positions and
interlock button highl ighted
T he selector lever lock is released as follows:
., Tur n the ignition on.
., Step on the brake pedal.
At the same time
press and hold the interlock button on the
side o f the gear selector knob
¢ fig. 111
with your thumb until you have moved the
selector lever to the des ired posit ion .
Automatic selector lever lock
The selector lever is locked in the P and N po
s iti ons when the ig nition is turned on. To
move the lever from these positions the driver
must depress the brake peda l. As a reminder
to the driver, the following warning appears in
the instrument cluster disp lay when the selec
tor is in
P and N :
When stationary apply footbrake while se
lecting gear
A time delay element prevents the selector
lever from locking when it is moved through
the
N position (going from R to D/S ). The
locking element will lock the se lector lever if
the lever is left in N (Neutral) for more than
approximately 1 second, without the brake
pedal being pressed .
At speeds above about 3 mph (5 km/h) the
Automatic Shift Lock is automatically deacti
vated in the
N position.
Interlock button
The lock button on the selector lever prevents
the lever from being accidentally shifted into
certain positions. Pressing this button deacti
vates the selector lever lock. Depending on
the direction of the sh ift, the selector lever
locks at different posit ions . The pos itions are
highlighted i n the illustration
¢fig . 111 .
Kick-down
Applies to veh icles: w ith tiptron ic
The kick-down feature allows the vehicle to
generate maximum acceleration .
When you press the accelerator pedal beyond
the resistance point that is reached at full
throttle, the transm iss ion w ill select a lower
Ill>
Page 107 of 294

gear ratio based on vehicle speed and engine RPM. The engin e RPM will be controll ed to
prod uce maximum vehicle acce leration as
l ong as you continue to press the accelerator
pedal beyond this resistance point.
A WARNING
Be careful when using the k ick-down fea
ture o n slippe ry roads . Rapid accelerat ion
may cause the veh icle to skid .
Dynamic shift program (DSP}
Applies to vehicles: with tiptronic
The au tomatic transmission is electronically
controlled .
-
The transmission is self adapting and will au
tomat ically
selec t the best shift progr am suit
ed to the driving condit ions and driving style .
T he transmission will se lect one of the
econo
m y
programs when you drive at a steady
speed or a gradually changing speed without heavy acceleration . T his achieves optimum
fuel efficiency, with early upshifting and de layed downshifting .
The transmission will automat ically select the
s porty shift programs when you drive at high
e r speeds, or with heavy acceleration and fre
quent ly chang ing speeds . Upshifts are de layed
to make fu ll use of eng ine power. Downsh ift
i ng takes p lace a t higher engine speeds than
i n the e conomy programs.
The selection of the most su itab le shift p ro
g ram is a cont inuous, automatic p rocess. The
d river can al so make the transmission switch
to a sporty program by
quickl y pressing down
the gas pedal.
This causes the transmission to shift down to
a lower gear to achieve rap id acceler ation, e.g.
fo r q ui ckly passing another veh icle. You do not
need to press the gas peda l into the kick -down
range . After the transmission has upshifted,
the original program is se lected according to
your driving style.
Automatic Tra nsmi ssi on 105
An additional sh ift program allows the auto
matic transmission to select the p roper gear
for uphill and downhi ll grad ients.
T his keeps the transm ission from shift ing up
and down unnecessarily on hills . The t rans
m iss ion w ill s hift down to a lower gear when
the driver presses the brake pedal on a down hill gradient . Th is makes use of the braking ef
fect of the engine wi thou t the need to sh ift
down manually .
Manual shift program
Applies to vehicles: with tiptron ic
Using the manual shift program you can
manually select gears.
,
f
F ig. 112 Cente r console : shi fting th e tiptron ic ma nua l
l y
Fi g. 1 13 Disp lay : man ual shi ft pro gram , s ele cted gear
hi ghlig hted
Switching to m anual shift program
... Push the selector lever to the right from DI
S. As soon as the transmiss ion has sw itched
over, the se lected gear appears in the dis
p lay .
To upshift
... Push the se lector lever forward to the plus
position
0 q fig . 112 . Ill>-
Page 108 of 294

106 Autom atic Tran smissi on
To d ownsh ift
.,. Push the lever to the m inus position 0 -
When acce lerat ing, the transm iss ion w ill au
tomatically sh ift into the next gear befo re the
engine reaches its maxim um RPM.
If you apply a light throttle when accelerat ing , tiptronic will automatically shift from 1st
to 2nd gea r to save fuel.
If you apply a heavy
thrott le, the transmission will stay in 1st gear
unti l near maximum RPM is reached, or unt il
the driver shifts into 2nd gear .
If you take your foot off the accelerator peda l
when dr iving down a steep i ncl ine, tiptronic
will downshift from the selected gear into the
next lower gear until it reaches 1st gear,
based on road speed and engine RPM. Auto
matic downshifting is interrupted as soon as
you apply the throttle again.
(D Tips
- When you shift into the next lower gear,
the transmiss ion will downshift only
when there is no possibility of over-rev
v ing the engine.
- When the kick-down comes on, the transmission will sh ift down to a lower
gear, depending on vehicle and engine
speeds.
- tiptronic is inoperative when the trans
mission is in the fail-safe mode .
Steering wheel with tiptronic
Applies to vehicles: with tiptron ic steer ing wheel
The shift buttons on the steering wheel allow
the driver to shift gears manually .
Fig. 1 14 Stee ring wheel: Sh ift butto ns
.,. To downshift, touch the button on the left
0 -
.,. To upshift, touch the button on the r ight
0 -
The shift buttons are activated when the se
lector lever is in
D /S or in the manual shift
program (tiptronic).
Of course , you can continue to use the manua l
shift program with the selector lever on the
center console.
Transmission malfunction
Applies to vehicles: with tiptronic
[O] Transm iss ion : pleas e pre ss the br ake ped
al and select the pos ition again
Press the brake pedal and select the desired
selector lever position again. You can then
continue driving.
[O] Tran smi ssio n hot: ple ase m odify dri ving
style
The transm iss io n temperat ure has in cr eased
s ignificantly due to the spor ty driving manner.
Drive in a less sporty ma nner until the tem
perature returns to the normal range and the
indicator light switches of.
[O] Transmi ssion malfun ction: You can c on
tinue driv ing
T he re is a system malfunction i n the t ransm is
s ion. You m ay cont inue drivi ng. Drive to you r
authorized Aud i dea ler o r qualified repa ir fa
c il ity soon to have the malfunction corrected.
[O] Transmis sion malfun ction: Limited driv
ing functionality
There is a system malfunction in the t ransm is
s ion . The transm ission is switching to emer
gency mode . This mode o nly shifts into ce r
ta in gears o r will no longer shift at all. The en
gine may sta ll. Drive to your authorized Audi
dealer or qualified repair faci lity immediately
to have the malfunction corrected .
[O] Transmi ssion malfunc tion: St op and shift
~p ~
Page 109 of 294

Do not continue driving. Select the P se lector
lever position and see your authorized Audi
dealer or qualified repair facility for assis
tance.
(D Note
If the transmission switches to emergency
mode, you shou ld take the vehicle to an
author ized Audi dealership as soon as pos
sible to have the cond ition corrected.
Emergency release of the selector lever
App lies to vehicles: with tiptron ic
If the vehicle's power supply foils, the selec
tor lever con be released in on emergency.
Fig. 115 Emergency release for selecto r lever
• To reach the eme rgency release mechan ism,
remove the asht ray insert*.
• Loosen and remove the small cap in the
ashtray mount<=:>
fig. 115.
• You now have access to a bolt. Using a
screwdriver or simi lar, press the bolt down
and hold it down.
• Now press the inter lock and move the selec-
tor lever to the
N position.
The selector lever can only be moved from the
P position if the ignition is turned on. If the
veh icle has to be pushed or towed if the power
supply fails (e.g. battery is discharged), the
selector lever must first be moved to the
N
position using the emergency locking device.
Automatic Transmission 107
Page 110 of 294

108 Parking system
Parking system
General information
Applies to vehicles: Aud i pa rki ng syste m plus/Audi park
ing system plus w ith rear v iew camera
Depending on your vehicle's equ ipment, vari
ous parking aids wil l help you when pa rk ing
and maneuvering.
The Audi p arking sy ste m p lu s assists you
when park ing by p rov iding audio and visual
warn ings abo ut objec ts
in front of and behind
the vehicle¢ page 108.
The Audi p arking sy ste m p lu s with rear view
c am era shows the area behind the vehicle in
the disp lay . Thi s image helps you when paral
lel parki ng or cross parking. The system a lso
p rovides the parking aid audio and vis ual sig
na ls
¢ page 109.
0) Tips
For information on clean ing, refer to
¢page 202.
Audi parking system
plus
Description
Ap plies to vehicles: with park ing system p lus
Audi parking system plus provides audio and
visual signals when parking .
Sensors are located in the front and rear
bumpers .
If these detect an obs tacle, aud ible
and v isua l signa ls warn you . The range at
which the sensors begin to measure is approx
i ma tely:
side 3 ft (0.90 m)
front
4 ft ( 1. 20 m)
side 2 ft (0.60 m)
rear S.2 ft (1.60 m)
The clos er you get to the obsta cle, the sho rter
the interval between the audible signa ls. A
continuous tone so unds when the obstacle is
less than approximate ly 1 foo t (0.30 meters)
away. Do not continue driving farther! If the distance to an obstacle remains con
stant, the volume of the distance warning
gradua
lly drops after about fo ur seconds (this
does not apply in the continuous tone range).
Switching on and off
Applies to vehicles: wit h parking system plus
Fig . 1 16 Center console: Parking system sw itch
F ig. 117 MMI d isplay: visual distance display
Switching on
.,. Switch the MMI on
.,. Activate comfort or auto mode in Audi drive
selec t ¢
page 96.
.,. Shift into reverse or
.,. Press the switch~ in the center conso le
¢
fig . 116. A short confirmation tone
sounds and the indicator light in the switch
lights up.
Switching off
.,. Drive faste r th an 6 mph ( 10 km/h), or
.,. press the switch
~ or
.,. switch off the ignition.
Segments in the visual display
The red segments in front of and behind the
vehicle ¢
fig. 117 help yo u to dete rm ine the
distan ce between yo u and an obstacle. As
you r vehicle comes close r to the obstacle, the .,.
Page 111 of 294

segments move closer to the vehicle. The col
lision area has been reached when the next to
last segment is displayed. Do not continue
driving farther
c:> ,& !
A WARNING
- Sensors have blind spots in which objects
cannot be detected . Pay special attention
to small children and animals because
the sensors cannot always detect them .
- The parking system cannot replace the
driver's attention. The driver alone is re
sponsible for parking and similar driving
maneuvers.
-Always keep your eyes on the veh icle's
surround ings, using the rear
view mirror
as well.
(D Note
Low obstacles already signaled by a warn
ing can disappear from the system 's detec
tion range as they are approached and will
not continue to be signaled. Objects such
as barrier chains, trailer draw bars, thin
pa inted vertical poles or fences may not be
detected by the system, posing risk of
damage.
(D Tips
- The sensors must be kept clean and free
of snow and ice for the park assist to op
erate.
- You can change the volume and pitch of
the signals as well as the display
<=> page 113.
-What appears in the display is time-de
l ayed.
Parking system 109
Audi parking system
plus with rear view
camera
Introduction
App lies to vehicles: park ing system p lus wit h rear view
came ra
Fig. 118 Park ing mode 1: reverse parking
Fig . 1 19 Park ing mode 2: parallel parking
This parking system integrates a rearview
camera
in addition to the audio and visual
parking system signals
¢ page 108.
0 0 ± .. a,
You can choose between two modes to assist
you w ith parking. For example, you can use
"parking mode 1" when parking in a parking
space or garage
c:> fig . 118. When you want to
park para llel to the edge of the street, select
"p arking mode 2"
<=>fig. 119 .
Page 112 of 294

110 Parking system
General Information
A pplies to vehicles: with par king system p lus w it h rear
view ca mera
Fig. 120 Area covered
(D and area not covered @ by
the rear view came ra.
Fig. 121 Rear lid : Locat ion of the rear view camera
Rear view camera coverage area
The MMI display shows the area covered by
the rear view camera
c::;, fig. 120 (i). Objects
that are not in the area covered @are not
shown on the MMI display.
N 0
9 (!)
~
We recommend that you practice park ing with
the rear v iew camera in a traffic-free locat ion
or parking lot to become familiar w ith the sys
tem, the orientation l ines, and their funct ion .
When doing th is, there shou ld be good light
and weather conditions.
In the MMI display, objects or vehicles appear
closer or further away if:
- you are driving in reverse gear from a level surface onto an incline or a downward slope,
- you are driving in reverse gear toward pro
truding objects,
- the vehicle is carrying too much load in the
rear.
The accuracy of the orientat ion lines and blue
surfaces diminishes if: -
the rear view camera does not provide a reli
ab le image, for example, in poor visibility
conditions or if the lens is dirty,
- the image on the screen is not visib le due to
sun glare and reflection.
Caring for the rear view camera lens
T he rea r view camera is located above the rear
lic ense plate bracket. For the parking system
to operate, the lens
r:!> fig. 121 m ust be kept
clean:
- Dampen the lens w ith a household alcohol
based g lass cleaner, and then wipe the lens
clean with a dry cloth
c::> (D .
-Remove snow with a hand br ush and ice
preferably with a de-ic ing spray
c::> (j) .
_& WARNING ,= --Sensors have blind spots in which objects
cannot be detected . Pay specia l attention
to small children and an imals because
the sensors cannot always detect them.
- The parking system cannot replace the
driver's attention. The driver alone is re
sponsible for parking and similar driving
maneuvers.
- Always keep your eyes on the vehicle's
surroundings, using the rear view mirror
as well.
- Do not allow yourself to be distracted
from traffic by the rea r view camera pic
tures.
- If the position and the installation angle
of the camera has changed, for example,
after a rear end coll ision, do not continue
to use the system for safety reasons .
Hav e it checked by a qualified dealership.
(D Note
-Low obstacles a lready s ignaled by a
warning can disappear from the system's detection range as they are approached
and will not continue to be signaled. Ob
jects such as barrier chains, trailer draw
bars, thin painted vertical poles or fen
ces may not be detected by the system,
posing risk of damage.