Page 411 of 664

411
5 5-5. Using the driving support systems
Driving
●Instances of the BSM function unnec-
essarily detecting a vehicle and/or
object may increase in the following
situations:
• When the sensor is misaligned due to
a strong impact to the sensor or its
surrounding area
• When the distance between your vehi-
cle and a guardrail, wall, etc. that
enters the detection area is short
• When driving up and down consecu-
tive steep inclines, such as hills, dips
in the road, etc.
• When vehicle lanes are narrow, or
when driving on the edge of a lane,
and a vehicle traveling in a lane other
than the adjacent lanes enters the
detection area
• When driving on roads with sharp
bends, consecutive curves, or uneven
surfaces
• When the tires are slipping or spinning
• When the distance between your vehi-
cle and a following vehicle is short
• When an accessory (such as a bicycle
carrier) is installed to the rear of the
vehicle
• When the vehicle throws up water or
snow behind.
■Operation of the RCTA func-
tion
The RCTA function uses radar sen-
sors to detect vehicles approaching
from the right or left at the rear of
the vehicle and alerts the driver of
the presence of such vehicles by
flashing the outside rear view mirror
indicators and sounding a buzzer.Approaching vehicles
Detection areas
■RCTA icon display
When a vehicle approaching from
the right or left at the rear of the
vehicle is detected, the following
will be displayed on the navigation
system (if equipped) or multimedia
system (if equipped) screen.
When the Toyota parking assist
monitor (if equipped) is displayed
When the panoramic view moni-
tor (if equipped) is displayed
The Rear Crossing Traffic
Alert function (if equipped)
A
B
Page 461 of 664

461
6
6-1. Using the air conditioning system and defogger
Interior features
●The outside temperature is extremely
low
●When the hybrid system is cool (for
example, after being left for a long time in low temperatures)
■Windshield defogger
When defogging the windshield using
the Remote Air Conditioning System, defogging may be insufficient due to the power being restricted more than during
normal air conditioning operation. Also, the outside of the windshield may fog up due to the outside temperature, humidity
or air conditioning set temperature.
■Using the heater via the Remote Air Conditioning System
●When the outside temperature is low, heating may feel insufficient due to restricted operation of the air condi-
tioning.
●When the outside heat exchanger
becomes frosted over, heating perfor- mance may decline due to automati-cally switching to the frost removal
operation. ( P.452)
■Security feature
Any unlocked doors will be automatically locked when the system is operating.
The emergency flashers flash to indicate that the doors have been locked or the system has been turned off.
■Conditions affecting operation
P.225
■While the Remote Air Conditioning System is operating
●Depending on the operating condition of the Remote Air Conditioning Sys-tem, the air conditioning compressor
or cooling fan may spin and an operat- ing noise may be heard.However, this does not indicate a mal-
function.
●The air conditioning operation
switches, etc. will not operate while the Remote Air Conditioning System is operating.
■Electronic key battery depletion
P.202
■When the electronic key battery is fully depleted
P.543
■Customization
Setting (e.g. Operation using “A/C” on the wireless remote control) can be changed. (Customizable features:
P.629)
WARNING
■Precautions for the Remote Air Conditioning System
●Do not use the system if people are in the vehicle. Even when the system is in use, the
internal temperature may still reach a high or low level due to features such as the automatic shut-off.
Children and pets left inside the vehicle may suffer heatstroke dehy-dration or hypothermia, or could
result in death or serious injury.
●Depending on the surrounding envi-
ronment, signals from the wireless switch may transmit further than expected. Pay appropriate attention
to the vehicle’s surroundings and use the switch only when neces-sary.
●Do not operate “A/C” on the wire-less remote control if the hood is
open. The air conditioning may operate unintentionally and objects may be drawn into the electrical
cooling fan.
NOTICE
■To prevent the hybrid battery (traction battery) from being dis-charged
Use “A/C” on the wireless remote control only when necessary.
Page 472 of 664
4726-3. Using the storage features
Raise the hook to use.
The cargo hooks are provided for
securing loose items.
Pull the tab and open the deck
board.
WARNING
■Items unsuitable for the open tray
Observe the following precautions when putting items in the open tray. Failure to do so may cause items to
be thrown out of the tray in the event of sudden braking or steering. In these cases, the items may interfere
with pedal operation or cause driver distraction, resulting in an accident.
●Do not store items in the tray that can easily shift or roll out.
●Do not stack items in the tray higher than the tray’s edge.
●Do not put items in the tray that may protrude over the tray’s edge.
Luggage compartment
features
Cargo hooks
WARNING
■When cargo hooks are not in use
To avoid injury, always return the hooks to their stowed positions when not in use.
Deck board
Page 474 of 664
4746-3. Using the storage features
2Pull out the luggage cover and
hook it onto the anchors.
■Removing the luggage cover
1 Release the cover from the left
and right anchors and allow it to
retract.
2 Compress the end of the lug-
gage cover and lift the luggage
cover up.
■Stowing the luggage cover
(except for vehicles with spare
tire)
1 Open the rear deck board and
remove the deck side cover.
2 Place the both ends of the lug-
gage cover into the holder.
WARNING
■Luggage cover
●When installing/stowing the lug-
gage cover, make sure that the lug- gage cover is securely installed/stowed. Failure to do so
may result in serious injury in the event of sudden braking or a colli-sion.
●Do not place anything on the lug-gage cover. In the event of sudden
braking or turning, the item may go flying and strike an occupant. This could lead to an unexpected acci-
dent, resulting in death or serious injury.
Page 498 of 664
4987-3. Do-it-yourself maintenance
1Pull the hood lock release lever.
The hood will pop up slightly.
2Push the auxiliary catch lever to
the left and lift the hood.
3 Hold the hood open by inserting
the supporting rod into the slot.Hood
Release the lock from the
inside of the vehicle to open
the hood.
Opening the hood
WARNING
■Pre-driving check
Check that the hood is fully closed
and locked. If the hood is not locked properly, it
may open while the vehicle is in motion and cause an accident, which may result in death or serious injury.
■To prevent burns
Do not touch the pipes when the com-
pressor is operating or after it is stopped, because the pipes are hot.
Touching by hands before the pipes
cool down may cause burns.
■After installing the support rod
into the slot
Make sure the rod supports the hood securely from falling down on to your
head or body.
Page 508 of 664

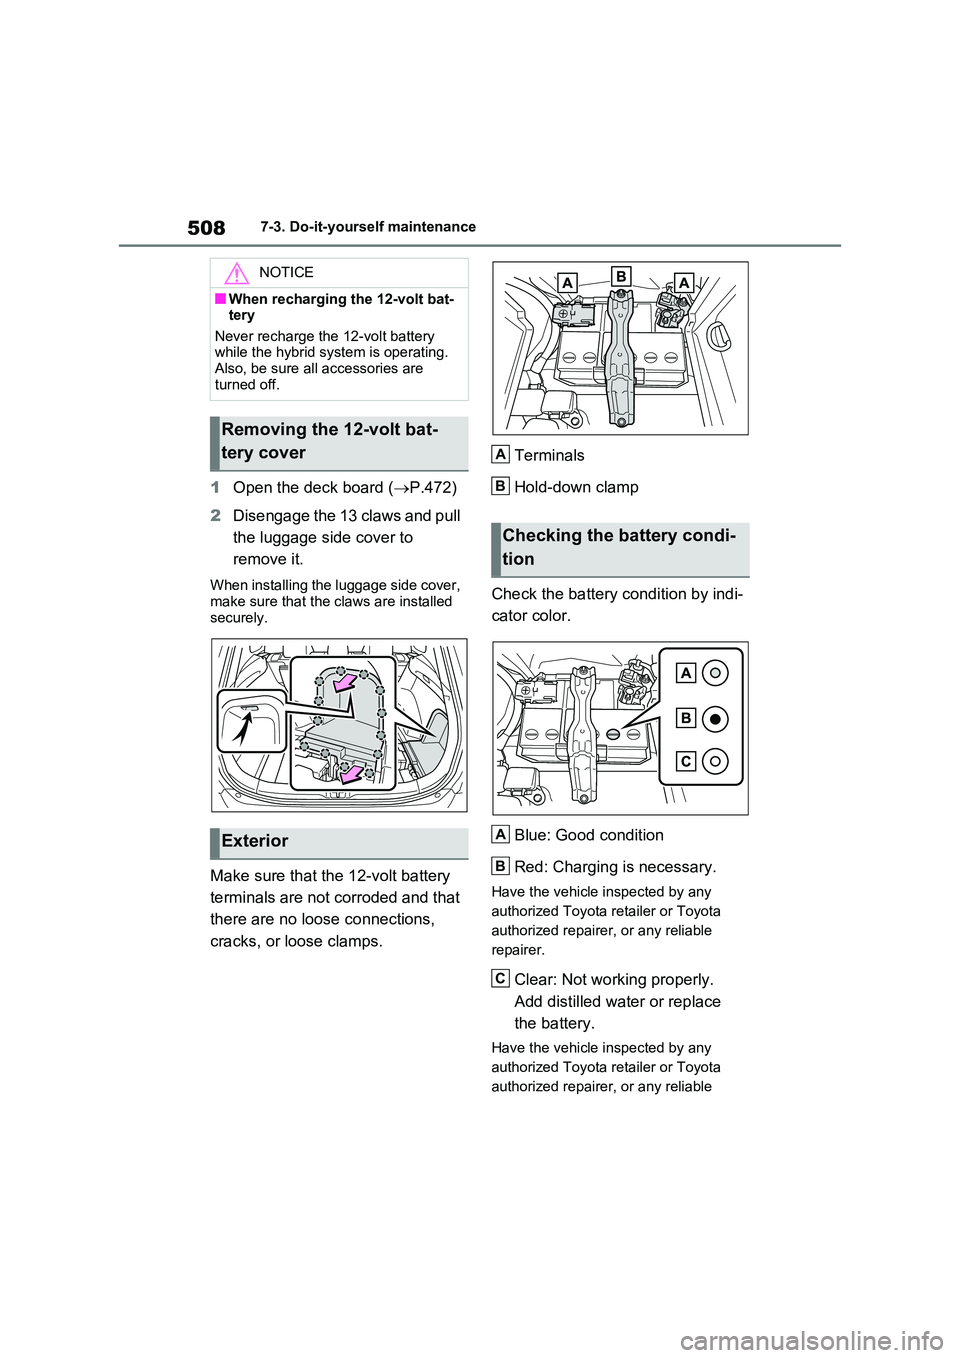
5087-3. Do-it-yourself maintenance
1Open the deck board (P.472)
2 Disengage the 13 claws and pull
the luggage side cover to
remove it.
When installing the luggage side cover,
make sure that the claws are installed securely.
Make sure that the 12-volt battery
terminals are not corroded and that
there are no loose connections,
cracks, or loose clamps.
Terminals
Hold-down clamp
Check the battery condition by indi-
cator color.
Blue: Good condition
Red: Charging is necessary.
Have the vehicle inspected by any
authorized Toyota retailer or Toyota
authorized repairer, or any reliable
repairer.
Clear: Not working properly.
Add distilled water or replace
the battery.
Have the vehicle inspected by any
authorized Toyota retailer or Toyota
authorized repairer, or any reliable
NOTICE
■When recharging the 12-volt bat- tery
Never recharge the 12-volt battery while the hybrid system is operating. Also, be sure all accessories are
turned off.
Removing the 12-volt bat-
tery cover
Exterior
Checking the battery condi-
tion
A
B
A
B
C
Page 540 of 664
5407-3. Do-it-yourself maintenance
rag.
3Slide the wiper blade to remove
it from the wiper arm.
When installing, reverse the steps
listed.
■Wiper insert replacement
1Pull the wiper insert to remove
the claw of the wiper blade from the stopper, and pull out the
wiper insert.
Stopper
Claw
2Remove the 2 metal plates from
the wiper insert pulled out, and
install the plates to a new wiper
insert.
Make sure that the cutout location and
warp direction of the metal blades are
same as the original.
3Install the wiper insert to the
wiper blade from the side with-
out the stopper.
4Secure the stopper of the wiper
insert with the claw of the wiper
blade.
A
B
Page 547 of 664

547
7
7-3. Do-it-yourself maintenance
Maintenance and care
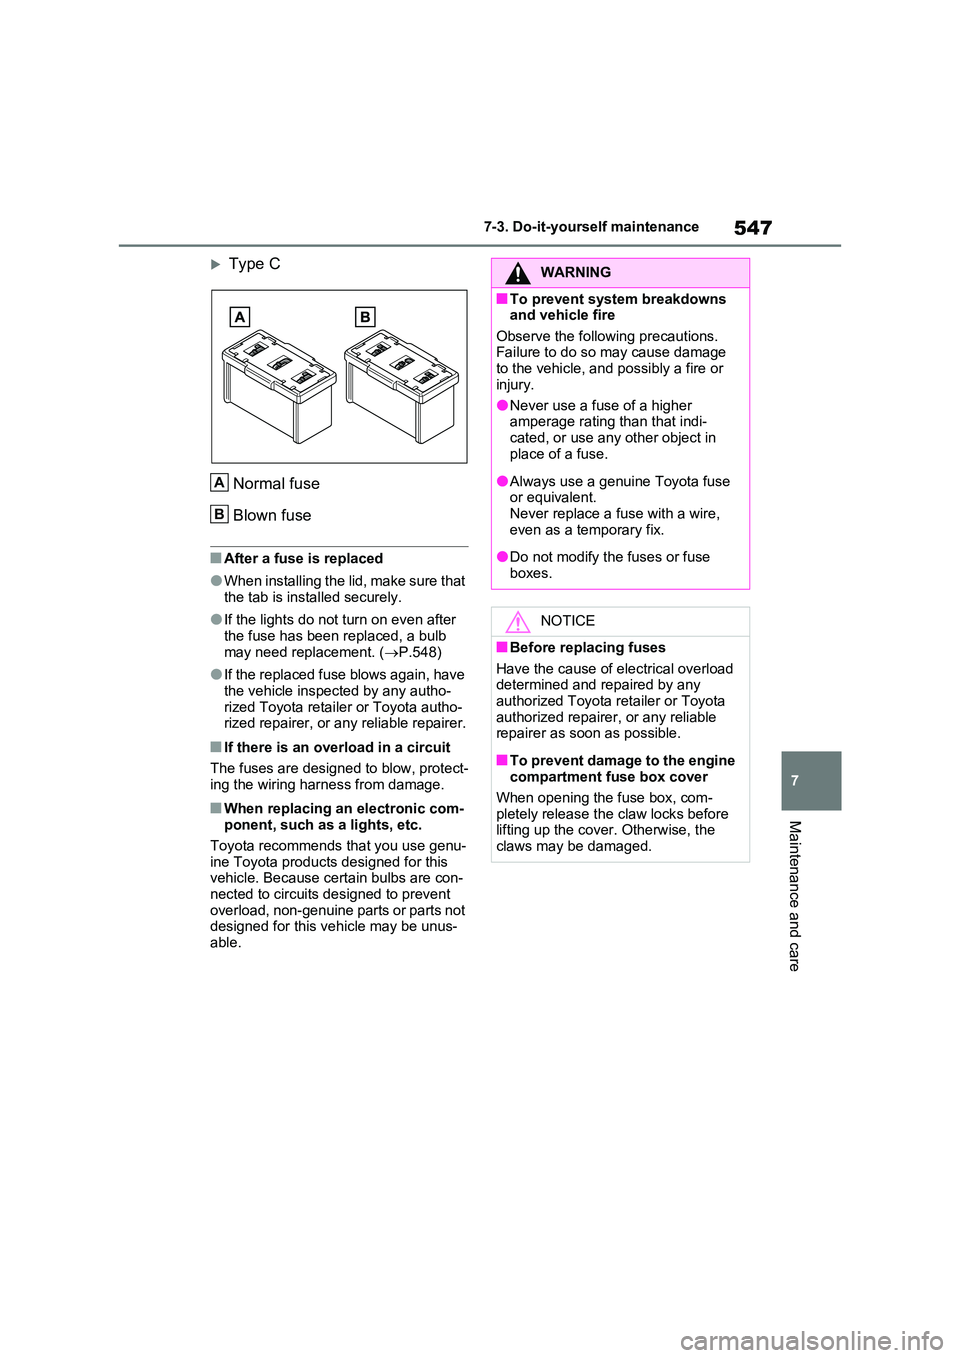
Type C
Normal fuse
Blown fuse
■After a fuse is replaced
●When installing the lid, make sure that
the tab is installed securely.
●If the lights do not turn on even after
the fuse has been replaced, a bulb may need replacement. ( P.548)
●If the replaced fuse blows again, have the vehicle inspected by any autho-
rized Toyota retailer or Toyota autho- rized repairer, or any reliable repairer.
■If there is an overload in a circuit
The fuses are designed to blow, protect-
ing the wiring harness from damage.
■When replacing an electronic com- ponent, such as a lights, etc.
Toyota recommends that you use genu-
ine Toyota products designed for this vehicle. Because certain bulbs are con-nected to circuits designed to prevent
overload, non-genuine parts or parts not designed for this vehicle may be unus-able.
A
B
WARNING
■To prevent system breakdowns and vehicle fire
Observe the following precautions. Failure to do so may cause damage to the vehicle, and possibly a fire or
injury.
●Never use a fuse of a higher amperage rating than that indi-
cated, or use any other object in place of a fuse.
●Always use a genuine Toyota fuse or equivalent.Never replace a fuse with a wire,
even as a temporary fix.
●Do not modify the fuses or fuse
boxes.
NOTICE
■Before replacing fuses
Have the cause of electrical overload determined and repaired by any authorized Toyota retailer or Toyota
authorized repairer, or any reliable repairer as soon as possible.
■To prevent damage to the engine compartment fuse box cover
When opening the fuse box, com- pletely release the claw locks before lifting up the cover. Otherwise, the
claws may be damaged.