Page 2356 of 3787
EI-26
< ON-VEHICLE REPAIR >
FENDER PROTECTOR
FENDER PROTECTOR
ComponentINFOID:0000000005929560
Removal and InstallationINFOID:0000000005929561
FRONT FENDER PROTECTOR
Removal
1. Remove front fender protector bolts and clips.
2. Remove front fender protector.
Installation
Installation is in the reverse order of removal.
REAR FENDER PROTECTOR
Removal
1. Remove rear fender protector bolt and clip.
2. Remove rear fender protector.
Installation
Installation is in the reverse order of removal.
1. Front fender protector 2. Clip C2053. Rear fender protector
Clip C103 Vehicle front
LIIA2567E
Revision: May 2010 2011 Versa
Page 2357 of 3787
ROOF SIDE MOLDINGEI-27
< ON-VEHICLE REPAIR >
C
DE
F
G H
J
K L
M A
B
EI
N
O P
ROOF SIDE MOLDING
ComponentINFOID:0000000005929562
Hatchback Models
Sedan Models
Removal and InstallationINFOID:0000000005929563
REMOVAL
1. Using a suitable tool, release the rear roof side molding clip and remove.
2. Lift up rear edge of roof side molding working forward.
3. Release front roof side molding clip, then remove roof side molding.
INSTALLATION
Installation is in the reverse order of removal.
NOTE:
WIIA1408E
1. Roof side molding A. Front roof side molding clip B. Rear roof side molding clip
WIIA1409E
1. Roof side moldingA. Front roof side molding clip B. Rear roof side molding clip
Revision: May 2010 2011 Versa
Page 2358 of 3787
EI-28
< ON-VEHICLE REPAIR >
ROOF SIDE MOLDING
Make sure front edge of roof side molding contacts windshield mold-
ing with no gap.
• For setting a new clip A or B, use Epoxy Adhesive DP-100C madeby 3M. For adhesive DP-100C application use an applicator 9170
EPX W 1:1 and mixer nozzle 9742 EPX 50ML made by 3M.
PIIB2599J
Revision: May 2010 2011 Versa
Page 2359 of 3787
DOOR OUTSIDE MOLDINGEI-29
< ON-VEHICLE REPAIR >
C
DE
F
G H
J
K L
M A
B
EI
N
O P
DOOR OUTSIDE MOLDING
ComponentINFOID:0000000005929564
Hatchback Models
WIIA1410E
1. Front door outside molding 2. Rear door outside molding3. Rear door corner cover
C. Clip C101
Revision: May 2010 2011 Versa
Page 2360 of 3787
EI-30
< ON-VEHICLE REPAIR >
DOOR OUTSIDE MOLDING
Sedan Models
Removal and InstallationINFOID:0000000005929565
FRONT DOOR OUTSIDE MOLDING
CAUTION:
• Use care while removing to avoid permanent damage to part from excessive force during removal.
• After removal, visually inspect mold ing; replace if deformed or damaged.
Removal
1. Open front door window.
2. Remove front door outside molding screw.
3. While pulling up on front of front door outside molding, insert a
suitable tool beneath the molding and release it from the door
top edge.
WIIA1411E
1. Front door outside molding 2. Rear door outside molding3. Rear door corner cover
C. Clip C101
PIIB3386J
Revision: May 2010 2011 Versa
Page 2361 of 3787

DOOR OUTSIDE MOLDINGEI-31
< ON-VEHICLE REPAIR >
C
DE
F
G H
J
K L
M A
B
EI
N
O P
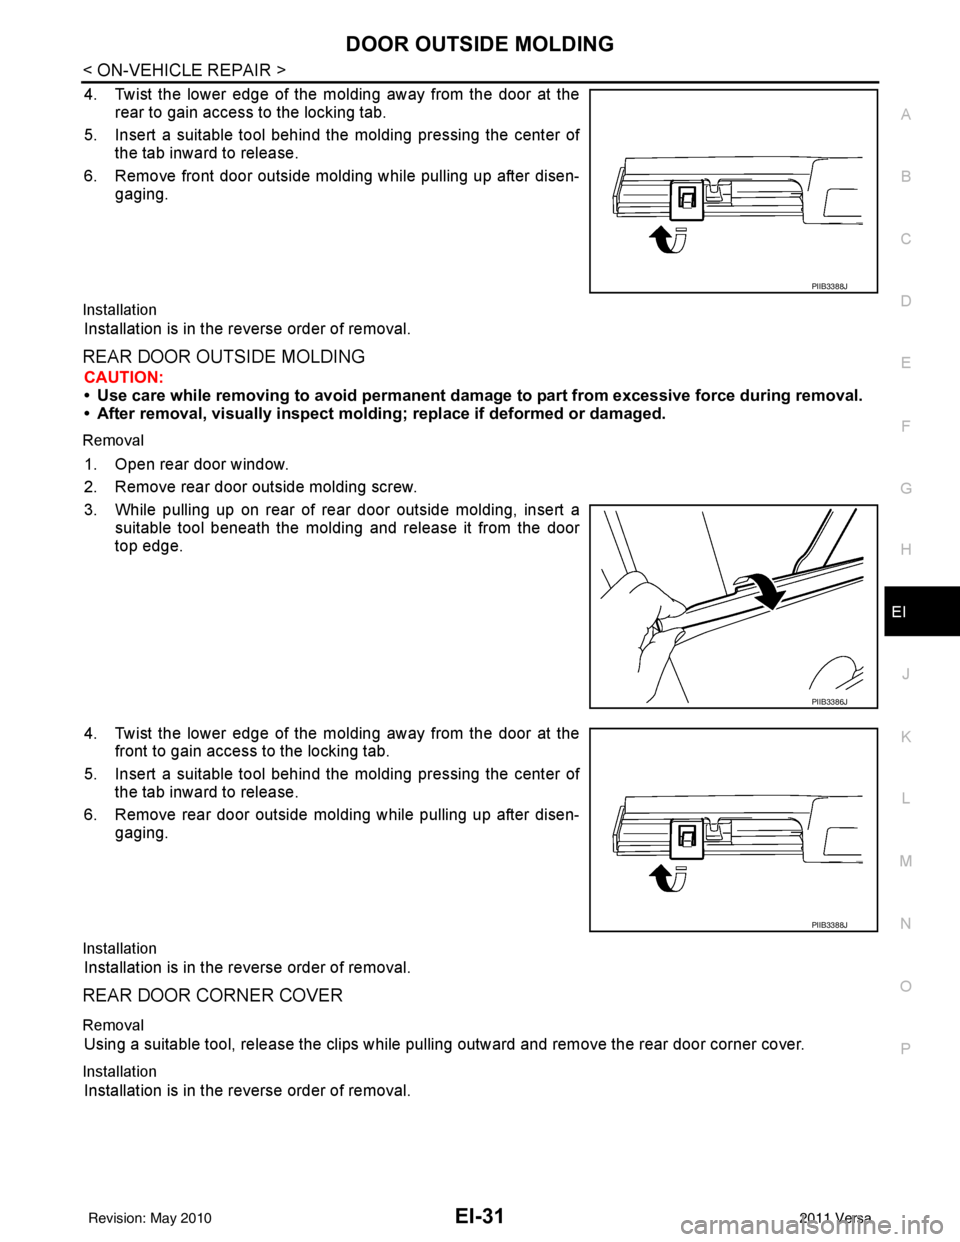
4. Twist the lower edge of the molding away from the door at the rear to gain access to the locking tab.
5. Insert a suitable tool behind the molding pressing the center of the tab inward to release.
6. Remove front door outside molding while pulling up after disen- gaging.
Installation
Installation is in the reverse order of removal.
REAR DOOR OUTSIDE MOLDING
CAUTION:
• Use care while removing to avoid permanent damage to part from excessive force during removal.
• After removal, visually inspect molding; replace if deformed or damaged.
Removal
1. Open rear door window.
2. Remove rear door outside molding screw.
3. While pulling up on rear of rear door outside molding, insert a
suitable tool beneath the molding and release it from the door
top edge.
4. Twist the lower edge of the molding away from the door at the front to gain access to the locking tab.
5. Insert a suitable tool behind the molding pressing the center of the tab inward to release.
6. Remove rear door outside molding while pulling up after disen- gaging.
Installation
Installation is in the reverse order of removal.
REAR DOOR CORNER COVER
Removal
Using a suitable tool, release the clips while pulling outward and remove the rear door corner cover.
Installation
Installation is in the reverse order of removal.
PIIB3388J
PIIB3386J
PIIB3388J
Revision: May 2010 2011 Versa
Page 2362 of 3787
EI-32
< ON-VEHICLE REPAIR >
CENTER MUD GUARD
CENTER MUD GUARD
Removal and InstallationINFOID:0000000005929566
REMOVAL
1. Remove center mud guard screws, front and rear.
2. Remove center mud guard bolts at bottom edge and release double-faced adhesive tape from body side.
3. Open front and rear doors, then using a suitable tool , remove the clips and remove the center mud guard
from the body side.
4. Release the sill cover cap clips, then remove sill cover cap.
INSTALLATION
Installation is in the reverse order of removal.
NOTE:
• Always replace double-faced adhesive tape on back of center mud guard when installing.
• Do not wash vehicle within 24 hours after installation.
1. Sill cover cap 2. Center mud guard 3. Double-faced adhesive tape
A. Clip C205 Clip C101Vehicle front
WIIA1412E
Revision: May 2010 2011 Versa
Page 2366 of 3787
EI-36
< ON-VEHICLE REPAIR >
DOOR FINISHER
DOOR FINISHER
Removal and InstallationINFOID:0000000005929569
FRONT DOOR
Removal
1. Open front door and front door window.
2. Release the front door inside handle escutcheon pawls, thenslide the escutcheon rearward to remove from front door fin-
isher.
: Pawl
1. Power window and door lock/unlock switch finisher 2. Front door finisher 3. Inside handle escutcheon
Clip C101
LIIA2572E
AWJIA0421ZZ
Revision: May 2010 2011 Versa