Page 185 of 235

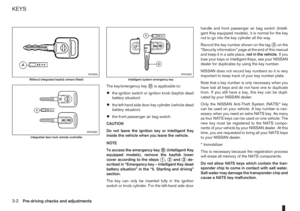
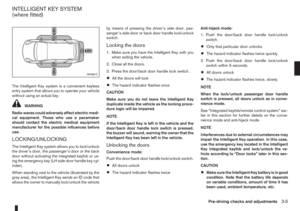
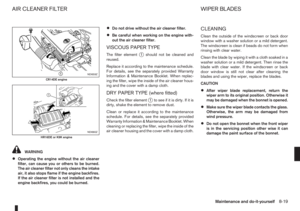
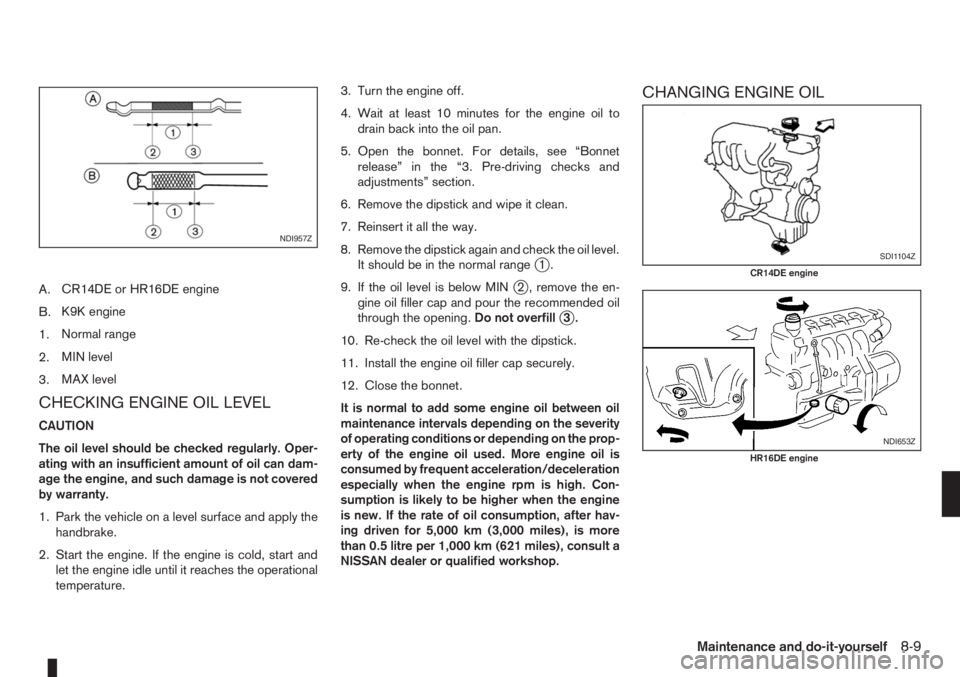
A.CR14DE or HR16DE engine
B.K9K engine
1.Normal range
2.MIN level
3.MAX level
CHECKING ENGINE OIL LEVEL
CAUTION
The oil level should be checked regularly. Oper-
ating with an insufficient amount of oil can dam-
age the engine, and such damage is not covered
by warranty.
1. Park the vehicle on a level surface and apply the
handbrake.
2. Start the engine. If the engine is cold, start and
let the engine idle until it reaches the operational
temperature.3. Turn the engine off.
4. Wait at least 10 minutes for the engine oil to
drain back into the oil pan.
5. Open the bonnet. For details, see “Bonnet
release” in the “3. Pre-driving checks and
adjustments” section.
6. Remove the dipstick and wipe it clean.
7. Reinsert it all the way.
8. Remove the dipstick again and check the oil level.
It should be in the normal range
j1.
9. If the oil level is below MIN
j2 , remove the en-
gine oil filler cap and pour the recommended oil
through the opening.Do not overfill
j3.
10. Re-check the oil level with the dipstick.
11. Install the engine oil filler cap securely.
12. Close the bonnet.
It is normal to add some engine oil between oil
maintenance intervals depending on the severity
of operating conditions or depending on the prop-
erty of the engine oil used. More engine oil is
consumed by frequent acceleration/deceleration
especially when the engine rpm is high. Con-
sumption is likely to be higher when the engine
is new. If the rate of oil consumption, after hav-
ing driven for 5,000 km (3,000 miles), is more
than 0.5 litre per 1,000 km (621 miles), consult a
NISSAN dealer or qualified workshop.
CHANGING ENGINE OIL
NDI957Z
SDI1104Z
CR14DE engine
NDI653Z
HR16DE engine
Maintenance and do-it-yourself8-9
Page 186 of 235

WARNING
•NISSAN recommends contacting a NISSAN
dealer or qualified workshop for engine oil
servicing.
NISSAN GREEN PROGRAM
A used oil filter should be disposed of at a
rubbish tip having proper facilities.
•Be careful not to burn yourself, as the engine
oil is hot.
•Prolonged and repeated contact with used
engine oil may cause skin cancer.
•Avoid direct skin contact with used oil. If skin
contact is made, wash thoroughly with soap
or hand cleaner and plenty of water as soon
as possible.
•Store used engine oil in marked containers
out of the reach of children.
1. Park the vehicle on a level surface and apply the
handbrake.
2. Start the engine. If the engine is cold, start and
let the engine idle until the engine temperature
reaches the operational temperature.
3. Turn the engine off and wait at least 10 minutes
to let the engine oil drain back into the oil pan.
4. Open the bonnet. For details, see “Bonnet
release” in the “3. Pre-driving checks and
adjustments” section.
5. Remove the engine oil filler cap.
6. Raise and support the vehicle using a suitable
floor jack and safety jack stands.
Place the safety jack stands under the vehicle
jack-up points.
For details, see “Flat tyre” in the “6. In case of
emergency” section.
7. Remove the engine compartment under cover
(where fitted).8. Place a large drain pan under the drain plug.
9. Remove the drain plug with a wrench and com-
pletely drain the oil.
If the engine oil filter needs to be changed, re-
move and replace it at this time. See “Changing
engine oil filter” later in this section.
10. Clean and reinstall the drain plug along with a
new washer. Securely tighten the drain plug
with a wrench.Do not use excessive force.
Drain plug tightening torques:
CR14DE or HR16DE engine:
34.3 N•m (3.5 kg-m, 25 ft-lb)
K9K engine:
20 N•m (2.0 kg-m, 15 ft-lb)
11. Refill the engine with recommended engine oil
and quantity.
See “Capacities and recommended fuel/
lubricants” in the “9. Technical information” sec-
tion.
12. Check the oil level with the dipstick. For details,
see “Checking engine oil level” earlier in this
section. If necessary, add engine oil.
13. Install the engine oil filler cap securely.
14. Start the engine.
15. Check for any leakage around the drain plug.
Correct as required.
16. Turn the engine off and wait several minutes.
17. Check the oil level again with the dipstick. If
necessary, add engine oil.NDI509Z
Euro 4 — K9K engine
NDI1064
Euro 5 — K9K engine
8-10Maintenance and do-it-yourself
Page 187 of 235

18. Install the engine compartment undercover
(where fitted).
19. Lower the vehicle carefully to the ground.
20. Close the bonnet.
CHANGING ENGINE OIL FILTER
WARNING
•NISSAN recommends contacting a NISSAN
dealer or qualified workshop for engine oil fil-
ter servicing.
NISSAN GREEN PROGRAM
A used oil filter should be disposed of at a
rubbish tip having proper facilities.
Engine oil filter replacement
Removal:
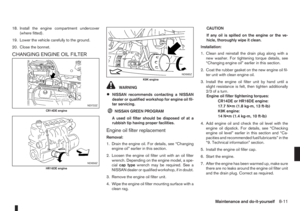
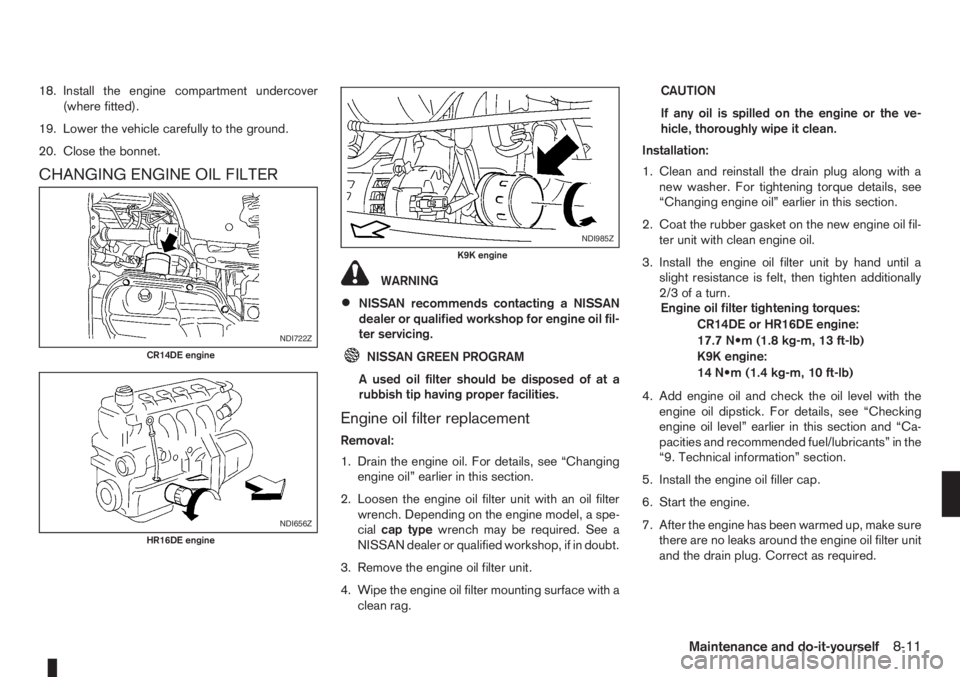
1. Drain the engine oil. For details, see “Changing
engine oil” earlier in this section.
2. Loosen the engine oil filter unit with an oil filter
wrench. Depending on the engine model, a spe-
cialcap typewrench may be required. See a
NISSAN dealer or qualified workshop, if in doubt.
3. Remove the engine oil filter unit.
4. Wipe the engine oil filter mounting surface with a
clean rag.CAUTION
If any oil is spilled on the engine or the ve-
hicle, thoroughly wipe it clean.
Installation:
1. Clean and reinstall the drain plug along with a
new washer. For tightening torque details, see
“Changing engine oil” earlier in this section.
2. Coat the rubber gasket on the new engine oil fil-
ter unit with clean engine oil.
3. Install the engine oil filter unit by hand until a
slight resistance is felt, then tighten additionally
2/3ofaturn.
Engine oil filter tightening torques:
CR14DE or HR16DE engine:
17.7 N•m (1.8 kg-m, 13 ft-lb)
K9K engine:
14 N•m (1.4 kg-m, 10 ft-lb)
4. Add engine oil and check the oil level with the
engine oil dipstick. For details, see “Checking
engine oil level” earlier in this section and “Ca-
pacities and recommended fuel/lubricants” in the
“9. Technical information” section.
5. Install the engine oil filler cap.
6. Start the engine.
7. After the engine has been warmed up, make sure
there are no leaks around the engine oil filter unit
and the drain plug. Correct as required.
NDI722Z
CR14DE engine
NDI656Z
HR16DE engine
NDI985Z
K9K engine
Maintenance and do-it-yourself8-11
Page 188 of 235

8. Turn the engine off and wait several minutes.
Check the oil level and add engine oil, if neces-
sary.
9. Install the engine compartment under cover
(where fitted).
10. Lower the vehicle carefully to the ground.
11. Close the bonnet.
PROTECT THE ENVIRONMENT
NISSAN GREEN PROGRAM
It is illegal to pollute drains, water courses and soil.
Use authorised waste collection facilities, including
civic amenity sites and garages providing facilities
for the disposal of used oil and used oil filters. If in
doubt, contact your local authority for advice on dis-
posal.
The regulations concerning the pollution of the
environment will vary from country to country.
BLEEDING THE FUEL SYSTEM
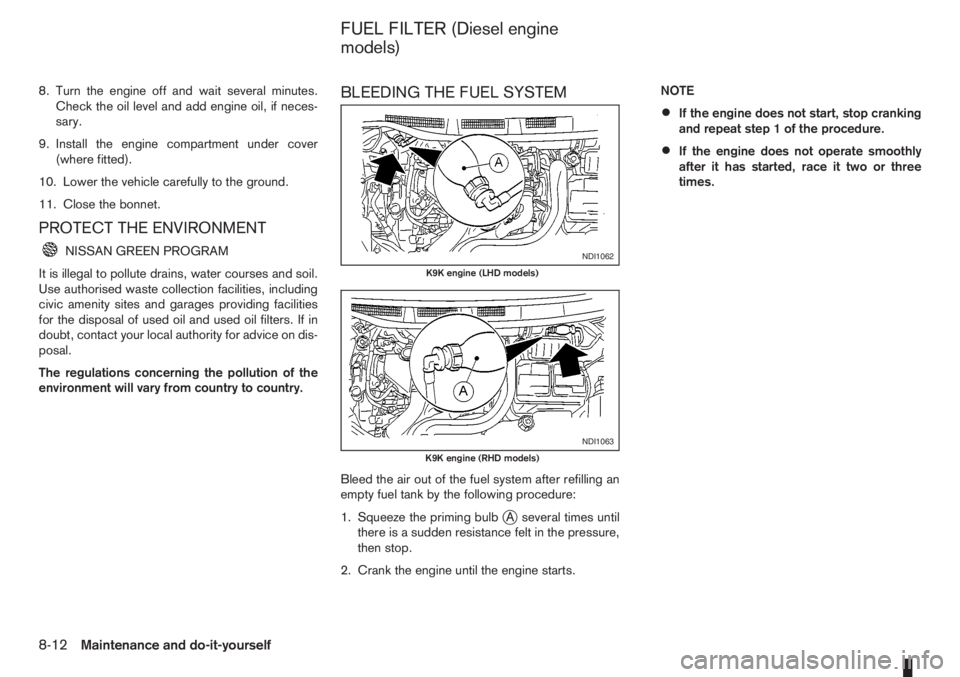
Bleed the air out of the fuel system after refilling an
empty fuel tank by the following procedure:
1. Squeeze the priming bulb
jA several times until
there is a sudden resistance felt in the pressure,
then stop.
2. Crank the engine until the engine starts.NOTE
•If the engine does not start, stop cranking
and repeat step 1 of the procedure.
•If the engine does not operate smoothly
after it has started, race it two or three
times.
NDI1062
K9K engine (LHD models)
NDI1063
K9K engine (RHD models)
FUEL FILTER (Diesel engine
models)
8-12Maintenance and do-it-yourself
Page 189 of 235

When checking or replacement is required, NISSAN
recommends contacting a NISSAN dealer or quali-
fied workshop for servicing.
CAUTION
•Use only Genuine NISSAN Matic D ATF. Do
not mix with other fluids.
•Using automatic transmission fluid other than
Genuine NISSAN Matic D ATF will cause dete-
rioration in driveability and automatic trans-
mission durability, and may damage the auto-
matic transmission, which is not covered by
the warranty.
CHECKING BRAKE PEDAL
If the brake pedal suddenly goes down further than
normal, the pedal feels “spongy” or the vehicle
seems to take longer to stop, see a NISSAN dealer
or qualified workshop.
CHECKING HANDBRAKE
Periodically check the holding ability of the hand-
brake by parking on a steep hill and restraining the
vehicle by using only the handbrake. If it does not
hold satisfactorily, see a NISSAN dealer or qualified
workshop.
WARNING
•Use only new fluid. Old, inferior, or contami-
nated fluid may damage the brake and clutch
systems. The use of improper fluids can dam-
age the brake system and affect the vehicle’s
stopping ability.
•Clean the filler cap before removing.
NDI1011Z
LHD models
NDI735Z
RHD models
AUTOMATIC TRANSMISSION
FLUID (ATF)BRAKES BRAKE AND CLUTCH FLUID
Maintenance and do-it-yourself8-13
Page 190 of 235

•Brake and clutch fluids are poisonous and
should be stored carefully in marked contain-
ers out of the reach of children.
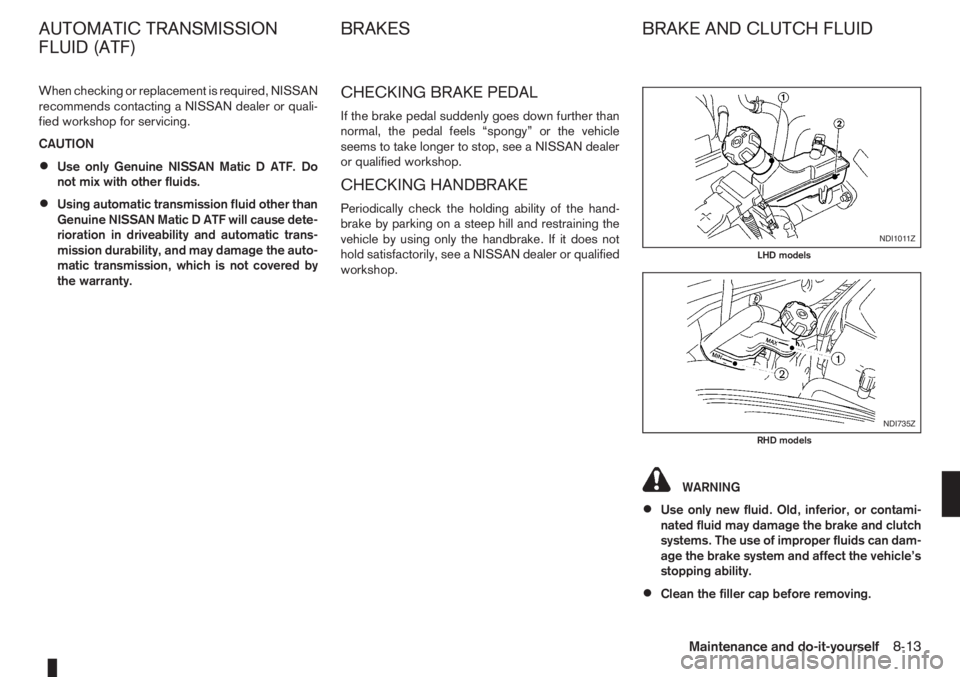
Check the fluid level in the reservoir. If the fluid level
is between the MIN
j2 and MAXj1 lines or the
brake warning light comes on, add fluid up to the
MAX line.
See “Capacities and recommended fuel/lubricants”
in the “9. Technical information” section for the rec-
ommended brake and clutch fluid type.
If fluid must be added frequently, the system should
be thoroughly checked by a NISSAN dealer or quali-
fied workshop.
CAUTION
•NISSAN recommends that refilling and check-
ing the brake and clutch systems should be
left to a NISSAN dealer or qualified workshop
who will have the necessary fluids and techni-
cal knowledge.
•Do not spill the fluid on painted surfaces. This
will damage the paint. If fluid is spilled, wash
with water.
WARNING
Anti-freeze window washer is poisonous and
should be stored carefully in marked containers
out of the reach of children.
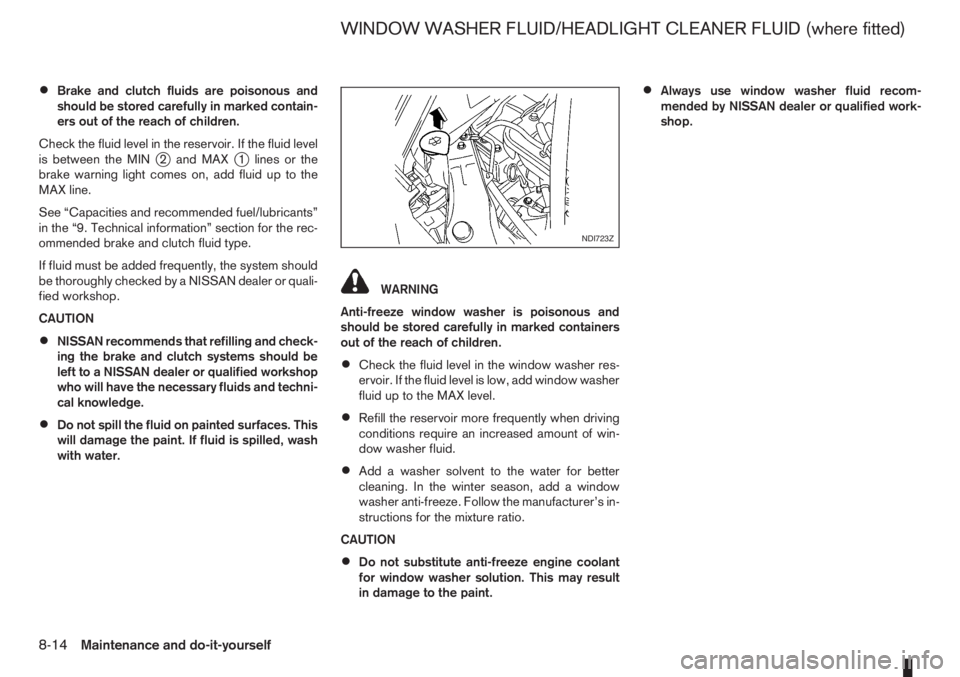
•Check the fluid level in the window washer res-
ervoir. If the fluid level is low, add window washer
fluid up to the MAX level.
•Refill the reservoir more frequently when driving
conditions require an increased amount of win-
dow washer fluid.
•Add a washer solvent to the water for better
cleaning. In the winter season, add a window
washer anti-freeze. Follow the manufacturer’s in-
structions for the mixture ratio.
CAUTION
•Do not substitute anti-freeze engine coolant
for window washer solution. This may result
in damage to the paint.
•Always use window washer fluid recom-
mended by NISSAN dealer or qualified work-
shop.
NDI723Z
WINDOW WASHER FLUID/HEADLIGHT CLEANER FLUID (where fitted)
8-14Maintenance and do-it-yourself
Page 191 of 235

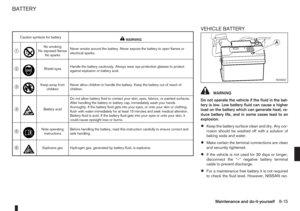
VEHICLE BATTERY
WARNING
Do not operate the vehicle if the fluid in the bat-
tery is low. Low battery fluid can cause a higher
load on the battery which can generate heat, re-
duce battery life, and in some cases lead to an
explosion.
•Keep the battery surface clean and dry. Any cor-
rosion should be washed off with a solution of
baking soda and water.
•Make certain the terminal connections are clean
and securely tightened.
•If the vehicle is not used for 30 days or longer,
disconnect the “–” negative battery terminal
cable to prevent discharge.
•For a maintenance free battery it is not required
to check the fluid level. However, NISSAN rec-
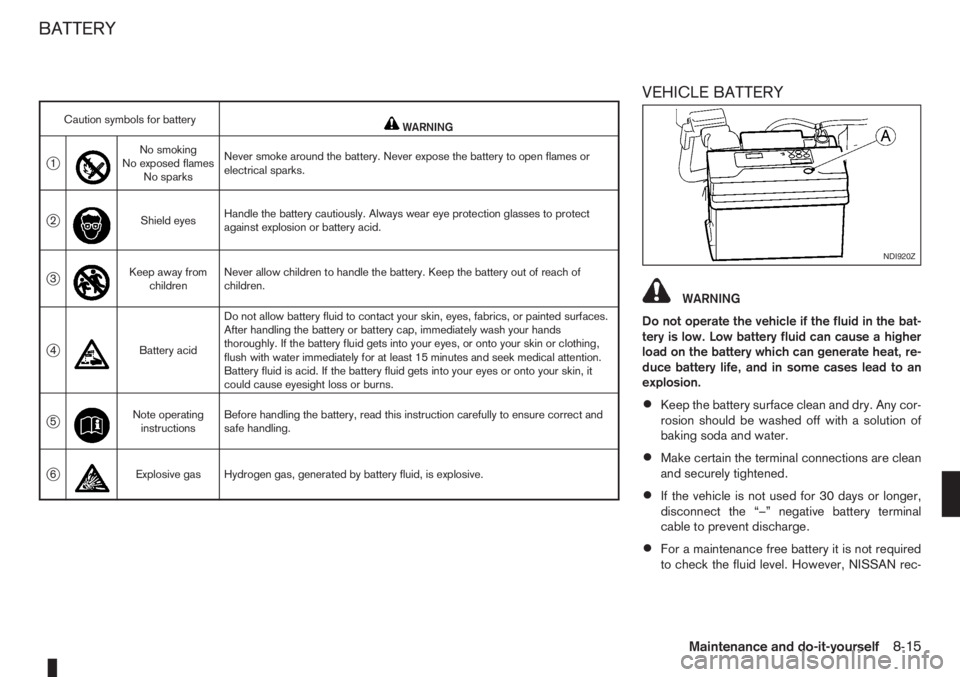
Caution symbols for batterymWARNING
j1
m
No smoking
No exposed flames
No sparksNever smoke around the battery. Never expose the battery to open flames or
electrical sparks.
j2
m
Shield eyesHandle the battery cautiously. Always wear eye protection glasses to protect
against explosion or battery acid.
j3
m
Keep away from
childrenNever allow children to handle the battery. Keep the battery out of reach of
children.
j4
m
Battery acidDo not allow battery fluid to contact your skin, eyes, fabrics, or painted surfaces.
After handling the battery or battery cap, immediately wash your hands
thoroughly. If the battery fluid gets into your eyes, or onto your skin or clothing,
flush with water immediately for at least 15 minutes and seek medical attention.
Battery fluid is acid. If the battery fluid gets into your eyes or onto your skin, it
could cause eyesight loss or burns.
j5
m
Note operating
instructionsBefore handling the battery, read this instruction carefully to ensure correct and
safe handling.
j6mExplosive gas Hydrogen gas, generated by battery fluid, is explosive.
NDI920Z
BATTERY
Maintenance and do-it-yourself8-15
Page 192 of 235

ommends to visually check the green indicatorjA status periodically. If it is not visible, replace
the battery as soon as possible.
•If battery replacement or check is required, con-
tact a NISSAN dealer or qualified workshop.
REINITIALISATION PROCEDURE
AFTER BATTERY RECONNECTION
Power window (Driver’s side —
where fitted)
When the vehicle battery has been connected, the
system must be reinitialised as follows:
1. Push down and hold the driver’s side window
switch until the window glass is completely low-
ered then release the switch.
2.In one continuous operation, pull up and hold
the driver’s side window switch until the window
glass is completely closed and continue holding
the switch for a further 5 seconds.
3. The system is now reinitialised.
Repeat the procedure every time the vehicle battery
is connected.
If the reinitialisation procedure cannot be performed
successfully, take your vehicle to a NISSAN dealer
or qualified workshop.
JUMP-STARTING
If jump-starting is necessary, see “Jump-starting” in
the “6. In case of emergency” section. If the engine
does not start by jump starting, the battery may have
to be replaced. Contact a NISSAN dealer or quali-
fied workshop.
8-16Maintenance and do-it-yourself