Page 177 of 235
Care of wheels ................................................... 8-31
Page 178 of 235

Your new NISSAN has been designed to have mini-
mum maintenance requirements with longer service
intervals, to save you both time and money. How-
ever, some day-to-day and regular maintenance is
essential to maintain your NISSAN’s good mechani-
cal condition, as well as its emission and engine
performance.
It is the owner’s responsibility to make sure that the
specified maintenance, as well as general mainte-
nance, is performed.
As the vehicle owner, you are the only one who can
ensure that your vehicle receives the proper mainte-
nance care.
SCHEDULED MAINTENANCE
For your convenience, the required scheduled main-
tenance items are described and listed in the sepa-
rately provided Warranty Information and Mainte-
nance booklet. You must refer to that booklet to
ensure that necessary maintenance is performed on
your NISSAN vehicle at regular intervals.
GENERAL MAINTENANCE
General maintenance includes those items which
should be checked during normal day-to-day opera-
tion of the vehicle. They are essential if your vehicle
is to continue to operate properly. It is your respon-
sibility to perform these procedures regularly as pre-
scribed.
Performing general maintenance checks requires
minimal mechanical skill and a few general automo-
tive tools.These checks or inspections can be done by your-
self, a qualified technician or, if you prefer, your
NISSAN dealer or qualified workshop.
WHERE TO GO FOR SERVICE
If maintenance service is required or your vehicle
appears to malfunction, have your vehicle checked
and tuned by an authorised NISSAN dealer or quali-
fied workshop.During the normal day-to-day operation of the ve-
hicle, general maintenance should be performed
regularly as prescribed in this section. If you detect
any unusual sounds, vibrations or smell, be sure to
check for the cause or have a NISSAN dealer or
qualified workshop do it promptly. In addition, you
should notify a NISSAN dealer or qualified work-
shop if repairs are required.
When performing any checks or maintenance work,
closely observe the “Maintenance precautions” later
in this section.
EXPLANATION OF GENERAL
MAINTENANCE ITEMS
Additional information on the following items with
an asterisk (*) is found later in this section.
The maintenance items listed here should be per-
formed from time to time, unless otherwise speci-
fied.
Outside the vehicle
Back door, doors and bonnet:
Check that the back door, all doors and the bonnet
operate properly. Also ensure that all latches lock
securely. Lubricate hinges and latches if necessary.
Make sure that the secondary latch keeps the bon-
net from opening when the primary latch is released.
When driving in areas using road salt or other cor-
rosive materials, check for lubrication frequently.
MAINTENANCE REQUIREMENTS GENERAL MAINTENANCE
8-2Maintenance and do-it-yourself
Page 179 of 235

Lights*:
Clean the headlights on a regular basis. Make sure
that the headlights, stop lights, tail lights, turn signal
lights, and other lights are all operating properly and
installed securely. Also check headlight aim.
Tyres*:
Check the pressure with a gauge periodically when
at a service station (including the spare) and adjust
to the specified pressure if necessary. Check care-
fully for damage, cuts or excessive wear.
Tyre rotation*:
Tyres should be rotated at least every 10,000 km
(6,000 miles). However, the timing for tyre rotation
may vary according to your driving habits and road
surface conditions.
Wheel alignment and balance:
If the vehicle pull to either side while driving on a
straight and level road, or if you detect uneven or
abnormal tyre wear, there may be a need for wheel
alignment. If the steering wheel or seat vibrates at
normal highway speeds, wheel balancing may be
needed.
Wheel bolts:
When checking the tyres, make sure no wheel bolts
are missing, and check for any loose wheel bolts.
Tighten if necessary.Windscreen:
Clean the windscreen on a regular basis. Check the
windscreen at least every six months for cracks or
other damage. Have a damaged windscreen re-
paired by a qualified repair facility.
Wiper blades*:
Check for cracks or wear if they do not wipe prop-
erly.
Under the bonnet and vehicle
The maintenance items listed here should be
checked periodically, e.g. each time you check the
engine oil or refuel.
Battery*:
Check if the green indicator on the top of the main-
tenance free battery is visible. If it is not visible,
replace the battery as soon as possible.
Vehicles operated in high temperatures or under
severe conditions, check the fluid level frequently.
Brake and clutch fluid level*:
Make sure that the brake and clutch fluid level is
between the MAX and MIN lines on the reservoir.
Engine coolant level*:
Check the coolant level when the engine is cold.
Engine drive belts*:
Make sure that the drive belts are not frayed, worn,
cracked or oily.Engine oil level*:
Check the level after parking the vehicle on a level
surface and turning off the engine.
Fluid leaks:
Check under the vehicle for fuel, oil, water or other
fluid leaks after the vehicle has been parked for a
while. Water dripping from the air conditioner after
use is normal. If you should notice any leaks or if
petrol fumes are evident, check for the cause and
have it corrected immediately.
Window washer fluid*:
Check that there is adequate fluid in the tank.
Inside the vehicle
The maintenance items listed here should be
checked on a regular basis, such as when perform-
ing periodic maintenance, cleaning the vehicle, etc.
Accelerator pedal:
Check the pedal for smooth operation and make
sure that the pedal does not catch or require uneven
effort. Keep the floor mats away from the pedal.
Brake pedal*:
Check the pedal for smooth operation. If the brake
pedal suddenly goes down further than normal, the
pedal feels spongy or the vehicle seems to take
longer to stop, contact a NISSAN dealer or qualified
workshop immediately. Keep the floor mat away
from the pedal.
Maintenance and do-it-yourself8-3
Page 180 of 235

Handbrake*:
Confirm that your vehicle is held securely on a fairly
steep hill with only the handbrake applied.
Seats:
Check seat position controls such as seat adjust-
ers, seatback recliner, etc. to ensure they operate
smoothly and all latches lock securely in every posi-
tion. Check that the head restraints move up and
down smoothly and the locks hold securely in all
latched positions.
Seat belts:
Check that all parts of the seat belt system (e.g.
buckles, anchors, adjusters and retractors) operate
properly and smoothly, and are installed securely.
Check the belt webbing for cuts, fraying, wear or
damage. See “Seat belt maintenance” in the
“1. Safety — seats, seat belts and supplemental
restraint system” section for further details.
Steering wheel:
Check for any change in the steering conditions,
such as excessive free play, hard steering or strange
noises.
Warning lights and audible reminders:
Make sure that all warning/indicator lights and au-
dible reminders are operating properly.
Windscreen defogger:
Check that the air comes out of the defogger outlets
properly when operating the heater or air condi-
tioner.Windscreen wiper and washer*:
Check that the wipers and washer operate properly
and that the wipers do not streak.When performing any inspection or maintenance
work on your vehicle, always take care to prevent
serious accidental injury to yourself or damage to
the vehicle. The following are general precautions
which should be closely observed.
•Park the vehicle on a level surface, apply the
handbrake securely and block the wheels to
prevent the vehicle from moving. For a manual
transmission models, move the gear lever to
N (Neutral) position. [For automatic transmis-
sion models, move the selector lever to P
(Park) position.]
•Do not work under the engine bonnet while
the engine is hot. Turn off the engine and wait
until it cools down.
•Be sure to turn the ignition switch to the “OFF”
or LOCK position.
When the ignition switch is in the ON or Acc
position, the cooling fan may start to operate
suddenly even when the engine is not run-
ning. To avoid injury, always disconnect the
negative battery cable before working near
the engine.
•If you must work with the engine running,
keep your hands, clothing, hair and tools away
from moving fans, belts and any other moving
parts.
•It is advisable to remove ties and any jewel-
lery, such as rings, watches, etc. before work-
ing on your vehicle.
MAINTENANCE PRECAUTIONS
8-4Maintenance and do-it-yourself
Page 181 of 235

•If you must run the engine in an enclosed
space such as a garage, be sure there is
proper ventilation for exhaust gases.
•Never get under the vehicle while it is sup-
ported only by a jack. If it is necessary to work
under the vehicle, support it with safety
stands.
•Keep smoking materials, flame and sparks
away from fuel and battery.
•Never connect or disconnect either the bat-
tery or any transistorised component connec-
tor while the ignition switch is in the ON posi-
tion.
•Never leave the engine or transmission re-
lated component harness connector discon-
nected while the ignition switch is in the ON
position.
•On petrol engine models with the multiport
fuel injection (MFI) system, the fuel filter or
fuel lines should be serviced by a NISSAN
dealer or qualified workshop because the fuel
lines are under high pressure even when the
engine is off.
•Always wear eye protection whenever you
work on your vehicle.
•Failure to follow these or other common sense
guidelines may lead to serious injury or ve-
hicle damage.
NISSAN GREEN PROGRAM
Improperly disposed engine oil and/or other
vehicle fluids can pollute the environment. Al-
ways conform to local regulations for disposal
of vehicle fluid.
This section gives instructions regarding only those
items which are relatively easy for an owner to per-
form.
You should be aware that incomplete or improper
servicing may result in operating difficulties or ex-
cessive emissions, and could affect your warranty
coverage.If in doubt about any servicing, have it
done by your NISSAN dealer or qualified work-
shop.For an overview of the engine compartment, see
“Engine compartment” in the “0. Illustrated table
of contents” section.
ENGINE COMPARTMENT
Maintenance and do-it-yourself8-5
Page 182 of 235
 when
the engine is hot. Serious burns could be
caused by high pressure fluid escaping either
from the radiat")
WARNING
•Never remove the engine coolant reservoir
cap or the radiator cap (where fitted) when
the engine is hot. Serious burns could be
caused by high pressure fluid escaping either
from the radiator or the engine coolant reser-
voir. Wait until the engine and radiator have
cooled down.
•Engine coolant is poisonous and should be
stored carefully in marked containers out of
the reach of children.
The engine cooling system is filled at the factory
with a high-quality, year-round and extended life en-
gine coolant. The high quality engine coolant con-
tains the specific solutions effective for the anti-cor-
rosion and the anti-freeze function. Therefore, addi-
tional cooling system additives are not necessary.
CAUTION
•When adding or replacing engine coolant, be
sure to use Genuine NISSAN anti-freeze L250
coolant or equivalent premixed type (mixture
ratio 50% for all ambient temperatures).
•The use of other types of engine coolant may
damage the engine cooling system.
•If the radiator or engine coolant reservoir tank
is equipped with a pressure cap, use a Genu-
ine NISSAN cap or its equivalent when re-
placement is required.
CHECKING ENGINE COOLANT
LEVEL
Check the coolant level in the reservoir when the
engine is cold. If the coolant level is below MINj2,
add coolant up to the MAXj1 level. If the reservoir
is empty, check the coolant level in the radiator
(where fitted)when the engine is cold.If there is
insufficient coolant in the radiator, fill the radiatorwith coolant up to the filler opening (where fitted)
and also add it to the coolant reservoir up to the
MAX level.
CAUTION
If the cooling system frequently requires coolant,
have it checked by a NISSAN dealer or qualified
workshop.
CHANGING ENGINE COOLANT
CAUTION
•Major cooling system repairs should be per-
formed by a NISSAN dealer or qualified work-
shop. The service procedures can be found in
the appropriate NISSAN Service Manual.
•When checking or replacement is required,
NISSAN recommends contacting a NISSAN
dealer or qualified workshop for servicing.
•Improper servicing or engine coolant change
can result in reduced heater performance and
engine overheating.
NDI742Z
Type A
NDI741Z
Type B
NDI719Z
CR14DE or HR16DE
ENGINE COOLING SYSTEM
8-6Maintenance and do-it-yourself
Page 183 of 235

WARNING
•To avoid the danger of being scalded, never
change the coolant when the engine is hot.
•Avoid direct skin contact with used coolant. If
skin contact is made, wash thoroughly with
soap or hand cleaner and plenty of water as
soon as possible.
•Keep coolant out of reach of children and
pets.
NISSAN GREEN PROGRAM
Engine coolant must be disposed of properly.
Check your local regulations.
CR14DE or HR16DE engine
1. Set the heater or air conditioner temperature
control to the maximum “HOT” position.
2. Open the bonnet. For details, see “Bonnet
release” in the “3. Pre-driving checks and
adjustments” section.
3. Open the radiator cap
j1 (where fitted) or en-
gine coolant reservoir cap to help to drain the
coolant.
4. Slacken off the radiator lower hose clip
j2and
remove the lower hosej3 to drain the coolant.
5. Flush the cooling system by running clean water
through the radiator filler opening (where fitted)
or engine coolant reservoir.
6. Install the radiator lower hose on the radiator
securely.7. Fill the radiator through the filler opening (where
applicable) slowly with coolant and fill the cool-
ant reservoir up to the MAX level. See “Capaci-
ties and recommended fuel/lubricants” in the
“9. Technical information” section for cooling
system capacity.
8. Install the radiator cap (where fitted) and the en-
gine coolant reservoir cap.
9. Start the engine, and warm it up until the radiator
fan operates. Then rev the engine two or three
times under no load. Observe the coolant tem-
perature warning light for signs of overheating.
10. Stop the engine. After it has completely cooled
down, refill the radiator up to the filler opening
(where fitted). If the coolant level lowered, fill
the engine coolant reservoir up to the MAX level.
11. Check radiator lower hose for any signs of leak-
age.
12. Close the bonnet.
K9K engine
1. Set the heater or air conditioner temperature
control to the maximum “HOT” position.
2. Open the bonnet. For details, see “Bonnet
release” in the “3. Pre-driving checks and
adjustments” section.
3. Disconnect the radiator lower hose
j1 and open
the drain plugj2 on the engine block.
4. Open the engine coolant reservoir cap to help to
drain the coolant.
5. Flush the cooling system by running fresh water
through the radiator.
6. Install the radiator lower hose to the radiator and
securely tighten the engine block drain plug.
7. Fill the reservoir up to the MAX level with cool-
ant. See “Capacities and recommended
fuel/lubricants” in the “9. Technical information”
section for cooling system capacity.
8. Install the engine coolant reservoir cap.
9. Start the engine and run the engine at about
2,000 rpm for 1 minute.
10. Stop the engine and check coolant level, allow
to cool and refill up to the MAX level.
11. Warm up the engine at about 2,000 rpm until it
reaches the normal operational temperature
(fan cycles).
Check heater core (below instrument panel) for
gurgling, refill if necessary.
NDI671Z
K9K engine
Maintenance and do-it-yourself8-7
Page 184 of 235
12. Stop the engine and check coolant level, allow
to cool and refill up to the MAX level.
13. Check the radiator lower hose for any signs of
leakage.
14. Close the bonnet.
NDI720Z
CR14DE engine
NDI721Z
HR16DE engine
NDI743Z
Euro 4 — K9K engine
NDI1061
Euro 5 — K9K engine
ENGINE OIL
8-8Maintenance and do-it-yourself
 1
1 2
2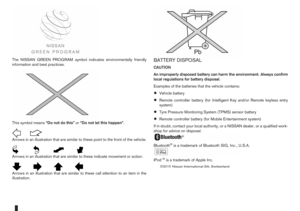 3
3 4
4 5
5 6
6 7
7 8
8 9
9 10
10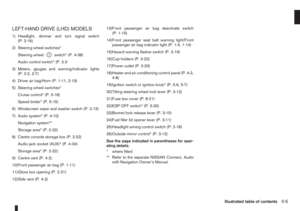 11
11 12
12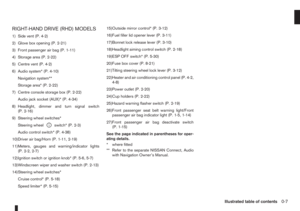 13
13 14
14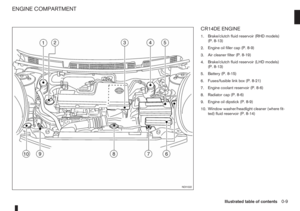 15
15 16
16 17
17 18
18 19
19 20
20 21
21 22
22 23
23 24
24 25
25 26
26 27
27 28
28 29
29 30
30 31
31 32
32 33
33 34
34 35
35 36
36 37
37 38
38 39
39 40
40 41
41 42
42 43
43 44
44 45
45 46
46 47
47 48
48 49
49 50
50 51
51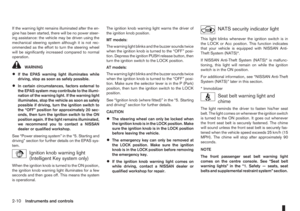 52
52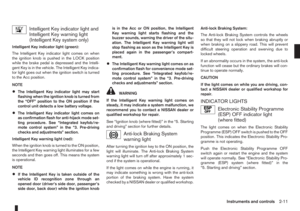 53
53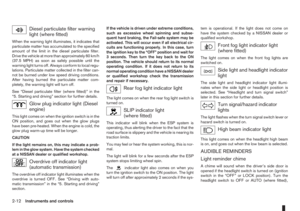 54
54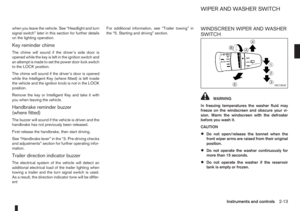 55
55 56
56 57
57 58
58 59
59 60
60 61
61 62
62 63
63 64
64 65
65 66
66 67
67 68
68 69
69 70
70 71
71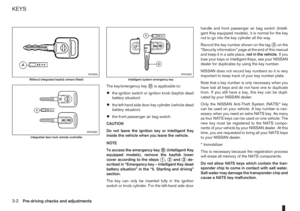 72
72 73
73 74
74 75
75 76
76 77
77 78
78 79
79 80
80 81
81 82
82 83
83 84
84 85
85 86
86 87
87 88
88 89
89 90
90 91
91 92
92 93
93 94
94 95
95 96
96 97
97 98
98 99
99 100
100 101
101 102
102 103
103 104
104 105
105 106
106 107
107 108
108 109
109 110
110 111
111 112
112 113
113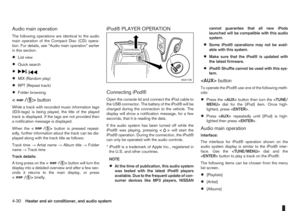 114
114 115
115 116
116 117
117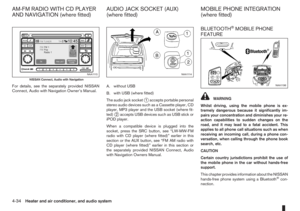 118
118 119
119 120
120 121
121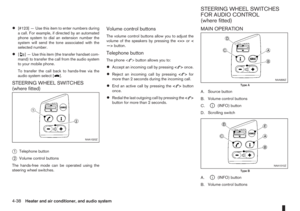 122
122 123
123 124
124 125
125 126
126 127
127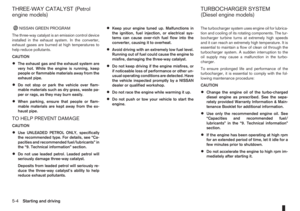 128
128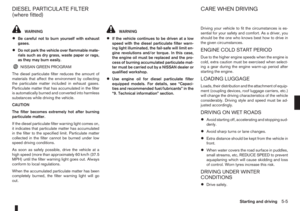 129
129 130
130 131
131 132
132 133
133 134
134 135
135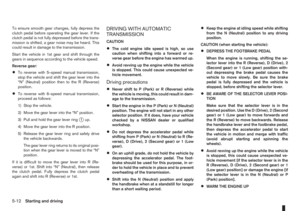 136
136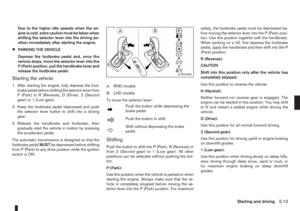 137
137 138
138 139
139 140
140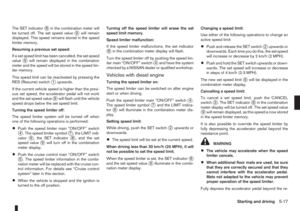 141
141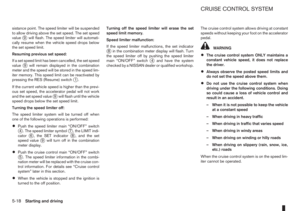 142
142 143
143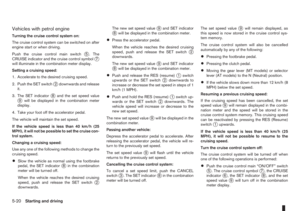 144
144 145
145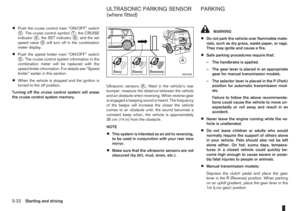 146
146 147
147 148
148 149
149 150
150 151
151 152
152 153
153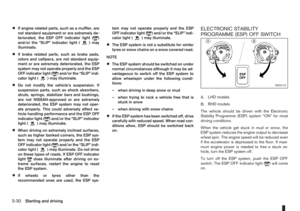 154
154 155
155 156
156 157
157 158
158 159
159 160
160 161
161 162
162 163
163 164
164 165
165 166
166 167
167 168
168 169
169 170
170 171
171 172
172 173
173 174
174 175
175 176
176 177
177 178
178 179
179 180
180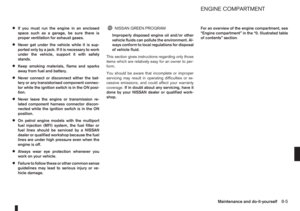 181
181 182
182 183
183 184
184 185
185 186
186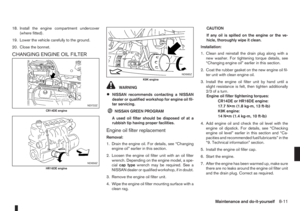 187
187 188
188 189
189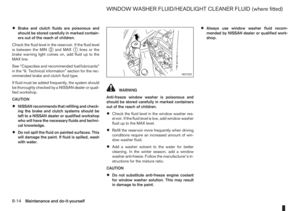 190
190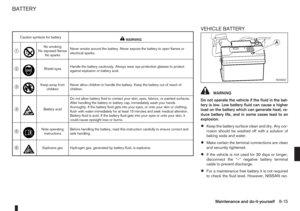 191
191 192
192 193
193 194
194 195
195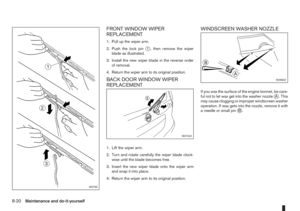 196
196 197
197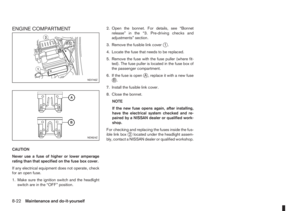 198
198 199
199 200
200 201
201 202
202 203
203 204
204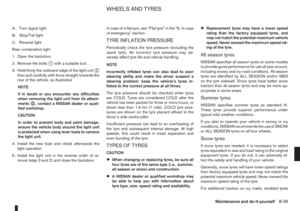 205
205 206
206 207
207 208
208 209
209 210
210 211
211 212
212 213
213 214
214 215
215 216
216 217
217 218
218 219
219 220
220 221
221 222
222 223
223 224
224 225
225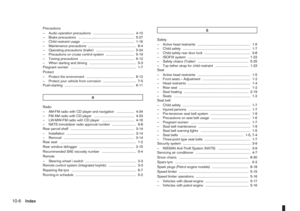 226
226 227
227 228
228 229
229 230
230 231
231 232
232 233
233 234
234
