2011 MITSUBISHI L200 radiator
[x] Cancel search: radiatorPage 166 of 330

Crossing a stream
4-wheel drive vehicles are not necessarily water-
proof. If the electrical circuits become wet, further
operation of the vehicle will be impossible; there-
fore, avoid crossing streams unless absolutely nec-
essary. If crossing a stream is unavoidable, use the
following procedure: 1.Check depths of a stream and geographical
features before attempting to cross a stream
and ford the stream where the water is as shal-
low as practicable.
2. Set the transfer shift lever to “4L” position
(easy select 4WD), “4LLc” position (super se-
lect 4WD).
3. Drive slowly at a speed of approximately
5 km/h (3 mph) to avoid splashing too much
water.CAUTIONl Never cross a stream where the water is
deep.
Do not change gears while crossing the
stream.
Frequent crossing of streams can adverse-
ly affect the life span of the vehicle; we rec-
ommend you to take the necessary meas-
ures to prepare, inspect, and repair the ve-
hicle.
After crossing a stream, apply the brakes to be sure
they are functioning properly. If the brakes are wet
and not functioning properly, dry them out by driv-
ing slowly while lightly depressing the brake pedal.
Inspect each part of the vehicle carefully.
Inspection and maintenance
following rough road operation E00606700048
After operating the vehicle in rough road condi-
tions, be sure to perform the following inspection
and maintenance procedures:
l Check that the vehicle has not been damaged
by rocks, gravel, etc.
l Carefully wash the vehicle with water.
After washing, drive the vehicle slowly
while lightly depressing the brake pedal in or-
der to dry out the brakes. If the brakes still
do not function properly, we recommend you
to have the brakes checked as soon as possible.
l Remove the insects, dried grass, etc. clog-
ging the radiator core.
l After crossing a stream, be sure to have the
following items inspected at a MITSUBISHI
MOTORS Authorized Service Point and take
the necessary measures. •Check the brake system and, if necessary,
have it serviced.
• Check the engine, transmission, transfer,
and differential oil or grease level and tur-
bidity. If the oil or grease is milky, it indi-
cates water contamination. Replace it
with new oil or grease.
• Grease the propeller shaft.
• Check the inside of the vehicle. If ingress
of water is found, dry the carpet etc.
• Inspect the headlamps. If the headlamp
bulb is flooded with water, we recom-
mend you to have it drained.Cautions on handling of 4-wheel
drive vehicles E00606800368
Tyres and wheels
Since the driving torque can be applied to the 4
wheels, the performance of the vehicle when oper-
ating in 4-wheel drive is greatly affected by the con-
dition of the tyres.
Pay close attention to the tyres.
l Install specified tyres on all wheels. Refer to
“Tyres and wheels” on page 9-17.
l Be sure to fit all 4 tyres and wheels of the
same size and type.
When replacement of any of the tyres or
wheels is necessary, replace all of them.
l All tyres should be rotated whenever the
wear difference between the front and rear
tyres is recognizable.
Good vehicle performance cannot be expected if
there is a difference in wear between tyres. Refer to
“Tyre rotation” on page 8-13.
l Check the tyre inflation pressure regularly.
Starting and driving
4-40
4
Page 234 of 330

CAUTIONlDo not attempt to start the engine by pull-
ing or pushing the vehicle.
It could damage your vehicle.
l Always wear protective eye goggles when
working near the battery.
l Keep the battery out of the reach of chil-
dren.
NOTE
l On vehicles with anti-lock brake system, if
the vehicle is put in motion without fully
charging the battery, it might cause the loss
of smooth engine operation and the antilock
brake warning lamp to illuminate.
Refer to “Anti-lock brake system (ABS)” on
page 4-43.
Engine overheating E00800601985
If the water temperature gauge indication remains
in the overheating zone for a long time, the engine
may be overheating. If this occurs, take the follow-
ing corrective measures: 1. Stop the vehicle in a safe place.
2. Check whether steam is coming from the en-
gine compartment.
[ If steam does not come from the engine com-
partment]
With the engine still running, raise the bon-
net to ventilate the engine compartment.
[If steam is coming from the engine compart-
ment]
Stop the engine, and when the steam stops,
raise the bonnet to ventilate the engine com-
partment. Restart the engine.WARNINGl Do not open the bonnet while steam is com-
ing from the engine compartment. It
could cause steam or hot water to spurt
out, causing burns. Hot water could spurt
out even when there is no steam coming
out, and some parts will be very hot. Be
very careful when opening the bonnet.
l Be careful of hot steam, which could be
blowing off the reserve tank cap.
l Do not attempt to remove the radiator
cap while the engine is hot.3. Confirm that the cooling fan is turning. If the
fan is not turning, stop the engine immediate-
ly and have it checked.
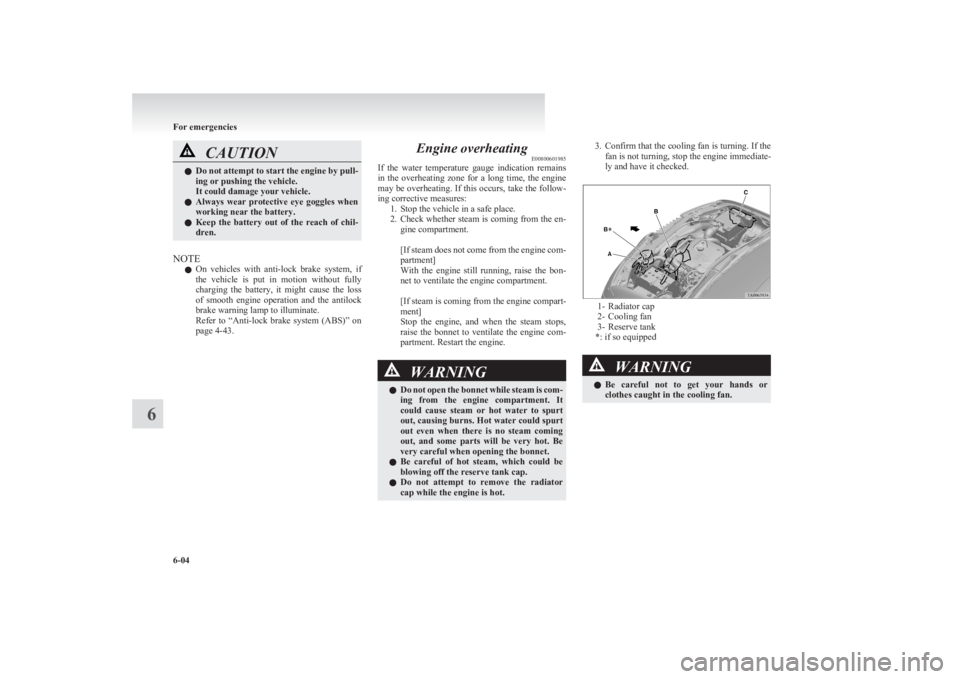
1- Radiator cap
2- Cooling fan
3- Reserve tank
*: if so equipped
WARNINGl Be careful not to get your hands or
clothes caught in the cooling fan.
For emergencies
6-04
6
Page 235 of 330

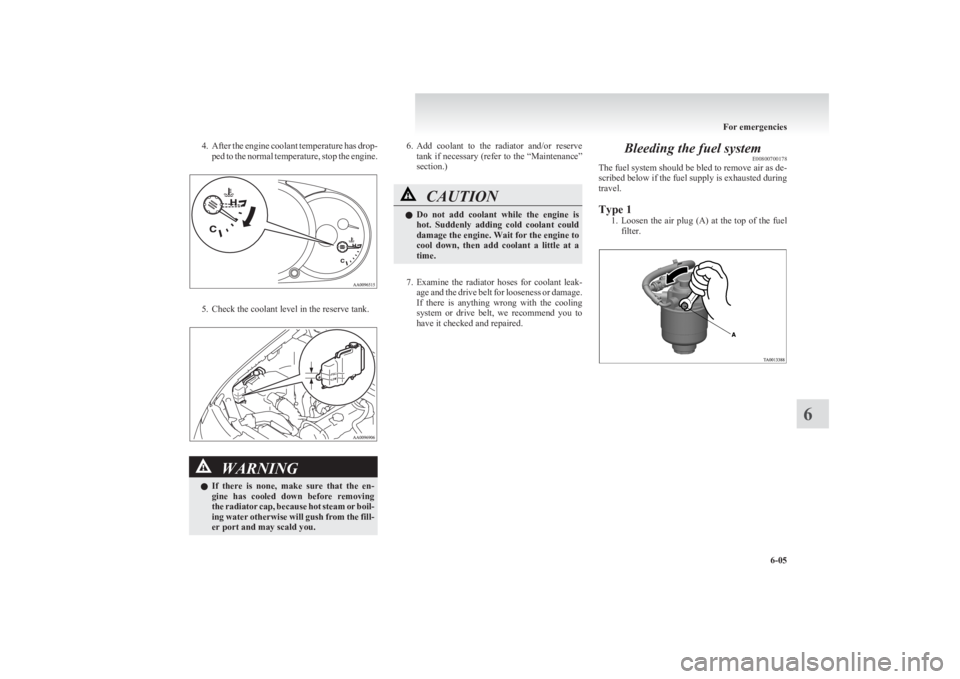
4.After the engine coolant temperature has drop-
ped to the normal temperature, stop the engine.
5. Check the coolant level in the reserve tank.
WARNINGl If there is none, make sure that the en-
gine has cooled down before removing
the radiator cap, because hot steam or boil-
ing water otherwise will gush from the fill-
er port and may scald you.6. Add coolant to the radiator and/or reserve
tank if necessary (refer to the “Maintenance”
section.)CAUTIONl Do not add coolant while the engine is
hot. Suddenly adding cold coolant could
damage the engine. Wait for the engine to
cool down, then add coolant a little at a
time.
7. Examine the radiator hoses for coolant leak-
age and the drive belt for looseness or damage.
If there is anything wrong with the cooling
system or drive belt, we recommend you to
have it checked and repaired.
Bleeding the fuel system E00800700178
The fuel system should be bled to remove air as de-
scribed below if the fuel supply is exhausted during
travel.
Type 1 1.Loosen the air plug (A) at the top of the fuel
filter.
For emergencies
6-05
6
Page 267 of 330

If the oil level is below the specified limit, remove
the cap located on the cylinder head cover and add
enough oil to raise the level to within the specified
range.
Be sure to use the specified engine oil and do not
mix various types of oil. Also, avoid mixing differ-
ent makes of oil together if possible.
After adding oil, close the cap securely.
Use only the recommended oils with an ACEA or
API classification as specified in this manual.
NOTE l The engine oil will deteriorate rapidly if the
vehicle is subjected to severe conditions (for
example, repeated operation on rough roads,
in mountainous regions, on roads with many
uphill and downhill gradients, or over short
distances). Consequently, the oil will require
earlier replacement.
l For handling of used engine oils, refer to
page 05.
Selection of engine oill Select engine oil of the proper SAE viscosity
number according to the atmospheric temper-
ature.
l Use engine oil conforming to the following
classification: • ACEA classification:“For service A1/ B1, A3/B3, A3/B4,
A5/B5”
• API classification: “For service CF-4”
NOTE l Use of additives is not recommended since
they may reduce the effectiveness of addi-
tives already included in the engine oil. It
may result in failure of the mechanical assem-
bly.Engine coolant E01000501202
To check the coolant level
A translucent coolant reserve tank is located in the
engine compartment.
The coolant level in this tank should be kept be-
tween the “LOW” and “FULL” marks when meas-
ured while the engine is cold.
To add coolant
The cooling system is a closed system and normal-
ly the loss of coolant should be very slight. A no-
ticeable drop in the coolant level could indicate leak-
age. If this occurs, we recommend you to have the
system checked as soon as possible.
If the level should drop below the “LOW” level on
the reserve tank, open the lid and add coolant.
Also, if the reserve tank is completely empty, re-
move the radiator cap and add coolant until the lev-
el reaches the filler neck.
Maintenance
8-05
8
Page 268 of 330

WARNINGlDo not open the radiator cap while the en-
gine is hot.
The coolant system is under pressure and
any hot coolant escaping could cause se-
vere burns.
Anti-freeze
The engine coolant contains an ethylene glycol anti-
corrosion agent. The cylinder head and water pump
housing are cast aluminium alloy, and periodic
changing of the engine coolant is necessary to pre-
vent corrosion of these parts.
Use “DIA QUEEN SUPER LONG LIFE COOL-
ANT” or equivalent.
MITSUBISHI Genuine Coolant has excellent pro-
tection against corrosion and rust formation of all
metals including aluminium and can avoid block-
ages in the radiator, heater, cylinder head, engine
block, etc.
Because of the necessity of this anti-corrosion
agent, the coolant must not be replaced with plain
water even in summer. The required concentration
of anti-freeze differs depending on the expected am-
bient temperature.
Ambient
temperature
( minimum) °C-15-20-25-30-35-50Anti-freeze
concentra- tion %303540455060CAUTIONl Do not use alcohol or methanol anti-
freeze or any engine coolants mixed with
alcohol or methanol anti-freeze. The use
of an improper anti-freeze can cause cor-
rosion of the aluminium components.
l For effective anti-corrosion and anti-
freeze performance, keep the anti-freeze
concentration within the range of 30 to
60 %.
Concentrations exceeding 60 % will re-
sult in a reduction of both the anti-freeze
and cooling performance thus adversely
affecting the engine.
l Do not top up with water only.
Water by itself reduces the rust-protec-
tive and anti-freeze qualities of the cool-
ant and has a lower boiling point. It can
also cause damage to the cooling system if
it should freeze. Do not use tapwater, as it
can cause corrosion and rust formation.
During cold weather
If the temperatures in your area drop below freez-
ing, there is the danger that the coolant in the en-
gine or radiator could freeze and cause severe dam-
age to the engine and/or radiator. The concentra-
tion should be checked before the start of cold weath-
er and anti-freeze added to the system if necessary.
Add a sufficient amount of anti-freeze to the cool-
ant to prevent it from freezing.
The concentration should be checked before the
start of cold weather and anti-freeze added to the
system if necessary.
Automatic transmission fluid* E01000600974
The proper amount of automatic transmission fluid
is essential to the life and operation of the automat-
ic transmission. Either insufficient fluid or exces-
sive fluid could cause transmission trouble. The
transmission fluid filler port cap is equipped with a
dipstick. Use the following procedure to check the
fluid level.
Procedure for checking the fluid level 1.Check the fluid level after the vehicle has
been driven enough to warm up the transmis-
sion fluid.
2. Park the vehicle on a flat, level surface and
apply the parking brake.
3. With the engine idling and the brake pedal
fully depressed, move the transmission selec-
tor lever through all the positions from the
"P” (PARK) to “L” (LOW) (with 4A/T), the
“P” (PARK) to “D” (DRIVE) (with 5A/T),
stopping momentarily at each position.
4. Move the selector lever to the “P” (PARK)
position.
5. Remove the dipstick and wipe it with a clean
lint-free cloth.
6. Reinsert the dipstick as far as it goes.
Maintenance
8-06
8