2011 MITSUBISHI L200 AUX
[x] Cancel search: AUXPage 12 of 330

Interior (Club cab)E001002038901. Lock switch* p. 1-09
2. Electric window control switch* p. 1-08
3. Room lamp (rear) p. 5-39, 8-24, 8-32
4. Personal lamps* p. 5-40, 8-24, 8-32
5. Sunglasses holder* p. 5-43
6. Room lamp (front)* p. 5-39, 8-24, 8-32
7. Inside rear-view mirror p. 4-09
8. Digital clock* p. 5-39
9. Sun visors p. 5-35 Card holder p. 5-35
Vanity mirror p. 5-36
10. Bottle holder p. 5-45
11. Front seats p. 2-03 Seat under tray* p. 5-44
12. Supplemental restraint system (SRS) - side airbag (for front seat)* p. 2-35
13. Secret box p. 5-43
14. Rear seat* p. 2-07
15. Floor console box p. 5-42 Accessory socket p. 5-38
Auxiliary Audio connector (RCA)* p. 5-27
Auxiliary Video connector (RCA)* p. 5-27
16. Jack p. 6-07 Jack handle p. 6-07
Tools p. 6-07
17. Head restraints p. 2-08
18. Coat hook* p. 5-46
19. Seat belts p. 2-09 Adjustable seat belt anchor p. 2-11
OverviewLHD1
2 3
4
5
6
7
8
9
10 11
12
13
14
15
16
17
18
19
Page 13 of 330

1. Personal lamps* p. 5-40, 8-24, 8-32
2. Sunglasses holder* p. 5-43
3. Room lamp (front)* p. 5-39, 8-24, 8-32
4. Inside rear-view mirror p. 4-09
5. Digital clock* p. 5-39
6. Room lamp (rear) p. 5-39, 8-24, 8-32
7. Lock switch* p. 1-09
8. Electric window control switch* p. 1-08
9. Seat belts p. 2-09 Adjustable seat belt anchor p. 2-11
10. Coat hook* p. 5-46
11. Head restraints p. 2-08
12. Secret box p. 5-43
13. Floor console box p. 5-42 Accessory socket p. 5-38
Auxiliary Audio connector (RCA)* p. 5-27
Auxiliary Video connector (RCA)* p. 5-27
14. Rear seat* p. 2-07
15. Jack p. 6-07 Jack handle p. 6-07
Tools p. 6-07
16. Supplemental restraint system (SRS) - side airbag (for front seat)* p. 2-35
17. Front seats p. 2-03 Seat under tray* p. 5-44
18. Bottle holder p. 5-45
19. Sun visors p. 5-35 Card holder p. 5-35
Vanity mirror p. 5-36
OverviewRHD1 2
3
4 6
7
8 9
10
11
12
13
14
15
16 17
18 19 5
Page 14 of 330

Interior - front area (Double cab)E001002039041. Lock switch* p. 1-09
2. Electric window control switch* p. 1-08
3. Sunroof switch* p. 1-13
4. Sunglasses holder p. 5-43
5. Personal lamps p. 5-40, 8-24, 8-32
6. Digital clock* p. 5-39
7. Inside rear-view mirror p. 4-09
8. Room lamp (front) p. 5-39, 8-24, 8-32
9. Sun visors p. 5-35 Card holder p. 5-35
Vanity mirror p. 5-36
10. Front seats p. 2-03 Seat under tray* p. 5-44
11. Supplemental restraint system (SRS) - side airbag (for front seat)* p. 2-35
12. Bottle holder p. 5-45
13. Floor console box p. 5-42 Accessory socket* p. 5-38
Auxiliary Audio connector (RCA)* p. 5-27
Auxiliary Video connector (RCA)* p. 5-27
14. Supplemental restraint system (SRS) - curtain airbag* p. 2-35
15. Coat hook* p. 5-46
16. Seat belts p. 2-09 Adjustable seat belt anchor (front seats) p. 2-11
OverviewLHD1
2 3
4
5
6
7
8
9
10
11
12
13
14
15 16
Page 15 of 330

1. Sunroof switch* p. 1-13
2. Sunglasses holder p. 5-43
3. Personal lamps p. 5-40, 8-24, 8-32
4. Digital clock* p. 5-39
5. Inside rear-view mirror p. 4-09
6. Room lamp (front) p. 5-39, 8-24, 8-32
7. Lock switch* p. 1-09
8. Electric window control switch* p. 1-08
9. Seat belts p. 2-09 Adjustable seat belt anchor (front seats) p. 2-11
10. Coat hook* p. 5-46
11. Supplemental restraint system (SRS) - curtain airbag* p. 2-35
12. Floor console box p. 5-42 Accessory socket* p. 5-38
Auxiliary Audio connector (RCA)* p. 5-27
Auxiliary Video connector (RCA)* p. 5-27
13. Bottle holder p. 5-45
14. Supplemental restraint system (SRS) - side airbag (for front seat)* p. 2-35
15. Front seats p. 2-03 Seat under tray* p. 5-44
16. Sun visors p. 5-35 Card holder p. 5-35
Vanity mirror p. 5-36
OverviewRHD1 7
8 9
10
11
12
13
14
15 16 2
34
5
6
Page 206 of 330

To listen to a CDE00709601903
1. Insert a disc with the label facing up, and the
CD player will begin playing even if the ra-
dio is being used. The CD indicator (15), the
track number, the playing time will appear
on the display. The CD player will also start
playback when the CD button (9) is pressed
with a disc in the player.
2. To adjust the volume and tone, refer to “To
adjust the volume” on page 5-15 and “To ad-
just the tone” on page 5-15.
3. To stop the CD, turn off the power by press-
ing the PWR switch (8) or change over to ra-
dio mode by pressing the AM/FM buttons, or
eject the disc by pressing the eject button (1).
NOTE l When an 8 cm compact disc is used, the adapt-
er is not needed for playback. Insert the disc
in the centre of the disc-loading slot.
l For information concerning the handling of
compact discs, refer to “Handling of compact
discs” on page 5-32.
To fast-forward/fast-reverse the disc
To fast-forward or fast-reverse the disc, press the
TRACK button (7).
Fast-forward
You can fast-forward the disc by pressing the
side of the TRACK button (7). While the button is
kept pressed, the disc will be fast-forwarded.
Fast-reverse
You can fast-reverse the disc by pressing the
side of the TRACK button (7). While the button is
kept pressed, the disc will be fast-reversed.
NOTE
l When you have fast-forwarded/fast-reversed
the disc, the playing-time may be shown
with deviation.
To listen to an MP3 CD
This CD player allows you to play MP3 (MPEG Au-
dio Layer-3) files recorded on CD-ROMs, CD-Rs
(recordable CDs), and CD-RWs (rewritable CDs)
in ISO9660 Level 1/Level 2, Joliet, and Romeo for-
mats. Each disc may have a maximum of 16 trees,
100 folders, and 255 files per disc. During MP3
playback, the unit can display ID3 tag information.
For information concerning ID3 tag, refer to “CD
text and MP3 title display” on page 5-26.
1. Insert a disc containing MP3 files into the slot.
2. The display shows the folder number and the
file number, then playback will begin.
NOTE
l While listening to a disc on which
CD-DA
(CD-Digital Audio) and MP3 files have both
been recorded, you can switch between read-
ing of the CD-DA, reading of the MP3 files,
and the external audio input mode (AUX) by
pressing the CD button for 2 seconds or longer.
l With a disc that contains both
CD-DA and
MP3 files, the CD-DA files are automatical-
ly played first.
l The playback sound quality differs depend-
ing on the encoding software and the bit rate.
For details, refer to the user manual of your
encoding software.
l Depending on file/folder configurations on a
disc, it may take some time before playback
starts.
l MP3 encoding software and writing software
are not supplied with this unit.
l You may encounter trouble in playing an
MP3 or displaying the information of MP3
files recorded with certain writing software
or CD recorders (CD-R/RW drivers).
l If you record too many folders or files other
than MP3 onto a disc, it may take some time
before playback starts.
l This unit does not record MP3 files.
l For information concerning CD-Rs/RWs, re-
fer to “Notes on CD-Rs/RWs” on page 5-33.CAUTIONl Attempting to play a file not in the MP3
format which has a “.mp3” file name may
produce noise from the speakers and
speaker damage, and can damage your
hearing.
For pleasant driving
5-24
5
Page 209 of 330

MP3 title
The CD player can display folder and file titles for
discs encoded with folder and file information.
Press the TEXT button (5) for less than 1 second re-
peatedly to make selections in the following se-
quence: folder name
file name normal dis-
play mode.
ExampleFolder
nameFile
name
ID3 tag information
The CD player can display ID3 tag information for
files that have been recorded with ID3 tag informa-
tion. 1.Press the TEXT button (5) for 2 seconds or
longer to switch to the ID3 tag information.
2. Then press the TEXT button for less than 1
second repeatedly to make selections in the
following sequence: album name
title
name artist name normal display mode.
NOTE l To return from ID3 tag information to the
folder name, press the TEXT button (5)
again for 2 seconds or longer.
l When there is no title information to be dis-
played, the display shows “NO TITLE”.
l The display can show up to 16 characters. If
a folder name, track name, or item of ID3 tag
information has more than 16 characters,
press the PAGE button (6) to view the next
16 characters.
l Folder names and track names can each be
displayed up to a length of 16 characters.
Items of ID3 tag information can each be dis-
played up to a length of 16 characters.
l Characters that the CD player cannot display
are shown as “ ”.To use the external audio input
function* E00732200566
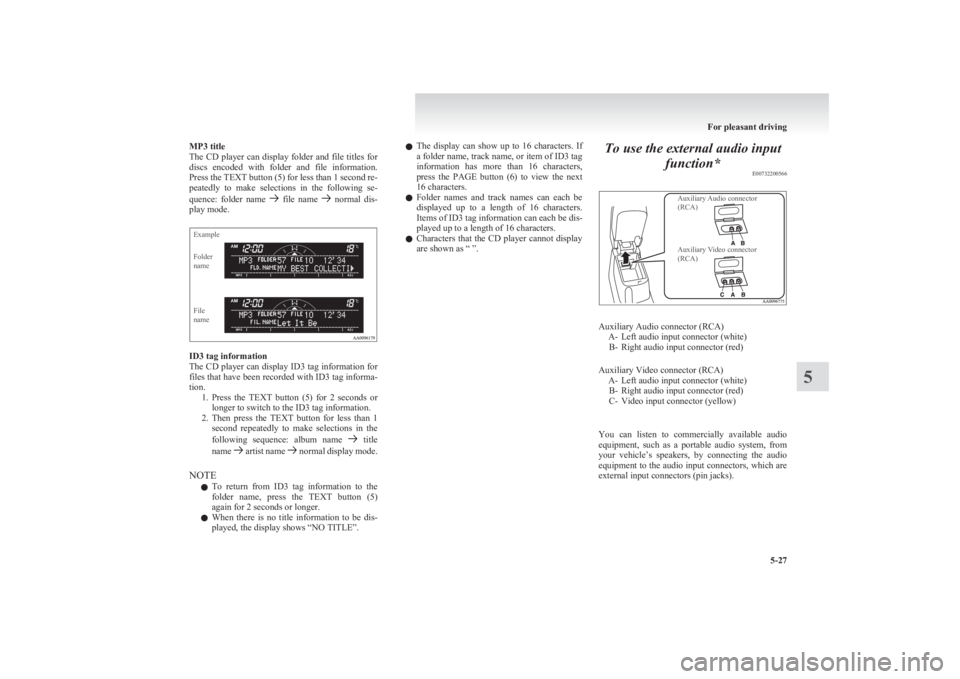
Auxiliary Audio connector
(RCA)Auxiliary Video connector
(RCA)
Auxiliary Audio connector (RCA) A- Left audio input connector (white)B- Right audio input connector (red)
Auxiliary Video connector (RCA) A- Left audio input connector (white)B- Right audio input connector (red)
C- Video input connector (yellow)
You can listen to commercially available audio
equipment, such as a portable audio system, from
your vehicle’s speakers, by connecting the audio
equipment to the audio input connectors, which are
external input connectors (pin jacks).
For pleasant driving
5-27
5
Page 210 of 330

NOTEl On vehicles equipped with the
MITSUBISHI
Multi-Communication System (MMCS), re-
fer to the separate owner’s manual of the
MITSUBISHI Multi-Communication Sys-
tem.
To activate the external audio input
mode
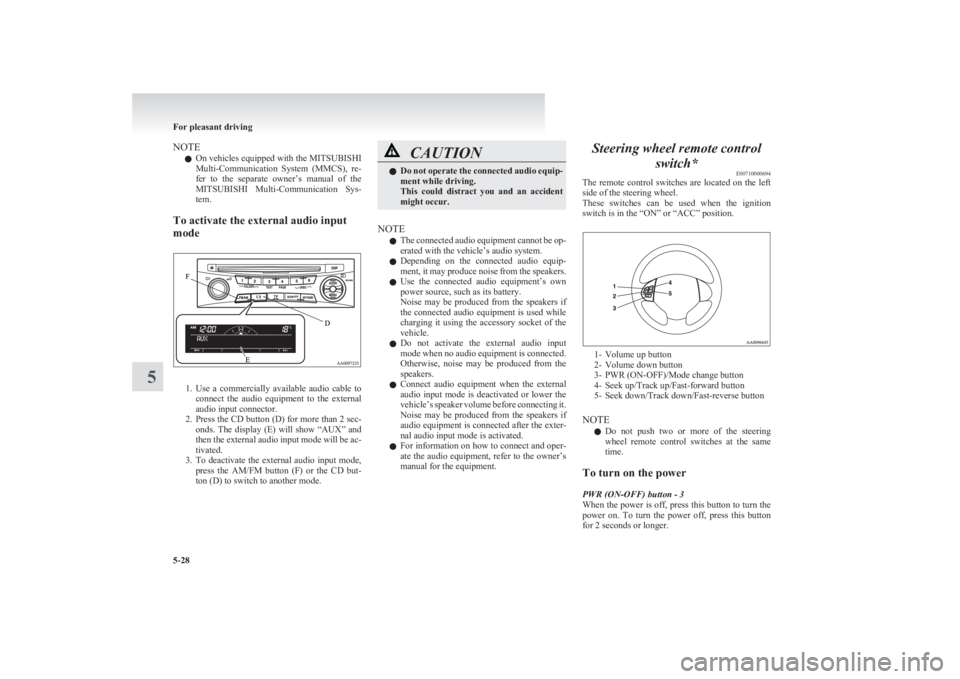
1. Use a commercially available audio cable to
connect the audio equipment to the external
audio input connector.
2. Press the CD button (D) for more than 2 sec-
onds. The display (E) will show “AUX” and
then the external audio input mode will be ac-
tivated.
3. To deactivate the external audio input mode,
press the AM/FM button (F) or the CD but-
ton (D) to switch to another mode.
CAUTIONl Do not operate the connected audio equip-
ment while driving.
This could distract you and an accident
might occur.
NOTE
l The connected audio equipment cannot be op-
erated with the vehicle’s audio system.
l Depending on the connected audio equip-
ment, it may produce noise from the speakers.
l Use the connected audio equipment’s own
power source, such as its battery.
Noise may be produced from the speakers if
the connected audio equipment is used while
charging it using the accessory socket of the
vehicle.
l Do not activate the external audio input
mode when no audio equipment is connected.
Otherwise, noise may be produced from the
speakers.
l Connect audio equipment when the external
audio input mode is deactivated or lower the
vehicle’s speaker volume before connecting it.
Noise may be produced from the speakers if
audio equipment is connected after the exter-
nal audio input mode is activated.
l For information on how to connect and oper-
ate the audio equipment, refer to the owner’s
manual for the equipment.
Steering wheel remote control
switch* E00710000694
The remote control switches are located on the left
side of the steering wheel.
These switches can be used when the ignition
switch is in the “ON” or “ACC” position.
1- Volume up button
2- Volume down button
3- PWR (ON-OFF)/Mode change button
4- Seek up/Track up/Fast-forward button
5- Seek down/Track down/Fast-reverse button
NOTE l Do not push two or more of the steering
wheel remote control switches at the same
time.
To turn on the power
PWR (ON-OFF) button - 3
When the power is off, press this button to turn the
power on. To turn the power off, press this button
for 2 seconds or longer.
For pleasant driving
5-28
5
Page 225 of 330

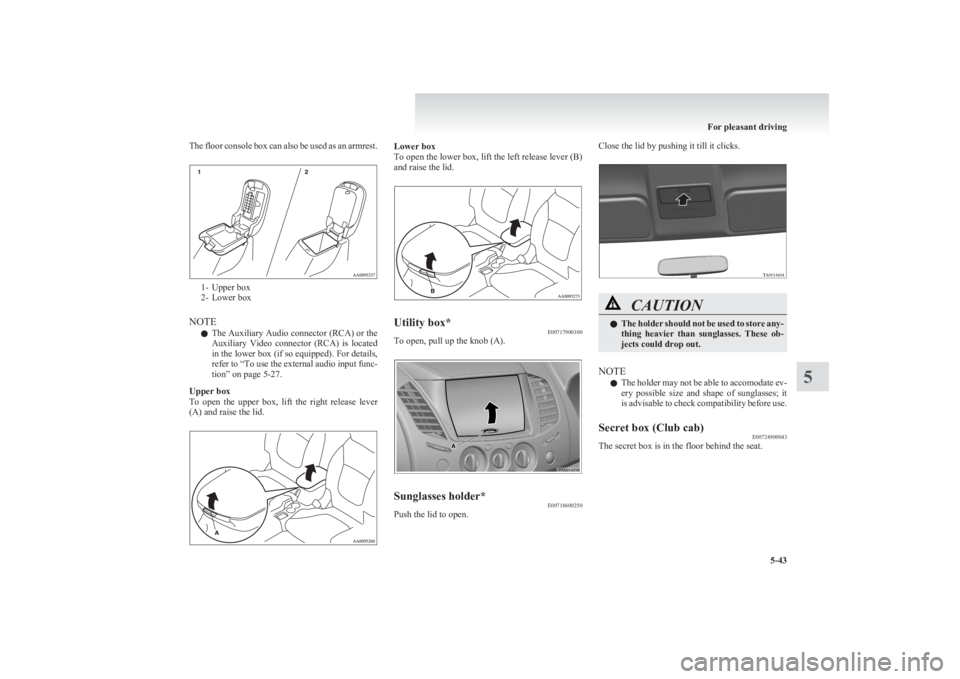
The floor console box can also be used as an armrest.
1- Upper box
2- Lower box
NOTE l The Auxiliary Audio connector (RCA) or the
Auxiliary Video connector (RCA) is located
in the lower box (if so equipped). For details,
refer to “To use the external audio input func-
tion” on page 5-27.
Upper box
To open the upper box, lift the right release lever
(A) and raise the lid.
Lower box
To open the lower box, lift the left release lever (B)
and raise the lid.Utility box* E00717900100
To open, pull up the knob (A).
Sunglasses holder*E00718600250
Push the lid to open.
Close the lid by pushing it till it clicks.CAUTIONlThe holder should not be used to store any-
thing heavier than sunglasses. These ob-
jects could drop out.
NOTE
l The holder may not be able to accomodate ev-
ery possible size and shape of sunglasses; it
is advisable to check compatibility before use.
Secret box (Club cab) E00724900043
The secret box is in the floor behind the seat.
For pleasant driving
5-43
5