2011 MITSUBISHI L200 fuel filter
[x] Cancel search: fuel filterPage 92 of 330

Indication and warning lampsE00501502002
Type 1Type 21.CRUISE indication lamp* ® p. 4-49
2. Turn-signal indication lamps/Hazard warning indication lamps ® p. 3-07
3. High-beam indication lamp ® p. 3-07
4. Front fog lamp indication lamp* ® p. 3-07
5. Rear fog lamp indication lamp ® p. 3-07
6. Seat belt reminder/warning lamp ® p. 2-10
7. Low fuel warning lamp ® p. 3-04
8. 2WD/4WD operation indication lamp* ® p. 4-27, 4-32
9. Rear differential lock indication lamp* ® p. 4-34
10. Check engine warning lamp ® p. 3-08
11. Diesel preheat indication lamp ® p. 3-07
12. Oil pressure warning lamp ® p. 3-0913.
Fuel filter indication lamp ® p. 3-07
14. Charge warning lamp ® p. 3-09
15. A/T (automatic transmission) fluid temperature warning lamp (vehicles
with A/T) ® p. 4-18
16. Overdrive off indication lamp (vehicles with 4A/T) ® p. 4-18
17. Selector lever position indicator (vehicles with A/T) ® p. 4-16, 4-23
18. Brake warning lamp ® p. 3-08
19. Active Stability & Traction Control (ASTC) OFF indication
lamp* ® p. 4-47
20. Anti-lock brake system (ABS) warning lamp* ® p. 4-44
21. Active Stability & Traction Control (ASTC) indication lamp* ® p. 4-47
22. Door ajar warning lamp ® p. 3-09
23. Supplement Restraint System (SRS) warning lamp ® p. 2-38
Instruments and controls
3-06
3
Page 93 of 330
Indication lampsE00501600012Turn-signal indication lamps/
Hazard warning indication
lamps E00501700185
These indication lamps blink on and off
when a turn-signal lamp is operating.
NOTE l If the blinking is too fast, the
cause may be a blown lamp bulb
or a faulty turn-signal connection.
When the hazard warning lamp switch is
pressed, all turn-signal lamps will flash
on and off continuously.High-beam indication lamp E00501800115
This indication lamp illuminates when
the high-beam is used.Front fog lamp indication
lamp* E00501900347
This indication lamp illuminates while
the front fog lamps are on.Rear fog lamp indication lamp E00502000114
This indication lamp illuminates while
the rear fog lamp is on.Diesel preheat indication lamp E00502300250
This indication lamp illuminates when
the ignition switch is placed in the “ON”
position. As the glow plug becomes hot,
the lamp goes out and the engine can be
started.CAUTIONl If the diesel preheat indication
lamp comes on after the engine
is started, the engine speed may
not rise above the idling speed
because of fuel freezing. In this
case, keep the engine idling for
about ten minutes, then turn
off the ignition switch and im-
mediately turn it on again to
confirm that the diesel preheat
indication lamp is off.
NOTE
l If the engine is cold, the diesel pre-
heat indication lamp is on for a lon-
ger time.
l When the engine has not been star-
ted within about 5 seconds after
the diesel preheat indication lamp
went out, return the ignition
switch to the “LOCK” position.
Then, turn the switch to the “ON”
position to preheat the engine
again.
l When the engine is warm, the die-
sel preheat indication lamp does
not come on even if the ignition
switch is placed in the “ON” posi-
tion.Fuel filter indication lamp E00509900170
This indication lamp illuminates when
the ignition switch is turned to the “ON”
position and goes off after the engine
has started. If it lights up while the en-
gine is running, it indicates that water
has accumulated inside the fuel filter; if
this happens, remove the water from the
fuel filter.
Refer to “Removal of water from the
fuel filter” on page 6-06.
When the lamp goes out, you can re-
sume driving. If it either does not go out
or comes on from time to time, we rec-
ommend you to have the vehicle inspec-
ted.
Instruments and controls
3-07
3
Page 231 of 330
If the vehicle breaks down............................................................ 6-02
Emergency starting ....................................................................... 6-02
Engine overheating ....................................................................... 6-04
Bleeding the fuel system...............................................................6-05
Removal of water from the fuel filter ...........................................6-06
Tools, jack and jack handle .......................................................... 6-07
Jacking up the vehicle...................................................................6-13
Spare wheel...................................................................................6-16
How to change a tyre .................................................................... 6-17
Towing .......................................................................................... 6-20
Operation under adverse driving conditions .................................6-24For emergencies6
Page 235 of 330
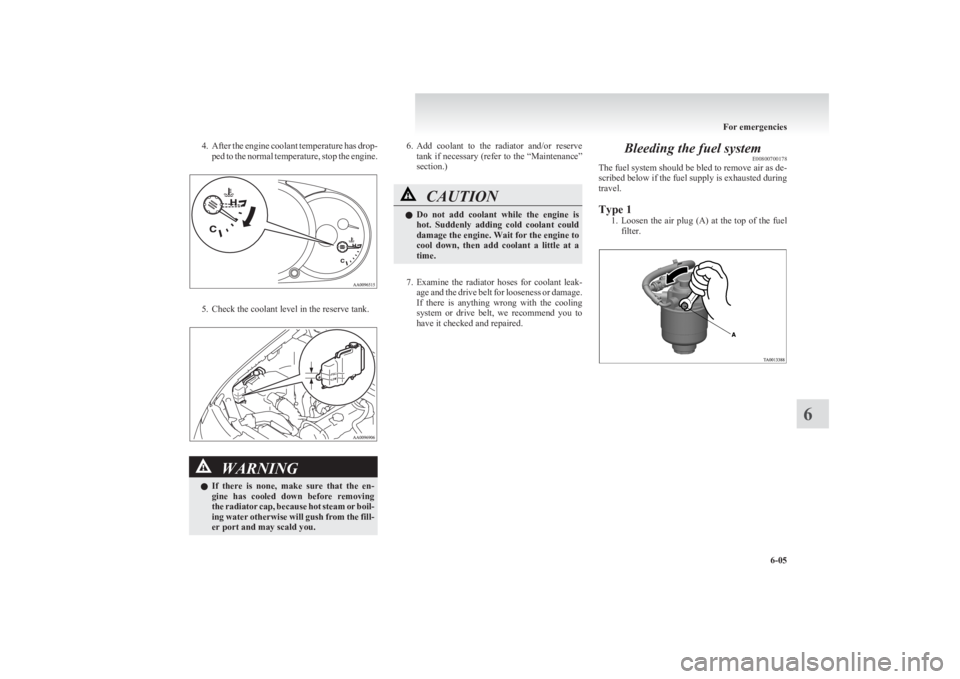
4.After the engine coolant temperature has drop-
ped to the normal temperature, stop the engine.
5. Check the coolant level in the reserve tank.
WARNINGl If there is none, make sure that the en-
gine has cooled down before removing
the radiator cap, because hot steam or boil-
ing water otherwise will gush from the fill-
er port and may scald you.6. Add coolant to the radiator and/or reserve
tank if necessary (refer to the “Maintenance”
section.)CAUTIONl Do not add coolant while the engine is
hot. Suddenly adding cold coolant could
damage the engine. Wait for the engine to
cool down, then add coolant a little at a
time.
7. Examine the radiator hoses for coolant leak-
age and the drive belt for looseness or damage.
If there is anything wrong with the cooling
system or drive belt, we recommend you to
have it checked and repaired.
Bleeding the fuel system E00800700178
The fuel system should be bled to remove air as de-
scribed below if the fuel supply is exhausted during
travel.
Type 1 1.Loosen the air plug (A) at the top of the fuel
filter.
For emergencies
6-05
6
Page 236 of 330
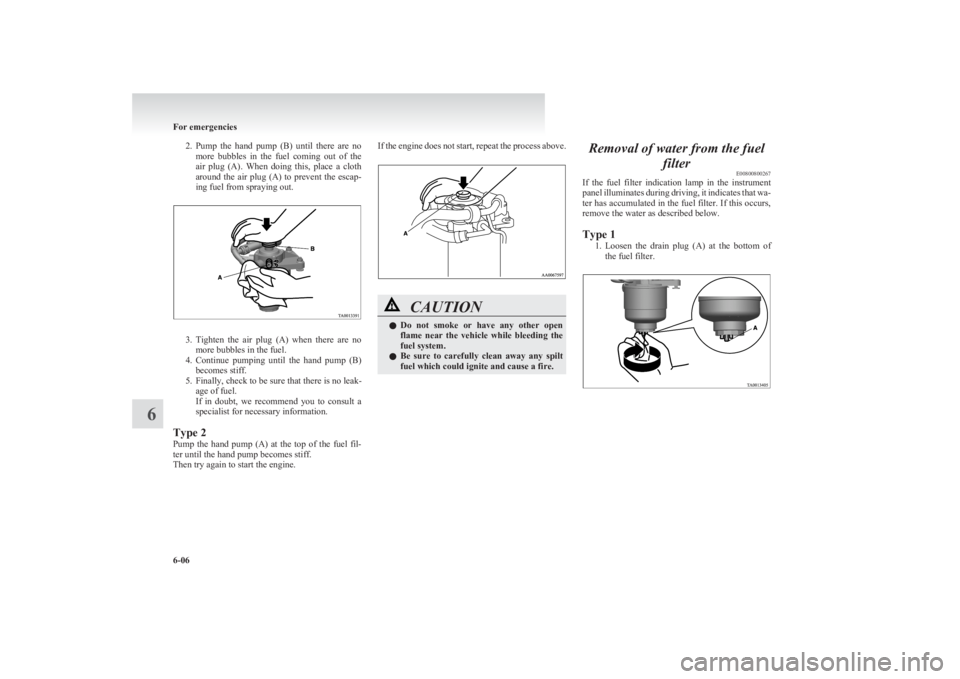
2.Pump the hand pump (B) until there are no
more bubbles in the fuel coming out of the
air plug (A). When doing this, place a cloth
around the air plug (A) to prevent the escap-
ing fuel from spraying out.
3. Tighten the air plug (A) when there are no
more bubbles in the fuel.
4. Continue pumping until the hand pump (B)
becomes stiff.
5. Finally, check to be sure that there is no leak- age of fuel.
If in doubt, we recommend you to consult a
specialist for necessary information.
Type 2
Pump the hand pump (A) at the top of the fuel fil-
ter until the hand pump becomes stiff.
Then try again to start the engine.
If the engine does not start, repeat the process above.CAUTIONl Do not smoke or have any other open
flame near the vehicle while bleeding the
fuel system.
l Be sure to carefully clean away any spilt
fuel which could ignite and cause a fire.Removal of water from the fuel
filterE00800800267
If the fuel filter indication lamp in the instrument
panel illuminates during driving, it indicates that wa-
ter has accumulated in the fuel filter. If this occurs,
remove the water as described below.
Type 1 1.Loosen the drain plug (A) at the bottom of
the fuel filter.
For emergencies
6-06
6
Page 237 of 330
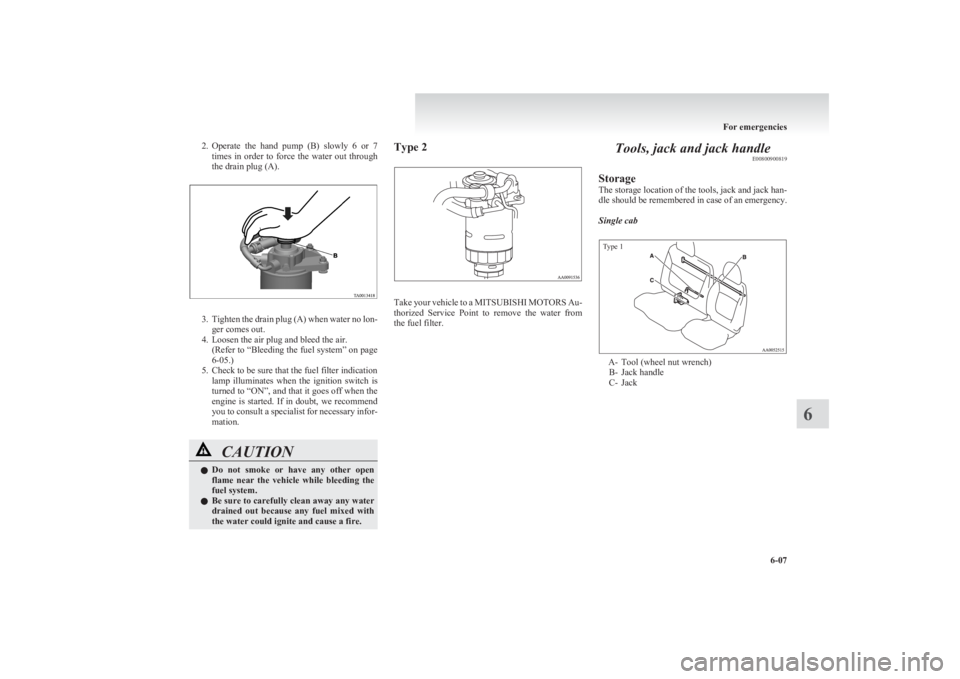
2.Operate the hand pump (B) slowly 6 or 7
times in order to force the water out through
the drain plug (A).
3. Tighten the drain plug (A) when water no lon-
ger comes out.
4. Loosen the air plug and bleed the air. (Refer to “Bleeding the fuel system” on page
6-05.)
5. Check to be sure that the fuel filter indication lamp illuminates when the ignition switch is
turned to “ON”, and that it goes off when the
engine is started. If in doubt, we recommend
you to consult a specialist for necessary infor-
mation.
CAUTIONl Do not smoke or have any other open
flame near the vehicle while bleeding the
fuel system.
l Be sure to carefully clean away any water
drained out because any fuel mixed with
the water could ignite and cause a fire.Type 2
Take your vehicle to a MITSUBISHI MOTORS Au-
thorized Service Point to remove the water from
the fuel filter.
Tools, jack and jack handle E00800900819
Storage
The storage location of the tools, jack and jack han-
dle should be remembered in case of an emergency.
Single cab
Type 1
A- Tool (wheel nut wrench) B- Jack handle
C- Jack
For emergencies
6-07
6
Page 322 of 330

Economical driving 4-02
Electric window control 1-08 Switch 1-08
Electrical system 9-16
Electronic immobilizer (Anti-theft starting sys-
tem) 1-03
Emergency starting 6-02
Engine specifications 9-14
Engine Coolant 8-05,9-21
Number 9-02
Oil 8-04,9-21
Overheating 6-04
Specifications 9-14
Used engine oils safety instructions and disposal
information 05
Water temperature gauge 3-05
Error codes 5-30
Exterior and interior lamp operation 8-18
F
First-aid kit and warning triangle band for secur-
ing 5-46
Floor console box 5-42
Fluid Automatic transmission fluid 8-06,9-21
Brake fluid 8-07,9-21
Clutch fluid 8-08,9-21
Engine coolant 8-05,9-21
Power steering fluid 8-09,9-21
Washer fluid 8-07,9-21
For cold and snowy weather 8-19
Front console box 5-42
Front fog lamps Bulb capacity 8-24
Indication lamp 3-07
Replacement 8-28
Switch 3-34
Front room lamp Bulb capacity 8-25
Replacement 8-32
Front seat 2-03
Front turn-signal lamps Bulb capacity 8-24
Replacement 8-27
Fuel consumption 9-19
Fuel Filling the fuel tank 02
Fuel filter indication lamp 3-07
Fuel gauge 3-04
Fuel selection 02
Low fuel warning lamp 3-04
Modification/alterations to the electrical or fuel
systems 04
Tank capacity 02
Fuses 8-20
Fusible links 8-19
G
Gauges 3-02
General maintenance 8-18
General vehicle data 9-03
Genuine parts 05
Glove box 5-42
Glove box lamp Bulb capacity 8-24
Replacement 8-33
H
Handling of compact discs 5-32
Hazard warning flasher switch 3-34
Hazard warning indication lamps 3-07
Head restraints 2-08
Headlamp levelling switch 3-32
Headlamps
Bulb capacity 8-24
Headlamp flasher 3-31
Replacement 8-25
Switch 3-30
Washer switch 3-39
Heated mirror 4-11
Heated seats 2-06
Heater 5-03
High-mounted stop lamp Bulb capacity 8-24
Replacement 8-31
Hinges and latches lubrication 8-19
Hooks Coat hook 5-46
Convenient hook 5-46
Horn switch 3-40
I
If the vehicle breaks down 6-02
Ignition switch 4-11
Indication and warning lamps 3-06
Indication lamps 3-07
Inside rear-view mirror 4-09
Inspection and maintenance following rough road
operation 4-40
Installation of accessories 04
Instruments 3-02
Interior lamps 5-39
J
Jack handle 6-12Storage 6-07
Jacking up the vehicle 6-13
Jack Storage 6-07
Jump starting (Emergency starting) 6-02
Alphabetical index
2
Page 323 of 330

K
Keyless entry system 1-04
Keys 1-02
L
Labeling 9-02
Lamp monitor buzzer 3-31
Lamps (headlamps, fog lamp, etc.) auto-cutout func-
tion 3-31
Leakage (Fuel, engine coolant, oil and exhaust
gas) 8-18
Licence plate lamps
Bulb capacity 8-24
Replacement 8-31
Limited-slip differential (LSD) 4-42
Low fuel warning lamp 3-04
Lubricants 9-21
LW/MW/FM electronic tuning radio with CD play-
er 5-13
M
Manual transmission 4-14Oil 9-21
Manual window control 1-08
Mirror Inside rear-view mirror 4-09
Outside rear-view mirrors 4-10
Vanity mirror 5-36
Modification/alterations to the electrical or fuel sys-
tems 04
O
Odometer 3-03
Oil
Differential oil 9-21
Engine oil 8-04,9-21
Manual transmission fluid 9-21
Transfer oil 9-21
Operation under adverse driving conditions 6-24
Other specifications 9-18
Outside rear-view mirrors 4-10
Overheating 6-04
P
Parking 4-08Parking brake 4-07
Parking brake lever stroke 8-16
Personal lamps 5-40 Replacement 8-32
Position lamps Bulb capacity 8-24
Replacement 8-27
Power steering Fluid 8-09,9-21
System 4-45
Precautions to observe when using wipers and wash-
ers 3-39
Pregnant women restraint 2-11
Puncture (Tyre changing) 6-17
R
RadioLW/MW/FM electronic tuning radio with CD
player 5-13
Rear combination lamps Bulb capacity 8-24
Replacement 8-30
Rear differential lock 4-34
Rear fog lamp Bulb capacity 8-24
Indication lamp 3-07
Replacement 8-29
Switch 3-35
Rear room lamp 5-39 Bulb capacity 8-25
Replacement 8-32
Rear seat 2-07
Rear side/quarter window 1-12
Rear turn-signal lamps Bulb capacity 8-24
Replacement 8-30
Rear window demister switch 3-40
Rear-view mirror Inside 4-09
Outside 4-10
Refill capacities 9-21
Removal of water from the fuel filter 6-06
Replacement of lamp bulbs 8-23
Reversing lamps Bulb capacity 8-24
Replacement 8-30
Room lamp 5-39,5-40
Running-in recommendations 4-04
S
Safe driving techniques 4-03
Seat belt 2-09 Adjustable seat belt anchor 2-11
Child restraint 2-13
Inspection 2-27
Pregnant women restraint 2-11
Pretensioner 2-12
Seat belt reminder/warning lamp 2-10
Seat under tray 5-44
Seat Adjustment 2-03
Armrest (Double cab) 2-07
Front seat 2-03
Head restraints 2-08
Alphabetical index
3