2011 MITSUBISHI L200 fuel
[x] Cancel search: fuelPage 143 of 330
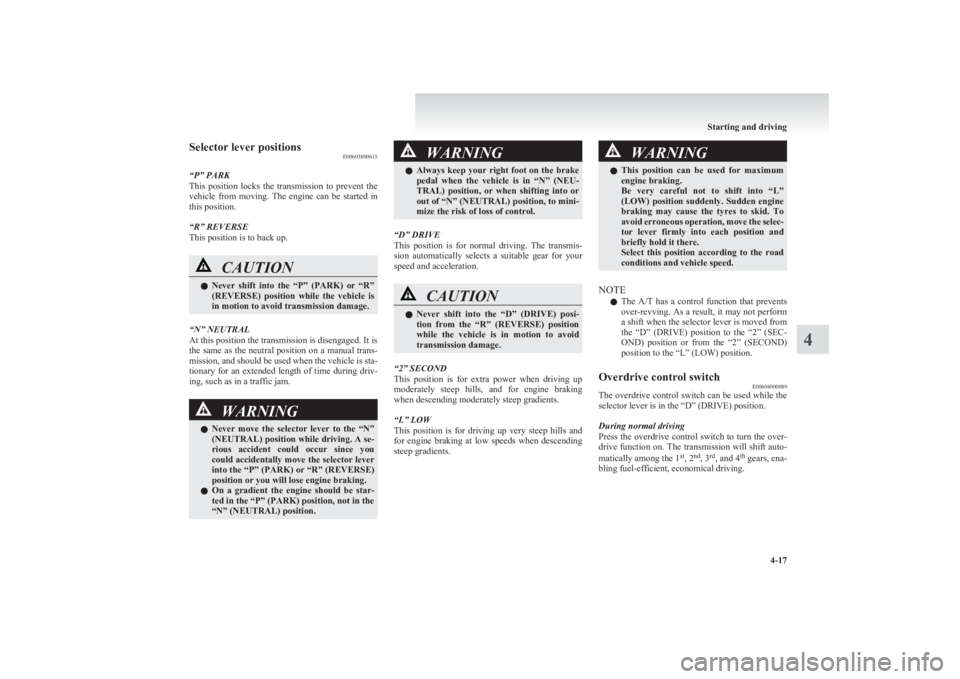
Selector lever positionsE00603800615
“P” PARK
This position locks the transmission to prevent the
vehicle from moving. The engine can be started in
this position.
“R” REVERSE
This position is to back up.CAUTIONl Never shift into the “P” (PARK) or “R”
(REVERSE) position while the vehicle is
in motion to avoid transmission damage.
“N” NEUTRAL
At this position the transmission is disengaged. It is
the same as the neutral position on a manual trans-
mission, and should be used when the vehicle is sta-
tionary for an extended length of time during driv-
ing, such as in a traffic jam.
WARNINGl Never move the selector lever to the “N”
(NEUTRAL) position while driving. A se-
rious accident could occur since you
could accidentally move the selector lever
into the “P” (PARK) or “R” (REVERSE)
position or you will lose engine braking.
l On a gradient the engine should be star-
ted in the “P” (PARK) position, not in the
“N” (NEUTRAL) position.WARNINGl Always keep your right foot on the brake
pedal when the vehicle is in “N” (NEU-
TRAL) position, or when shifting into or
out of “N” (NEUTRAL) position, to mini-
mize the risk of loss of control.
“D” DRIVE
This position is for normal driving. The transmis-
sion automatically selects a suitable gear for your
speed and acceleration.
CAUTIONl Never shift into the “D” (DRIVE) posi-
tion from the “R” (REVERSE) position
while the vehicle is in motion to avoid
transmission damage.
“2” SECOND
This position is for extra power when driving up
moderately steep hills, and for engine braking
when descending moderately steep gradients.
“L” LOW
This position is for driving up very steep hills and
for engine braking at low speeds when descending
steep gradients.
WARNINGl This position can be used for maximum
engine braking.
Be very careful not to shift into “L”
(LOW) position suddenly. Sudden engine
braking may cause the tyres to skid. To
avoid erroneous operation, move the selec-
tor lever firmly into each position and
briefly hold it there.
Select this position according to the road
conditions and vehicle speed.
NOTE
l The
A/T has a control function that prevents
over-revving. As a result, it may not perform
a shift when the selector lever is moved from
the “D” (DRIVE) position to the “2” (SEC-
OND) position or from the “2” (SECOND)
position to the “L” (LOW) position.
Overdrive control switch E00604000089
The overdrive control switch can be used while the
selector lever is in the “D” (DRIVE) position.
During normal driving
Press the overdrive control switch to turn the over-
drive function on. The transmission will shift auto-
matically among the 1 st
, 2 nd
, 3 rd
, and 4 th
gears, ena-
bling fuel-efficient, economical driving.
Starting and driving
4-17
4
Page 151 of 330
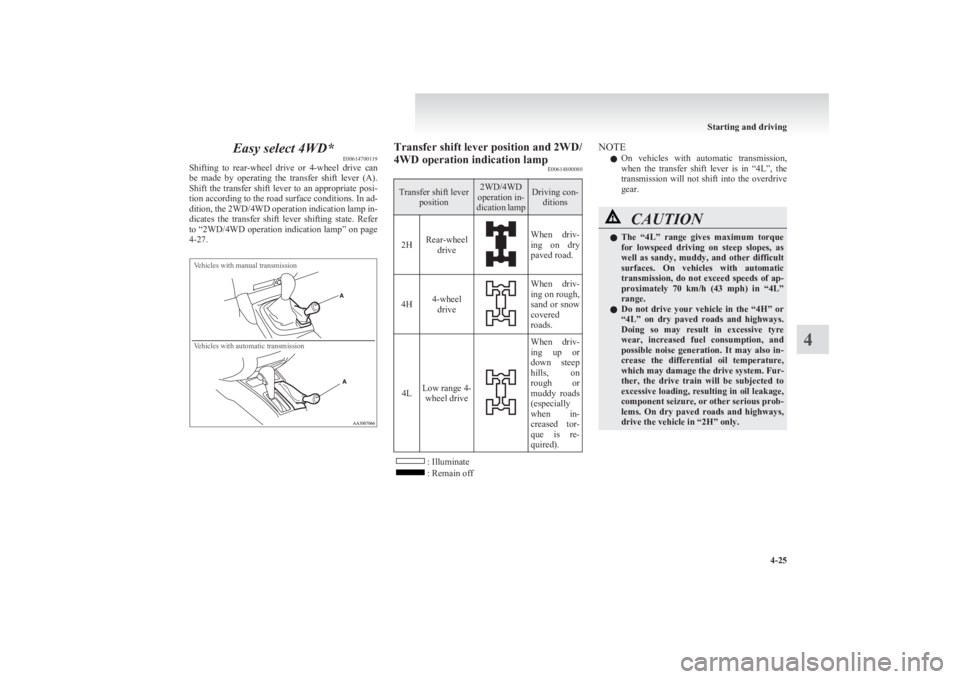
Easy select 4WD*E00614700119
Shifting to rear-wheel drive or 4-wheel drive can
be made by operating the transfer shift lever (A).
Shift the transfer shift lever to an appropriate posi-
tion according to the road surface conditions. In ad-
dition, the 2WD/4WD operation indication lamp in-
dicates the transfer shift lever shifting state. Refer
to “2WD/4WD operation indication lamp” on page
4-27.
Vehicles with manual transmissionVehicles with automatic transmissionTransfer shift lever position and 2WD/
4WD operation indication lamp E00614800080Transfer shift lever
position2WD/4WD
operation in-
dication lampDriving con- ditions
2HRear-wheel driveWhen driv-
ing on dry
paved road.4H4-wheel drive
When driv-
ing on rough,
sand or snow
covered
roads.
4LLow range 4- wheel drive
When driv-
ing up or
down steep
hills, on
rough or
muddy roads
(especially
when in-
creased tor-
que is re-
quired).
: Illuminate: Remain off
NOTE
l On vehicles with automatic transmission,
when the transfer shift lever is in “4L”, the
transmission will not shift into the overdrive
gear.CAUTIONl The “4L” range gives maximum torque
for lowspeed driving on steep slopes, as
well as sandy, muddy, and other difficult
surfaces. On vehicles with automatic
transmission, do not exceed speeds of ap-
proximately 70 km/h (43 mph) in “4L”
range.
l Do not drive your vehicle in the “4H” or
“4L” on dry paved roads and highways.
Doing so may result in excessive tyre
wear, increased fuel consumption, and
possible noise generation. It may also in-
crease the differential oil temperature,
which may damage the drive system. Fur-
ther, the drive train will be subjected to
excessive loading, resulting in oil leakage,
component seizure, or other serious prob-
lems. On dry paved roads and highways,
drive the vehicle in “2H” only.
Starting and driving
4-25
4
Page 156 of 330
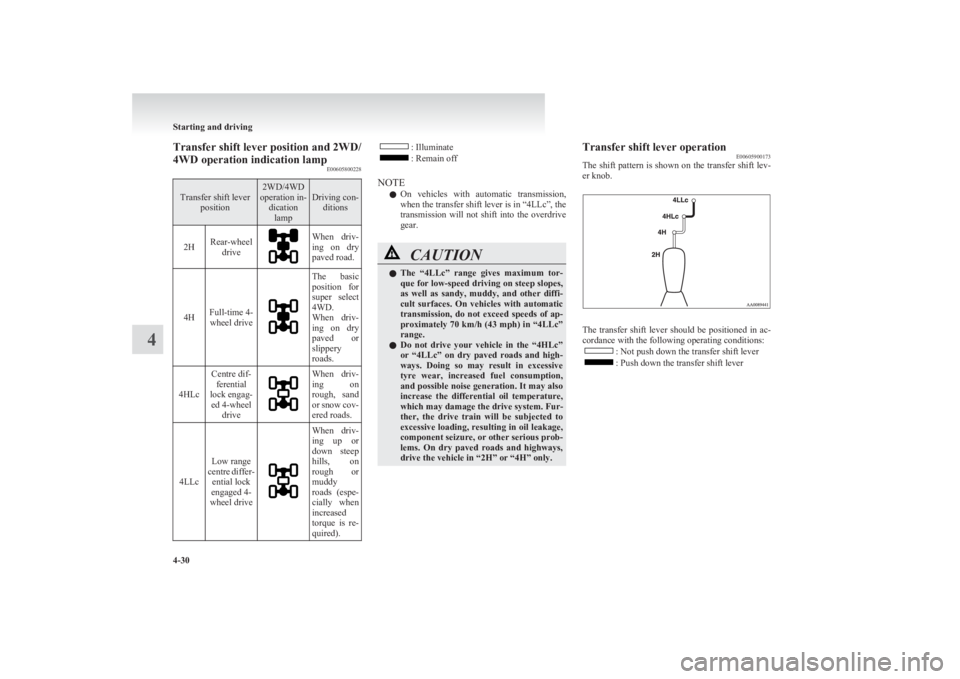
Transfer shift lever position and 2WD/
4WD operation indication lamp E00605800228Transfer shift lever
position2WD/4WD
operation in- dicationlampDriving con- ditions2HRear-wheel driveWhen driv-
ing on dry
paved road.
4HFull-time 4- wheel drive
The basic
position for
super select
4WD.
When driv-
ing on dry
paved or
slippery
roads.
4HLc
Centre dif- ferential
lock engag- ed 4-wheel driveWhen driv-
ing on
rough, sand
or snow cov-
ered roads.
4LLc
Low range
centre differ- ential lock
engaged 4-
wheel drive
When driv-
ing up or
down steep
hills, on
rough or
muddy
roads (espe-
cially when
increased
torque is re-
quired).: Illuminate: Remain off
NOTE l On vehicles with automatic transmission,
when the transfer shift lever is in “4LLc”, the
transmission will not shift into the overdrive
gear.CAUTIONl The “4LLc” range gives maximum tor-
que for low-speed driving on steep slopes,
as well as sandy, muddy, and other diffi-
cult surfaces. On vehicles with automatic
transmission, do not exceed speeds of ap-
proximately 70 km/h (43 mph) in “4LLc”
range.
l Do not drive your vehicle in the “4HLc”
or “4LLc” on dry paved roads and high-
ways. Doing so may result in excessive
tyre wear, increased fuel consumption,
and possible noise generation. It may also
increase the differential oil temperature,
which may damage the drive system. Fur-
ther, the drive train will be subjected to
excessive loading, resulting in oil leakage,
component seizure, or other serious prob-
lems. On dry paved roads and highways,
drive the vehicle in “2H” or “4H” only.Transfer shift lever operation E00605900173
The shift pattern is shown on the transfer shift lev-
er knob.
The transfer shift lever should be positioned in ac-
cordance with the following operating conditions:
: Not push down the transfer shift lever: Push down the transfer shift lever
Starting and driving
4-30
4
Page 164 of 330

4-wheel drive operationE00606600920
By selecting 4-wheel drive, both axles of the vehi-
cle are rigidly connected with each other. This im-
proves the traction characteristics. When turning
sharp corners or moving forward and backward re-
peatedly, however, the drive line is stressed, which
is felt as a braking effect. A 4-wheel drive vehicle
can accelerate more quickly and smoothly.
However, note that the braking distance is not short-
er than that of a rear-wheel drive vehicle.
When using 4-wheel drive on rough roads (snow,
mud, sand, etc.), it is important to operate the vehi-
cle correctly.
NOTE l The driving posture should be more upright
and closer to the wheel than usual; adjust the
seat to a good position for easy steering and
pedal operation. Be sure to wear the seat belt.
l After driving on rough roads, check each
part of the vehicle and wash it thoroughly
with water. Refer to the “Vehicle care” sec-
tion and “Inspection and maintenance follow-
ing rough road operation” on page 4-40.
Driving on dry paved road and highway
Select “2H” position (easy select 4WD), “2H” or
“4H” position (super select 4WD) to drive on the
dry paved road. Especially on dry highway, never
select the “4H” or “4L” position (easy select
4WD), “4HLc” or “4LLc” position (super select
4WD).CAUTIONl Selecting “4H” or “4L” position (easy se-
lect 4WD), “4HLc” or “4LLc” position (su-
per select 4WD) to drive on dry paved
road will increase the fuel consumption
with possible noise generation and early
tyre wear.
It may also increase the differential oil
temperature, resulting in possible dam-
age to the driving system.
Further, the drive train will be subjected
to excessive loading, possibly leading to
oil leakage, component seizure, or other
serious faults.
Driving on snowy or icy roads
Set the transfer shift lever to “4H” or “4L” position
(easy select 4WD), “4H” or “4HLc” position (su-
per select 4WD) in accordance with the road condi-
tions, and then gradually depress the accelerator ped-
al for a smooth start.
NOTE l The use of snow tyres and/or tyre chains is
recommended.
l Maintain a safe distance between vehicles,
avoid sudden braking, and use engine brak-
ing (downshifting).
CAUTIONl Avoid sudden braking, sudden accelera-
tion, and sharp turning; such operations
could cause skidding and spinouts.Driving on sandy or muddy roads
Set the transfer shift lever to “4H” or “4L” position
(easy select 4WD), “4HLc” or “4LLc” position (su-
per select 4WD) and then gradually depress the ac-
celerator pedal for a smooth start. Keep the pres-
sure on the accelerator pedal as constant as possi-
ble, and drive at low speed.CAUTIONl Do not force the vehicle or drive reckless-
ly on sandy surfaces. In comparison with
normal road surfaces, the engine and oth-
er drive-system components are put un-
der excessive strain when driving on such
a surface, and this could lead to accidents.
l If any of following conditions occur while
the vehicle is being driven, immediately
park your vehicle in a safe place and fol-
low these procedures: •The needle in the temperature gauge
approaches the overheating zone.
Refer to “Engine overheating” on
page 6-04.
• Automatic transmission fluid temper-
ature warning lamp comes on.
Refer to “When the A/T (automatic
transmission) fluid temperature warn-
ing lamp comes on” on pages 4-18,
4-23.
Starting and driving
4-38
4
Page 180 of 330
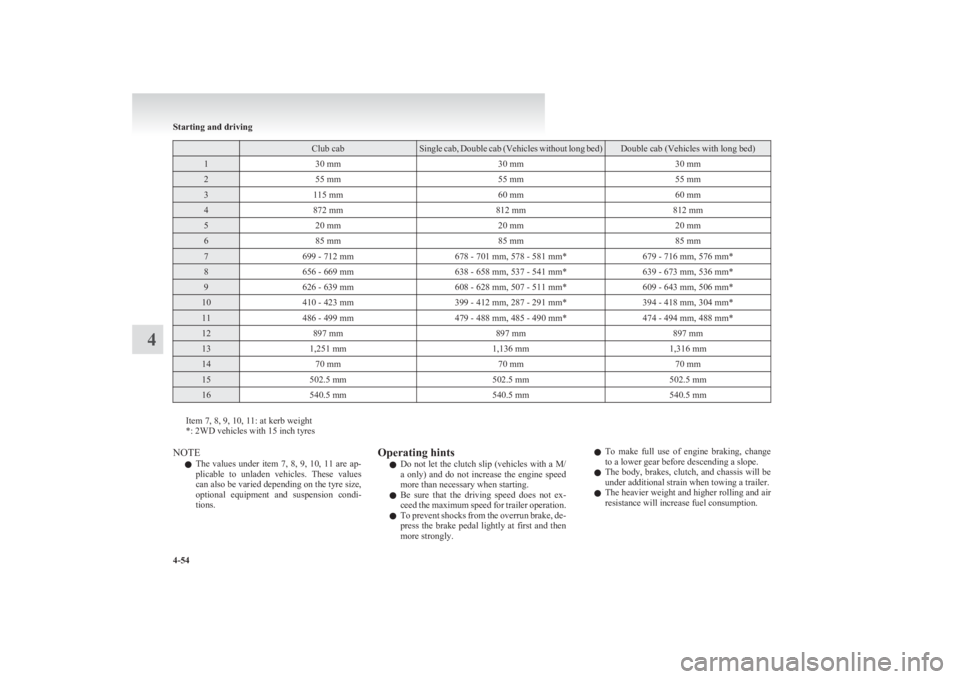
Club cabSingle cab, Double cab (Vehicles without long bed)Double cab (Vehicles with long bed)130 mm30 mm30 mm255 mm55 mm55 mm3115 mm60 mm60 mm4872 mm812 mm812 mm520 mm20 mm20 mm685 mm85 mm85 mm7699 - 712 mm678 - 701 mm, 578 - 581 mm*679 - 716 mm, 576 mm*8656 - 669 mm638 - 658 mm, 537 - 541 mm*639 - 673 mm, 536 mm*9626 - 639 mm608 - 628 mm, 507 - 511 mm*609 - 643 mm, 506 mm*10410 - 423 mm399 - 412 mm, 287 - 291 mm*394 - 418 mm, 304 mm*11486 - 499 mm479 - 488 mm, 485 - 490 mm*474 - 494 mm, 488 mm*12897 mm897 mm897 mm131,251 mm1,136 mm1,316 mm1470 mm70 mm70 mm15502.5 mm502.5 mm502.5 mm16540.5 mm540.5 mm540.5 mm
Item 7, 8, 9, 10, 11: at kerb weight
*: 2WD vehicles with 15 inch tyres
NOTE
l The values under item 7, 8, 9, 10, 11 are ap-
plicable to unladen vehicles. These values
can also be varied depending on the tyre size,
optional equipment and suspension condi-
tions.Operating hints
l Do not let the clutch slip (vehicles with a M/
a only) and do not increase the engine speed
more than necessary when starting.
l Be sure that the driving speed does not ex-
ceed the maximum speed for trailer operation.
l To prevent shocks from the overrun brake, de-
press the brake pedal lightly at first and then
more strongly.l To make full use of engine braking, change
to a lower gear before descending a slope.
l The body, brakes, clutch, and chassis will be
under additional strain when towing a trailer.
l The heavier weight and higher rolling and air
resistance will increase fuel consumption.
Starting and driving
4-54
4
Page 197 of 330

To adjust the volumeE00708700548
VOL (Volume control)
Turn the VOL knob (2) clockwise to increase the
volume; anticlockwise to decrease the volume. The
status will be displayed in the display (7).
NOTE l The volume control mode will shut off auto-
matically if either the radio or CD is selec-
ted, or if no adjustment is made within about
2 seconds.To adjust the tone E00708801070
Press the AUDIO button (5) to select BASS TRE-
BLE FADER BALANCE Audio adjust
mode off. The status will be displayed in the dis-
play (7).
BASS (Bass tone control)
Press the audio adjust button (6) either
or to select the desired bass tone quality.
TREBLE (Treble tone control)
Press the audio adjust button (6) either
or to select the desired treble tone quality.
FADER (Front/Rear balance control)
Press the audio adjust button (6) either
or to balance the volume of sound from the front and
the rear speakers.
BALANCE (Left/Right balance control)
Press the audio adjust button (6) either
or to balance the volume of sound from the left and
the right speakers.
NOTE
l Audio adjust mode will be cancelled when ra-
dio or CD operation is performed or no ad-
justment is performed for more than
7 seconds.
To enter audio tone settings into the memory E00733000079
It is possible to enter the audio adjustment condi-
tion (BASS, TREBLE, FADER, BALANCE) into
the memory. 1.Make the desired adjustments in the audio ad-
just mode.
Refer to “To adjust the tone” on page 5-15.
2. In the audio adjust mode, press and hold one
of the memory select buttons (3) [1-6]. The
display will show the button number
[SOUND1-SOUND6] for which the settings
were memorized.
3. In future, when you gently press the memory
select button in the audio adjust mode, the au-
dio adjustment condition memorized for that
button will take effect.To change the information display E00735100032
Press the DISP button (4) to change the informa-
tion display. The display switches in the following
sequence: Audio information → Average fuel con-
sumption → Driving range → Average speed →
Outside temperature → Altimeter → Barometer →
Calendar → Clock-only → Blank. For details, refer
to “Changing the information display” on page
3-12.
NOTE l Audio information is displayed when the au-
dio system is on.
For pleasant driving
5-15
5
Page 231 of 330
If the vehicle breaks down............................................................ 6-02
Emergency starting ....................................................................... 6-02
Engine overheating ....................................................................... 6-04
Bleeding the fuel system...............................................................6-05
Removal of water from the fuel filter ...........................................6-06
Tools, jack and jack handle .......................................................... 6-07
Jacking up the vehicle...................................................................6-13
Spare wheel...................................................................................6-16
How to change a tyre .................................................................... 6-17
Towing .......................................................................................... 6-20
Operation under adverse driving conditions .................................6-24For emergencies6
Page 235 of 330
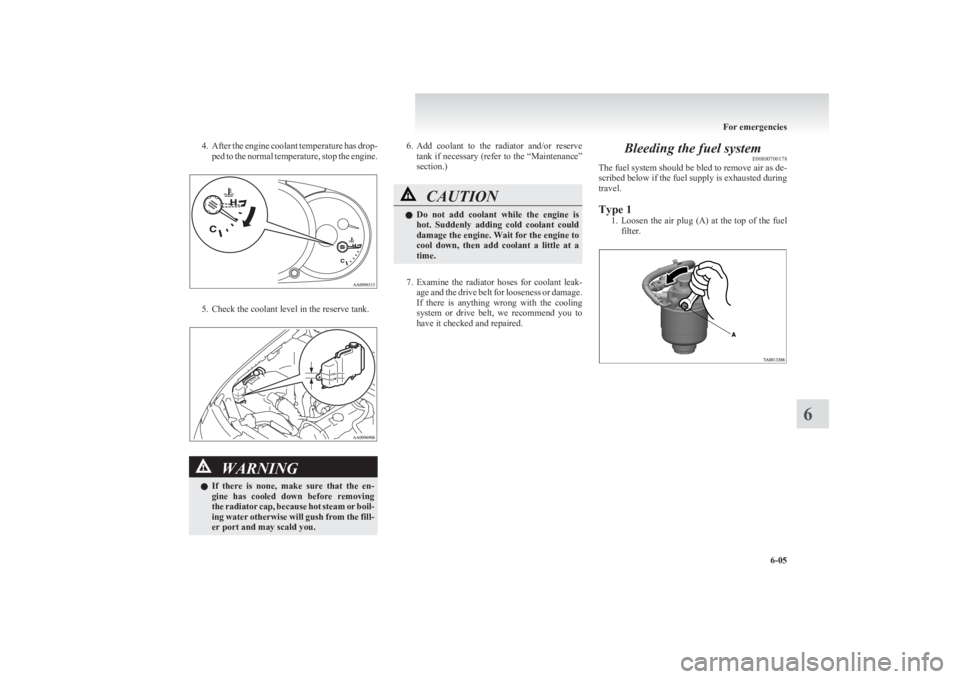
4.After the engine coolant temperature has drop-
ped to the normal temperature, stop the engine.
5. Check the coolant level in the reserve tank.
WARNINGl If there is none, make sure that the en-
gine has cooled down before removing
the radiator cap, because hot steam or boil-
ing water otherwise will gush from the fill-
er port and may scald you.6. Add coolant to the radiator and/or reserve
tank if necessary (refer to the “Maintenance”
section.)CAUTIONl Do not add coolant while the engine is
hot. Suddenly adding cold coolant could
damage the engine. Wait for the engine to
cool down, then add coolant a little at a
time.
7. Examine the radiator hoses for coolant leak-
age and the drive belt for looseness or damage.
If there is anything wrong with the cooling
system or drive belt, we recommend you to
have it checked and repaired.
Bleeding the fuel system E00800700178
The fuel system should be bled to remove air as de-
scribed below if the fuel supply is exhausted during
travel.
Type 1 1.Loosen the air plug (A) at the top of the fuel
filter.
For emergencies
6-05
6