2011 MERCEDES-BENZ M-CLASS SUV ignition
[x] Cancel search: ignitionPage 197 of 389

Problems wit
hPARKTRONIC Problem Possible causes/consequences and
M Solutions
Only the red segments
in the PARKTRONIC
warning display sare lit.
Yo ua lso hear awarning
tone for approximately
two seconds.
PARKTRONIC is deacti-
vated after approx-
imately 20 seconds,
and the indicator lamp
in the PARKTRONIC
button lights up. PARKTRONIC has malfunctioned and has switched off.
X If problems persist, have PARKTRONIC checked at aqualified
specialist workshop. Only the red segments
in the PARKTRONIC
warning display sare lit.
PARKTRONIC is deacti-
vate dafter approx-
imatel y20seconds. The PARKTRONI
Csensors are dirt yorthere is interference.
X Clean the PARKTRONI Csensors (Y page 327).
X Switch the ignition back on. The problem may be caused by an exter
nalsource of radio or
ultrasoun dwaves.
X See if PARKTRONIC functions in adifferent location. Active Parking Assist
Important safet ynotes Active Parking Assist is an electronic parking
aid with ultrasound. Ultrasound is used to
measure the road on both sides of the vehicle.
As uitable parking space is indicated by the
parking symbol. Activ esteering intervention
can assis tyou during parking. You ma yalso
use PARKTRONIC (Y page 191). When PARK-
TRONIC is switched off, Active Parking Assist
is also unavailable. G
WARNING
Active Parkin gAssist is merely an aid and may
sometimes recommen dparking spaces that
are not suitable for parking. For example,
these might be spaces where parking is pro-
hibited ,driveways, unsuitabl esurfaces, etc.
Active Parking Assis tmeasures the parking
space as you driv epast it. Any later changes to the parking space are not taken into
account .For insta nce,this ma ybethe case
when the vehicle parked in front of or behind
the space changes its position or when an
obstacle is moved int othe parkin gspace.
Active Parking Assist does not reliev eyou of
the responsibilit yofpaying attention. If you
rely solel yonA ctive Parkin gAssist ,you could
cause an accident and injure yourself and oth-
ers.
You are always responsible for safet yand
must continue to pay attention to your imme-
diate surroundings whe nparking and
manoeuvring. G
WARNING
Objects located above the heigh trange of
Active Parking Assis twill not be detected
when the parking space is measured. These
are not taken into account when the parking 194
Drivin
gsystemsDrivin gand parking
Page 201 of 389

:
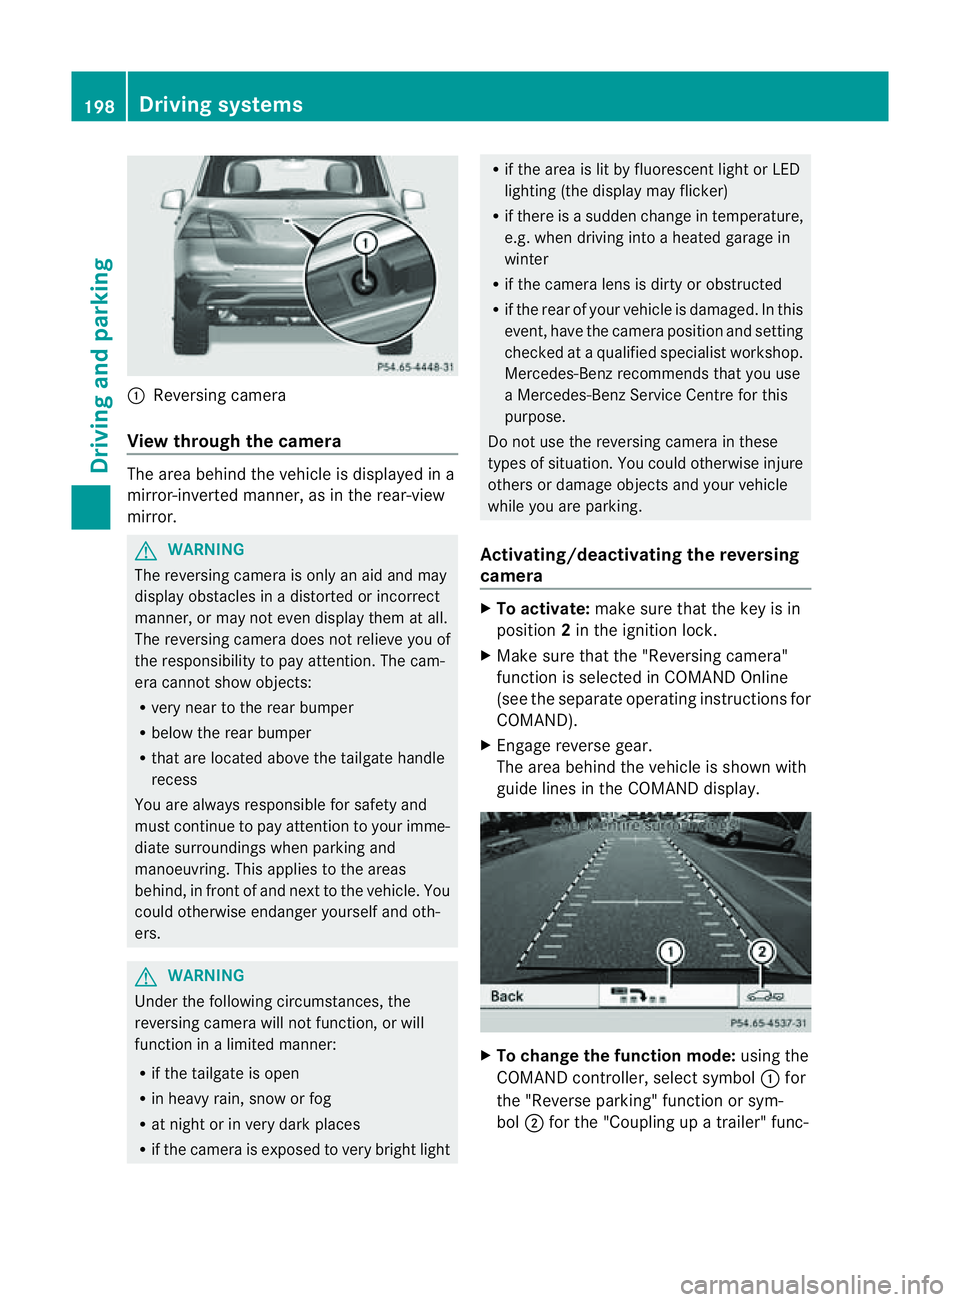
Reversin gcamera
View through th ecamera Th
ea rea behind the vehicle is displaye dina
mirror-inverted manner, as in the rea r-view
mirror. G
WARNING
The reversin gcamera is only an aid and may
display obstacles in adistorted or incorrect
manner, or may no teven display them at all.
Th er eversing camera does not relieve you of
the responsibility to pay attention. The cam-
era cannot show objects:
R ver ynear to the rear bumper
R belo wthe rea rbumper
R that are located above the tailgate handle
recess
You are alway sresponsible for safet yand
must continue to pay attentio ntoyourimme-
di at es urroundings when parking and
manoeuvring. This applie stothe areas
behind, in front of and nex ttothe vehicle. You
coul dotherwise endang er yourself and oth-
ers. G
WARNING
Under the following circumstances, the
reversing camera will not function, or will
function in alimited manner:
R if the tailgate is open
R in heavy rain, snow or fog
R at night or in very dark places
R if the camer aisexposed to very brigh tlight R
if the area is lit by fluorescen tlight or LED
lighting (the display may flicker)
R if there is asudden change in temperature,
e.g. when driving into aheated garage in
winter
R if the camera lens is dirt yorobstruc ted
R if the rear of your vehicle is damaged. In this
event ,have the camera positio nand setting
checked at aqualified specialist workshop.
Mercedes-Benz recommends that you use
aM ercedes-Benz Servic eCentr efor this
purpose.
Do not use the reversin gcamera in these
types of situation. You could otherwise injure
others or damage objects and your vehicle
while you are parking.
Activating/deactivating the reversing
camera X
To activate: make sure that the key is in
position 2in the ignition lock.
X Make sure that the "Reversing camera"
function is selected in COMAND Online
(see the separate operating instructions for
COMAND).
X Engage reverse gear.
The area behind the vehicle is shown with
guide lines in the COMAND display. X
To change the function mode: using the
COMAND controller, select symbol :for
the "Reverse parking" function or sym-
bol ;for the "Coupling up atrailer" func- 198
Dri
ving systemsDriving and parking
Page 209 of 389

position "Automatic drivin
glights/daytime
drivin glights" is located on the light switch. You can only activat
eNight View Assist Plus
if:
R the key is in position 2in the ignition lock.
R it is dark.
R the light switc hisset to either c,
à orL.
R rev ers egear has not been engaged.
X Make sure COMAND Onlin eisswitched on.
X Press button :.
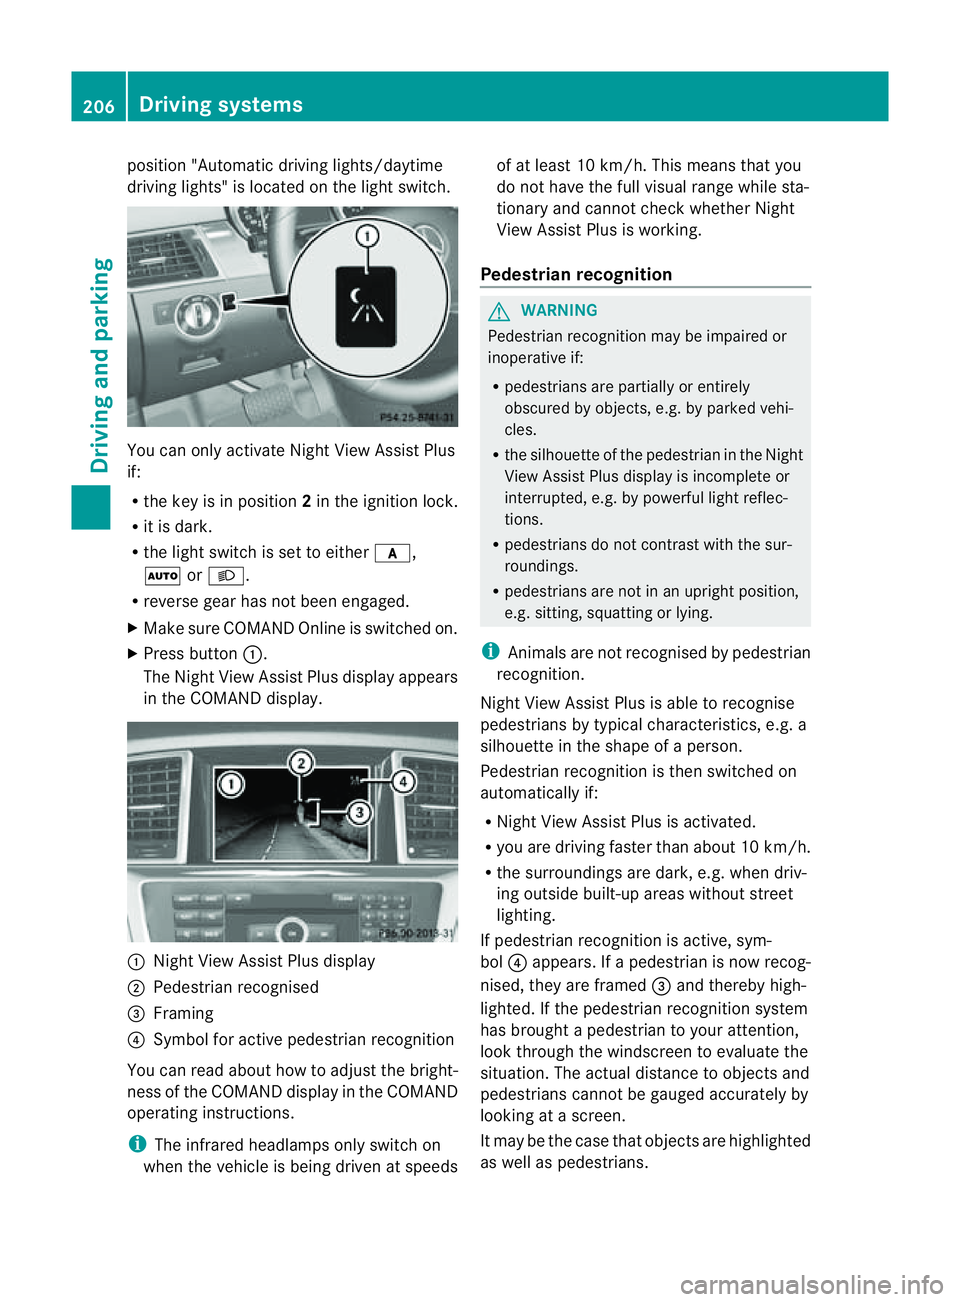
The Night View Assist Plus display appears
in the COMAN Ddisplay. :
Night View Assist Plus display
; Pedestrian recognised
= Framing
? Symbol for active pedestrian recognition
You can read abou thow to adjust the bright-
nes soft he COMAND displa yinthe COMAND
operating instructions.
i The infrared headlamps only switc hon
when the vehicle is being drive natspeeds of at least 10 km/h. This mean
sthat you
do not hav ethe full visual range while sta-
tionar yand cannot check whether Night
View Assist Plus is working.
Pedestrian recognition G
WARNING
Pedestrian recognition may be impaired or
inoperative if:
R pedestrians are partiall yorentirely
obscured by obje cts, e.g. by parked vehi-
cles.
R the silhouett eofthe pedestrian in the Night
View Assist Plus displa yisincomplete or
interrupted, e.g. by powerful ligh treflec-
tions.
R pedestrians do not contrast with the sur-
roundings.
R pedestrians are not in an upright position,
e.g. sitting, squattin gorlying.
i Animals are not recognised by pedestrian
recognition.
Night View Assist Plus is able to recognise
pedestrians by typical characteristics, e.g. a
silhouette in the shape of aperson.
Pedestrian recognition is then switched on
automatically if:
R Night View Assist Plus is activa ted.
R you are driving faster than about 10 km/ h.
R the surrounding sare dark ,e.g.w hen driv-
ing outside built-up areas without street
lighting.
If pedestrian recognition is active ,sym-
bol ?appears. If apedestrian is now recog-
nised, they are framed =and thereby high-
lighted. If the pedestrian recognition system
has brought apedestrian to your atten tion,
look through the windscreen to evaluate the
situation .The actual distanc etoobjectsand
pedestrians cannot be gauged accurately by
looking at ascreen.
It may be the case that objects are highlighted
as wel laspedestrians. 206
Driving systemsDriving and parking
Page 213 of 389

the warning onl
yoccurs if the differenc ein
spee dislesst han 12 km/h.
The yellow indicator lamp goes out if reverse
gea rise ngaged. Blind Spot Assist is then
deactivated.
The brightness of the indicator/warning
lamps is adjusted automaticall yaccording to
the ambient light. G
WARNING
Blind Spot Assist is not active at speeds below
30 km/h, and the indicator lamps in the exte-
rior mirrors are yellow. Vehicles in the moni-
toring range are the nnot indicated.
Always pay attention to traffic condition sand
your surroundings .Otherwise, you may fail to
recognis edangers in time, cause an accident
and injure yoursel fand others.
Collisio nwarning
If av ehicle is detected in the mon itoring range
of Blind Spot Assis tand you switch on the turn
signal, adouble warnin gtone sounds. Red
warnin glamp :flashes .Ifthe tur nsignal
remains on, detected vehicles are indicated
by the flashing of red warnin glamp :.T here
ar enof urther warning tones.
Switching on Blind Spot Assist
X On vehicles without anavigation system,
make sure that the Becker ®
MAP PILOT is
connected; see the separate operating
instructions for Audio 20.
X Make sure that the radar senso rsystem
(Y page 249) and Blind Spot Assist
(Y page 245) are activated in the on-board
computer.
X Turn the key to position 2in the ignition
lock.
Warning lamps :ligh tupr ed in the exte-
rior mirror sfor approximately 1. 5seconds
and then tur nyellow.
Trailer towing
If you attach atrailer, make sure that yo uhave
correctly established the electrical connec-
tion. This can be accomplished by checking the trailer lighting
.Blind Spot Assist is then
deactivated. The indicator lamp in the exte-
rior mirrors lights up yellow, and the Blind Spot Assist currentl
yunavailable See Owner's Manual message appe
arsin
the multifunction display.
i You can deactivate the indicato rlamps in
the exterior mirrors.
To do so, switch off Blind Spot Assis tif:
R thek ey is in position 2in the ignition
lock.
R the engine is not running.
R the electrical connection to the trailer
has been established.
Lane Keeping Assist Important safety notes
Lan
eKeeping Assist monitor sthe area in
front of your vehicle by means of acamera at
the top of the windscreen. Lane Keeping
Assis tdetect slane markings on the road and
warns you before you leave your lane unin-
tentionally. :
Lane Keeping Assis tcamera
If you have chose nthe Displa yunit Speed-/odometer (Y
page 246) functio nin
the on-board computer and select km as the
unit of measurement, Active Lane Keeping
Assist is active from speeds of 60 km/h. If
the miles displa
yunit is selected ,the assis-
tance range begin sat40mph. 210
Driving systemsDriving and parking
Page 218 of 389

R
the Off-roa dprogra misa ctivate d(vehicles
without th eON&OFFROAD package).
R Off-road progra m1or2isactivated(vehi-
cle sw ith the ON&OFFROAD package).
R the LOW RANGE off-road gear is activated
(vehicles with the ON&OFFROAD package).
R al oss of tyr epressure or adefectiv etyre is
detected.
Activating Active Blind Spot Assist
X On vehicles without anavigation system,
make sure that the Becker ®
MAP PILOT is
connected; see the separate operating
instructions for Audio 20.
X Make sure that the radar senso rsystem
(Y page 249) and Active Blind Spot Assist
(Y page 245) are activated in the on-board
computer.
X Turn the key to position 2in the ignition
lock.
Warning lamps :ligh tupr ed in the exte-
rior mirror sfor approximately 1. 5seconds
and then tur nyellow.
Trailer towing
If you attach atrailer, make sure that yo uhave
correctly established the electrical connec-
tion. This can be accomplished by checking
the trailer lighting .Active Blind Spo tAssist is
then deactivated. The indicator lam plights up
yellow in the exterior mirrors and the ActiveBlind Spot Assist currently unavail‐
able Se
eOwner's Manual message
appe arsint he multifunction display.
Active Lan eKeeping Assist Import
ants afety notes
Active Lane Keeping Assis tmonitors the area
in front of your vehicle by means of acamera
at the top of the windscreen. Active Lane
Keeping Assis tdetect slane markings on the
road and warns you before you leave your
lane unintentionally .Ifyou do not react to the
warning, alane-correcting application of the
brakes can bring the vehicle back into the
original lane. :
Active Lane Keeping Assis tcamera
If you have selected the Displayunit Speed-/odometer (Y
page 246) function in
th eo n-board compute rand select km as the
unit of measurement, Active Lane Keeping
Assist is active from speeds of 60 km/h. If
the miles display unit is selected
,the assis-
tan ce ra nge begins at 40 mph. G
WARNING
Active Lane Keeping Assist doe snot keep
your vehicle in its lane. It is only an aid and
may detec tthe lan emarkings on the road
incorrectly or not at all.
The system may be impaired or may not func-
tion if:
R several or no lane markings for asingle lane
are present.
R there is poor visibility, e.g. due to insuffi-
cient illumination of the road, or due to
snow, rain, fog or spray.
R there is glare, e.g. from oncoming traffic,
the sun, or reflec tion from other vehicles.
R the windscreen is dirty, misted up or cov-
ered, for insta ncebyasticker, in the vicinity
of the camera.
R the lane markings are worn away ,dark or
covered up, e.g. by dirt or snow.
R the distance to the vehicle in front is too
small and the lane markings thus cannot be
detected.
R the lane markings on the road are unclear,
e.g. near roadworks. Driving systems
215Drivingand park ing
Z
Page 221 of 389

On-roa
dprogram (vehicle swith the
ON&OFFROAD package)
Genera lnotes The on-road program
ssupport you when driv-
ing on roads and the off-road programs sup-
port you when driving off-road (Y page 222).
The following program messages remain in
the multifunction display until the corre-
spondin gvehicle level has been set. Up to off-
road level 2, you can hide the program mes-
sages using the %ora button on the
multifunction steering wheel.
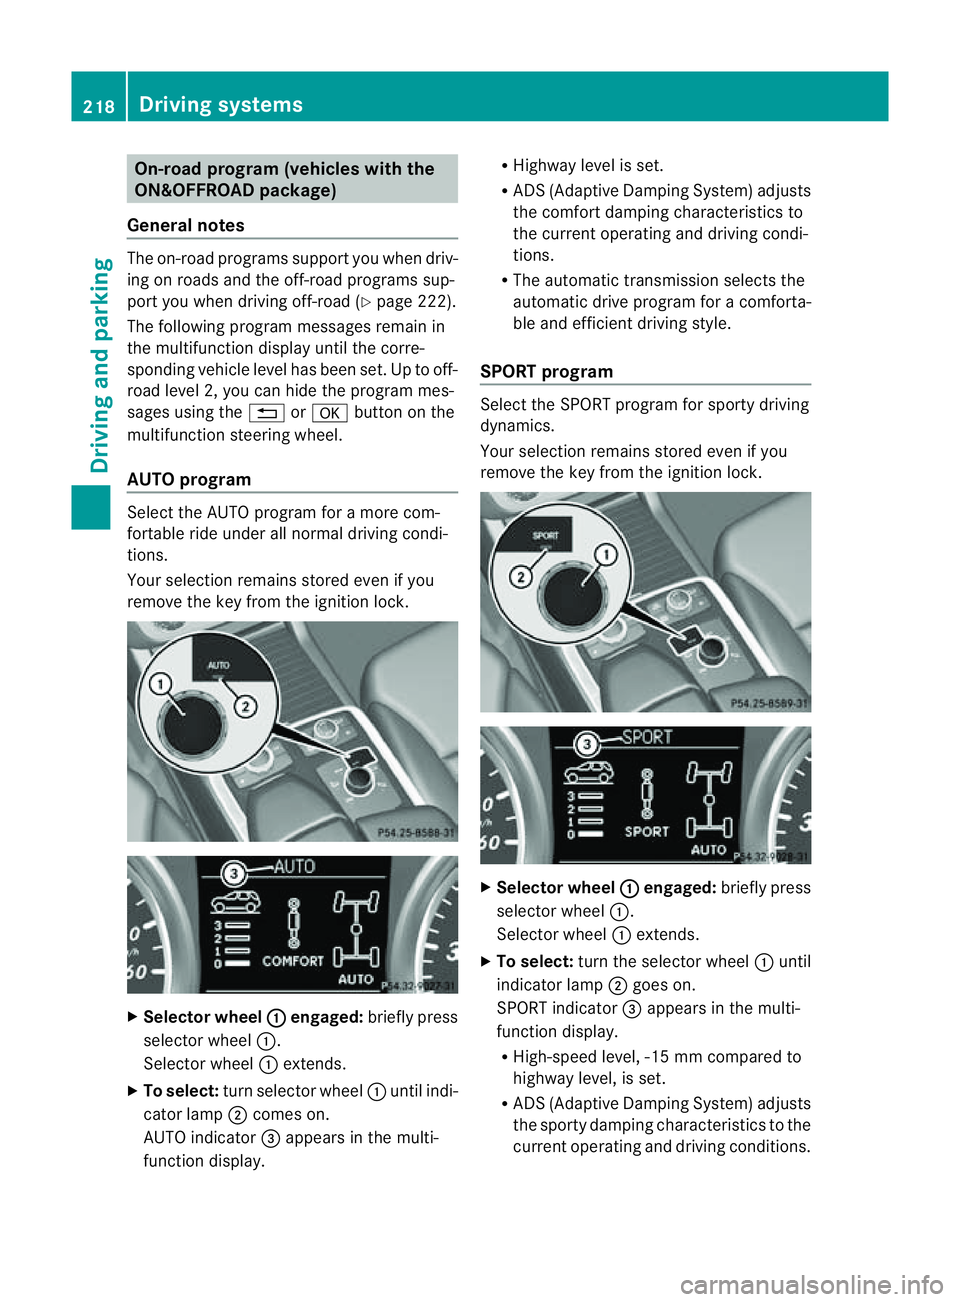
AUTO program Selec
tthe AUTO program for amore com-
for table ride under all normal driving condi-
tions.
Your selection remains stored even if you
remove the key from the ignition lock. X
Selecto rwheel : engaged:
brieflypress
selector wheel :.
Selector wheel :extends.
X To select: turn selector wheel :unti lindi-
cator lamp ;comes on.
AUTO indicator =appears in the multi-
function display. R
Highway level is set.
R AD S(Adaptive Damp ingS ystem) adjusts
the comfort damping characteristics to
the current operating and driving condi-
tions.
R The automatic transmission selects the
automatic drive progra mforac omforta-
ble and efficien tdriving style.
SPORT program Select th
eSPORT program for sport ydriving
dynamics.
Your selection remains store deven if you
remove th ekey from the ignition lock. X
Selector wheel : engaged:
briefly press
selector wheel :.
Selec torw heel :extends.
X To select: turnthe selector wheel :until
indicator lamp ;goes on.
SPOR Tindicator =appears in the multi-
function display.
R High-speed level ,-15 mm compared to
highway level ,isset.
R AD S(Adaptive Damp ingS ystem) adjusts
the sporty damping characteristics to the
current operating and driving conditions. 218
Driving systemsDriving and
parking
Page 228 of 389

From LOW RANGE to HIG
HRANGE
! Only carry out the gear change process if:
R the engin eisrunning
R the transmission is in position N
R you are not driving above 70 km/h
X Press LOW RANG Ebutton :.
Indicato rlamp ;flashes.
When the gear change is complete, indica-
tor lamp ;goes out. In th emultifunction
display, the LOWR ANGE Off message
appears and status indica tor=goes out.
While indica torlamp ;is flashing, you can
cancel the gear change by pressin gLOW
RANGE button :agai n.
Me ssages in th emultif un ction display
If ag ear chang eprocess ha snot been suc-
cessful, th efollowin gmessages may be dis-
played in the multifunction display:
LOW RANGE Max. speed 40 km/h :Y
ou have
been drivin gabove 40 km/h. Indicator
lamp ;also flashes.
X Drive mor eslowly to carr yout the gear
change process.
LO WR ANGE Shift to position N briefly :T
he transmission is in position D
and you ar enow drivin gatbelow 40 km/h.
X Shif tthe transmission to Nto complete the
gear change process.
LOW RANGE Shifting cancelled Please
reactivate :T
he shifting process has not
been completed.
X Maintai nall gear change condition sand
carry out the gea rchange process again.
LO WR ANGE Stop Apply parking brake :
Aw arning ton eisalso heard. The gear change
proces shas not been completed. LOW
RANGE is in the neut ralp osition .There is no
con nectio nbetween the engine and the drive
wheels.
! Do not driv eany further, otherwis eyou
coul ddamage the vehicle's drive train. X
Stop the vehicle. Take into account the
road and traffic conditions when doing this.
X Apply the electric parking brake
(Y page 161).
X Carry out the gear change process again.
If the gear change process has been carried
out, the LOWR ANGE Stop Apply park‐ ing brake message disapp
ears. ON&OFFROAD men
uint he COMAND
display (vehicles wit hthe ON&OFF-
ROA Dpackage)
Yo uc an displ ay some driving systems ,driving
programs and additional information in the
COMAND display. X
Make sure that th ekey is in position 2in
the ignition lock.
X Make sure that COMAN DOnline is activa-
ted, see the separate COMAND operating
instructions.
X Pres sthe : func tion button.
The corresponding displays appear in the
CO MAN Ddisplay:
R level control
R steering angle
R vehicle' sangle of inclination
R uphill or downhil lgradient in percentage
R on- road/off-road program selected
R condition of the differential lock for the
transfer case
R the LOW RANGE off-road gear is selected Off-road driving systems
225Drivingand parking Z
Page 233 of 389

Vehicles with the AIRMATIC package
X
Make sure tha tthe transmission is in posi-
tion P.
X Engage the electric parkin gbrake.
X Start th eengine.
X Clos ethe doors and tailgate.
X Secur ethe trailer against rolling away.
X Remove the trailer cable and decouple the
trailer.
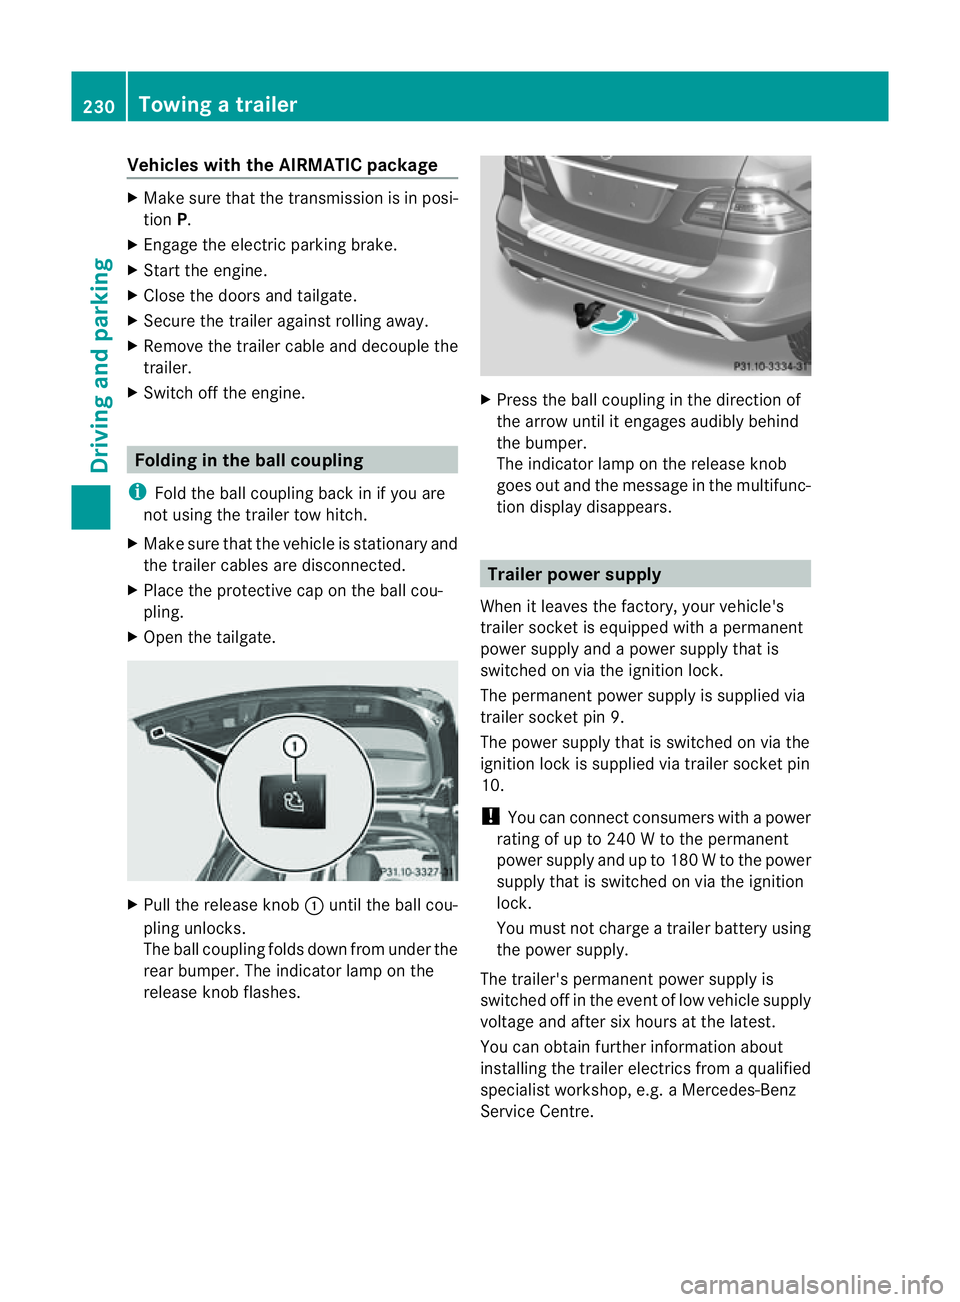
X Switc hoff th eengine. Folding in the ball coupling
i Fold the ball coupling back in if you are
not using the trailer tow hitch.
X Make sure that the vehicl eisstationary and
the trailer cables are disconnected.
X Place the protective cap on the ball cou-
pling.
X Ope nthe tailgate. X
Pull the release knob :until the ball cou-
plin gunlocks.
The ball coupling folds dow nfrom under the
rea rbumper. The indicator lamp on the
release knob flashes. X
Press the ball coupling in the direction of
the arrow until it engage saudibly behind
the bumper.
The indicator lamp on the release knob
goes out and the messag einthe multifunc-
tion display disappears. Trailer power supply
When it leaves the factory ,your vehicle's
trailer socket is equipped with apermanent
power supply and apower supply that is
switched on via the ignition lock.
The permanen tpower supply is supplied via
trailer socket pin 9.
The power supply that is switched on via the
ignition lock is supplied via trailer socket pin
10.
! You can con nect consumers with apower
ratin gofupto2 40Wtot he permanent
power supply and up to 18 0Wto the power
supply that is switched on via the ignition
lock.
You must not charge atrailer battery using
th ep ower supply.
The trailer's permanen tpower supply is
switched off in the even toflow vehicle supply
voltage and after six hour satthe latest.
You can obtai nfurther information about
installing the trailer electrics from aqualified
specialist workshop, e.g. aMercedes-Benz
Ser vice Centre. 230
Towing
atrailerDriving and parking