2011 MERCEDES-BENZ M-CLASS SUV ignition
[x] Cancel search: ignitionPage 155 of 389

Problems wit
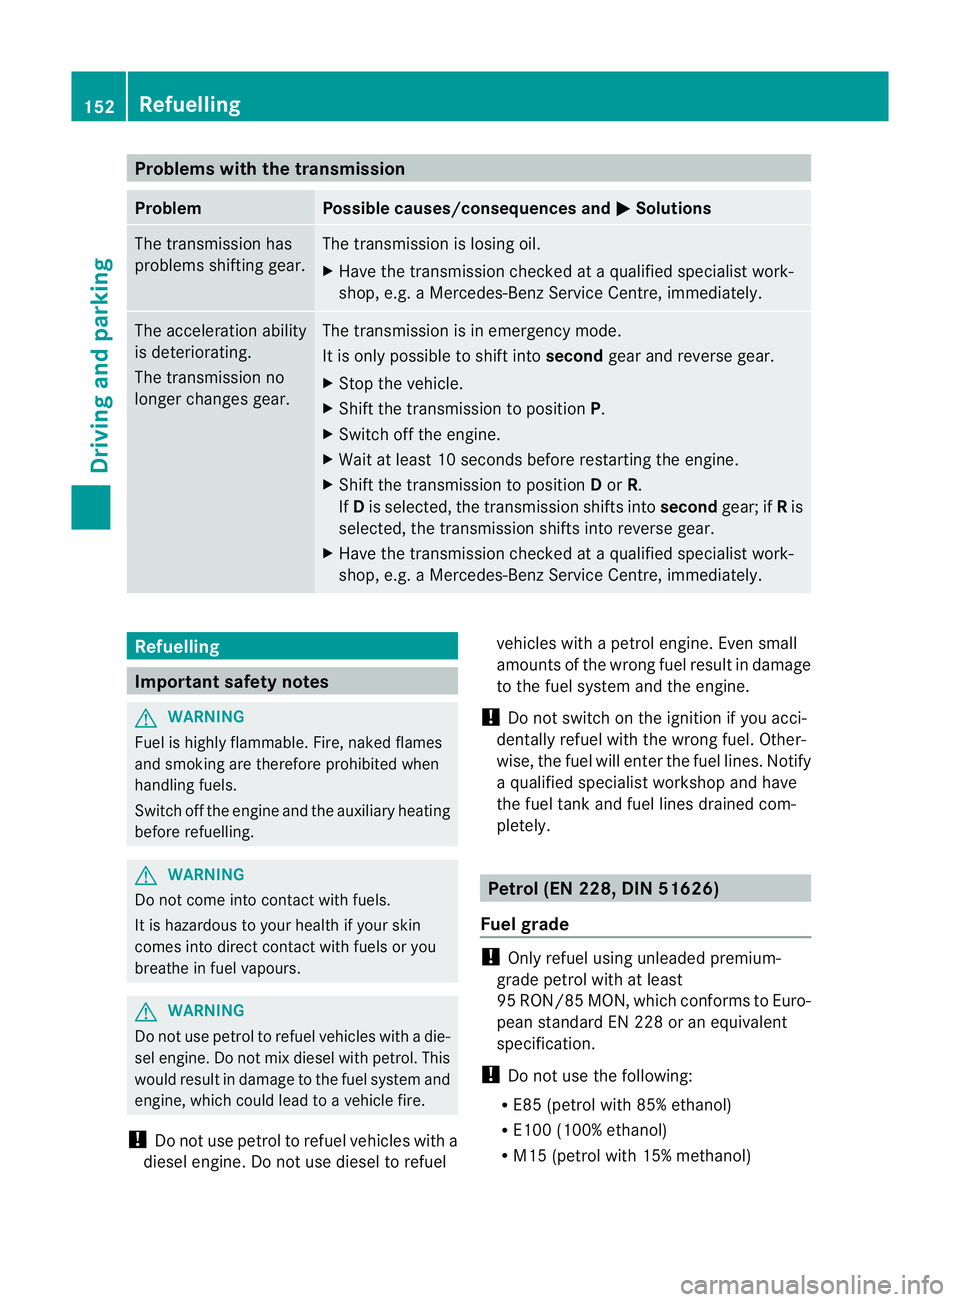
hthe transmission Problem Possible causes/consequences and
M Solutions
Th
et rans mission has
problem sshifting gear. The transmission is losing oil.
X Hav ethe transmission chec kedataq ualified specialist work-
shop, e.g. aMercedes-Benz Servic eCentre, immediately. The acceleration ability
is deteriorating.
The transmission no
longer changes gear. The transmission is in emergency mode.
It is only possible to shift into
secondgear and reverse gear.
X Stop the vehicle.
X Shif tthe transmission to position P.
X Switc hoff th eengine.
X Wait at leas t10seconds befor erestar tingthe engine.
X Shift the transmission to position Dor R.
If D is selected, the transmission shifts into secondgear; ifRis
selected, the transmission shifts into reverse gear.
X Have the transmission checked at aqualified specialist work-
shop, e.g. aMercedes-Benz Servic eCentre, immediately. Refuelling
Important safety notes
G
WARNING
Fuel is highly flammable. Fire, naked flames
and smoking are therefor eprohibite dwhen
handling fuels.
Switch off the engin eand the auxili aryh eating
befor erefuelling. G
WARNING
Do not com einto contact with fuels.
It is hazardous to your health if your skin
comes into direct contact with fuels or you
breath einfuel vapours. G
WARNING
Do not use petrol to refuel vehicles with adie-
sel engine. Do not mix diesel with petrol. This
would result in damage to the fuel system and
engine, which could lead to avehicle fire.
! Do not use petrol to refuel vehicles with a
diesel engine. Do not use diesel to refuel vehicles with
apetrol engine. Even small
amounts of the wron gfuel result in damage
to the fuel system and the engine.
! Do not switch on the ignition if you acci-
dentally refuel with the wrong fuel. Other-
wise, the fuel will enter the fuel lines. Notify
aq ualified specialist worksho pand have
the fuel tank and fuel lines drained com-
pletely. Petro
l(EN 228, DIN 51626)
Fuel grade !
Only refuel using unleaded premium-
grade petrol with at least
95 RON/8 5MON, whic hconform stoEuro-
pean standard EN 228 or an equivalent
specification.
! Do not use the following:
R E85 (petrol with 85% ethanol)
R E10 0(100% ethanol)
R M15 (petro lwith 15% methanol) 152
RefuellingDriving and parking
Page 158 of 389

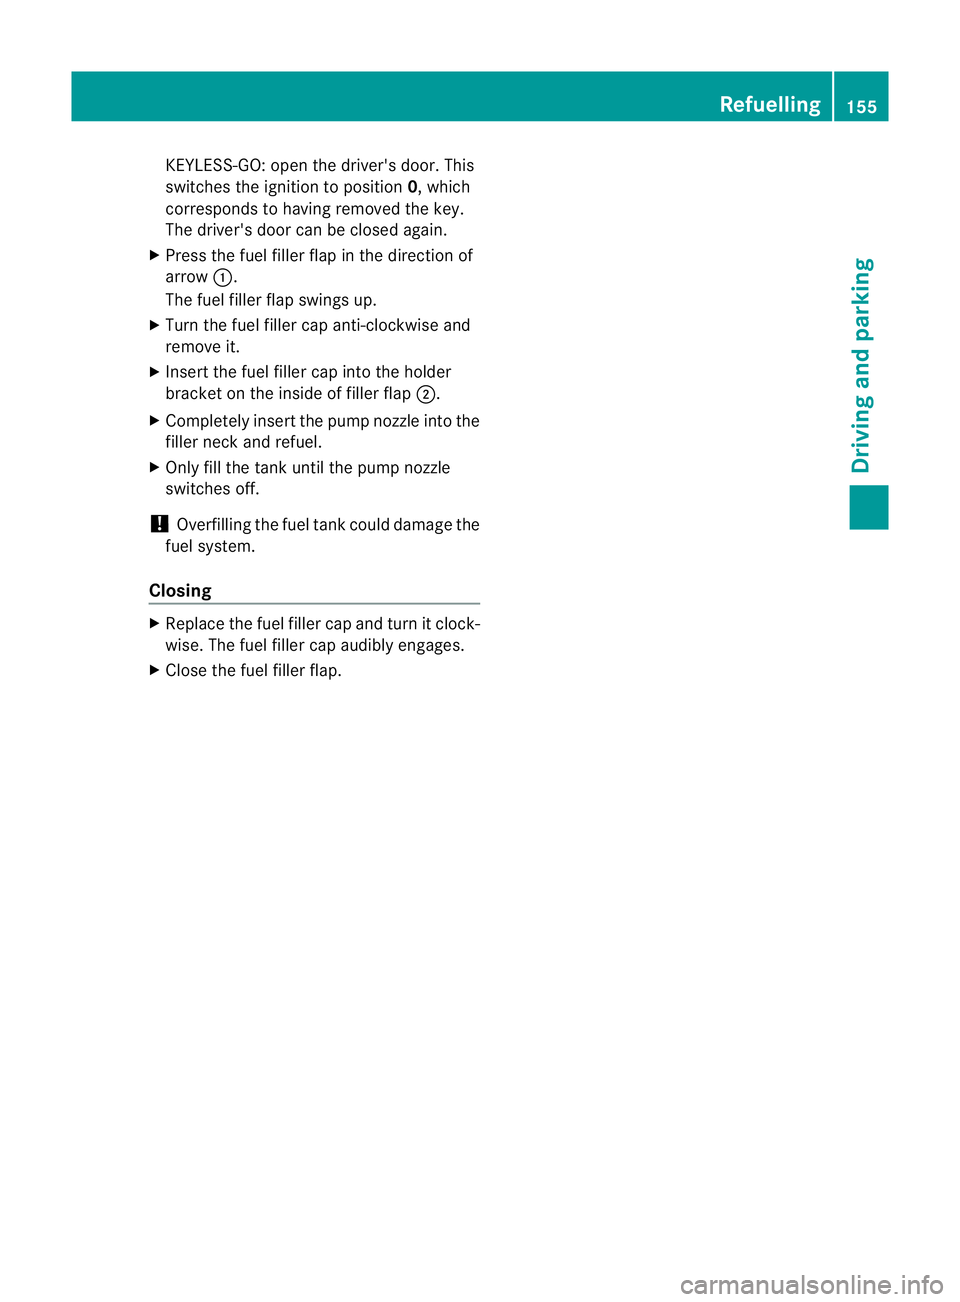
KEYLESS-GO: open th
edriver's door. This
switche sthe ignition to positi on0,w hich
corresponds to having removed the key.
The driver's door can be closed again.
X Press the fuel filler fla pint he direction of
arrow :.
The fuel filler fla pswings up.
X Turn the fuel filler cap anti-clockwise and
remove it.
X Insert the fuel filler cap into the holder
bracket on the inside of filler flap ;.
X Completely insert the pump nozzle into the
filler neck and refuel.
X Only fill the tank until the pump nozzle
switches off.
! Overfilling the fuel tank could damag ethe
fuel system.
Closing X
Replace the fuel filler cap and tur nitclock-
wise .The fuel filler cap audibly engages.
X Close the fuel filler flap. Refuelling
155Drivingand park ing Z
Page 159 of 389

Problems wit
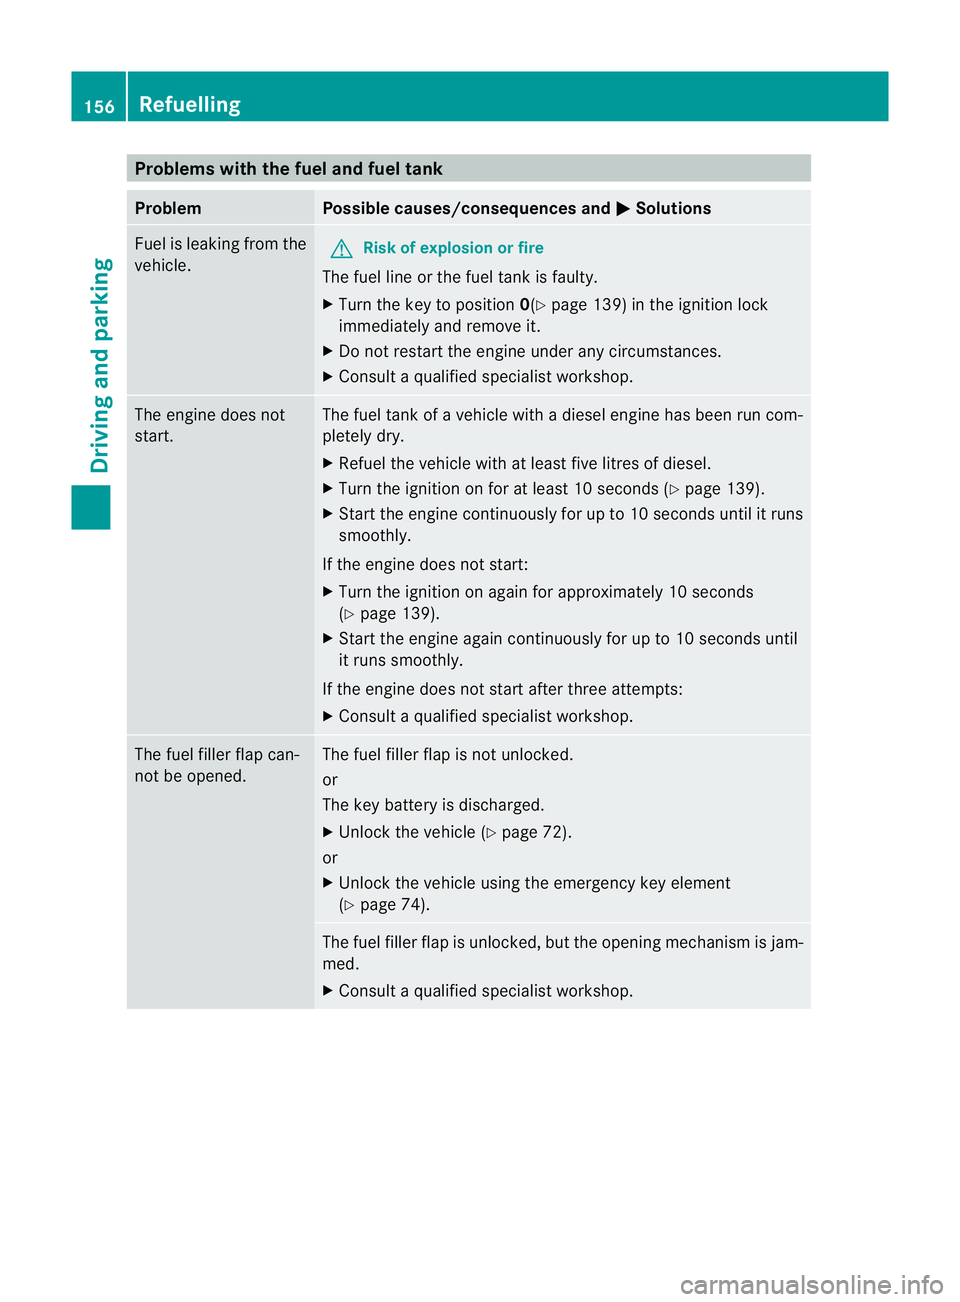
hthe fuel and fuel tank Problem Possible causes/consequences and
M Solutions
Fue
lisl eakin gfrom the
vehicle. G
Ris
kofe xplosion or fire
The fuel line or the fuel tan kisf aulty.
X Turn the key to position 0(Ypage 139 )inthe ignition lock
immediately and remove it.
X Do not restar tthe engin eunder any circumstances.
X Consult aqualified specialist workshop. The engine does not
start. The fuel tank of
avehicle with adiesel engine has been run com-
pletely dry.
X Refuel the vehicle with at least fiv elitres of diesel.
X Turn the ignition on for at least 10 seconds (Y page 139).
X Star tthe engin econtinuously for up to 10 second suntil it runs
smoothly.
If the engine doe snot start:
X Tur nthe ignition on again for approximatel y10seconds
(Y page 139).
X Start the engine again continuously for up to 10 seconds until
it run ssmoothly.
If th eengine doe snot star tafter three attempts:
X Consult aqualified specialist workshop. The fuel filler flap can-
not be opened. The fuel filler flap is not unlocked.
or
The key battery is discharged.
X Unlock the vehicle (Y page 72).
or
X Unlock the vehicle using the emergency key element
(Y page 74). The fuel filler flap is unlocked, but the opening mechanism is jam-
med.
X Consult aqualified specialist workshop. 156
RefuellingDrivin
gand parking
Page 161 of 389

ded. Fillin
gavehicle standing on an uneven
surface is not permitted. There is adanger
of overfilling, which can cause damage to
BlueTEC exhaust gas aftertreatment com-
ponents.
Have the AdBlue ®
tank refilled at aqualified
specialist workshop. However ,you can also
top up the AdBlue ®
tan k:
R at afilling station with an AdBlue ®
filling
pump
R with AdBlue ®
refill bottles
R with an AdBlue ®
refill canister
If the outside temperature is lower than
Ò 11 †, it may be difficult to top up. If
AdBlue ®
is frozen and ther eisanactive warn-
ing indicator, topping up may not be possible.
Park the vehicle in awarmer place, e.g. in a
garage, until AdBlue ®
has become fluid again.
Topping up is then possible again. Alterna-
tively, have the AdBlue ®
tank refilled at a
qualified specialis tworkshop.
When the pum pnozzle switches off automat-
ically during filling at afilling pump, the
AdBlue ®
tank has been completely filled. Do
not fill the the AdBlue ®
tank any fur ther.
AdBlue ®
may possibly leak.
! Surfaces which have com eintoc ontact
with AdBlue ®
while refillin gshould be
rinsed immediately with water, or remove
AdBlue ®
with amoist clot hand cold water.
If AdBlue ®
has alread ycrystallised, us ea
sponge and cold water to clean the area.
AdBlue ®
residue crystallises after acertain
amount of tim eand soils the affected sur-
faces.
! AdBlue ®
is not afuel additive and must
not be added to the fuel tank .IfAdBlue ®
is
added to the fuel tank ,this can lead to
engin edamage.
Further information on
AdBlue ®
(Y page 374). Opening the AdBlue
®
filler cap The filler nec
kfor AdBlue ®
is located behind
the fuel filler flap.
The fuel filler fla pisunlocked or locked auto-
matically whe nyou open or close the vehicle
with the key or using KEYLESS-GO. X
Swit choff the ignition.
X Press the fuel filler fla pinthe direction of
arrow :.
The fuel filler fla pswings up.
X Turn blue AdBlue ®
filler cap ;anti-clock-
wise and remov eit.
AdBlue ®
filler cap ;is secured with aplas-
tic strip.
AdBlue ®
refill canisters AdBlue
®
refill canisters can be obtained at
many filling stations or at aMercedes-Benz
Ser vice Centre. AdBlue ®
refill canis ters are
often sold with afiller hose. Afiller hose that
does not exactly fit the vehicle's AdBlue ®
tan koffers no pro tection agains toverfilling.
AdBlue ®
could leak ou tasar esult of overfill-
ing. Mercedes-Ben zoffers aspecial disposa-
ble hose with overfill protection. You can
obtain this from any Mercedes-Benz Service
Centre. AdBlue ®
is available in avariety of
containers and receptacles. Only use the dis-
posable hos ewith the Mercedes-Benz
AdBlue ®
refill canister s.158
RefuellingDriving and parking
Page 163 of 389

X
Release AdBlue ®
refill bottle :.
X Turn AdBlue ®
refill bottle :anti-clockwise
and remove it.
X Screw the protective cap onto AdBlue ®
refill bottle :again.
Closing th eAdBlue ®
filler cap and fuel
filler flap X
Fit AdBlue ®
filler cap ;on the filler neck
and tur nitclockwise.
X To close th efuel filler flap ,press it in the
di rectio nofarrow:.
X Drive faster than 15 km/h.
The Refill AdBlue See Owner' sMan‐ ual messag
egoeso ut after approximately
on em inute.
i If the Refill AdBlue See Owner's Manual messag
eremain sinthe mu ltifunc-
tion display, you mus ttop up with more
AdBlue ®
. Parking
Important safety notes
G
WARNING
Only remove the key from the ignition lock
when the vehicle is stationary, as you can not
steer the vehicle when the key is removed.
Never leav echildren unsupervised in the vehi-
cle. They might release the electric parking
brake. This coul dlead to aserious or fatal
accident. G
WAR
NING
Under no circumstances should the exhaust
system come into contact with flammable
materials such as dry grass or petrol ,for
example. Do not par kthe vehicle on dry grass-
lan dorh arvested grain fields. The hot exhaust
system could otherwise ignite the flammable
material and set the vehicle on fire.
To ensure that the vehicle is secured against
rolling away unintentionally:
R the electric parking brake must be applied.
R the transmission must be in position Pand
the key must be removed from the ignition
lock.
R on steep uphill or downhill gradients, turn
the fron twheels towards the kerb. Switching of
fthe engine
Important safety notes G
WARNING
Neve rswitch off the engine while the vehicle
is in motion.
There is no brake boost for the service brake
if the engine is not running. If the ignition is
switched off, there is also no power assis-
tance for the steering.
You will require considerably more effort to
steer and brake and you could therefore lose
control of the vehicle and cause an accident.
X Apply the electric parking brake.
X Shift the transmission to position P.
Using the key X
Turn the key to position 0in the ignition
lock and remove it.
The immobiliser is activated.
i If you switch the engine off with the trans-
mission in position Ror D,t he automatic
transmission shift stoNautomatically. 160
ParkingDriving and parking
Page 164 of 389

If yo
uthen open one of the front doors or
remove the key from the ignition ,the auto-
matic transmission shift stoP.
If yo ushift the automatic transmission to
N before switching off the engine, the auto-
matic transmission remains in Neven when
ad oor is opened.
Using KEYLESS-GO X
Press the Start/Stop button (Y page 139).
The engin estops and all the indicator
lamp sint he instrumen tcluster go out.
i If you use the Start/Stop button to switch
off the engine, the automatic transmission
shifts to Nautomatically. If you then open
one of the front doors, the automatic trans-
missio nshift stoP .
i The engin ecan be turned off while the
vehicle is in motion by pressing and holding
the Start/Stop button for three seconds.
This function operates independently of the
ECO start/stop automatic engine switch-
off function. Electric parking brake
General notes i
The electric parking brake carries out a
function check at regular intervals when
the engine is switched off. Noises that
occur are normal. Engaging/releasing manually
X
To engage: push handle :.
The red !indicator lamp in the instru-
ment cluster lights up.
i The electric parking brake can also be
applied when the key is removed.
X To release: pull handle:.
The red !indicator lamp in the instru-
ment cluster goes out.
i The electric parking brake can only be
released when the key in the ignition lock
is in position 1or the ignition is switched
on using the Start/Stop button.
To ensure that you don't roll backwards when
pulling away on an uphill slope, engage the
electric parking brake (Y page 141).
Engaging automatically Your vehicle's electric parking brake is auto-
matically applied if DISTRONIC PLUS or the
HOLD function bring the vehicle to
astand-
still ,ora re engaged to kee pthe vehicle sta-
tionary. In addition, at least one of the follow-
ing condition smust be fulfilled:
R the engine is switched off.
R the driver' sdoor is open and the seat belt
is not fastened.
R the vehicle is stationar yfor alengthy
period.
The red !indicator lam pint he instrument
cluster lights up.
i The electric parkin gbrake is not automat-
icall yengaged if the engine is switched off
by the ECO start/stop function.
Releasing automatically The electric parking brake of your vehicl
eis
release dautomatically when all of the follow-
ing conditions are fulfilled:
R the engine is running.
R the transmission is in position Dor R. Parking
161Drivingand park ing Z
Page 194 of 389

PARKTRONIC
Important safety notes G
WARNING
PARKTRONI Cisonly an aid and may not
detect all obstacles .Itisnotas ubstitute for
attentive driving.
You are always responsible for safety and
must continue to pay attention to your imme-
diate surroundings when parking and
manoeuvring. You could otherwis eendanger
yourself and others. G
WARNING
Make sure that no persons or animals are in
the manoeuvring range. Otherwise, they
could be injured.
PARKTRONIC is an electronic parking aid with
ultrasonic sensors. It indicates visual lyand
audibly the distance between your vehicle
and an object.
PARKTRONIC is activated automatically if
you:
R switch on the ignition
R shift the transmissio ntoposition D,Ror N
R release the electric parkin gbrake
PARKTRONIC is deactivate datspeeds above
18 km/h. It is reactivated at lower speeds.
PARKTRONI Cmonitor sthe area around your
vehicle usin gsix sensors in the front bumper
and four sensors in the rear bumper. :
Example: sensors in the front bumper,
left-han dside Range of the sensors Genera
lnotes
The sensors must be free of dirt, ice and
slush; otherwise, they may not func tion cor-
rectly. Clean the sensor sregularly, taking
car enot to scratc hordamage them
(Y page 327). Side view
Top view
Front sensors
Centre approximately 100 cm
Corners approximately 60 cm
Rear sensors
Centre approximately 120 cm
Corners approximately 80 cm
!
When parking, pay particular attention to
objects above or below the sensors, such
as flower pots or trailer drawbars. PARK-
TRONIC does not detect such objects when
they are in the immediate vicinity of the Driving systems
191Drivingand parking Z
Page 196 of 389

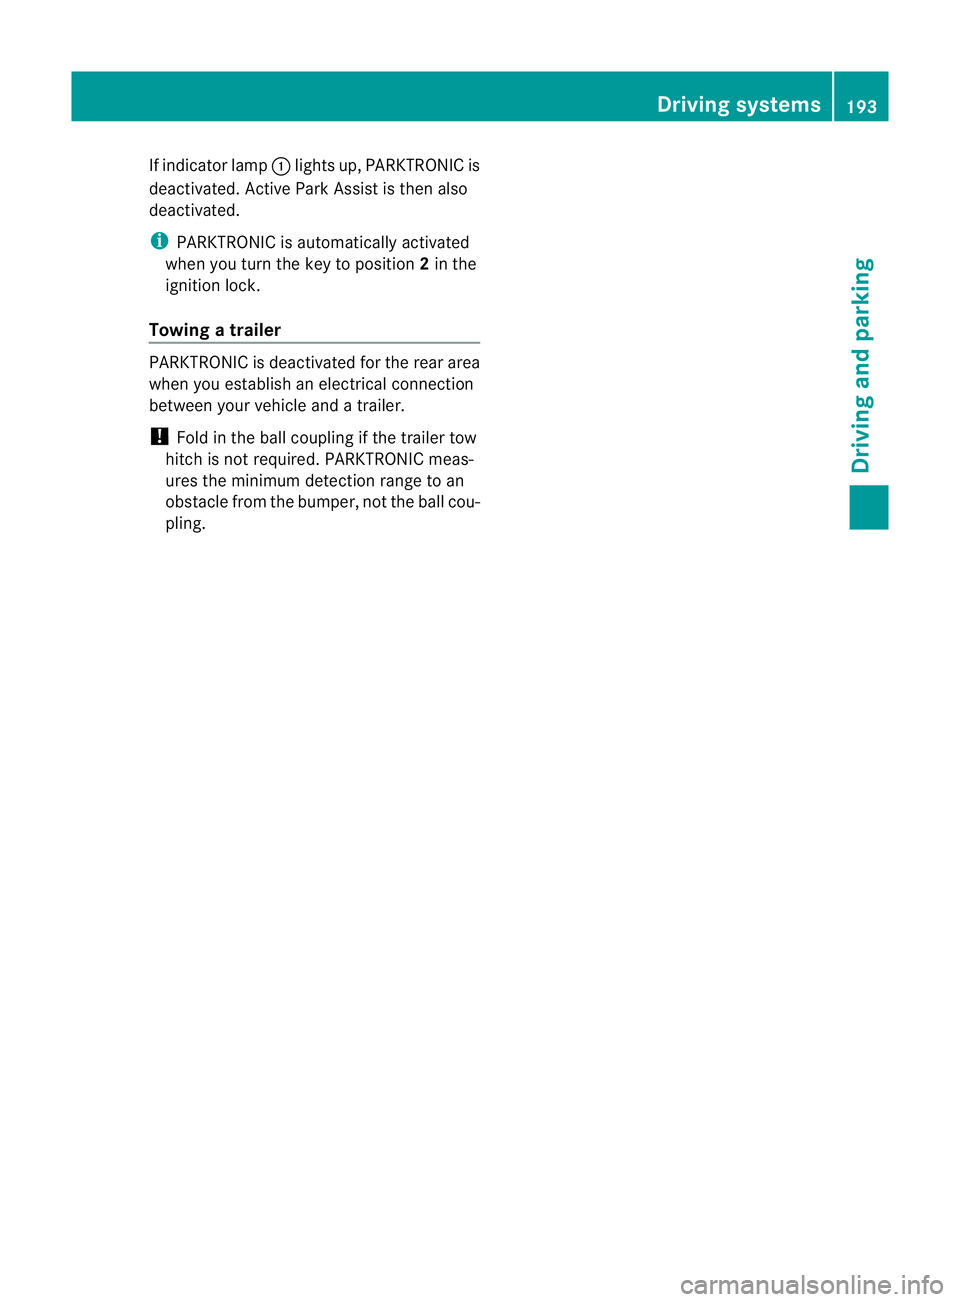
If indicato
rlamp :lights up, PARKTRONIC is
deactivated. Active Park Assis tisthen also
deactivated.
i PARKTRONIC is automatically activated
when you tur nthe key to positi on2in the
ignition lock.
Towing atrailer PARKTRONIC is deactivate
dfor the rear area
when you establish an electrical connection
between you rvehicle and atrailer.
! Foldint he ball couplin gifthe trailer tow
hitc hisn ot required .PARKTRONIC meas-
ures the minimum dete ction range to an
obstacle from the bumper, not the ball cou-
pling. Drivin
gsystems
193Drivingand park ing Z