2011 INFINITI QX56 boot
[x] Cancel search: bootPage 514 of 5598

BR-44
< REMOVAL AND INSTALLATION >
REAR DISC BRAKE
CAUTION:
Never spill or splash brake fluid on painted surfaces. Brake fluid may seriously damage paint. Wipe it
off immediately and wash with wate r if it gets on a painted surface.
Never depress the brake pedal. Brake fluid may splash while removing the brake hose.
If the brake fluid or grease adheres to the brake calip er assembly and disc rotor, quickly wipe it off.
1. Remove tires with power tool.
2. Fix the disc rotor using wheel nuts.
3. Drain brake fluid. Refer to BR-10, "
Draining".
4. Separate brake hose from brake caliper assembly. Refer to BR-26, "
REAR : Removal and Installation".
5. Remove torque member mounting bolts, and remove brake caliper assembly. CAUTION:
Never drop brake pad and caliper assembly.
6. Remove disc rotor. Refer to RAX-7, "
Removal and Installation".
INSTALLATION
WARNING:
Clean any dust from the brake caliper assembly an d brake pads with a vacuum dust collector. Never
blow with compressed air.
CAUTION:
Never spill or splash brake fluid on painted surfaces. Brake fluid may seriously damage paint. Wipe it
off immediately and wash with wate r if it gets on a painted surface.
Never depress the brake pedal. Brake fluid may splash while removing the brake hose.
If the brake fluid or grease adheres to the brake calip er assembly and disc rotor, quickly wipe it off.
1. Install disc rotor. Refer to RAX-7, "
Removal and Installation".
2. Install the brake caliper assembly to the axle hous ing and tighten the torque member mounting bolts to the
specified torque.
CAUTION:
Never spill or splash any grease and moisture on the brake caliper assembly mounting face,
threads, mounting bolts. Wipe out any grease and moisture.
3. Install brake hose to brake caliper assembly. Refer to BR-26, "
REAR : Removal and Installation".
4. Perform the air bleeding. Refer to BR-11, "
Bleeding Brake System".
5. Check a drag of rear disc brake. If any drag is found, refer to BR-45, "
BRAKE CALIPER ASSEMBLY :
Inspection".
6. Install tires with power tool. Refer to WT-64, "
Exploded View".
BRAKE CALIPER ASSEMBLY : Disassembly and AssemblyINFOID:0000000006222500
DISASSEMBLY
NOTE:
Never remove the torque member, brake pads and pad retainers when disassembling and assembling the cyl-
inder body.
1. Remove the sliding pin bolt, and remove the cylinder body from the torque member.
CAUTION:
Fix the brake pad at suitable tape so that the brake pad will not drop.
2. Remove sliding pin boots from torque member.
3. Remove bushing from sliding pin bolt.
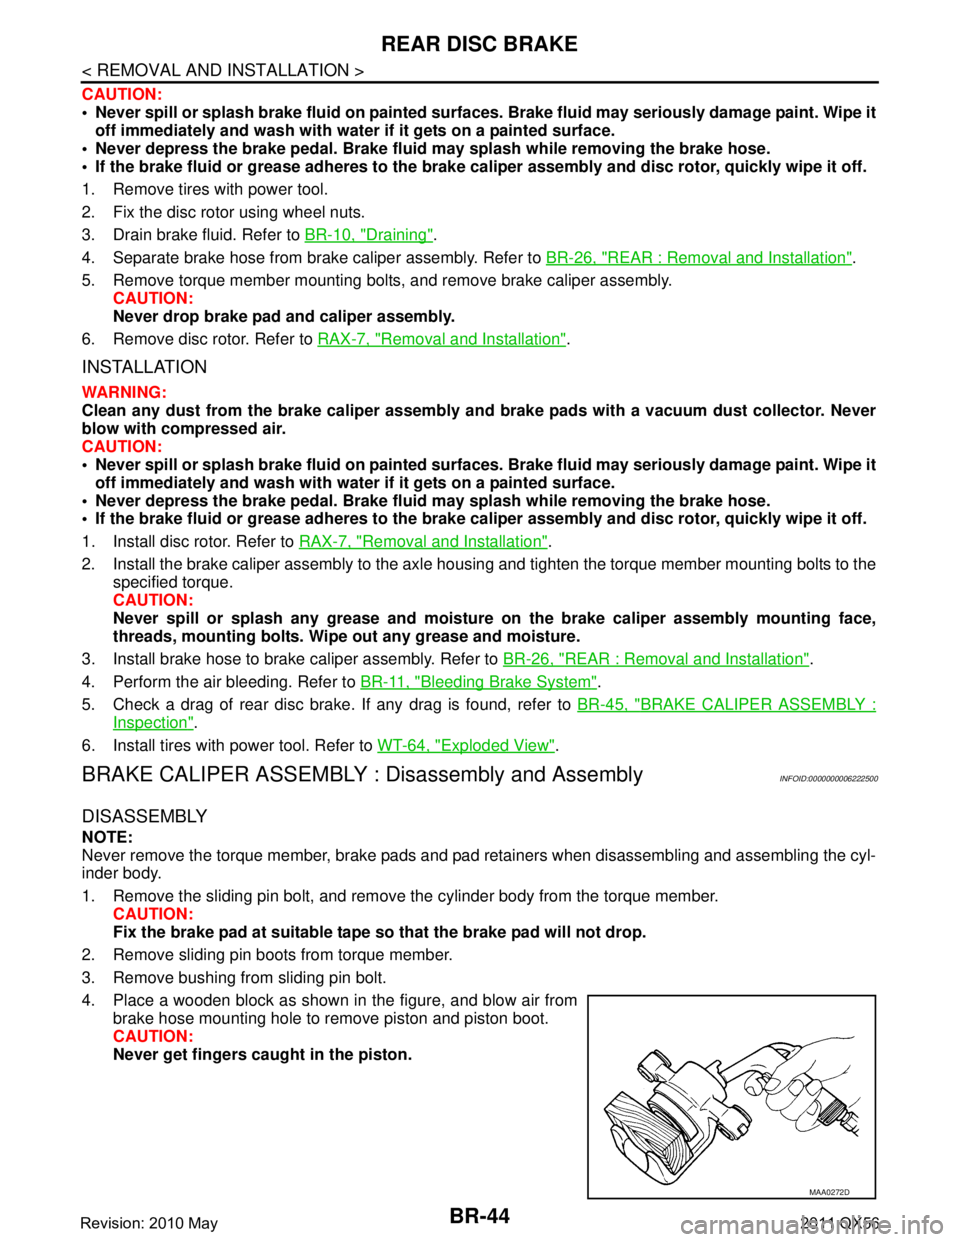
4. Place a wooden block as shown in the figure, and blow air from brake hose mounting hole to remove piston and piston boot.
CAUTION:
Never get fingers caught in the piston.
MAA0272D
Revision: 2010 May2011 QX56
Page 515 of 5598

REAR DISC BRAKEBR-45
< REMOVAL AND INSTALLATION >
C
DE
G H
I
J
K L
M A
B
BR
N
O P
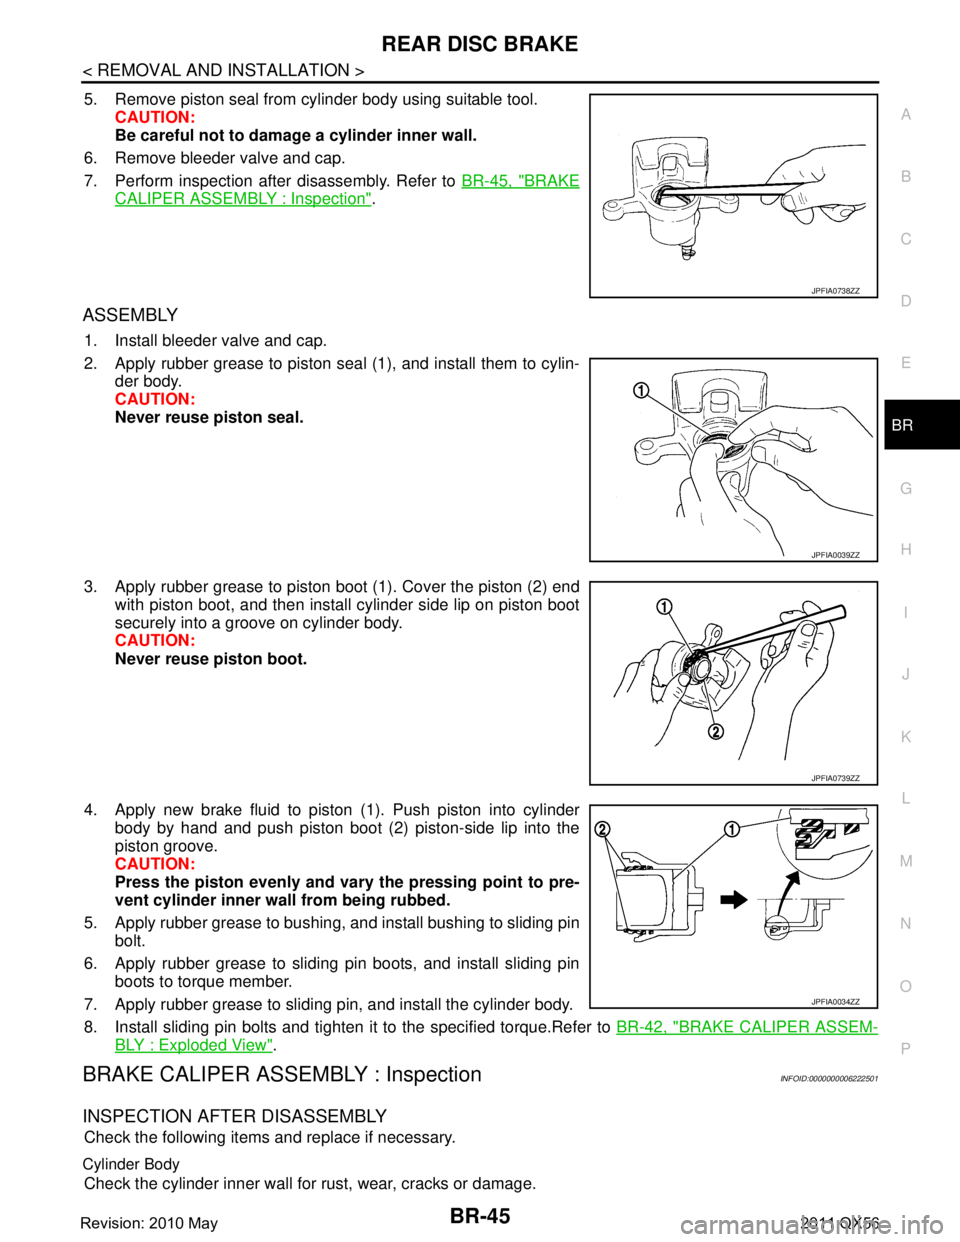
5. Remove piston seal from cylinder body using suitable tool. CAUTION:
Be careful not to damage a cylinder inner wall.
6. Remove bleeder valve and cap.
7. Perform inspection after disassembly. Refer to BR-45, "
BRAKE
CALIPER ASSEMBLY : Inspection".
ASSEMBLY
1. Install bleeder valve and cap.
2. Apply rubber grease to piston seal (1), and install them to cylin-
der body.
CAUTION:
Never reuse piston seal.
3. Apply rubber grease to piston boot (1). Cover the piston (2) end with piston boot, and then install cylinder side lip on piston boot
securely into a groove on cylinder body.
CAUTION:
Never reuse piston boot.
4. Apply new brake fluid to piston (1). Push piston into cylinder body by hand and push piston boot (2) piston-side lip into the
piston groove.
CAUTION:
Press the piston evenly and var y the pressing point to pre-
vent cylinder inner wall from being rubbed.
5. Apply rubber grease to bushing, and install bushing to sliding pin bolt.
6. Apply rubber grease to sliding pin boots, and install sliding pin boots to torque member.
7. Apply rubber grease to sliding pin, and install the cylinder body.
8. Install sliding pin bolts and tighten it to the specified torque.Refer to BR-42, "
BRAKE CALIPER ASSEM-
BLY : Exploded View".
BRAKE CALIPER ASSEMBLY : InspectionINFOID:0000000006222501
INSPECTION AFTER DISASSEMBLY
Check the following items and replace if necessary.
Cylinder Body
Check the cylinder inner wall for rust, wear, cracks or damage.
JPFIA0738ZZ
JPFIA0039ZZ
JPFIA0739ZZ
JPFIA0034ZZ
Revision: 2010 May2011 QX56
Page 516 of 5598

BR-46
< REMOVAL AND INSTALLATION >
REAR DISC BRAKE
CAUTION:
Always clean with new brake fluid. Never clean with mineral oil such as gasoline and light oil.
Torque Member
Check the torque member for rust, wear, cracks or damage.
Piston
Check the surface of the piston for rust, wear, cracks or damage.
CAUTION:
A piston sliding surface is plat ed. Never polish with sandpaper.
Sliding Pin, Sliding Pin Boot and Bushing
Check the sliding pins, sliding pin boots and bushing for rust, wear, cracks or damage.
INSPECTION AFTER INSTALLATION
1. Check a drag of rear disc brake. If any dr ag is found, follow the procedure described below.
2. Remove brake pads. Refer to BR-41, "
BRAKE PAD : Removal and Installation".
3. Press the piston. Refer to BR-41, "
BRAKE PAD : Removal and Installation".
4. Install brake pads. Refer to BR-41, "
BRAKE PAD : Removal and Installation".
5. Depress the brake pedal several times.
6. Check a drag of rear disc brake again. If any drag is found, disassemble the caliper. Refer to BR-44,
"BRAKE CALIPER ASSEMBLY : Disassembly and Assembly".
7. Burnish contact surfaces brake pads and disc rotor after refinishing or replacing disc rotor, or if a soft pedal occurs at very low mileage. Refer to BR-18, "
DISC ROTOR : Inspection and Adjustment".
Revision: 2010 May2011 QX56
Page 1826 of 5598
![INFINITI QX56 2011 Factory Service Manual
DLN-24
< ECU DIAGNOSIS INFORMATION >[TRANSFER: ATX90A]
TRANSFER CONTROL UNIT
ECU DIAGNOSIS INFORMATION
TRANSFER CONTROL UNIT
Reference ValueINFOID:0000000006222227
VALUES ON THE DIAGNOSIS TOOL
Monito INFINITI QX56 2011 Factory Service Manual
DLN-24
< ECU DIAGNOSIS INFORMATION >[TRANSFER: ATX90A]
TRANSFER CONTROL UNIT
ECU DIAGNOSIS INFORMATION
TRANSFER CONTROL UNIT
Reference ValueINFOID:0000000006222227
VALUES ON THE DIAGNOSIS TOOL
Monito](/manual-img/42/57033/w960_57033-1825.png)
DLN-24
< ECU DIAGNOSIS INFORMATION >[TRANSFER: ATX90A]
TRANSFER CONTROL UNIT
ECU DIAGNOSIS INFORMATION
TRANSFER CONTROL UNIT
Reference ValueINFOID:0000000006222227
VALUES ON THE DIAGNOSIS TOOL
Monitor item Condition Value/Status
4WD MODE IGN ON 4WD is booting BOTNG
4WD mode is switching SWTNG
4WD mode: 4L 4L
4WD mode: 4H 4H
4WD mode: AUTO AUTO
2WD SWITCH
*1Always OFF
AUTO SWITCH 4WD shift switch: AUTO ON
4WD shift switch: 4H or 4L OFF
4H SWITCH 4WD shift switch: 4H ON
4WD shift switch: AUTO or 4L OFF
4L SWITCH 4WD shift switch: 4L ON
4WD shift switch: AUTO or 4H OFF
T/M RANGE A/T shift selector: D D
A/T shift selector: N N
A/T shift selector: R R
A/T shift selector: P P
N RANGE SW A/T shift selector: N ON
A/T shift selector: Except N OFF
R RANGE SW A/T shift selector: R ON
A/T shift selector: Except R OFF
IGN SW IGN SW: ON ON
IGN SW: OFF OFF
TCS OPER SW TCS is operating ON
TCS is not operating OFF
VDC OPER SW VDC is operating ON
VDC is not operating OFF
ABS OPER SW ABS is operating ON
ABS is not operating OFF
SAND MODE IND
*2Always OFF
ROCK MODE IND
*2Always OFF
SNOW MODE IND
*2Always OFF
ONROAD MODE IND
*2Always ON
SAND MODE SW
*3Always OFF
ROCK MODE SW
*3Always OFF
SNOW MODE SW
*3Always OFF
ONROAD MODE SW
*3Always ON
Revision: 2010 May2011 QX56
Page 2901 of 5598

FAX-1
TRANSMISSION & DRIVELINE
CEF
G H
I
J
K L
M
SECTION FA X
A
B
FA X
N
O P
CONTENTS
FRONT AXLE
2WD
PRECAUTION ................ ...............................
3
PRECAUTIONS .............................................. .....3
Precaution for Supplemental Restraint System
(SRS) "AIR BAG" and "SEAT BELT PRE-TEN-
SIONER" ............................................................. ......
3
Precaution Necessary for Steering Wheel Rota-
tion after Battery Disconnect .....................................
3
PREPARATION ............................................5
PREPARATION .............................................. .....5
Commercial Service Tools .................................. ......5
SYMPTOM DIAGNOSIS ...............................6
NOISE, VIBRATION AND HARSHNESS
(NVH) TROUBLESHOOTING ........................ .....
6
NVH Troubleshooting Chart ................................ ......6
PERIODIC MAINTENANCE ..........................7
FRONT WHEEL HUB AND KNUCKLE ......... .....7
Inspection ............................................................ ......7
REMOVAL AND INSTALLATION ................8
FRONT WHEEL HUB AND KNUCKLE ......... .....8
Exploded View .................................................... ......8
Removal and Installation ...........................................8
Inspection ..................................................................9
SERVICE DATA AND SPECIFICATIONS
(SDS) ......... ................................. ..................
10
SERVICE DATA AND SPECIFICATIONS
(SDS) .............................................................. ....
10
Wheel Hub and Bearing Assembly ..................... ....10
4WDPRECAUTION ...............
...............................
11
PRECAUTIONS .................................................11
Precaution for Supplemental Restraint System
(SRS) "AIR BAG" and "SEAT BELT PRE-TEN-
SIONER" ............................................................. ....
11
Precaution Necessary for Steering Wheel Rota-
tion after Battery Disconnect ...................................
11
Precautions for Drive Shaft ......................................12
PREPARATION ...........................................13
PREPARATION .................................................13
Special Service Tools .......................................... ....13
Commercial Service Tools .......................................13
SYMPTOM DIAGNOSIS ..............................15
NOISE, VIBRATION AND HARSHNESS
(NVH) TROUBLESHOOTING ...........................
15
NVH Troubleshooting Chart ................................ ....15
PERIODIC MAINTENANCE ........................16
FRONT WHEEL HUB AND KNUCKLE ............16
Inspection ............................................................ ....16
FRONT DRIVE SHAFT .....................................17
Inspection ................................................................17
REMOVAL AND INSTALLATION ...............18
FRONT WHEEL HUB AND KNUCKLE ............18
Exploded View ..................................................... ....18
Removal and Installation .........................................18
Inspection ................................................................20
FRONT DRIVE SHAFT BOOT ..........................21
Exploded View .........................................................21
Removal and Installation .........................................21
Inspection ................................................................21
FRONT DRIVE SHAFT .....................................22
Revision: 2010 May2011 QX56
Page 2909 of 5598
![INFINITI QX56 2011 Factory Service Manual
FRONT WHEEL HUB AND KNUCKLEFAX-9
< REMOVAL AND INSTALLATION > [2WD]
C
EF
G H
I
J
K L
M A
B
FA X
N
O P
8. Remove shock absorber mounting bolt from lower link. Refer to FSU-10, "Removal and Installati INFINITI QX56 2011 Factory Service Manual
FRONT WHEEL HUB AND KNUCKLEFAX-9
< REMOVAL AND INSTALLATION > [2WD]
C
EF
G H
I
J
K L
M A
B
FA X
N
O P
8. Remove shock absorber mounting bolt from lower link. Refer to FSU-10, "Removal and Installati](/manual-img/42/57033/w960_57033-2908.png)
FRONT WHEEL HUB AND KNUCKLEFAX-9
< REMOVAL AND INSTALLATION > [2WD]
C
EF
G H
I
J
K L
M A
B
FA X
N
O P
8. Remove shock absorber mounting bolt from lower link. Refer to FSU-10, "Removal and Installation".
9. Separate upper link from steering knuckle, using the ball joint remover (commercial service tool), and
remove upper link.
CAUTION:
Temporarily tighten the nut to prevent damage to threads and to prevent the ball joint remover
from suddenly coming off.
Never damage ball joint boot.
10. Remove wheel hub and bearing assembly, and then remove splash guard.
11. Remove lower link from steering knuckle. CAUTION:
Never damage ball joint boot.
12. Remove steering knuckle.
13. Remove hub bolts (1) from wheel hub and bearing assembly, using the ball joint remover (A) (commercial service tool).
CAUTION:
Remove hub bolt only when necessary.
Never hammer the hub bolt to avoid impact to the wheel
hub and bearing assembly.
Pull out the hub bolt in a di rection perpendicular to the
wheel hub and bearing assembly.
14. Perform inspection after removal. Refer to FAX-9, "
Inspection".
INSTALLATION
Note the following, and install in the reverse order of removal.
Place a suitable washer (A) as shown in the figure to install the hub
bolts (1) by using the tightening force of the nut (B).
CAUTION:
Check that there is no cl earance between wheel hub and
bearing assembly, and hub bolt.
Never reuse hub bolt.
Perform the final tightening of each of parts under unladen condi-
tions, which were removed when removing wheel hub and bearing
assembly and steering knuckle.
Never reuse cotter pin.
Perform inspection after installation. Refer to FA X - 9 , "
Inspection".
InspectionINFOID:0000000006225420
INSPECTION AFTER REMOVAL
Check components for deformation, cracks, and other damage. Replace it if necessary.
Ball Joint Inspection
Check boots of lower link and steering outer socket ba ll joint for breakage, axial play, and torque. Refer to
FSU-15, "
Inspection" and ST-46, "Inspection".
INSPECTION AFTER INSTALLATION
1. Check wheel sensor harness for proper connection. Refer to BRC-134, "FRONT WHEEL SENSOR :
Exploded View".
2. Check the wheel alignment. Refer to FSU-7, "
Inspection".
3. Adjust neutral position of steering angle sensor. Refer to BRC-64, "
Work Procedure".
JPDIF0299ZZ
JPDIF0300ZZ
Revision: 2010 May2011 QX56
Page 2913 of 5598
![INFINITI QX56 2011 Factory Service Manual
PREPARATIONFAX-13
< PREPARATION > [4WD]
C
EF
G H
I
J
K L
M A
B
FA X
N
O P
PREPARATION
PREPARATION
Special Service ToolsINFOID:0000000006225391
The actual shapes of Kent-Moore t ools may differ from t INFINITI QX56 2011 Factory Service Manual
PREPARATIONFAX-13
< PREPARATION > [4WD]
C
EF
G H
I
J
K L
M A
B
FA X
N
O P
PREPARATION
PREPARATION
Special Service ToolsINFOID:0000000006225391
The actual shapes of Kent-Moore t ools may differ from t](/manual-img/42/57033/w960_57033-2912.png)
PREPARATIONFAX-13
< PREPARATION > [4WD]
C
EF
G H
I
J
K L
M A
B
FA X
N
O P
PREPARATION
PREPARATION
Special Service ToolsINFOID:0000000006225391
The actual shapes of Kent-Moore t ools may differ from those of special service tools illustrated here.
Commercial Service ToolsINFOID:0000000006225392
Tool number
(Kent-Moore No.)
Tool name Description
KV40107300
( − )
Boot band crimping tool Installing boot band
KV40107500
( − )
Drive shaft attachment Removing drive shaft
KV38106300
( − )
Protector
a: 35 mm (1.38 in) dia. Installing drive shaft
ZZA1229D
ZZA1230D
PDIA1183J
Tool name
Description
Power tool Loosening bolts and nuts
Ball joint remover Removing ball joint for steering knuckle Removing hub bolt
PBIC0190E
NT146
Revision: 2010 May2011 QX56
Page 2917 of 5598
![INFINITI QX56 2011 Factory Service Manual
FRONT DRIVE SHAFTFAX-17
< PERIODIC MAINTENANCE > [4WD]
C
EF
G H
I
J
K L
M A
B
FA X
N
O P
FRONT DRIVE SHAFT
InspectionINFOID:0000000006225395
Check the following items, and replace the part if necessa INFINITI QX56 2011 Factory Service Manual
FRONT DRIVE SHAFTFAX-17
< PERIODIC MAINTENANCE > [4WD]
C
EF
G H
I
J
K L
M A
B
FA X
N
O P
FRONT DRIVE SHAFT
InspectionINFOID:0000000006225395
Check the following items, and replace the part if necessa](/manual-img/42/57033/w960_57033-2916.png)
FRONT DRIVE SHAFTFAX-17
< PERIODIC MAINTENANCE > [4WD]
C
EF
G H
I
J
K L
M A
B
FA X
N
O P
FRONT DRIVE SHAFT
InspectionINFOID:0000000006225395
Check the following items, and replace the part if necessary.
Check drive shaft mounting point and joint for looseness and other damage. CAUTION:
Replace entire drive shaft assem bly when noise or vibration occurs from drive shaft.
Check boot for cracks and other damage.
Revision: 2010 May2011 QX56