Page 1676 of 2057

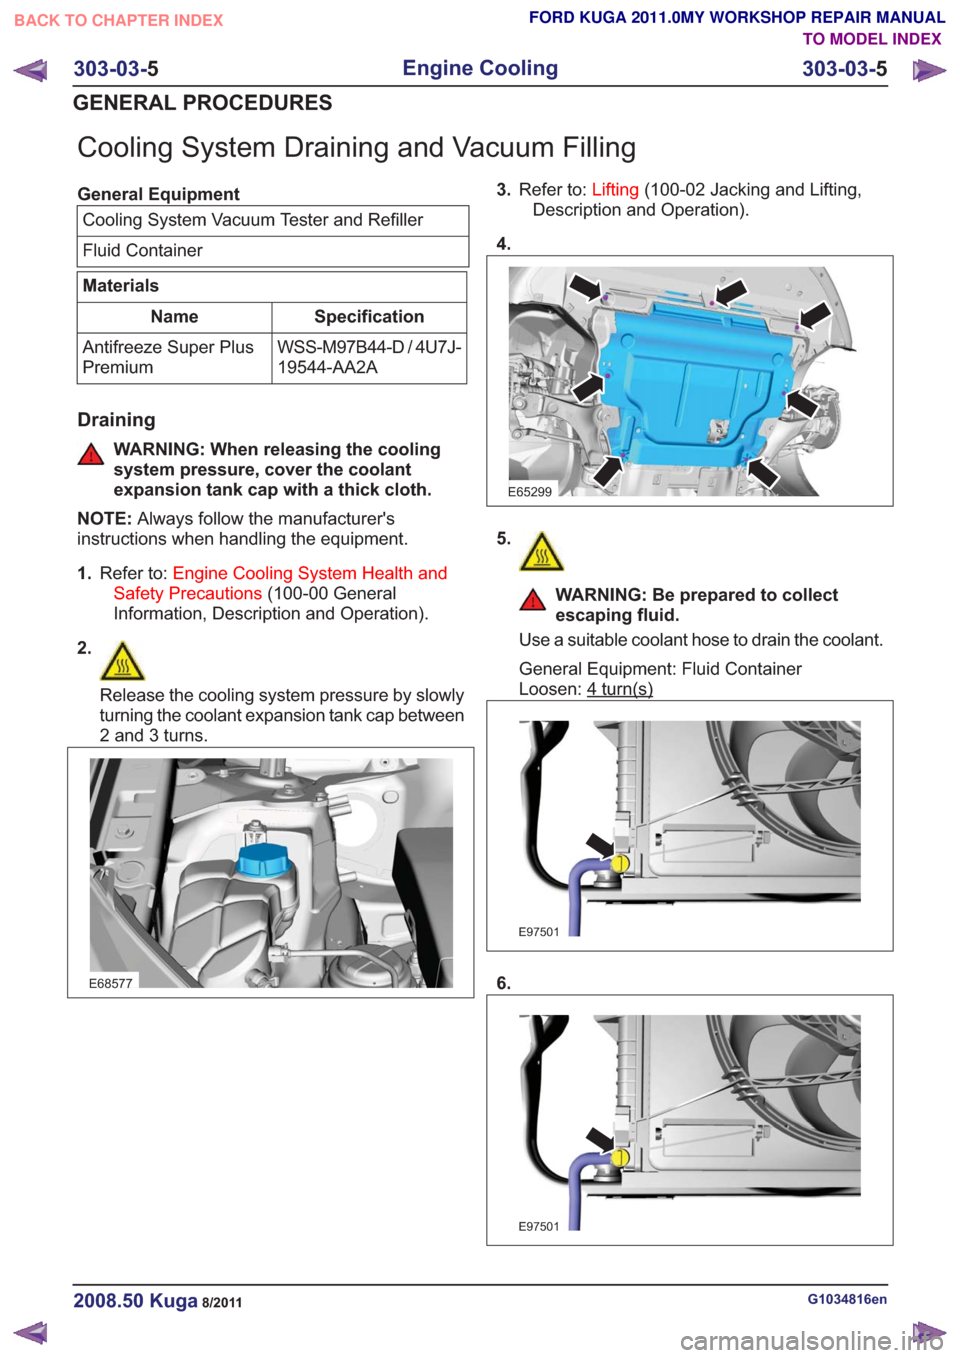
Cooling System Draining and Vacuum Filling
General EquipmentCooling System Vacuum Tester and Refiller
Fluid Container
Materials
Specification
Name
WSS-M97B44-D / 4U7J-
19544-AA2A
Antifreeze Super Plus
Premium
Draining
WARNING: When releasing the cooling
system pressure, cover the coolant
expansion tank cap with a thick cloth.
NOTE: Always follow the manufacturer's
instructions when handling the equipment.
1. Refer to: Engine Cooling System Health and
Safety Precautions (100-00 General
Information, Description and Operation).
2.
Release the cooling system pressure by slowly
turning the coolant expansion tank cap between
2 and 3 turns.
E68577
3. Refer to: Lifting(100-02 Jacking and Lifting,
Description and Operation).
4.
E65299
5.
WARNING: Be prepared to collect
escaping fluid.
Use a suitable coolant hose to drain the coolant.
General Equipment: Fluid Container
Loosen: 4
turn(s)
E97501
6.
E97501
G1034816en2008.50 Kuga8/2011
303-03- 5
Engine Cooling
303-03- 5
GENERAL PROCEDURES
TO MODEL INDEX
BACK TO CHAPTER INDEX
FORD KUGA 2011.0MY WORKSHOP REPAIR MANUAL
Page 1716 of 2057
9.Torque: 10Nm
E64166
10. To r q u e : 2Nm1.
4.
WARNING: Be prepared to collect
escaping fluid.
Torque: 10
Nm
x5
x24
2
3
1
E93083
Installation
1. To install, reverse the removal procedure.
2. Refer to: Door Window Motor Initialization
(501-11 Glass, Frames and Mechanisms,
General Procedures).
G1079057en2008.50 Kuga8/2011
303-04A- 25
Fuel Charging and Controls
— 2.5L Duratec (147kW/200PS) -
VI5
303-04A- 25
REMOVAL AND INSTALLATION
TO MODEL INDEX
BACK TO CHAPTER INDEX
FORD KUGA 2011.0MY WORKSHOP REPAIR MANUAL
Page 1727 of 2057

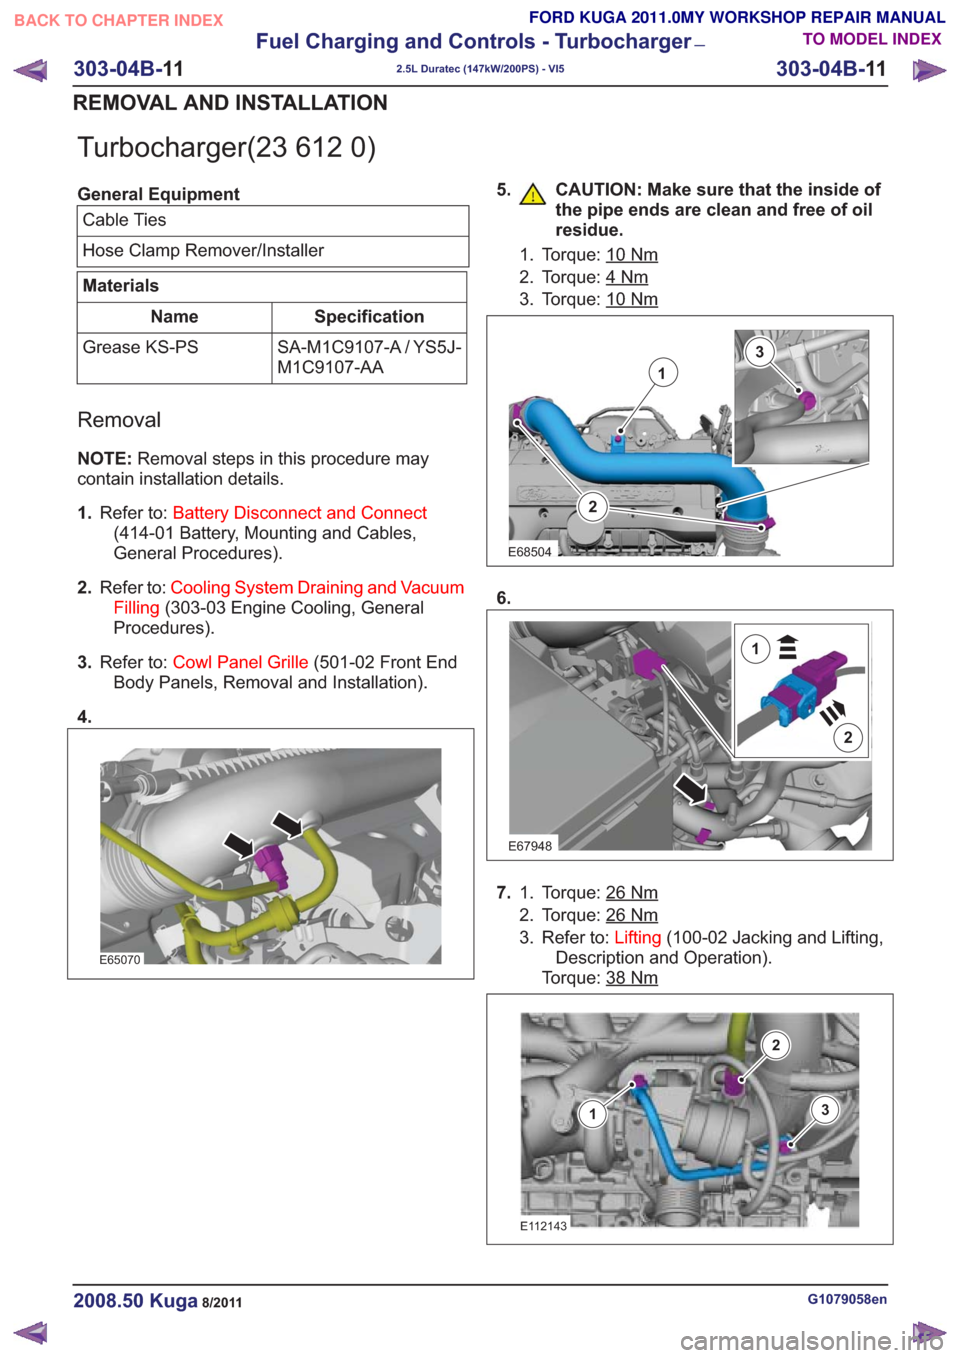
Turbocharger(23 612 0)
General EquipmentCable Ties
Hose Clamp Remover/Installer
Materials
Specification
Name
SA-M1C9107-A / YS5J-
M1C9107-AA
Grease KS-PS
Removal
NOTE:
Removal steps in this procedure may
contain installation details.
1. Refer to: Battery Disconnect and Connect
(414-01 Battery, Mounting and Cables,
General Procedures).
2. Refer to: Cooling System Draining and Vacuum
Filling (303-03 Engine Cooling, General
Procedures).
3. Refer to: Cowl Panel Grille (501-02 Front End
Body Panels, Removal and Installation).
4.
E65070
5. CAUTION: Make sure that the inside of the pipe ends are clean and free of oil
residue.
1. Torque: 10Nm
2. Torque: 4Nm
3. Torque: 10Nm
2
1
3
E68504
6.
E67948
2
1
7.Torque: 26Nm1.
2. Torque: 26
Nm
3. Refer to: Lifting(100-02 Jacking and Lifting,
Description and Operation).
Torque: 38
Nm
E112143
3
2
1
G1079058en2008.50 Kuga8/2011
303-04B- 11
Fuel Charging and Controls - Turbocharger
—
2.5L Duratec (147kW/200PS) - VI5
303-04B- 11
REMOVAL AND INSTALLATION
TO MODEL INDEX
BACK TO CHAPTER INDEX
FORD KUGA 2011.0MY WORKSHOP REPAIR MANUAL
Page 1730 of 2057
19.Torque: 12Nm
E66829
x2
20.Torque: 24Nm
E112772
x12
1
2
3
Installation
1.To install, reverse the removal procedure.
2. Refer to: Door Window Motor Initialization
(501-11 Glass, Frames and Mechanisms,
General Procedures).
G1079058en2008.50 Kuga8/2011
303-04B- 14
Fuel Charging and Controls - Turbocharger
—
2.5L Duratec (147kW/200PS) - VI5
303-04B- 14
REMOVAL AND INSTALLATION
TO MODEL INDEX
BACK TO CHAPTER INDEX
FORD KUGA 2011.0MY WORKSHOP REPAIR MANUAL
Page 1743 of 2057
Air Conditioning (A/C) Compressor Belt(21 567 0)
Removal
1.Remove the right-hand front wheel and tire.
Refer to: Wheel and Tire (204-04 Wheels and
Tires, Removal and Installation).
2.
E65955
3.
E64285
4.
E64286
2
1
Installation
1. To install, reverse the removal procedure.
G545010en2008.50 Kuga8/2011
303-05- 13
Accessory Drive— 2.5L Duratec (147kW/200PS) - VI5303-05-
13
REMOVAL AND INSTALLATION
TO MODEL INDEX
BACK TO CHAPTER INDEX
FORD KUGA 2011.0MY WORKSHOP REPAIR MANUAL
Page 1754 of 2057
Starter Motor(26 204 0)
Removal
NOTE:Removal steps in this procedure may
contain installation details.
1. Refer to: Battery Disconnect and Connect
(414-01 Battery, Mounting and Cables,
General Procedures).
2. Refer to: Air Cleaner (303-12 Intake Air
Distribution and Filtering - 2.5L Duratec
(147kW/200PS) - VI5, Removal and
Installation).
3.
E63784
4. Torque: 10Nm
E63785
5.Torque: 12Nm
E64737
6.Torque: 50Nm
E64738
x2
Installation
1.To install, reverse the removal procedure.
2. Refer to: Door Window Motor Initialization
(501-11 Glass, Frames and Mechanisms,
General Procedures).
G962446en2008.50 Kuga8/2011
303-06- 10
Starting System— 2.5L Duratec (147kW/200PS) - VI5303-06-
10
REMOVAL AND INSTALLATION
TO MODEL INDEX
BACK TO CHAPTER INDEX
FORD KUGA 2011.0MY WORKSHOP REPAIR MANUAL
Page 1898 of 2057
Transmission Range (TR) Sensor
Special Tool(s)501-028A
Pliers, Door Trim Removal
43001A
Removal
1.
E114413
2.
E114504
3.
E114505
4.
20 mm20 mm
E114506
G1163634en2008.50 Kuga8/2011
307-01-77
Automatic Transmission/Transaxle
— Vehicles With:
5-Speed Automatic Transaxle - AW55 AWD
307-01- 77
REMOVAL AND INSTALLATION
TO MODEL INDEX
BACK TO CHAPTER INDEX
FORD KUGA 2011.0MY WORKSHOP REPAIR MANUAL
Page 1899 of 2057
5.
E114436
6.
E114437
7.1. CAUTION: Use an open-ended
wrench to prevent the component
from turning.
3. Special Tool(s): 501-028A
E114438
8.
E114439
G1163634en2008.50 Kuga8/2011
307-01- 78
Automatic Transmission/Transaxle
— Vehicles With:
5-Speed Automatic Transaxle - AW55 AWD
307-01- 78
REMOVAL AND INSTALLATION
FORD KUGA 2011.0MY WORKSHOP REPAIR MANUALBACK TO CHAPTER INDEX
TO MODEL INDEX
1
2
3501-028A
x3