2011 FIAT STRADA Owner handbook (in English)
-
 1
1 -
 2
2 -
 3
3 -
 4
4 -
 5
5 -
 6
6 -
 7
7 -
 8
8 -
 9
9 -
 10
10 -
 11
11 -
 12
12 -
 13
13 -
 14
14 -
 15
15 -
 16
16 -
 17
17 -
 18
18 -
 19
19 -
 20
20 -
 21
21 -
 22
22 -
 23
23 -
 24
24 -
 25
25 -
 26
26 -
 27
27 -
 28
28 -
 29
29 -
 30
30 -
 31
31 -
 32
32 -
 33
33 -
 34
34 -
 35
35 -
 36
36 -
 37
37 -
 38
38 -
 39
39 -
 40
40 -
 41
41 -
 42
42 -
 43
43 -
 44
44 -
 45
45 -
 46
46 -
 47
47 -
 48
48 -
 49
49 -
 50
50 -
 51
51 -
 52
52 -
 53
53 -
 54
54 -
 55
55 -
 56
56 -
 57
57 -
 58
58 -
 59
59 -
 60
60 -
 61
61 -
 62
62 -
 63
63 -
 64
64 -
 65
65 -
 66
66 -
 67
67 -
 68
68 -
 69
69 -
 70
70 -
 71
71 -
 72
72 -
 73
73 -
 74
74 -
 75
75 -
 76
76 -
 77
77 -
 78
78 -
 79
79 -
 80
80 -
 81
81 -
 82
82 -
 83
83 -
 84
84 -
 85
85 -
 86
86 -
 87
87 -
 88
88 -
 89
89 -
 90
90 -
 91
91 -
 92
92 -
 93
93 -
 94
94 -
 95
95 -
 96
96 -
 97
97 -
 98
98 -
 99
99 -
 100
100 -
 101
101 -
 102
102 -
 103
103 -
 104
104 -
 105
105 -
 106
106 -
 107
107 -
 108
108 -
 109
109 -
 110
110 -
 111
111 -
 112
112 -
 113
113 -
 114
114 -
 115
115 -
 116
116 -
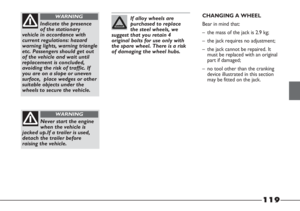
 117
117 -
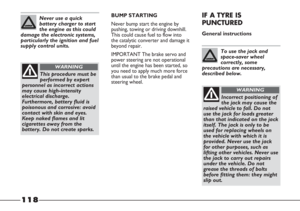
 118
118 -
 119
119 -
 120
120 -
 121
121 -
 122
122 -
 123
123 -
 124
124 -
 125
125 -
 126
126 -
 127
127 -
 128
128 -
 129
129 -
 130
130 -
 131
131 -
 132
132 -
 133
133 -
 134
134 -
 135
135 -
 136
136 -
 137
137 -
 138
138 -
 139
139 -
 140
140 -
 141
141 -
 142
142 -
 143
143 -
 144
144 -
 145
145 -
 146
146 -
 147
147 -
 148
148 -
 149
149 -
 150
150 -
 151
151 -
 152
152 -
 153
153 -
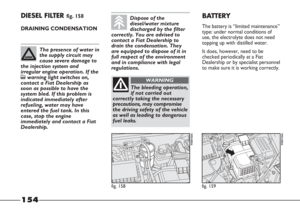
 154
154 -
 155
155 -
 156
156 -
 157
157 -
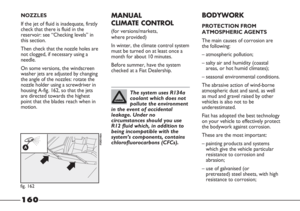
 158
158 -
 159
159 -
 160
160 -
 161
161 -
 162
162 -
 163
163 -
 164
164 -
 165
165 -
 166
166 -
 167
167 -
 168
168 -
 169
169 -
 170
170 -
 171
171 -
 172
172 -
 173
173 -
 174
174 -
 175
175 -
 176
176 -
 177
177 -
 178
178 -
 179
179 -
 180
180 -
 181
181 -
 182
182 -
 183
183 -
 184
184 -
 185
185 -
 186
186 -
 187
187 -
 188
188 -
 189
189 -
 190
190 -
 191
191 -
 192
192 -
 193
193 -
 194
194
 47
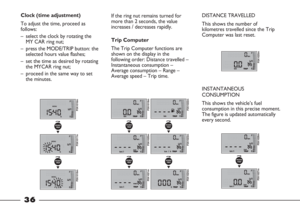
Clock Mode (12h or 24h)
To choose the time display format
(12h or 24h), proceed as follows:
– press the MODE button briefly:
the mode set previously flashes on
the display;
– press the ▼or �")
 48
Cons. (fuel consumption unit)
This function, present only on some
versions/markets where provided,
allows the unit of measurement used
to calculate fuel consumption to be
selected: km/l or l/100km.")
 49
Temp. Unit
(outdoor temperature unit)
This function, present only on some
versions/markets where provided,
allows the unit of measurement used
to calculate outdoor temperature to
be selected: °C")
 50
Service (Scheduled Servicing)
The display allows the distance
before Scheduled Servicing
(“coupon”) provided by Fiat
Dealerships is due to be shown, in
kilometres or miles (depending on
the pre")
 51
Exit menu
This is the last option concluding the
menu function cycle.
– Press the MODE button briefly:
the display returns to the standard
screen.
– Pressing the ▼button returns to
the first")
 52
TRIP COMPUTER
(for versions/markets,
where provided)
General information
Available on cars with reconfigurable
multifunction display, the Trip
computer is used to display
information on vehicle o")
 53
Values displayed
Range
This value shows the distance that
the car can still cover before needing
fuel, assuming that driving style is
unvaried. The display will show the
reading “----” when the")
 54
New mission: this begins after a
reset:
– “manual” resetting by the user, by
pressing the relevant button;
– “automatic” resetting, when the
distance travelled reaches 3,999.9
km or 9,9")