Page 190 of 452

RUN and remain on, as a bulb check, until the engine is
started. If the vehicle is not ready for emissions testing,
the light will come on when the ignition is first turned to
ON/RUN and remain on for 15 seconds, then blink for
5 seconds, and remain on until the vehicle is started. If
the bulb does not come on during starting, have the
condition investigated promptly.
If this light comes on and remains on while driving, it
suggests a potential engine control problem and the need
for system service.
Although your vehicle will usually be drivable and not
need towing, see an authorized dealer for service as soon
as possible.CAUTION!
Prolonged driving with the MIL on could cause
damage to the engine control system. It also could
affect fuel economy and drivability. If the MIL is
flashing, severe catalytic converter damage and
power loss will soon occur. Immediate service is
required.
WARNING!
A malfunctioning catalytic converter, as referenced
above, can reach higher temperatures than in normal
operating conditions. This can cause a fire if you
drive slowly or park over flammable substances such
as dry plants, wood, cardboard, etc. This could result
in death or serious injury to the driver, occupants or
others.
188 UNDERSTANDING YOUR INSTRUMENT PANEL
Page 191 of 452
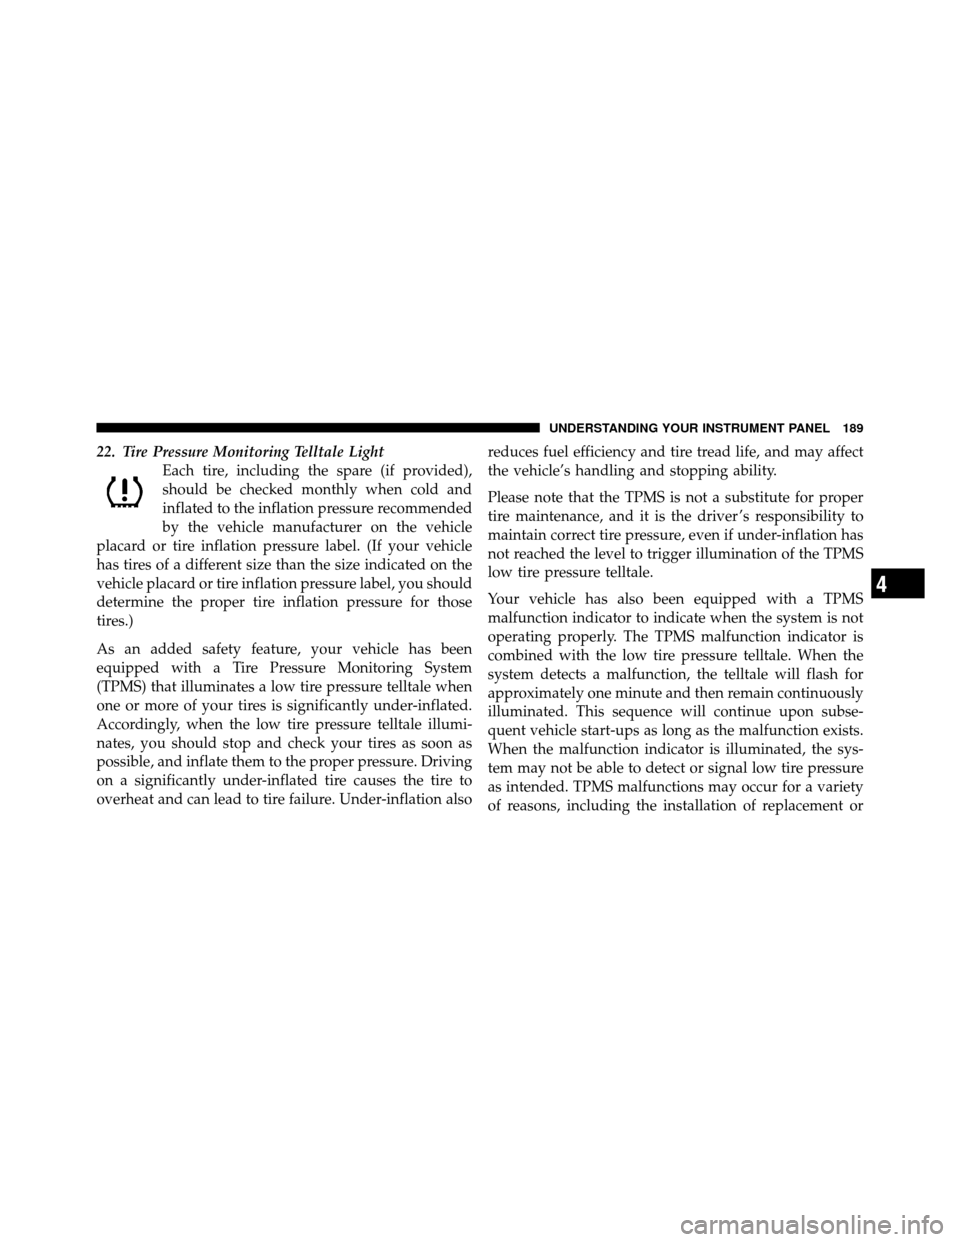
22. Tire Pressure Monitoring Telltale LightEach tire, including the spare (if provided),
should be checked monthly when cold and
inflated to the inflation pressure recommended
by the vehicle manufacturer on the vehicle
placard or tire inflation pressure label. (If your vehicle
has tires of a different size than the size indicated on the
vehicle placard or tire inflation pressure label, you should
determine the proper tire inflation pressure for those
tires.)
As an added safety feature, your vehicle has been
equipped with a Tire Pressure Monitoring System
(TPMS) that illuminates a low tire pressure telltale when
one or more of your tires is significantly under-inflated.
Accordingly, when the low tire pressure telltale illumi-
nates, you should stop and check your tires as soon as
possible, and inflate them to the proper pressure. Driving
on a significantly under-inflated tire causes the tire to
overheat and can lead to tire failure. Under-inflation also reduces fuel efficiency and tire tread life, and may affect
the vehicle’s handling and stopping ability.
Please note that the TPMS is not a substitute for proper
tire maintenance, and it is the driver ’s responsibility to
maintain correct tire pressure, even if under-inflation has
not reached the level to trigger illumination of the TPMS
low tire pressure telltale.
Your vehicle has also been equipped with a TPMS
malfunction indicator to indicate when the system is not
operating properly. The TPMS malfunction indicator is
combined with the low tire pressure telltale. When the
system detects a malfunction, the telltale will flash for
approximately one minute and then remain continuously
illuminated. This sequence will continue upon subse-
quent vehicle start-ups as long as the malfunction exists.
When the malfunction indicator is illuminated, the sys-
tem may not be able to detect or signal low tire pressure
as intended. TPMS malfunctions may occur for a variety
of reasons, including the installation of replacement or
4
UNDERSTANDING YOUR INSTRUMENT PANEL 189
Page 192 of 452

alternate tires or wheels on the vehicle that prevent the
TPMS from functioning properly. Always check the
TPMS malfunction telltale after replacing one or more
tires or wheels on your vehicle, to ensure that the
replacement or alternate tires and wheels allow the TPMS
to continue to function properly.
CAUTION!
The TPMS has been optimized for the original
equipment tires and wheels. TPMS pressures and
warning have been established for the tire size
equipped on your vehicle. Undesirable system opera-
tion or sensor damage may result when using re-
placement equipment that is not of the same size,
type, and/or style. Aftermarket wheels can cause
sensor damage. Do not use tire sealant from a can or
balance beads if your vehicle is equipped with a
TPMS, as damage to the sensors may result.23. Airbag Warning Light
This light will turn on for four to eight seconds
as a bulb check when the ignition switch is first
turned to ON/RUN. If the light is either not on
during starting, stays on, or turns on while
driving, have the system inspected at an authorized
dealer as soon as possible. Refer to “Occupant Restraints”
in “Things To Know Before Starting Your Vehicle” for
further information.
24. 4WD Indicator This light indicates the vehicle is in four-wheel
drive and 4LOCK. 4WD allows all four wheels
to receive torque from the engine simultane-
ously.
190 UNDERSTANDING YOUR INSTRUMENT PANEL
Page 193 of 452
25. SVC (Service) 4WD Indicator
The SVC 4WD illuminates when the ignition key is
turned to the ON/RUN position and will stay on for two
seconds. If the light stays on or illuminates during
driving, it means that the 4WD system is not functioning
properly and that service is required.
26. Cruise Indicator
The cruise indicator illuminates when the electronic
speed control system is turned on.
27. Cargo LampThe Cargo Lamp indicator will illuminate
when the Cargo Lamp is activated by pressing
the CARGO button, located on the headlight
switch.
28. TOW/HAUL
The TOW/HAUL button is located at the end of the gear
shift lever. This light will illuminate when the TOW/
HAUL button has been selected. 29. 4WD LOW Indicator
This light alerts the driver that the vehicle is in
the four-wheel drive LOW mode. The front and
rear driveshafts are mechanically locked to-
gether forcing the front and rear wheels to
rotate at the same speed. Low range provides a greater
gear reduction ratio to provide increased torque at the
wheels.
30. Odometer/Trip Odometer Button
Press the ODOMETER/TRIP ODOMETER button to
toggle between the odometer and the trip odometer
display. Holding the button in, resets the trip odometer
reading.
4
UNDERSTANDING YOUR INSTRUMENT PANEL 191
Page 194 of 452
MEDIA CENTER 230 (REQ) — AM/FM STEREO
RADIO AND 6–DISC CD/DVD CHANGER
(MP3/WMA AUX JACK)
NOTE:The radio sales code is located on the lower right
side of the radio faceplate.
Operating Instructions - Radio Mode
NOTE: The ignition switch must be in the ON or ACC
position to operate the radio.
Power Switch/Volume Control (Rotary)
Push the ON/VOLUME control knob to turn on the
radio. Press the ON/VOLUME control knob a second
time to turn off the radio.
Electronic Volume Control
The electronic volume control turns continuously (360
degrees) in either direction without stopping. Turning the
ON/VOLUME control knob to the right increases the
volume and to the left decreases it.
When the audio system is turned ON, the sound will be
set at the same volume level as last played.
Media Center 230 (REQ)
192 UNDERSTANDING YOUR INSTRUMENT PANEL
Page 195 of 452
SEEK Buttons
Press and release the SEEK buttons to search for the next
listenable station in AM/FM mode. Press the right switch
to seek up and the left switch to seek down. The radio
will remain tuned to the new station until you make
another selection. Holding either button will bypass
stations without stopping until you release it.
SCAN Button
Pressing the SCAN button causes the tuner to search for
the next listenable station in AM, FM or Satellite (if
equipped) frequencies, pausing for five seconds at each
listenable station before continuing to the next. To stop
the search, press the SCAN button a second time.
Voice Command Button Uconnect™ Phone —
If Equipped
Press this button to operate the Uconnect™ Phone feature
(if equipped). Refer to “Voice Command in the Uconnect™
User Manual located on the DVD for further details.
If your vehicle is not equipped with or this feature is not
available on your vehicle, a “Not Equipped With
Uconnect Phone” message will display on the radio
screen.
Phone Button Uconnect™ Phone — If Equipped
Press this button to operate the Uconnect™ Phone feature
(if equipped). Refer to “Uconnect™ Phone” in the
Uconnect™ User Manual located on the DVD for further
details.
If your vehicle is not equipped with or this feature is not
available on your vehicle, a “Not Equipped With
Uconnect Phone” message will display on the radio
screen.
TIME Button
Press the TIME button to alternate locations of the time
and frequency display.
4
UNDERSTANDING YOUR INSTRUMENT PANEL 193
Page 196 of 452
Clock Setting Procedure
1. Press and hold the TIME button until the hours blink.
2. Adjust the hours by turning the right side TUNE/
SCROLL control knob.
3. After adjusting the hours, press the right side TUNE/
SCROLL control knob to set the minutes. The minutes
will begin to blink.
4. Adjust the minutes using the right side TUNE/
SCROLL control knob. Press the TUNE/SCROLL control
knob to save the time change.
5. To exit, press any button/knob or wait five seconds.
The clock can also be set by pressing the SETUP button
and selecting the “SET HOME CLOCK” entry. Once in
this display follow the above procedure, starting at
step 2.
INFO Button
Press the INFO button for an RDS station (one with call
letters displayed). The radio will return a Radio Text
message broadcast from an FM station (FM mode only).
RW/FF
Pressing the RW (Rewind) or FF (Fast Forward) buttons
causes the tuner to search for the next frequency in the
direction of the arrows. This feature operates in AM, FM
or Satellite (if equipped) frequencies.
TUNE Control
Turn the rotary TUNE/SCROLL control knob clockwise
to increase or counterclockwise to decrease the frequency.
Setting the Tone, Balance, and Fade
Push the rotary TUNE/SCROLL control knob and BASS
will display. Turn the TUNE/SCROLL control knob to
the right or left to increase or decrease the bass tones.
194 UNDERSTANDING YOUR INSTRUMENT PANEL
Page 197 of 452
Push the rotary TUNE/SCROLL control knob a second
time and MID will display. Turn the TUNE/SCROLL
control knob to the right or left to increase or decrease the
mid-range tones.
Push the rotary TUNE/SCROLL control knob a third
time and TREBLE will display. Turn the TUNE/SCROLL
control knob to the right or left to increase or decrease the
treble tones.
Push the rotary TUNE/SCROLL control knob a fourth
time and BALANCE will display. Turn the TUNE/
SCROLL control knob to the right or left to adjust the
sound level from the right or left side speakers.
Push the rotary TUNE/SCROLL control knob a fifth time
and FADE will display. Turn the TUNE/SCROLL control
knob to the left or right to adjust the sound level between
the front and rear speakers.
Push the rotary TUNE/SCROLL control knob again to
exit setting tone, balance, and fade.MUSIC TYPE Button
Pressing this button once will turn on the Music Type
mode for five seconds. Pressing the MUSIC TYPE button
or turning the TUNE/SCROLL control knob within five
seconds will allow the program format type to be se-
lected. Many radio stations do not currently broadcast
Music Type information.
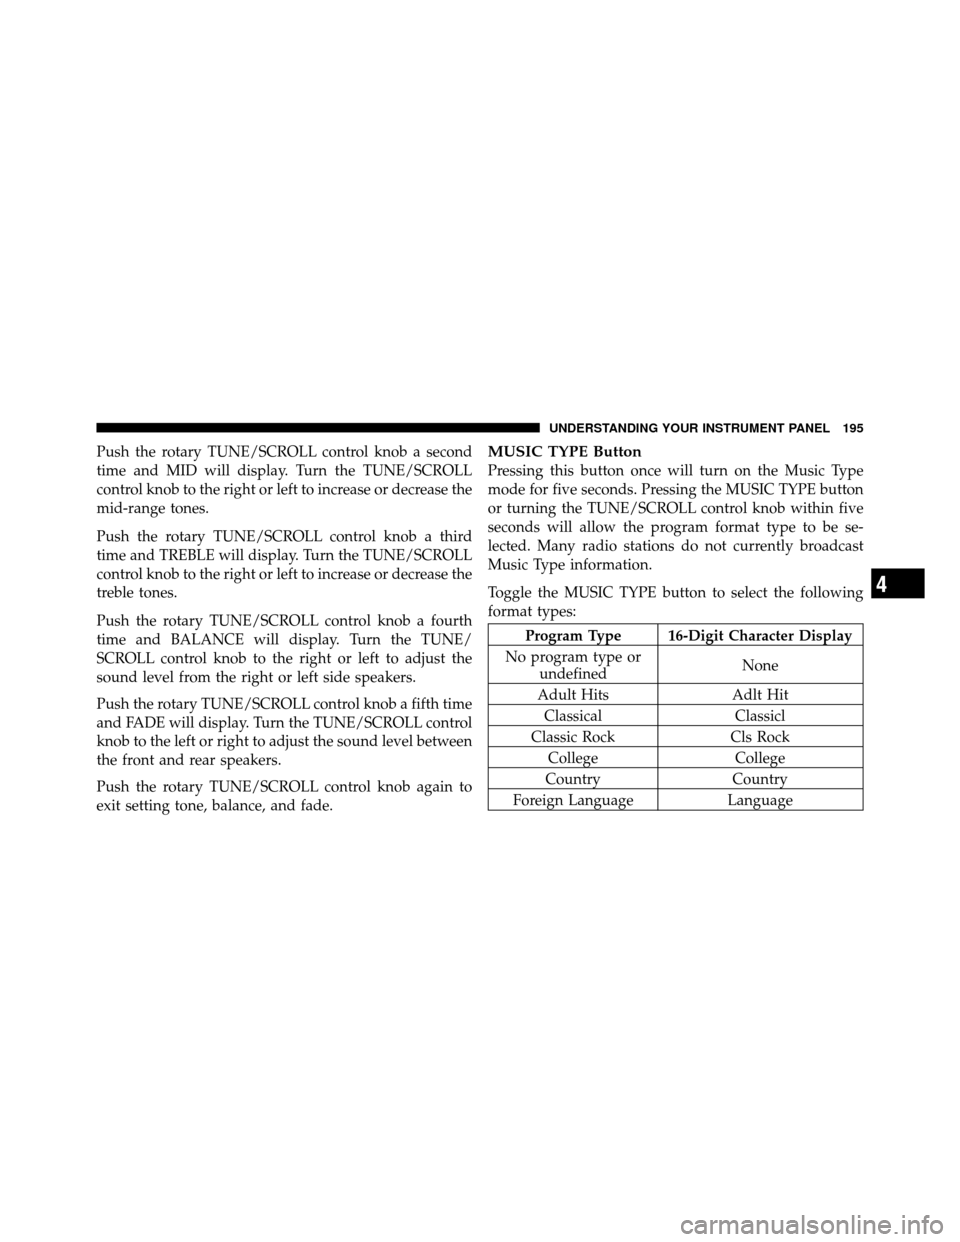
Toggle the MUSIC TYPE button to select the following
format types:
Program Type 16-Digit Character Display
No program type or undefined None
Adult Hits Adlt Hit
Classical Classicl
Classic Rock Cls Rock
College College
Country Country
Foreign Language Language
4
UNDERSTANDING YOUR INSTRUMENT PANEL 195