Page 138 of 452

wheel on the right side of the switch) is rotated to the
second upward detent position, or if equipped, when the
UNLOCK button is pressed on the Remote Keyless Entry
(RKE) transmitter. When a door is open and the interior
lights are on, rotating the dimmer control all the way
down to the OFF detent will cause all the interior lights to
go out. This is also known as the�Party�mode because it
allows the doors to stay open for extended periods of
time without discharging the vehicle’s battery.
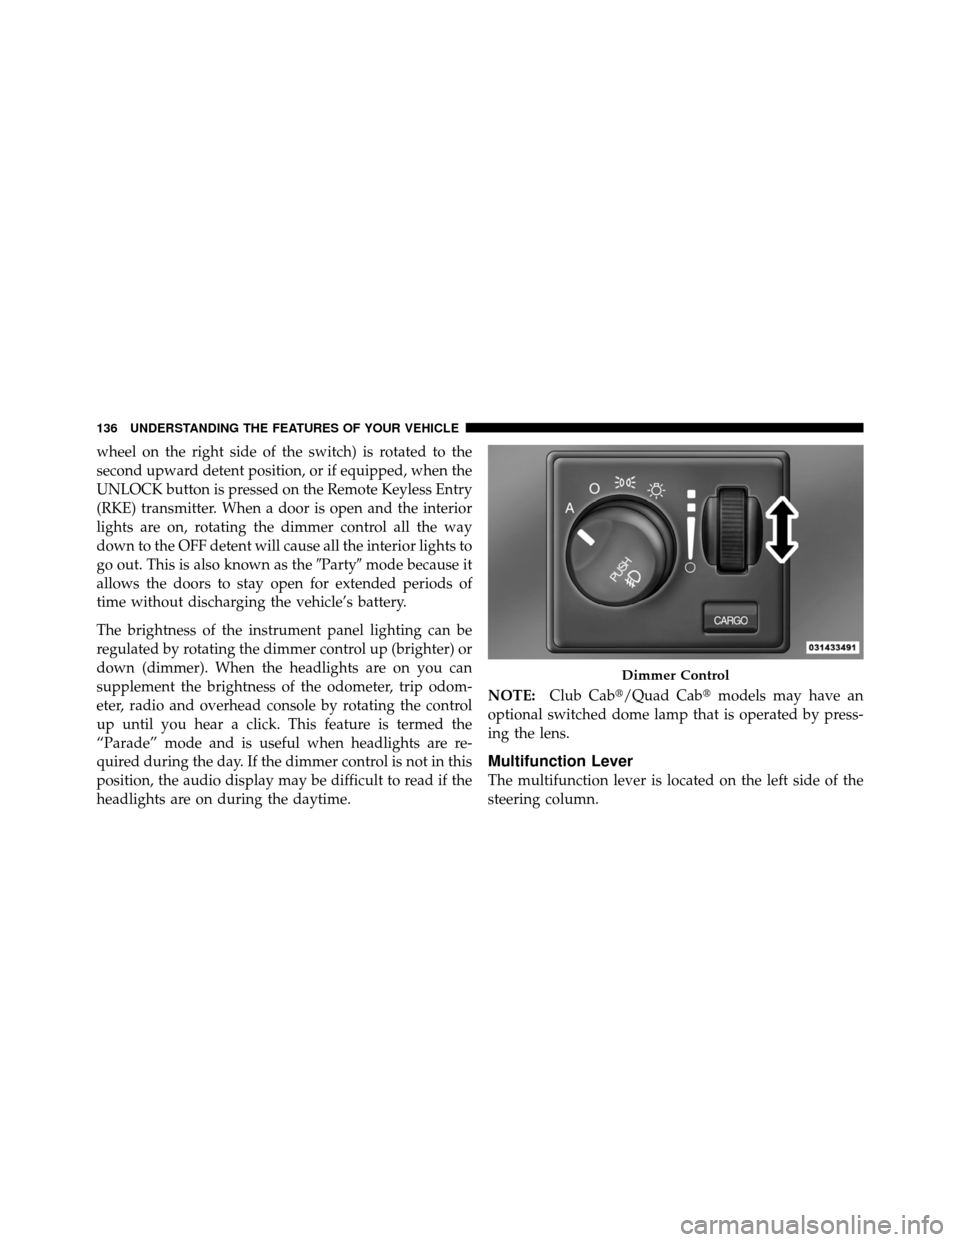
The brightness of the instrument panel lighting can be
regulated by rotating the dimmer control up (brighter) or
down (dimmer). When the headlights are on you can
supplement the brightness of the odometer, trip odom-
eter, radio and overhead console by rotating the control
up until you hear a click. This feature is termed the
“Parade” mode and is useful when headlights are re-
quired during the day. If the dimmer control is not in this
position, the audio display may be difficult to read if the
headlights are on during the daytime. NOTE:
Club Cab�/Quad Cab� models may have an
optional switched dome lamp that is operated by press-
ing the lens.
Multifunction Lever
The multifunction lever is located on the left side of the
steering column.
Dimmer Control
136 UNDERSTANDING THE FEATURES OF YOUR VEHICLE
Page 162 of 452

ELECTRICAL POWER OUTLETS
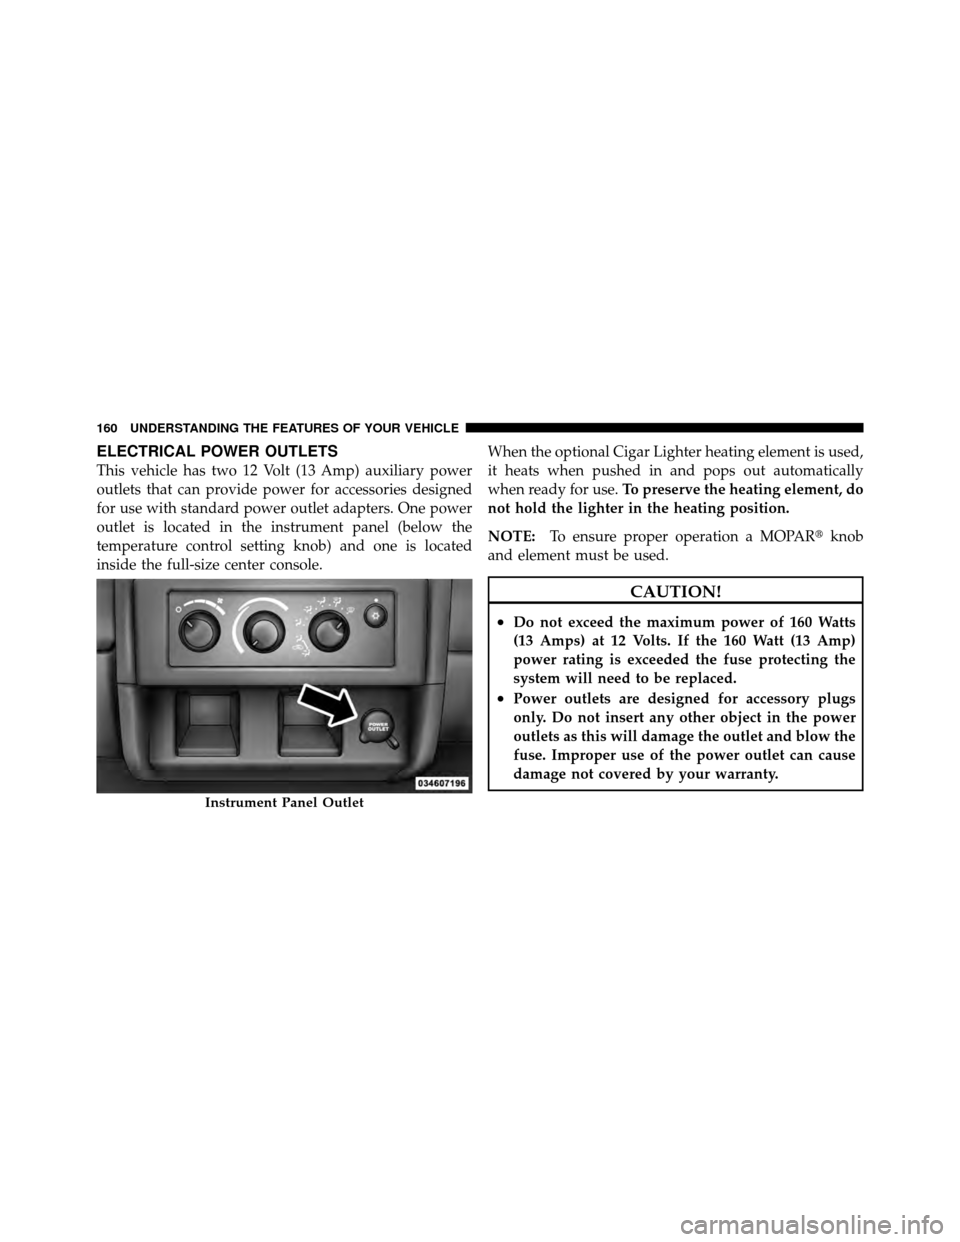
This vehicle has two 12 Volt (13 Amp) auxiliary power
outlets that can provide power for accessories designed
for use with standard power outlet adapters. One power
outlet is located in the instrument panel (below the
temperature control setting knob) and one is located
inside the full-size center console.When the optional Cigar Lighter heating element is used,
it heats when pushed in and pops out automatically
when ready for use.
To preserve the heating element, do
not hold the lighter in the heating position.
NOTE: To ensure proper operation a MOPAR� knob
and element must be used.
CAUTION!
•Do not exceed the maximum power of 160 Watts
(13 Amps) at 12 Volts. If the 160 Watt (13 Amp)
power rating is exceeded the fuse protecting the
system will need to be replaced.
•Power outlets are designed for accessory plugs
only. Do not insert any other object in the power
outlets as this will damage the outlet and blow the
fuse. Improper use of the power outlet can cause
damage not covered by your warranty.
Instrument Panel Outlet
160 UNDERSTANDING THE FEATURES OF YOUR VEHICLE
Page 168 of 452
•Coin slots (located under the instrument panel center
stack).WARNING!
Do not operate this vehicle with a console compart-
ment lid in the open position. Cellular phones, music
players, and other handheld electronic devices
should be stowed while driving. Use of these devices
while driving can cause an accident due to distrac-
tion, resulting in death or injury.
Storage Compartments
Some miscellaneous storage compartments and cuphold-
ers are both removable and dishwasher safe (upper rack
of dishwasher only) for cleaning purposes. Various stor-
age compartments provide versatile and useful storage.
A coin holder is also provided inside the driver side
storage bin.
Floor Console
166 UNDERSTANDING THE FEATURES OF YOUR VEHICLE
Page 177 of 452
UNDERSTANDING YOUR INSTRUMENT PANEL
CONTENTS
�Instrument Panel Features ............... 177
� Instrument Cluster .................... 178
� Instrument Cluster Descriptions ........... 179
� Media Center 230 (REQ) — AM/FM Stereo
Radio And 6–Disc CD/DVD Changer
(MP3/WMA AUX Jack) .................. 192
▫ Operating Instructions - Radio Mode ...... 192
▫ Operation Instructions - (Disc Mode For CD
And MP3/WMA Audio Play, DVD-Video) . . . 200
▫ Notes On Playing MP3/WMA Files ....... 202▫
List Button
(Disc Mode For MP3/WMA Play) ......... 205
▫ Info Button
(Disc Mode For MP3/WMA Play) ......... 205
▫ Uconnect™ Multimedia
(Satellite Radio) — If Equipped .......... 207
� Media Center 130 (Sales Code RES) ......... 211
▫ Operating Instructions — Radio Mode ..... 211
▫ Operation Instructions — CD Mode For CD
And MP3 Audio Play ................. 214
4
Page 178 of 452

▫Notes On Playing MP3 Files ............ 216
▫ Operation Instructions - Auxiliary Mode .... 219
� Media Center 130 With Satellite Radio
(Sales Code RES+RSC) ................... 220
▫ Operating Instructions — Radio Mode ..... 220
▫ Operation Instructions — CD Mode For CD
And MP3 Audio Play ................. 226
▫ Notes On Playing MP3 Files ............ 228
▫ List Button (CD Mode For MP3 Play) ...... 230
▫ Info Button (CD Mode For MP3 Play) ...... 230
▫ Uconnect™ Multimedia
(Satellite Radio) — If Equipped .......... 231�
Steering Wheel Audio
Controls — If Equipped .................. 236
▫ Radio Operation ..................... 236
▫ CD Player ......................... 237
� CD/DVD Disc Maintenance .............. 237
� Radio Operation And Mobile Phones ....... 238
� Climate Controls ...................... 238
▫ Air Conditioning And Heater ............ 238
▫ Operating Tips ...................... 241
▫ Operation Tips Chart ................. 244
176 UNDERSTANDING YOUR INSTRUMENT PANEL
Page 179 of 452
INSTRUMENT PANEL FEATURES
1 — Headlight Switch6 — Glove Compartment11 — Transfer Case Switch*
2 — Air Outlets 7 — Radio12 — Speed Control Switches
3 — Demister Outlets 8 — Climate Controls13 — Hood Release
4 — Instrument Cluster 9 — Power Outlet14 — Parking Brake Release
5 — Airbags 10 — Heated Seat Switches** If Equipped
4
UNDERSTANDING YOUR INSTRUMENT PANEL 177
Page 180 of 452
INSTRUMENT CLUSTER
178 UNDERSTANDING YOUR INSTRUMENT PANEL
Page 181 of 452

INSTRUMENT CLUSTER DESCRIPTIONS
1. Fuel Gauge
The fuel gauge shows the level of fuel in the fuel tank
when ignition switch is in the ON/RUN position.
2. Temperature Gauge
The temperature gauge shows engine coolant tempera-
ture. Any reading within the normal range indicates that
the engine cooling system is operating satisfactorily. The
gauge pointer will likely indicate a higher temperature
when driving in hot weather, up mountain grades, or
when towing a trailer. It should not be allowed to exceed
the upper limits of the normal operating range.
CAUTION!
Do not leave your vehicle unattended with the en-
gine running as you would not be able to react to the
temperature gauge if the engine overheats.3. Turn Signal Indicators
When a turn signal is activated, a right-pointing or
left-pointing arrow lights up and flashes to indicate
the direction of the turn. These indicators also indicate
proper operation of the front and rear turn signal lights.
If either indicator flashes at a faster rate than normal,
check for a defective bulb. If either indicator fails to light
up when the lever is moved, check for a defective fuse or
turn signal LED. A single chime is activated when the
left/right turn signal is left on, with the vehicle speed
greater than 15 mph (24 km/h) for more than 1 mile
(1.6 km).
4. Low Fuel Warning Light The low fuel warning light will illuminate when the
fuel gauge reads 1/8 of a tank or less. There is a
pointer on the side of this symbol that indicates the
side that your fuel filler door is located.
4
UNDERSTANDING YOUR INSTRUMENT PANEL 179