Page 22 of 452
ILLUMINATED ENTRY
Vehicles Equipped With Power Door Locks
All interior lights will illuminate in the vehicle when the
doors are unlocked using the Remote Keyless Entry
(RKE) transmitter.
The interior lights will remain on for 30 seconds after the
last door is closed, or until all doors are closed and either
the ignition is turned to the ON/RUN position or a RKE
transmitter LOCK button is pressed.
There is also a battery saver feature that will turn the
interior lights off after eight minutes if the ignition is OFF
and a door is left open or the dimmer control is in the
interior lights ON position.
NOTE:None of the courtesy lights will operate if the
dimmer control is in the “defeat” position (extreme
downward position), unless the overhead map/reading
lights are turned on manually.
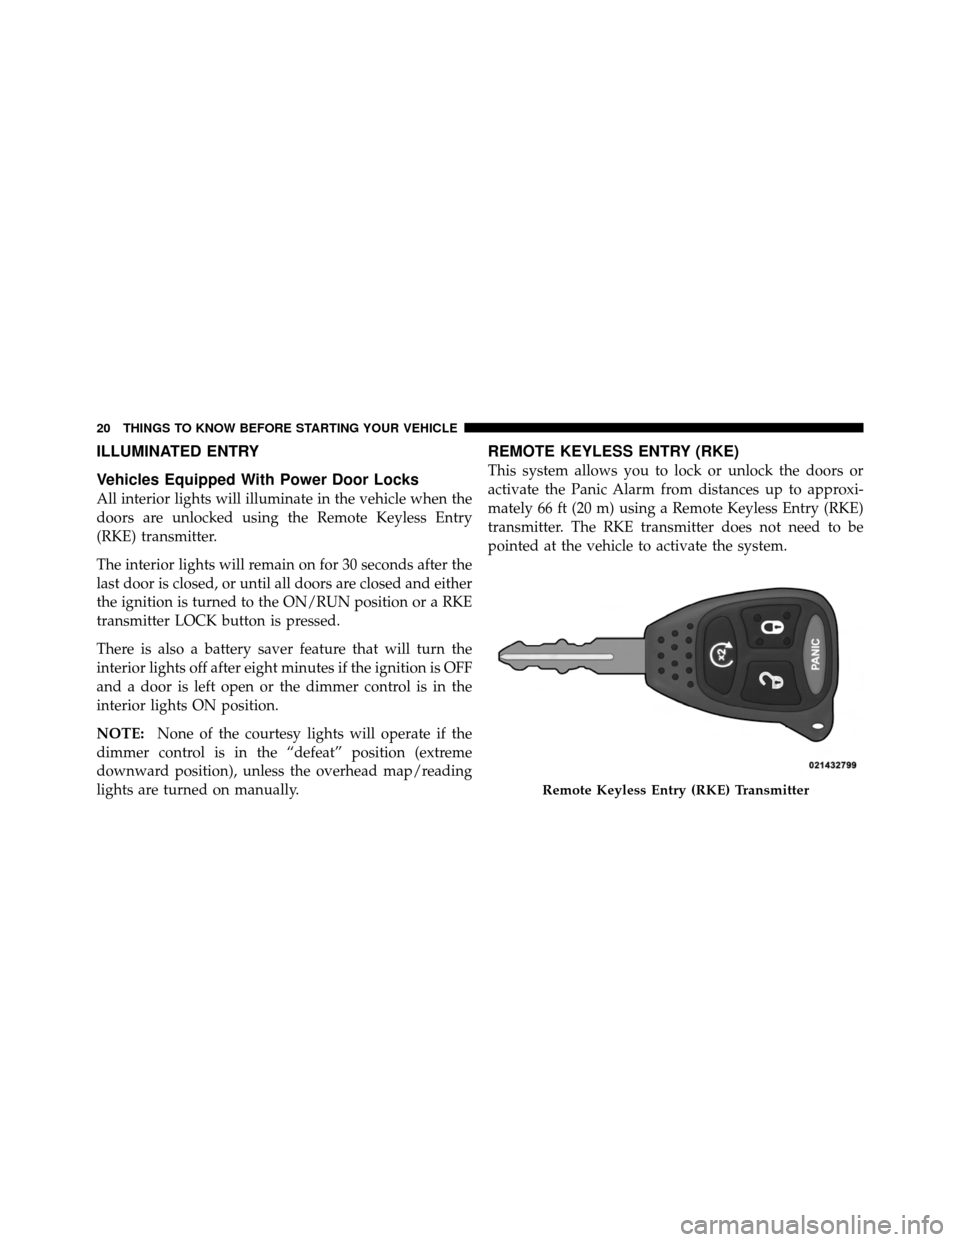
REMOTE KEYLESS ENTRY (RKE)
This system allows you to lock or unlock the doors or
activate the Panic Alarm from distances up to approxi-
mately 66 ft (20 m) using a Remote Keyless Entry (RKE)
transmitter. The RKE transmitter does not need to be
pointed at the vehicle to activate the system.
Remote Keyless Entry (RKE) Transmitter
20 THINGS TO KNOW BEFORE STARTING YOUR VEHICLE
Page 28 of 452
WARNING!
•Do not start or run an engine in a closed garage or
confined area. Exhaust gas contains Carbon Mon-
oxide (CO) which is odorless and colorless. Car-
bon Monoxide is poisonous and can cause serious
injury or death when inhaled.
•Keep Remote Keyless Entry (RKE) transmitters
away from children. Operation of the Remote Start
System, windows, door locks or other controls
could cause serious injury or death.
To Enter Remote Start
Press and release the REMOTE START button
on the RKE transmitter twice within five sec-
onds. The parking lights will flash and the horn
will chirp twice (if programmed). Then, the
engine will start and the vehicle will remain in the
Remote Start mode for a 15-minute cycle. NOTE:
•The park lamps will turn on and remain on during
Remote Start mode.
•For security, power window and power sunroof op-
eration (if equipped) are disabled when the vehicle is
in the Remote Start mode.
•The engine can be started two consecutive times (two
15-minute cycles) with the RKE transmitter. However,
the ignition switch must be cycled to the ON/RUN
position before you can repeat the start sequence for a
third cycle.
Remote start will also cancel if any of the following occur:
•The engine stalls or RPM exceeds 2500
•Any engine warning lamps come on
•The hood is opened
•The hazard switch is pressed
26 THINGS TO KNOW BEFORE STARTING YOUR VEHICLE
Page 138 of 452
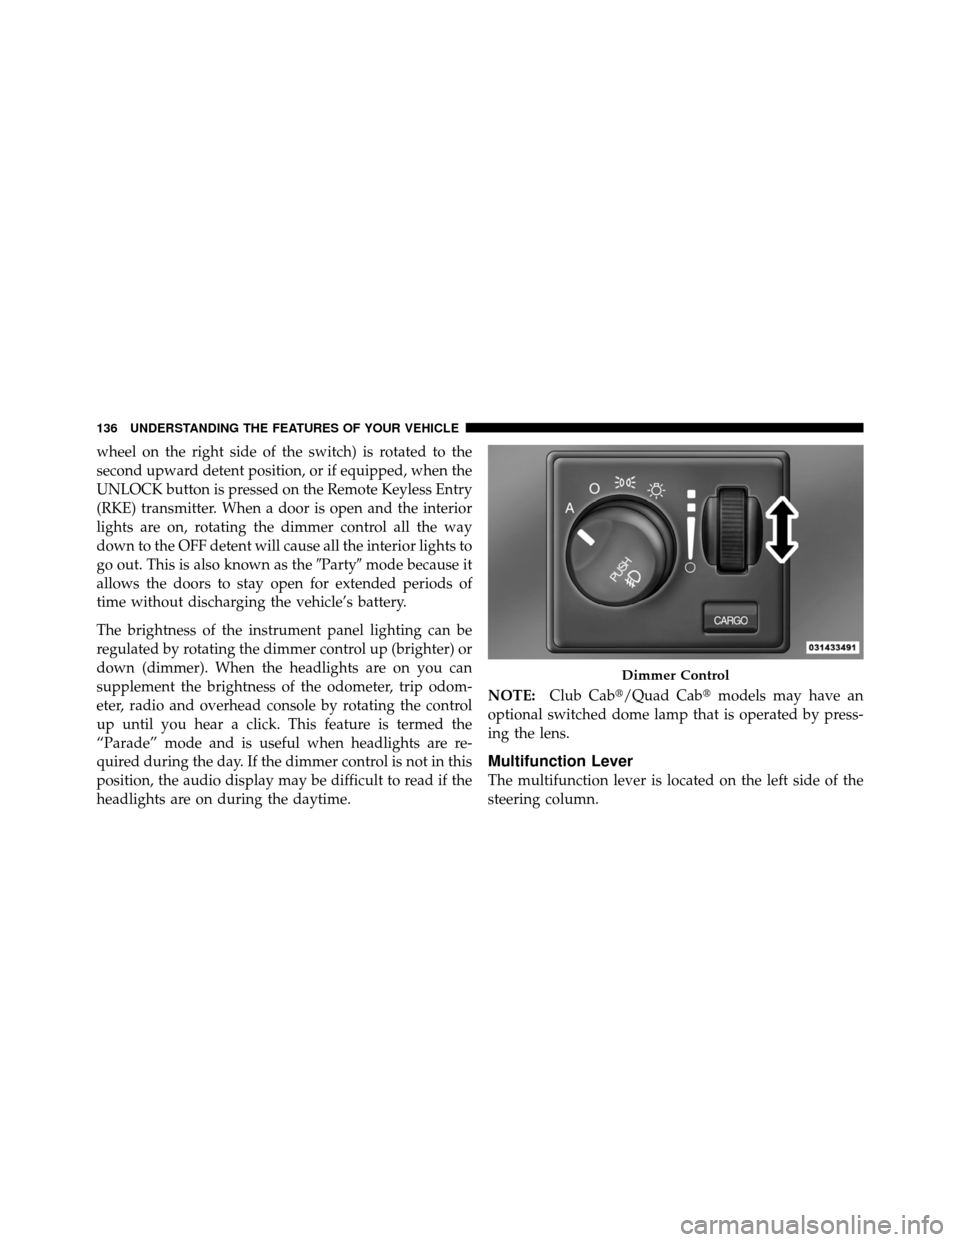
wheel on the right side of the switch) is rotated to the
second upward detent position, or if equipped, when the
UNLOCK button is pressed on the Remote Keyless Entry
(RKE) transmitter. When a door is open and the interior
lights are on, rotating the dimmer control all the way
down to the OFF detent will cause all the interior lights to
go out. This is also known as the�Party�mode because it
allows the doors to stay open for extended periods of
time without discharging the vehicle’s battery.
The brightness of the instrument panel lighting can be
regulated by rotating the dimmer control up (brighter) or
down (dimmer). When the headlights are on you can
supplement the brightness of the odometer, trip odom-
eter, radio and overhead console by rotating the control
up until you hear a click. This feature is termed the
“Parade” mode and is useful when headlights are re-
quired during the day. If the dimmer control is not in this
position, the audio display may be difficult to read if the
headlights are on during the daytime. NOTE:
Club Cab�/Quad Cab� models may have an
optional switched dome lamp that is operated by press-
ing the lens.
Multifunction Lever
The multifunction lever is located on the left side of the
steering column.
Dimmer Control
136 UNDERSTANDING THE FEATURES OF YOUR VEHICLE
Page 149 of 452
•Compass/Temperature Mini-Trip Computer — If
Equipped
Courtesy/Reading Lights
Near the front of the console are two courtesy/reading
lights.
Both lights illuminate as courtesy lights when a door is
opened, when the dimmer control is rotated to the
courtesy light position (fully upward position), or when
the UNLOCK button is pressed on the Remote Keyless
Entry (RKE) transmitter, if equipped. These lights are also
operated individually as reading lights by pressing the
recessed area of the corresponding lens.NOTE:
The courtesy/reading lights will remain on until
the switch is pressed a second time, so be sure they have
been turned off before leaving the vehicle. If the interior
lights are left on after the vehicle is turned OFF, they will
extinguish after approximately 10 minutes.
COMPASS/TEMPERATURE MINI-TRIP COMPUTER
This feature allows you to choose between a compass/
temperature display and one of four trip conditions being
monitored.
3
UNDERSTANDING THE FEATURES OF YOUR VEHICLE 147
Page 155 of 452
To set the variance: Turn the ignition ON and set the
display to “Compass/Temperature.” Press and hold the
RESET button approximately five seconds. The last vari-
ance zone number will be displayed. Press the STEPbutton to select the new variance zone and press the
RESET button to resume normal operation.
Outside Temperature
Because the ambient temperature sensor is located under
the hood, engine temperature can influence the displayed
temperature; therefore, temperature readings are slowly
updated when the vehicle speed is below 20 mph
(30 km/h) or during stop-and-go driving.
GARAGE DOOR OPENER — IF EQUIPPED
HomeLink�
replaces up to three remote controls (hand-
held transmitters) that operate devices such as garage
door openers, motorized gates, lighting or home security
systems. The HomeLink� unit operates off of your vehi-
cle’s battery.
Compass Variance Map
3
UNDERSTANDING THE FEATURES OF YOUR VEHICLE 153
Page 199 of 452
•DVD Enter -When the disc is in DVD Menu mode,
selecting DVD Enter will allow you to play the current
highlighted selection. Use the remote control to scroll
up and down the menu (if equipped).
•DISC Play/Pause - You can toggle between
playing the DVD and pausing the DVD by
pushing the SELECT button (if equipped).
•DVD Play Options - Selecting the DVD Play Options
will display the following:
•Subtitle – Repeatedly pressing SELECT will switch
subtitles to different subtitle languages that are
available on the disc (if equipped).
•Audio Stream – Repeatedly pressing SELECT will
switch to different audio languages (if supported on
the disc) (if equipped).
•Angle – Repeatedly pressing SELECT will change
the viewing angle if supported by the DVD disc (if
equipped).
NOTE:
•The available selections for each of the above entries
varies depending upon the disc.
•These selections can only be made while playing a
DVD.
•VES™ Power - Allows you to turn VES™ ON and
OFF (if equipped).
•VES™ Lock - Locks out rear VES™ remote controls (if
equipped).
•VES™ CH1/CH2 - Allows the user to change the
mode of either the IR1 or IR2 wireless headphones by
pressing the AUDIO/SELECT button (if equipped).
4
UNDERSTANDING YOUR INSTRUMENT PANEL 197
Page 201 of 452
Audio DRC — If Equipped
Selecting this item allows you to limit maximum audio
dynamic range. The default is set to�High,�and under
this setting, dialogues will play at 11 db higher than if the
setting is �Normal.�
Aspect Ratio — If Equipped
Selecting this item allows you to choose between wide
screen, pan scan, and letter box.
AutoPlay — If Equipped
When this is set to On and a DVD video is inserted, it will
bypass the DVD menu screen and automatically play the
movie. In some rare cases, the DVD player may not
auto-play the main title. In such cases, use the MENU
button on the remote control to select desired title to play. NOTE:
The user will have to set these defaults before
loading a disc. If changes are made to these settings after
a disc is loaded, changes will not be effective. Also, the
defaults are effective only if the disc supports the
customer-preferred settings.
AM and FM Buttons
Press the buttons to select AM or FM mode.
SET Button — To Set the Pushbutton Memory
When you are receiving a station that you wish to
commit to pushbutton memory, press the SET button.
The symbol SET 1 will now show in the display window.
Select the button (1-6) you wish to lock onto this station
and press and release that button. If a button is not
selected within five seconds after pressing the SET but-
ton, the station will continue to play but will not be
stored into pushbutton memory.
4
UNDERSTANDING YOUR INSTRUMENT PANEL 199
Page 238 of 452
STEERING WHEEL AUDIO CONTROLS —
IF EQUIPPED
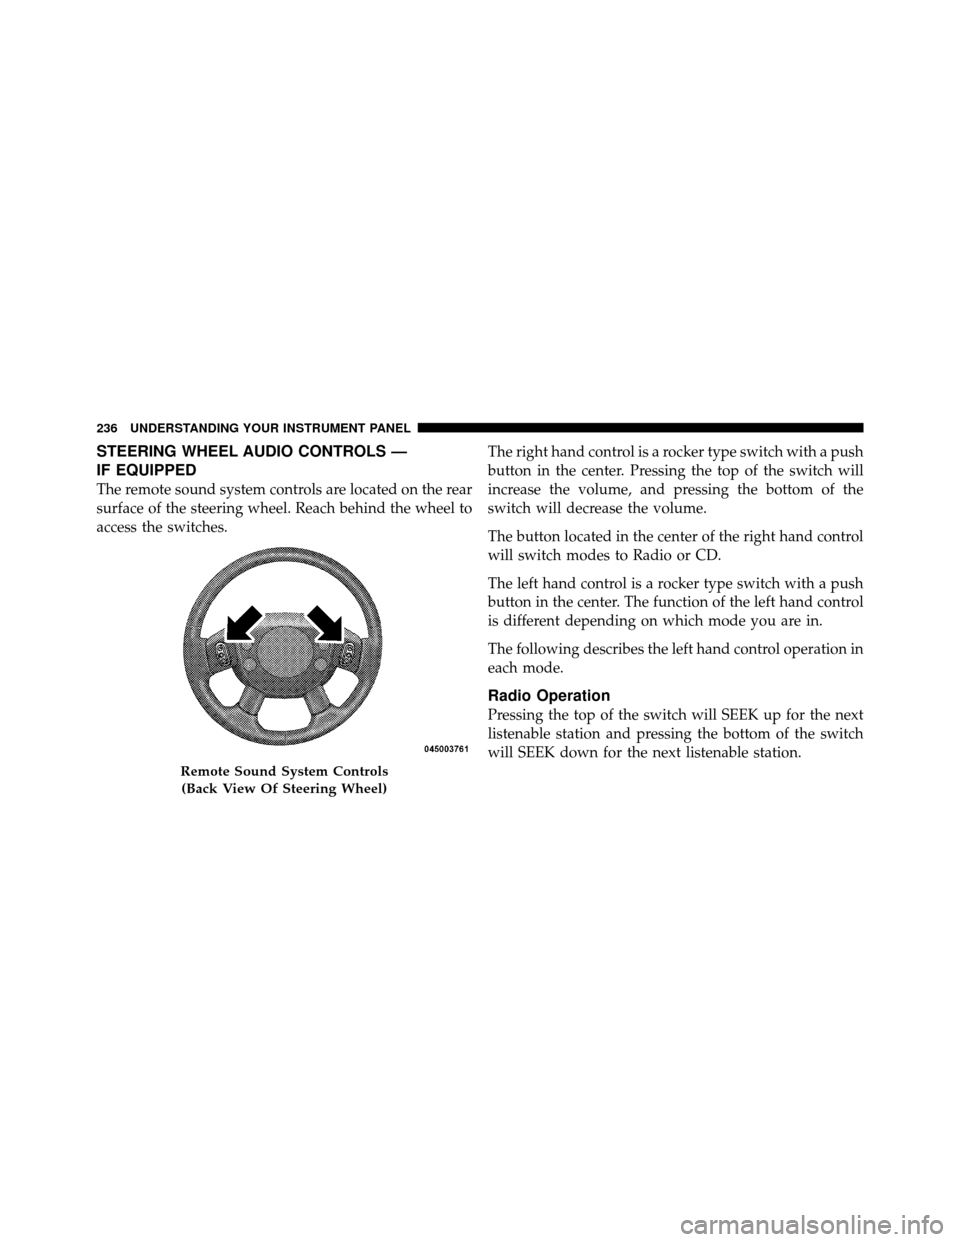
The remote sound system controls are located on the rear
surface of the steering wheel. Reach behind the wheel to
access the switches.The right hand control is a rocker type switch with a push
button in the center. Pressing the top of the switch will
increase the volume, and pressing the bottom of the
switch will decrease the volume.
The button located in the center of the right hand control
will switch modes to Radio or CD.
The left hand control is a rocker type switch with a push
button in the center. The function of the left hand control
is different depending on which mode you are in.
The following describes the left hand control operation in
each mode.
Radio Operation
Pressing the top of the switch will SEEK up for the next
listenable station and pressing the bottom of the switch
will SEEK down for the next listenable station.
Remote Sound System Controls
(Back View Of Steering Wheel)
236 UNDERSTANDING YOUR INSTRUMENT PANEL