Page 321 of 364

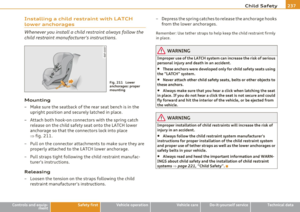
_____________________________________________ W __ h_a _ t_ d_o_ I_ d _ o_ n_o_ w_ ? _ ___._
Before returning the jack to its place, retract the jack arm fully.
& WARNING
• Never use the screw drive r he x head to tighten wheel bolts,
s in ce the bolts cannot attain the necessary tightening torque if
you use the hex head , potentially cau sing an accident .
• The factory-supplied jack i s intended only for your vehicle
model. Under no circumstances should it be used to lift hea vy
vehicles or other loads; you ri sk injuring your self .
• Never start the engine when the vehicle is raised , which could
cause an accident.
• Support the vehicle securely with appropriate stands if work i s
to be performed underneath the v ehicle; otherw ise, there is a
potential risk for inju ry .•
Space-saving spare tire (compact
spare tire)
The spare tire/wheel is located in the luggage compar t
ment und er the cargo floor cover. It is intended for short
term use only.
Fig . 236 Spare ti re
Vehicle OP-eration
Removing the spare tire
-Lift the cargo floor by the plas tic hand le=> fig. 236.
- Hook the h and le i nto the luggage compartment weather
str ip .
- Turn the large screw=> fig. 236 counter-cloc kw ise .
- Tak e ou t the spare tir e.
- Unhook the cargo floor before closing the rear lid.
Securing the replaced tire
- Place the wheel wi th t ire in the s pare wheel well and
secu re t he wheel with the large screw.
- Unho ok th e ca rgo floor befo re closin g the re ar li d.
Using the spare tire (compact spare tire)
The compact spare tire is only intended for emergencies until you can
re ach a rep air sho p. Rep lace i t as quick ly as possib le wit h a standard
wheel and tire.
Th ere are some restr ictions on the use of the compac t spare ti re. The
compact spare t ire has been des igned specifically fo r you r type of
vehicle . It must not be swapped with a compact spare tire from
another type of vehicle .
Snow chains
For technical reasons, the use of snow chains on the compact spa re
t ire is
not permitted .
If you do have to dr ive wi th snow chains and a front tire fails, mo unt
the spare wheel with tire instead of a rear tire. Install the snow chains on the rear tire and use it to replace the defective front tire . ._
Vehicle care Do-it-yourself service iTechnical data
Page 322 of 364

lffl!I.___W __ h_a_ t_ d_ o_ I_ d_o_ n_ o_w _ ? _____________________________________________ _
in. WARNING
• Never use the spare tire if it is damaged or if it is worn down to
the tread wear indicators.
• If the spare tire is more than 6 years old, use it only in an emer
gency and with extreme caution and careful driving.
• The spare tire is intended only for temporary and short-term
use. It should be replaced as soon as possible with the normal
wheel and tire.
• After mounting the compact spare tire, the tire pressure must
be checked as soon as possible. The tire pressure for the compact
spare tire is located on the driver 's side B-pillar
=> page 300,
fig. 227.
• Do not drive faster than 50 mph (80 km/h). You risk having an
accident.
• Avoid full-throttle acceleration, heavy braking, and fast
cornering. You risk having an accident.
• Never drive using more than one spare wheel and tire. You risk
having an accident.
• Normal summer or winter tires must not be mounted on the
compact spare wheel rim.
• For technical reasons, the use of tire chains on the spare tire is not permitted. If it is necessary to drive with tire chains, the spare
wheel must be mounted on the front axle in the event of a flat in
a rear tire. The newly available front wheel must then be installed
in place of the rear wheel with the flat tire. Installing the tire
chain before mounting the wheel and tire is recommended.
• Loose items in the passenger compartment can cause serious
personal injury during hard braking or in an accident.
-Never store the inflatable spare tire or jack and tools in the
passenger compartment.
- Always store all jacking equipment, tools, and the inflatable
spare tire in the luggage compartment.
& WARNING (continued)
-Tighten the knurled retaining screw for the inflatable spare
tire securely. •
Changing a wheel
Before changing a wheel
Observe the following precautions for your own and your
passenger's safety when changing a wheel.
- After you experience a tire failure, pull the car well away
from moving traffic and try to reach level ground before
you stop ~& .
- All passengers should leave the car and move to a safe
location (for instance, behind the guardrail) =>& .
- Engage the parking brake to prevent your vehicle from
rolling unintentionally ~& .
- Move selector lever to position P
~ &.
- If you are towing a trailer: unhitch the trailer from your
vehicle.
- Take the jack~
page 318 and the spare tire~ page 319
out of the luggage compartment.
in. WARNING
You or your passengers could be injured while changing a wheel if
you do not follow these safety precautions:
• If you have a flat tire, move a safe distance off the road. Turn
off the engine, turn the emergency flashers on and use other
warning devices to alert other motorists. ._
Page 323 of 364

What do I do now? Ill
----------------
& WARNING (continued)
• Make sure that passengers wait in a safe place away from the
vehicle and well away from the road and traffic.
• To help prevent the vehicle from moving suddenly and possibly
slipping off the jack, always fully set the parking brake and block
the wheel diagonally opposite the wheel being changed with the
folding chocks or other objects. When one front wheel is lifted off
the ground, placing the Automatic Transmission in "P" (Park) will
not prevent the vehicle from moving.
• Before you change a wheel, be sure the ground is level and
firm. If necessary, use a sturdy board under the jack.
• After installing the inflatable spare tire, make sure that you
replace the flat tire/wheel in its storage area properly and tighten
the knurled retaining screw securely.
0 Note
If you are changing the wheel on a steep incline, use a rock or similar
object to block the opposite wheel to prevent the vehicle from
moving.
[I) Tips
Obey all laws.•
Changing a wheel
When you change a wheel, follow the sequence described
below step-by-step and in exactly that order.
1. Remove the decorative wheel cover*. For more details see
also~
page 322, "Decorative wheel covers" .
2. Loosen the
wheel bolts=> page 323.
Safety first
3. Locate the proper mounting point for the jack and align
the jack below that point~
page 323.
4. Lift the car with the jack~ page 323.
5. Remove the wheel with the flat tire and then install the
spare tire~ page 325.
6. Tighten all wheel bolts lightly.
7.
Lower the vehicle with the jack.
8. Use the wheel bolt wrench and
firmly tighten all wheel
bolts in a crisscross pattern~
page 323.
9. Replace the decorative wheel cover*.
& WARNING
Always read and follow all WARNINGS and information=> & in
"Raising the vehicle" on
page 323 and => page 326. •
After changing a wheel
A wheel change is not complete without the doing the
following.
- Store and secure the wheel you replaced in the spare
wheel well.
- Replace the tools and the jack in their proper location.
- Check the
tire pressure of the spare tire as soon as
possible.
- As soon as possible, have the
tightening torques on all
wheel bolts checked with a torque wrench. The correct
tightening torque is 90 ft lb (120 Nm).
- Have the flat tire
replaced as soon as possible.
Vehicle care Do-it-yourself service Technical data
Page 324 of 364

-What do I do now? .,,,.,__ ______________ _
(I) Tips
• If you notice that the wheel bo lts are co rroded and difficult to turn
while changing a tire, they should be replaced before you check the
t ighteni ng to rque.
• Drive at reduced speed until you have the tightening torques
checked. •
Applies to veh icles: with d ecorat ive w heel co vers
Decorative wheel covers
The decorative wheel covers must be removed first to
access the wheel bolts .
Removing
Fig. 237 Ch an g ing a
w heel: re moving t he
wh eel cov er
- Ins ert the hook provided with the vehicle tool kit in the
hole in the hub.
- Pull off the
decorative wheel cover=:> fig. 237. •
Applies to vehicles : w ith wheel bolts with caps
Wheels with wheel bolt caps
The caps must be removed first from the wheel bolts
before the bolts can be unscrewed .
Removing
Fig. 238 Ch an ging a
whe el: rem oving th e
w heel b olt cap s
- Push the plastic clip provided with the vehic le tool kit over
the wheel bolt cap until it engages.
- Pull on the
plastic clip to remove the cap=:> fig . 238 .
Refitting
-Place the caps over the wheel bolts and push them back
on.
The caps are to protect and keep the wheel bolts clean. •
Page 325 of 364

What do I do now? -_______________ __.PfWII
Loosening and tightening the wheel bolts
The wheel bolts must be Loosened before raising the
vehicle.
Loosening
Fig. 239 Changing a
wheel: loosening the
wheel bolts
- Install the wheel bolt wrench over the wheel bolt and
push it down as far as it will go.
- Take tight hold of the
end of the wrench handle and turn
the wheel bolts
counter-clockwise about one single turn
in the direction of arrow=:, fig. 239.
Tightening
-Install the wheel bolt wrench over the wheel bolt and
push it down as far as it will go.
- Take tight hold of the
end of the wrench handle and turn
each wheel bolt
clockwise until it is seated.
& WARNING
• Do not use force or hurry when changing a wheel· you can
cause the vehicle to slip off the jack and cause serious personal
injuries.
Vehicle OP-eration
& WARNING (continued)
• Do not loosen the wheel bolts more than one turn before you
raise the vehicle with the jack. -You risk an injury.
[ i] Tips
• Never use the hexagonal socket in the handle of the screwdriver to
loosen or tighten the wheel bolts .
• If a wheel bolt is very tight, you may find it easier to loosen by
carefully pushing down on the end of the wheel bolt wrench with
one
foot only .
As you do so, hold on to the car to keep your balance and
take care not to slip. •
Raising the vehi cle
The vehicle must be Lifted with the jack first before the
wheel can be removed.
Vehicle care
Fig . 240 Changing a
wheel: mounting
points for the jack ..
Do-it-yourself service iTechnical data
Page 326 of 364

lffll.,___W_ h_ a_t _ d_ o_ I_d_ o_ n_o _w_ ? ___________________________________________ _
Fig . 241 Close-up :
p rope r pos itioning of
ja ck
The locat ion of t he ja ck p oint is ind icated by a n in dentat ion
on the underside of the vehicle==>
page 323, f ig. 240 .
- E ngag e th e
parking brake to prev ent your vehicl e from
r ol ling un in te ntion ally .
- Move the
selector lever to position P .
- Posit ion the jack below the door sill under t he mounting
po int
that is closest to the w heel to be cha nged
==>
page 323, f ig. 240.
- Crank up the
jack on t he handwh eel u ntil its arm is posi
tioned directly under the lift ing point ~& .
- Align t he jac k so that its claw ©==> fig. 241 completely
covers the
seam in the designated lifti ng point i n the door
sill a nd the base ® lies flat on t he gro und. The base ®
must be
vertical under the lifting point@.
- Now at tac h th e r od to t he jack : St ick the rod i nto t he
o peni ng o n the ha ndwheel. Tur n the rod left or r ight to
secure i t.
- Con tin u e to cra nk t he jac k wit h the rod until th e wh eel is
li ft ed just c lea r o f the gro un d==> & .
The jack must be installed o nly at the places in d icated=> page 323,
fig. 240. There is ex act ly one location fo r each wheel. The ja ck mu st
not be positioned at any other location=> &.
An unstab le s urface under t he jack can cause the veh icle to s lip off the
j a ck. A lways p rov ide a firm base for the ja ck on t he g round.
If nece s
sary place a sturdy boa rd o r sim ilar support under the jac k. On hard,
sl ippery surfaces ( such as til es) u se a r ubber mat or sim ila r to preve nt
the jack from slipping =>& .
& WARNING
• You or your passengers could be injured while changing a
wheel
if you do not follow these safety precautions :
- Pos itioning the jack under the vehicle at any other place than
tho se indicated ab ove may damage the vehicle o r may result in
personal injuries .
- A soft or unstable surface under the jack may cause the
vehicle to sl ip off the jack. Always provide a firm base for the
jack on the ground . If ne ce ss ary , use a sturd y board under the
jack .
- On hard , slippery surface (such a s tiles) use a rubber mat or
similar to prevent the jack from slipp ing .
• To help prevent injury to your self and your passengers :
- Do not raise the vehicle until you are sure the jack is securely
engaged .
- Passengers must not remain in the vehicle when it is jacked
up.
- Make sure that pas sengers wait in a safe pla ce away from the
vehicle and well away from the road and traffic.
- Make sure jack position is correct, adjust as necessary and
then continue to raise the jack . •
Page 327 of 364

What do I do now ? -_______________ __.PfWII
Taking the wheel off/installing the spare
tire
Follow these instructions step-by-step for changing the wheel
F ig. 242 Changing a
wheel: using the
sc rewdriver handle
(w ith the b lade
r emove d) to turn t he
bolts
Fig. 243 Changi ng a
wheel: alignment p in
i nside t he top hole
After you have loosened all wheel bolts and raised the vehicle
off the ground, remove and replace the wheel as follows :
Removing the wheel
- Remove the topmost wheel bolt completely with the
hex agon al sock et in the screwdriver handle (vehicle tool
kit) :=} fig. 242 and set it aside on a
clean surface.
Vehicle OP-eration
-Screw the threaded end of the alignment pin from the
tool kit hand-tight into the empty bolt hole:=} fig. 243.
- Then remove the other wheel bolts as described above .
- Take off the wheel leaving the alignment pin in the bolt
hole.
Putting on the inflatabl e spare tir e
-Push the spare tire over the alignment pin=} 0.
- Screw on the wheel bolts and tighten them slightly using
the hexagonal socket.
- Remove the alignment pin and insert and tighten the
remaining wheel bolt slightly like the rest .
- Turn the jack handle counter-clockwise to lower the
vehicle until the jack is fully released.
- Use the wheel bolt wrench to tighten all wheel bolts firmly :=}
page 323 . Tighten them Tighten them in a crisscross
pattern,
from one bolt to the (approximately) opposite
one, to keep the wheel centered .
- Perform the steps required after changing the wheel :=}
page 321, "After changing a wheel" .
0 Note
When removing or installing the wheel, the rim could hit the brake
rotor and damage the rotor. Work caref ully and have a second person
help you.
W Tips
Never use the hexagonal socket in the handle of the screwdriver to
loosen or tighten the wheel bolts. _.,
Vehicle care Do-it-yourself service iTechnical data
Page 328 of 364

llffl.___W __ h_a_ t_ d_ o_ I_ d_o_ n_ o_w _ ? _____________________________________________ _
• Pull the r eversible blade from the sc rewdriver before you use the
hexagon al socke t in the h an dl e to tur n t he whee l bolts.
• When mounting tires with
unidirectional tread design make sure
t he t read p attern is po inte d the rig ht way =:>
page 326.
• The wheel bo lts shou ld be clean and easy to turn. Check for dirt
and cor rosion on the mat ing surfa ces of both the whee l and the hub.
Remove all d irt from these surfaces before remounting the whee l.•
Tires with unidirectional tread design
Tires with unidirectional tread design must be mounted
with their tread pattern pointed in the right direction.
Using a spare tire with a tread pattern intended for
use in a specific direction
When using a spare tire w ith a tread pattern intended for use in a
spe cific d irec tion, please note the follow ing :
• The direction of rotation is marked by an
arrow on the side of the
tire .
• If the spare tire has to be installed in the incorrect d irect ion, use
t he spare tire only temporari ly since the tire wi ll not be ab le to
achieve its optimum performance characte rist ics with regard to
aquap lan ing, noise and wear.
• We recommend that you pay particular attention to this fact
during wet weather an d that you adjus t you r speed to match road
conditions.
• Rep lace t he fl at t ire w ith a new one and have it ins talled on your
vehicle as soon as possible to restore the handling advantages of a
unidi rectional tire .•
Notes on wheel changing
Please read the in format ion =:> page 307, "New tires and replac ing
t ires and wheels" if yo u are go ing to use a spare ti re wh ich is diffe rent
from the tires on your vehicle .
After you change a tire :
• Che ck the tire pre ssure on the spare immediat ely after installa
tion .
• Have the wheel bo lt tightening torque checked with a torqu e
wren ch as soon as possible by your autho rized Aud i deale r or a qual
ified work shop .
• With steel and all oy wheel rims , the wheel bolts are co rrectly
tightened at a torque of 90 ft lb (120 Nm ).
• If you noti ce that the wheel bolts are corroded and difficult to
turn while changing a tire, they should be rep laced before you chec k
the tightening torque .
• Replace the flat tire with a new one and have it installed on your
v ehicle a s soon a s poss ible. Remount the wheel co ve r.
Until then, drive with extra car e and at reduced speed s.
& WARNING
• If you are going to equip your veh icl e with tires or r ims whi ch
differ from those which were factory installed, then be sure to
read the information =:>
page 307, "New tires and replacing ti re s
and wheels".
• Alw ays make sure the damag ed wh eel or ev en a flat tir e and
the j ack and tool kit are properl y secured in the luggage compart
ment and ar e not loo se in th e pas senger compartment.
• In an a ccident or sudden maneuver they could fl y forward,
i n juring anyone in th e ve hicle .
• Alw ay s s tore dam aged wheel , jack and t ool s se cure ly in the
luggage compartment. Othe rwi se , in an ac cident or sudden