Page 57 of 90

Navigation 71
Navigation Setup
Quick POI selectionUsing this function, you can set the point of interest categories that are
displayed when selecting the Point of Interest menu key on the current
map screen. Set up to six different categories that are used most fre-
quently. (See Page 87 for displaying POI categories on the map and
searching for the nearest points of interest.)1
Press the button, then select (navigation
setup), and then select (quick POI selection).
2
Select one of the six category keys you wish to program
into the Quick POI storage.
(default ):
Use this key to restore the factory settings.
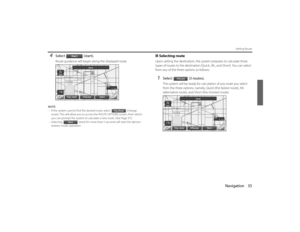
3
Select a category.Once you have selected a category key, subcategories will be dis-
played.
(all category list):
Subcategories from all individual categories will be displayed
together.
4
Select the subcategories to be displayed on the map.
NOTE
Repeat Steps 1 to 4 to add more POI categories for display on the menu screen.
Legacy_B2462BE-A.book Page 71 Wednesday, April 22, 2009 5:32 PM
Page 58 of 90
72 NavigationNavigation SetupLanguage SelectionPerform the following procedure to select your preferred language for
the menu screens, voice guid ance and voice recognition.1
Press the button, then select (navigation
setup), and then select (language)
2
Select your preferred language from the list.
Legacy_B2462BE-A.book Page 72 Wednesday, April 22, 2009 5:32 PM
Page 59 of 90
Navigation 73
Navigation Setup
CalibrationThis function allows you to correct any display errors in the position and
direction of your vehicle on the map display.■ Adjusting current position and direction1
Press the button, then select (navigation
setup), and then select (calibration).
2
Select (position/direction).
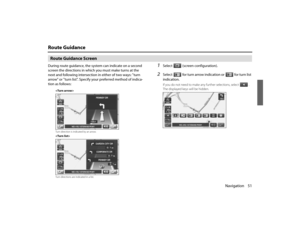
3
Move the crosshair to the co rrect position, and then
select
.
4
Use or to adjust the direction in which you are
heading, and then select .
Legacy_B2462BE-A.book Page 73 Wednesday, April 22, 2009 5:32 PM
Page 60 of 90
74 NavigationNavigation Setup■DistanceWhen selected, this function automatically corrects an error in the cur-
rent position display that might occur after tire replacement.1
Press the button, then select (navigation
setup), and then select (calibration).
2
Select (Distance).
Set clockSince the adjustments for minutes an d seconds are made automatically
using the time data provided by GPS satellites, you can set your cloc k by
simply performing a time-zone and daylight saving time adjustment
using this function.1
Press the button, then select (navigation
setup), and then se lect (set clock).
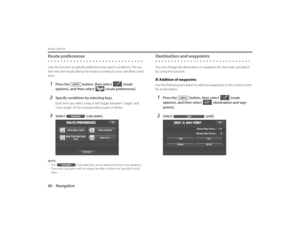
2
Select if you prefer 24-hour display; select for
12-hour display.
3
Select the time-zone by pressing or .
NOTE
Initial time-zone setting of this navigation unit is Eastern (Disc A)/Mid (Disc B)/
Pacific (Disc C).
Legacy_B2462BE-A.book Page 74 Wednesday, April 22, 2009 5:32 PM
Page 61 of 90
Navigation 75
Navigation Setup
4
Select the daylight saving time mode by pressing
or .
NOTE
Select to advance the time by one hour.Vehicle signalThis function allows certain vehicle data and GPS satellite data to be dis-
played.1
Press the button, then select (navigation
setup), select and then select (vehicle signal).The VEHICLE SIGNAL screen will appear.
Restore system defaultsUse this function if you want to ch ange all of the system's current set-
tings back to the default settings.1
Press the button, then select (navigation
setup), select and then select (restore system
defaults).
2
Select to return all current systems settings to
default.
NOTE
If you select this function, all your settings will be deleted.
Legacy_B2462BE-A.book Page 75 Wednesday, April 22, 2009 5:32 PM
Page 62 of 90
![SUBARU LEGACY 2010 5.G Navigation Manual
76 NavigationNavigation Setup
[Default List]ItemInitial condition
Map display
Search Area
Display Guidance Language
Voice Recognition Language
Map Orientation (1 and 2 screen)
Map Display Mode
Map Di](/manual-img/17/7276/w960_7276-61.png "SUBARU LEGACY 2010 5.G Navigation Manual
76 NavigationNavigation Setup
[Default List]ItemInitial condition
Map display
Search Area
Display Guidance Language
Voice Recognition Language
Map Orientation (1 and 2 screen)
Map Display Mode
Map Di")
76 NavigationNavigation Setup
[Default List]ItemInitial condition
Map display
Search Area
Display Guidance Language
Voice Recognition Language
Map Orientation (1 and 2 screen)
Map Display Mode
Map Display Scale
Map Configuration
Q-POI Map Display
Show POI Icon Display
Right Screen Setting, POI
Passage Point Display/Current Location, Map Screen ( Time
Requirement, Time, Direction / Distance)Passage Point Display/ Full Route, Map Screen ( Time Require-
ment, Time, Direction / Distance)
Restricted Road
Freeway Information Disc A ( WEST ): CA
Disc B (MID): IL
Disc C (EAST ): DC
US English, female
US English
North up
Single-screen display
Single-screen:
10,000 map (1/16 mi) (100 m)
Dual-screen:
40,000 map (1/4 mi) (500 m)
Arrow Mode
Off
Off
On
Next passage point
Destination
On
Off
Volume Control
Volume Preset
4
Navigation Setup Menu
Distance
Road Restriction Warnings
Reverse Mute
Keyboard Layout
Arrival Timemile
On
Off
ABC
Required remaining time
Item Initial condition
Map Mode
Guidance Screen
Q-POI Selection
Language Selection Auto
On
A: Gas station
B: ATM
C: Parking
D: Grocery store
E: All Restaurants
F: Hotel
US English, female, male,
French, Espanõl
Route Options
Search Condition
Route Preferences Quick
Allow Toll Road: Off
Allow Ferry: Off
Allow Major Roads: On
Allow Time Restricted Road:
Off
Item
Initial condition
Legacy_B2462BE-A.book Page 76 Wednesday, April 22, 2009 5:32 PM
Page 63 of 90

Navigation 77
Stored LocationsYou can store, edit, or delete any destinations, waypoints, and
other marked points using the procedures described in this
section.1
Press the button.
2
Select (stored locations).
3
Select the desired item.
(Memory Points):
Use this function to place markers on the map. (See Page 78.)
(Avoid Area):
Use this function to store into the system's memory any areas you
want to avoid. (See Page 83.)
(Previous Destination):
Use this function to delete prev iously stored destinations and
waypoints. (See Page 85.)
(Display memory point icons):
Selecting this key allows you to display icons for memory points.
Each of the above three functions has some or all of the following
four standard editing functions (see the table below): (add):
You can store a new location into memory.
(list):
You can see a list of the stored locations.
(delete):
You can delete stored locations.
(delete all):
You can delete all stored locations.
Legacy_B2462BE-A.book Page 77 Wednesday, April 22, 2009 5:32 PM
Page 64 of 90
78 NavigationStored Locations
Editing keys displayed for each function are as follows:
The numbers in parentheses following the function names indicate the
maximum locations you can store in the memory.
Memory points■ Storing new memory pointsMemory points can be stored into any of the six categories (including
Home) of storage locations.1
Press the button, then select (stored loca-
tions), and then select (memory points).
2
Select (add).
Memory Points (100)
Avoid Area (10)
Previous Dest. (100)
Legacy_B2462BE-A.book Page 78 Wednesday, April 22, 2009 5:32 PM