Page 17 of 36

15
FUEL-FILLER DOOR RELEASE
The fuel-filler door release is located on the floor to the left of t\
he driver’s seat.
To open the fuel-filler door, pull the release up.
To lock, close the fuel-filler door securely.
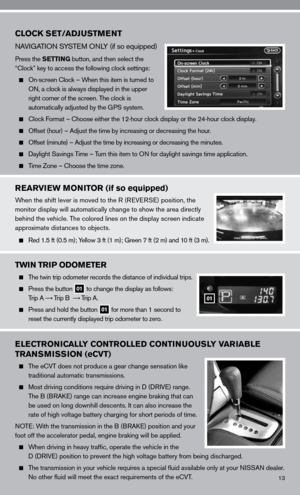
FUEL-FILLER CAP
To tighten, turn the fuel-filler cap clockwise until ratcheting clicks
are heard. if the cap is not fully tightened, the
light may
illuminate.
if the
light illuminates because the fuel cap is loose or missing,
tighten or re-install the cap. The
light should turn off after a
few driving trips.
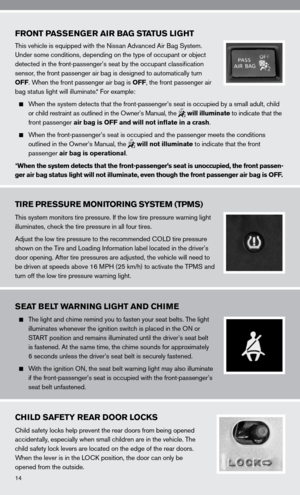
TRUNK LID CANCEL SWITCH
When the cancel switch (located inside the glove box) is O ff, the
trunk lid cannot be opened with the trunk lid opener (located on the
instrument panel), the trunk lid Release/Request Switch (if so
equipped) or the ni SSAn intelligent key
TM button.
it can be opened by using the emergency inside Trunk Release.
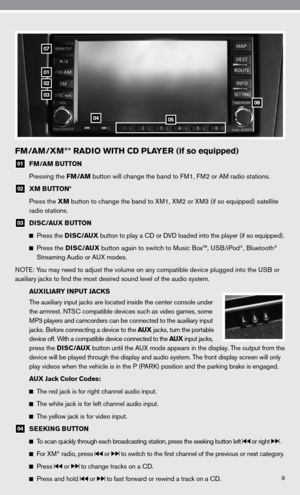
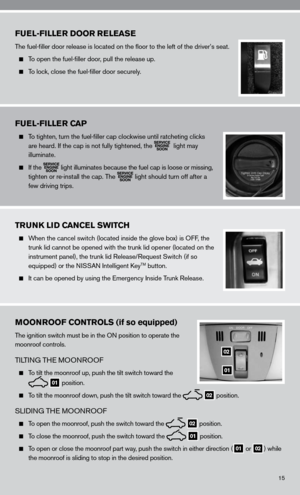
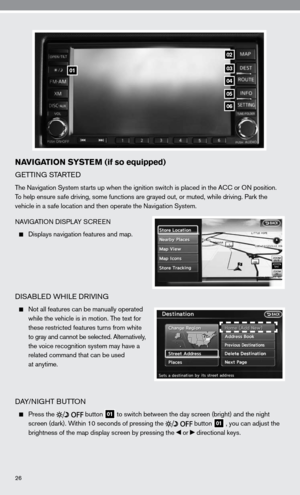
MOONROOF CONTROLS (if so equipped)
The ignition switch must be in the O n position to operate the
moonroof controls.
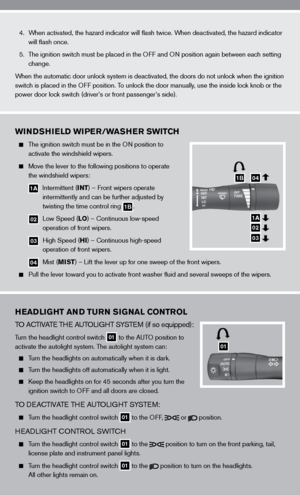
Ti LTin G TH e MOO nROO f
To tilt the moonroof up, push the tilt switch toward the
01 position.
To tilt the moonroof down, push the tilt switch toward the 02 position.
SL
idinG TH e MOOn ROOf
To open the moonroof, push the switch toward the 02 position.
To close the moonroof, push the switch toward the 01 position.
To open or close the moonroof part way, push the switch in either direction (01 or
02) while
the moonroof is sliding to stop in the desired position.
01
02
Page 18 of 36
:
fORWARd And BA ckWARd
Pull the center of the bar up 01 under the front of the
seat and hold it while you slide the seat forward or")
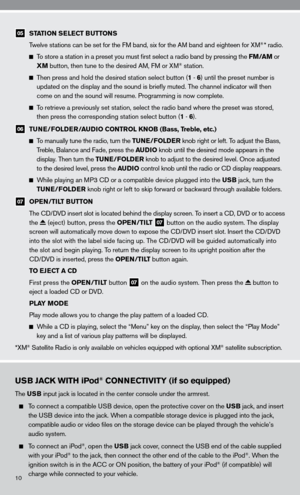
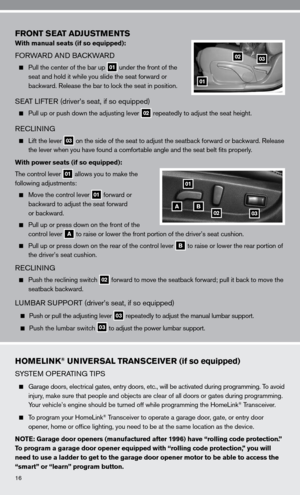
FRONT SEAT ADJUSTMENTS
With manual seats (if so equipped):
fORWARd And BA ckWARd
Pull the center of the bar up 01 under the front of the
seat and hold it while you slide the seat forward or
backward. Release the bar to lock the seat in position.
SeAT LifTe R (driver’s seat, if so equipped)
Pull up or push down the adjusting lever 02 repeatedly to adjust the seat height.
Rec
Linin G
Lift the lever 03 on the side of the seat to adjust the seatback forward or backward. Release
the lever when you have found a comfortable angle and the seat belt fits properly.
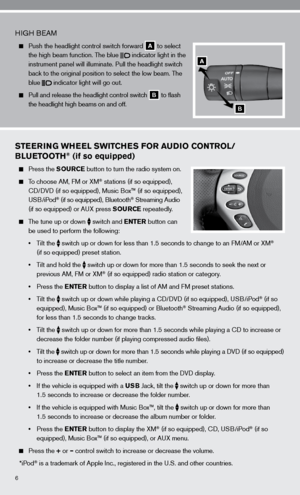
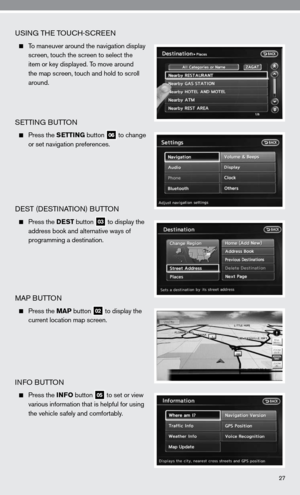
With power seats (if so equipped):
The control lever
01 allows you to make the
following adjustments:
Move the control lever 01 forward or
backward to adjust the seat forward
or backward.
Pull up or press down on the front of the
control lever
A to raise or lower the front portion of the driver’s seat cushion.
Pull up or press down on the rear of the control lever B to raise or lower the rear portion of
the driver’s seat cushion.
Rec Linin G
Push the reclining switch 02 forward to move the seatback forward; pull it back to move the
seatback backward.
LuMBAR S uPPORT (driver’s seat, if so equipped)
Push or pull the adjusting lever 03 repeatedly to adjust the manual lumbar support.
Push the lumbar switch
03 to adjust the power lumbar support.
01
0203
0302BA
01
HOMELINK® UNIVERSAL TRANSCEIVER (if so equipped)
S
ySTe M OP eRATin G TiPS
Garage doors, electrical gates, entry doors, etc., will be activated during programming. To avoid
injury, make sure that people and objects are clear of all doors or gates duri\
ng programming.
y our vehicle’s engine should be turned off while programming the HomeL\
ink
® Transceiver.
To program your HomeLink® Transceiver to operate a garage door, gate, or entry door
opener, home or office lighting, you need to be at the same location as the device.
NOTE: Garage door openers (manufactured after 1996) have “rolling code protection.”
To program a garage door opener equipped with “rolling code protection\
,” you will
need to use a ladder to get to the garage door opener motor to be able to access the
“smart” or “learn” program button.
16
Page 19 of 36

1. To begin, press and hold the two outer
HomeLink® buttons (to clear the
memory)")
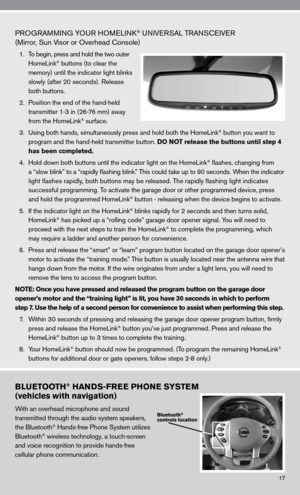
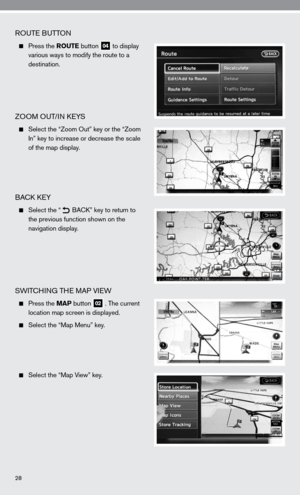
PROGRAMMinG yO uR HOMeL ink® uni Ve RSAL TRA nScei Ve R
(Mirror, Sun Visor or Overhead console)
1. To begin, press and hold the two outer
HomeLink® buttons (to clear the
memory) until the indicator light blinks
slowly (after 20 seconds). Release
both buttons.
2. Position the end of the hand-held
transmitter 1-3 in (26-76 mm) away
from the HomeLink
® surface.
3. using both hands, simultaneously press and hold both the HomeLink
® button you want to
program and the hand-held transmitter button. DO NOT release the buttons until step 4
has been completed.
4. Hold down both buttons until the indicator light on the HomeLink
® flashes, changing from
a “slow blink” to a “rapidly flashing blink.” This could take up to 90 seconds. When the indicator
light flashes rapidly, both buttons may be released. The rapidly flashing light indicates
successful programming. To activate the garage door or other programmed device, press
and hold the programmed HomeLink
® button - releasing when the device begins to activate.
5. if the indicator light on the HomeLink
® blinks rapidly for 2 seconds and then turns solid,
HomeLink® has picked up a “rolling code” garage door opener signal. you will need to
proceed with the next steps to train the HomeLink® to complete the programming, which
may require a ladder and another person for convenience.
6. Press and release the “smart” or “learn” program button loca\
ted on the garage door opener’s
motor to activate the “training mode.” This button is usually located near the antenna wire that
hangs down from the motor. if the wire originates from under a light lens, you will need to
remove the lens to access the program button.
NOTE: Once you have pressed and released the program button on the garage door
opener’s motor and the “training light” is lit, you have 30 seconds in which to perform
step 7. Use the help of a second person for convenience to assist when perform\
ing this step.
7. Within 30 seconds of pressing and releasing the garage door opener program butto\
n, firmly
press and release the HomeLink
® button you’ve just programmed. Press and release the
HomeLink® button up to 3 times to complete the training.
8. y our HomeLink
® button should now be programmed. (To program the remaining HomeLink®
buttons for additional door or gate openers, follow steps 2-8 only.)
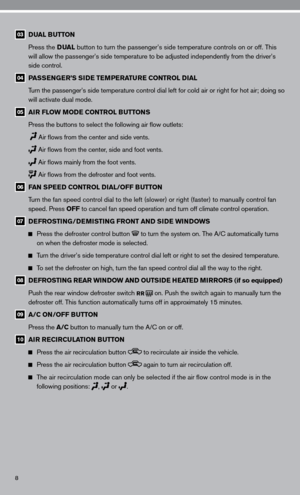
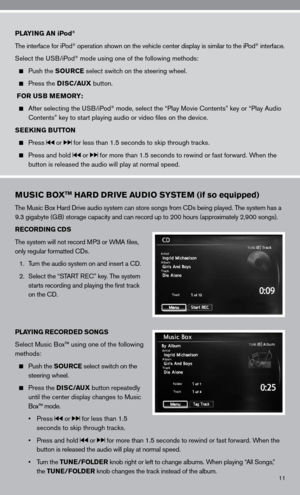
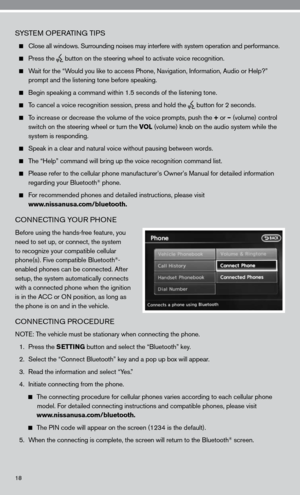
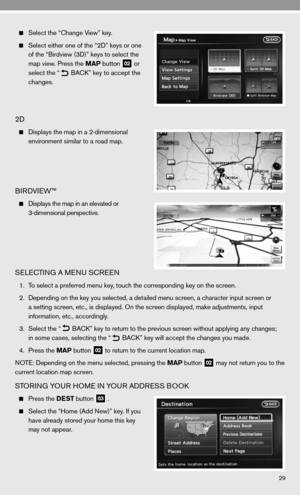
BLUETOOTH® HANDS-FREE PHONE SYSTEM
(vehicles with navigation)
With an overhead microphone and sound
transmitted through the audio system speakers,
the Bluetooth
® Hands-free Phone System utilizes
Bluetooth® wireless technology, a touch-screen
and voice recognition to provide hands-free
cellular phone communication.
17
Page 20 of 36

SySTe M OP eRATin G TiPS
close all windows. Surrounding noises may interfere with system operation\
and performance.
Press the
button on the steering wheel to activate voice recognition.
Wait for the “Would you like to access Phone, navigation, information, Audio or Help?”
prompt and the listening tone before speaking.
Begin speaking a command within 1.5 seconds of the listening tone.
To cancel a voice recognition session, press and hold the
button for 2 seconds.
To increase or decrease the volume of the voice prompts, push the + or – (volume) control
switch on the steering wheel or turn the VOL (volume) knob on the audio system while the
system is responding.
Speak in a clear and natural voice without pausing between words.
The “Help” command will bring up the voice recognition command list\
.
Please refer to the cellular phone manufacturer’s Owner’s Manual for detailed information
regarding your Bluetooth® phone.
for recommended phones and detailed instructions, please visit
www.nissanusa.com/bluetooth.
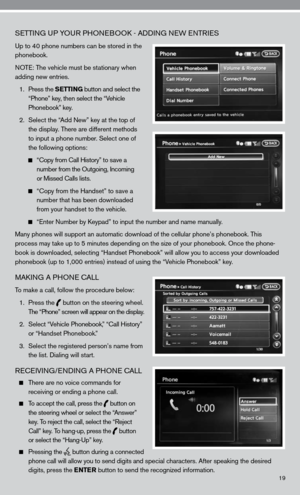
cOnnec TinG yOu R PHOne
Before using the hands-free feature, you
need to set up, or connect, the system
to recognize your compatible cellular
phone(s). five compatible Bluetooth
®-
enabled phones can be connected. After
setup, the system automatically connects
with a connected phone when the ignition
is in the A cc or O n position, as long as
the phone is on and in the vehicle.
cOnnec TinG PROcedu Re
n OTe: The vehicle must be stationary when connecting the phone.
1. Press the SETTING button and select the “Bluetooth” key.
2. Select the “connect Bluetooth” key and a pop up box will appear.
3. Read the information and select “y es.”
4. initiate connecting from the phone.
The connecting procedure for cellular phones varies according to each cellular phone
model. f or detailed connecting instructions and compatible phones, please visit
www.nissanusa.com/bluetooth.
The P in code will appear on the screen (1234 is the default).
5. When the connecting is complete, the screen will return to the Bluetooth
® screen.
18
Page 21 of 36

19
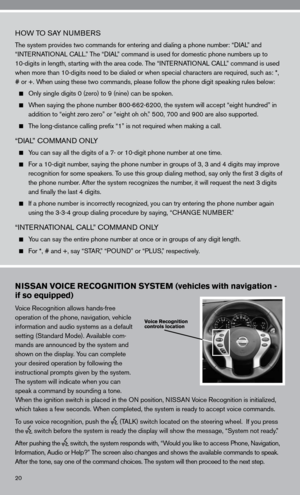
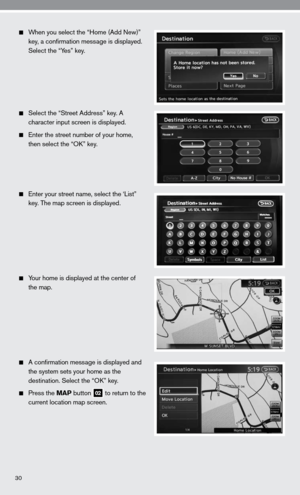
SeTTin G uP yOuR PHO neBOO k - Addin G neW enTR ieS
up to 40 phone numbers can be stored in the
phonebook.
n OT e: The vehicle must be stationary when
adding new entries.
1. Press the SETTING button and select the
“Phone” key, then select the “Vehicle
Phonebook” key.
2. Select the “Add new” key at the top of
the display. There are different methods
to input a phone number. Select one of
the following options:
“c opy from call History” to save a
number from the Outgoing, incoming
or Missed calls lists.
“c opy from the Handset” to save a
number that has been downloaded
from your handset to the vehicle.
“enter number by k eypad” to input the number and name manually.
Many phones will support an automatic download of the cellular phone’\
s phonebook. This
process may take up to 5 minutes depending on the size of your phonebook. Once the ph\
one-
book is downloaded, selecting “Handset Phonebook” will allow you t\
o access your downloaded
phonebook (up to 1,000 entries) instead of using the “Vehicle Phonebook” key.
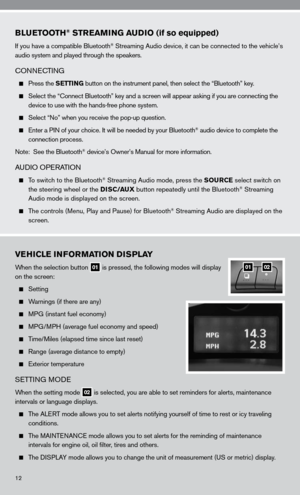
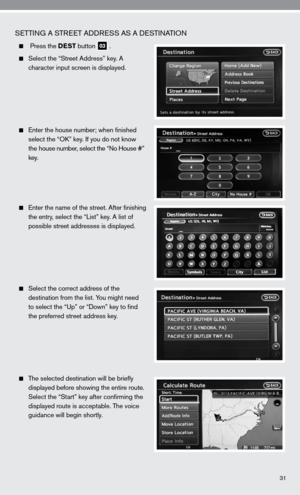
MAkin G A PHO ne cALL
To make a call, follow the procedure below:
1. Press the
button on the steering wheel.
The “Phone” screen will appear on the display.
2. Select “Vehicle Phonebook,” “ call History”
or “Handset Phonebook.”
3. Select the registered person’s name from
the list. dialing will start.
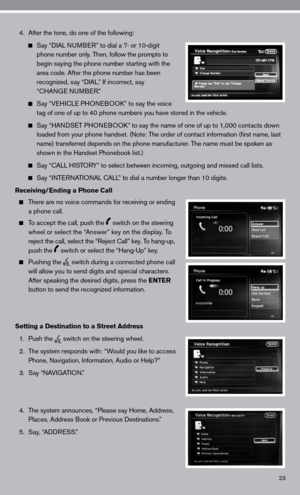
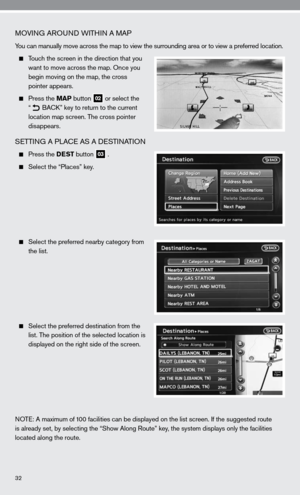
ReceiVin G/endin G A PHO ne cALL
There are no voice commands for
receiving or ending a phone call.
To accept the call, press the
button on
the steering wheel or select the “Answer”
key. To reject the call, select the “Reject
call” key. To hang-up, press the
button
or select the “Hang-up” key.
Pressing the
button during a connected
phone call will allow you to send digits and special characters. After speaking the desired
digits, press the ENTER button to send the recognized information.
Page 22 of 36

20
HOW TO SAy nuMBeRS
The system provides two commands for entering and dialing a phone number: “ diAL” and
“inTe RnATi OnAL c ALL.” The “diAL” command is used for domestic phone numbers up to
10-digits in length, starting with the area code. The “inTe RnATi OnAL c ALL” command is used
when more than 10-digits need to be dialed or when special characters are required, such as: *,
# or +. When using these two commands, please follow the phone digit speaking rul\
es below:
Only single digits 0 (zero) to 9 (nine) can be spoken.
When saying the phone number 800-662-6200, the system will accept “eight hundred” in
addition to “eight zero zero” or “eight oh oh.” 500, 700 and 900 are also supported.
The long-distance calling prefix “1” is not required when making a call.
“diAL” c OMMAnd O nLy
y ou can say all the digits of a 7- or 10-digit phone number at one time.
f or a 10-digit number, saying the phone number in groups of 3, 3 and 4 digits may improve
recognition for some speakers. To use this group dialing method, say only the first 3 digits of
the phone number. After the system recognizes the number, it will request the next 3 digits
and finally the last 4 digits.
i f a phone number is incorrectly recognized, you can try entering the phone number again
using the 3-3-4 group dialing procedure by saying, “c HAnGe nu MBeR.”
“inTe RnATi OnAL c ALL” c OMMAnd O nLy
y ou can say the entire phone number at once or in groups of any digit length.
f or *, # and +, say “STAR, ” “POund” or “PLuS,” respectively.
NISSAN VOICE RECOGNITION SYSTEM (vehicles with navigation -
if so equipped)
Voice Recognition allows hands-free
operation of the phone, navigation, vehicle
information and audio systems as a default
setting (Standard Mode). Available com-
mands are announced by the system and
shown on the display. y ou can complete
your desired operation by following the
instructional prompts given by the system.
The system will indicate when you can
speak a command by sounding a tone.
When the ignition switch is placed in the O n position, niSSAn Voice Recognition is initialized,
which takes a few seconds. When completed, the system is ready to accept voice commands.
To use voice recognition, push the
(TALk) switch located on the steering wheel. if you press
the
switch before the system is ready the display will show the message, “System not ready.”
After pushing the
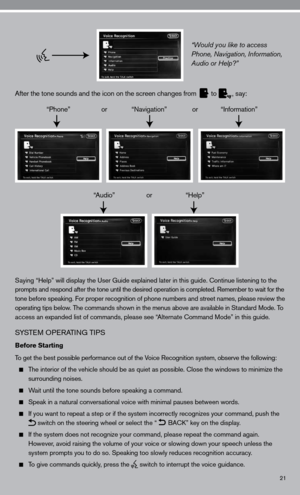
switch, the system responds with, “Would you like to access Phone, navigation,
i nformation, Audio or Help?” The screen also changes and shows the available commands to speak.
After the tone, say one of the command choices. The system will then proceed to the next step.
Page 23 of 36

21
“Would you like to access
Phone, Navigation, Information,
Audio or Help?”
After the tone sounds and the icon on the screen changes from
to
, say:
“Phone” or “navigation” or “information”
“Audio” or “Help”
Saying “Help” will display the user Guide explained later in this guide. continue listening to the
prompts and respond after the tone until the desired operation is completed. Remember to wait for the
tone before speaking. for proper recognition of phone numbers and street names, please review the
operating tips below. The commands shown in the menus above are available in Standard Mode. To
access an expanded list of commands, please see “Alternate command Mode” in this guide.
S ySTe M OP eRATin G TiPS
Before Starting
To get the best possible performance out of the Voice Recognition system, observe the following:
The interior of the vehicle should be as quiet as possible. close the windows to minimize the
surrounding noises.
Wait until the tone sounds before speaking a command.
Speak in a natural conversational voice with minimal pauses between words.
if you want to repeat a step or if the system incorrectly recognizes your command, push the
switch on the steering wheel or select the “
BA
ck” key on the display.
if the system does not recognize your command, please repeat the command \
again.
However, avoid raising the volume of your voice or slowing down your speech unless the
system prompts you to do so. Speaking too slowly reduces recognition acc\
uracy.
To give commands quickly, press the
switch to interrupt the voice guidance.
Page 24 of 36

22
How to speak phone numbers
The system provides two commands for entering and dialing a phone number: “diAL” and
“inTe RnATi OnAL c ALL.” The “diAL” command is used for domestic phone numbers up to
10 digits in length starting with the area code. The “ inTe R nAT iO nAL cALL” command is used
when more than 10 digits need to be dialed or when special characters are required such as *, #,
or +. When using these two commands, please follow the phone digit speaking rul\
es below:
Only single digits 0 (zero) to 9 (nine) can be spoken.
Speak digits at a normal pace. Speaking too slowly reduces recognition a\
ccuracy.
When saying the phone number 800-662-6200, the system will accept “eight zero zero” or
“eight oh oh.” 500, 700 and 900 are also supported.
The long-distance dialing prefix “1” is not required when making a call.
“diAL” c OMMAnd O nLy
you can say all the digits of a 7- or 10-digit phone number at one time.
for a 10-digit number, saying the phone number in groups of 3, 3 and 4 digits may improve
recognition for some speakers. To use this group dialing method, say only the first 3 digits of
the phone number. After the system recognizes the 3 three digits, it will request the next 3
digits and finally the last 4 digits.
if a phone number is incorrectly recognized, you can try entering the pho\
ne number again
using the 3-3-4 group dialing procedure by saying, “c HAnGe nu MBeR.”
“inTe RnATi OnAL c ALL” c OMMAnd O nLy
you can say the entire phone number at once or in groups of any digit length.
for *, # and +, say “STAR,” “PO und” or “PLuS,” respectively.
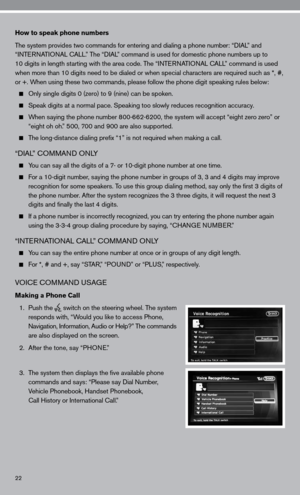
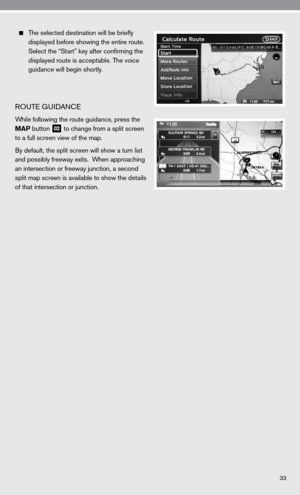
VOice c OMMAnd u SAGe
Making a Phone Call
1. Push the
switch on the steering wheel. The system
responds with, “Would you like to access Phone,
n avigation, information, Audio or Help?” The commands
are also displayed on the screen.
2. After the tone, say “PHO ne.”
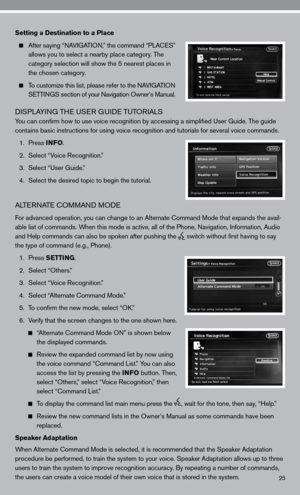
3. The system then displays the five available phone
commands and says: “Please say dial number,
Vehicle Phonebook, Handset Phonebook,
call History or international call.”