Page 603 of 658
7-72 Vehicle care and maintenance
7
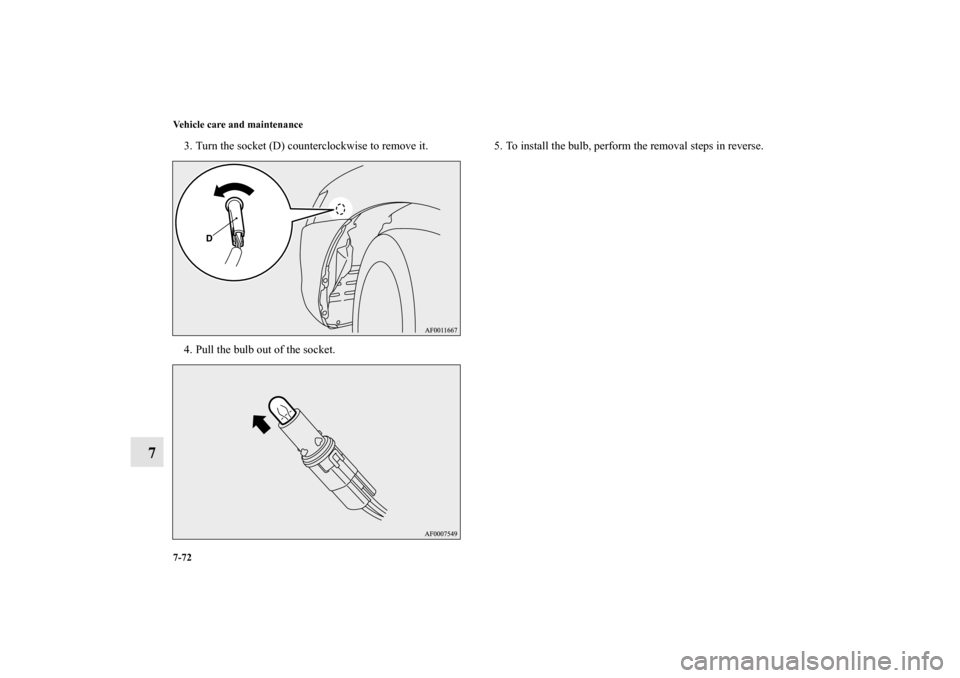
3. Turn the socket (D) counterclockwise to remove it.
4. Pull the bulb out of the socket.5. To install the bulb, perform the removal steps in reverse.
BK0103001US.book 72 ページ 2009年8月20日 木曜日 午前10時45分
Page 605 of 658
7-74 Vehicle care and maintenance
7
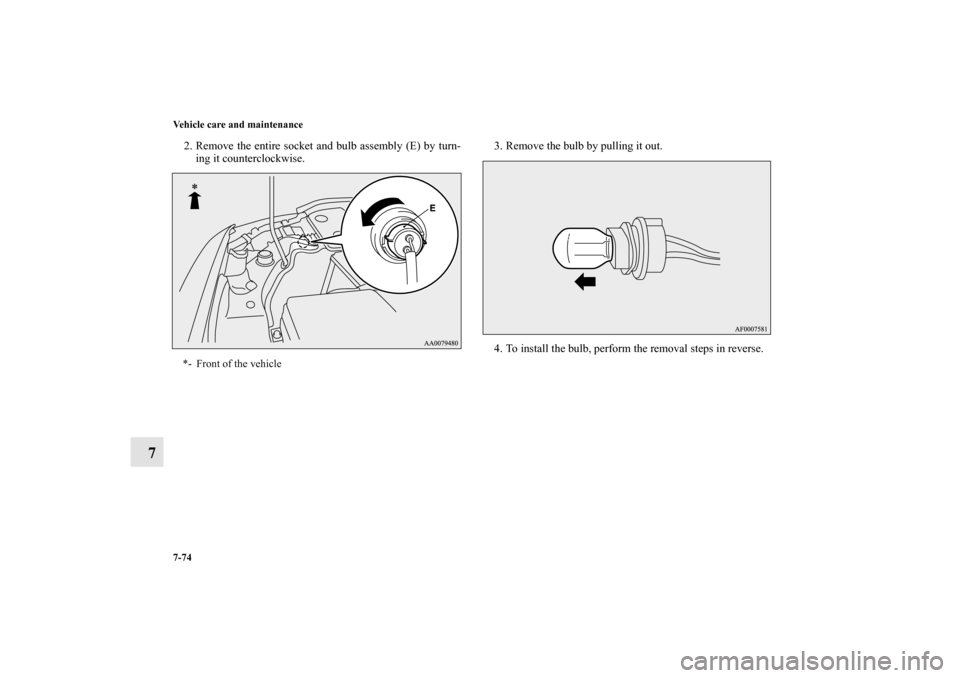
2. Remove the entire socket and bulb assembly (E) by turn-
ing it counterclockwise.3. Remove the bulb by pulling it out.
4. To install the bulb, perform the removal steps in reverse.*- Front of the vehicle
BK0103001US.book 74 ページ 2009年8月20日 木曜日 午前10時45分
Page 608 of 658
Vehicle care and maintenance
7-77
7
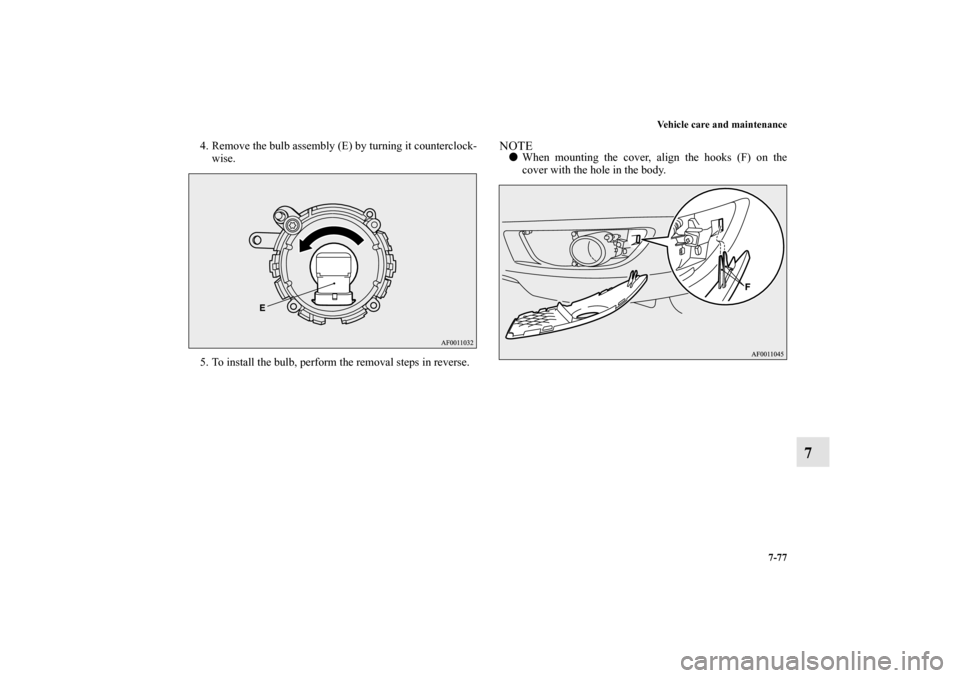
4. Remove the bulb assembly (E) by turning it counterclock-
wise.
5. To install the bulb, perform the removal steps in reverse.
NOTE�
When mounting the cover, align the hooks (F) on the
cover with the hole in the body.
BK0103001US.book 77 ページ 2009年8月20日 木曜日 午前10時45分
Page 612 of 658
Vehicle care and maintenance
7-81
7
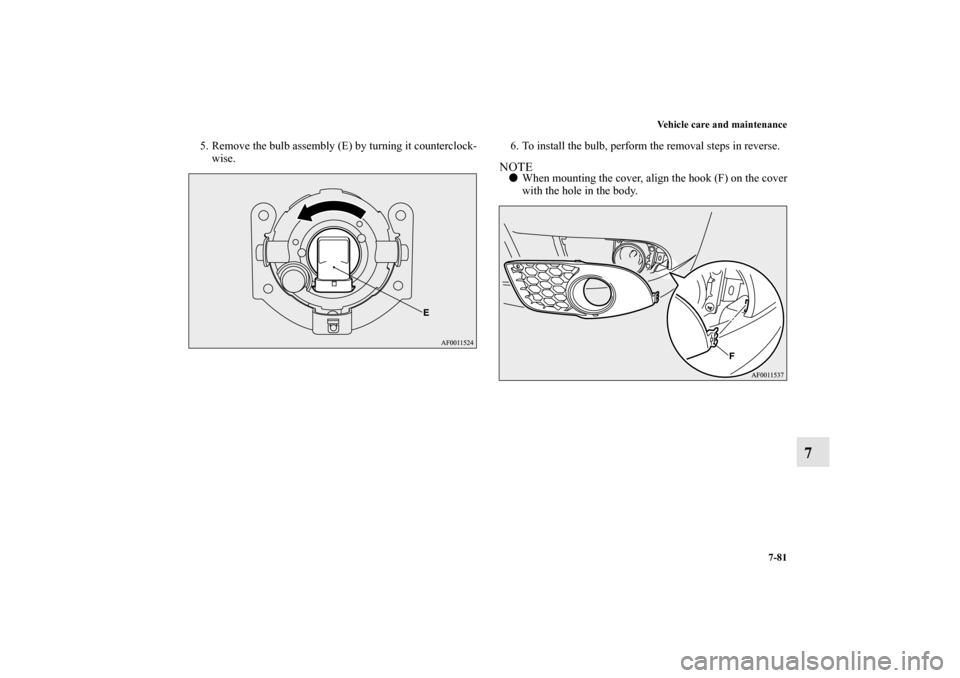
5. Remove the bulb assembly (E) by turning it counterclock-
wise.6. To install the bulb, perform the removal steps in reverse.
NOTE�
When mounting the cover, align the hook (F) on the cover
with the hole in the body.
BK0103001US.book 81 ページ 2009年8月20日 木曜日 午前10時45分
Page 614 of 658
Vehicle care and maintenance
7-83
7
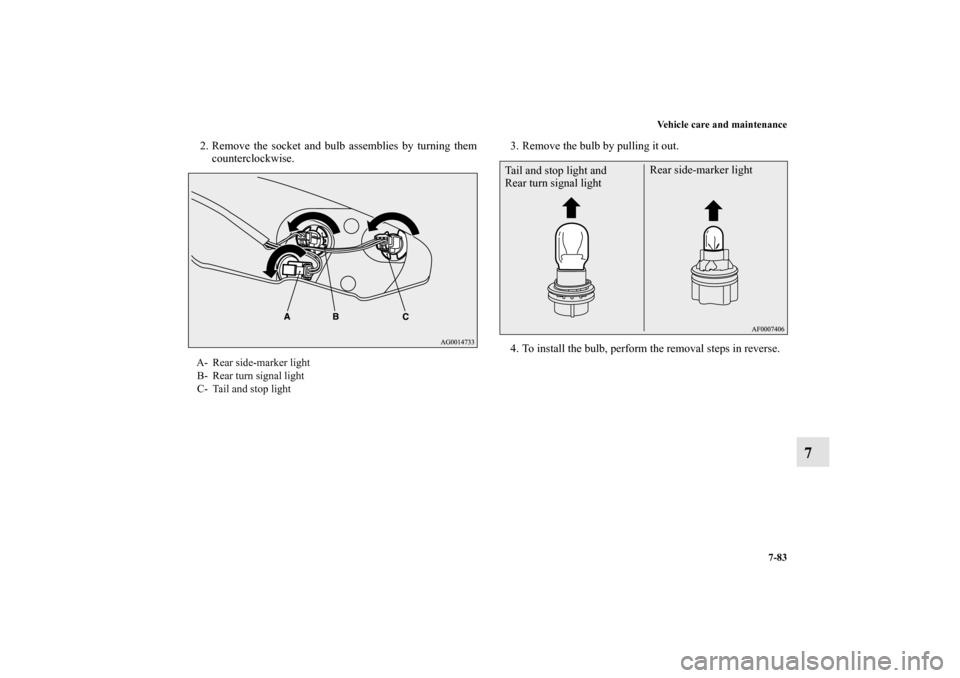
2. Remove the socket and bulb assemblies by turning them
counterclockwise.3. Remove the bulb by pulling it out.
4. To install the bulb, perform the removal steps in reverse.A- Rear side-marker light
B- Rear turn signal light
C- Tail and stop light
Tail and stop light and
Rear turn signal lightRear side-marker light
BK0103001US.book 83 ページ 2009年8月20日 木曜日 午前10時45分
Page 616 of 658
Vehicle care and maintenance
7-85
7
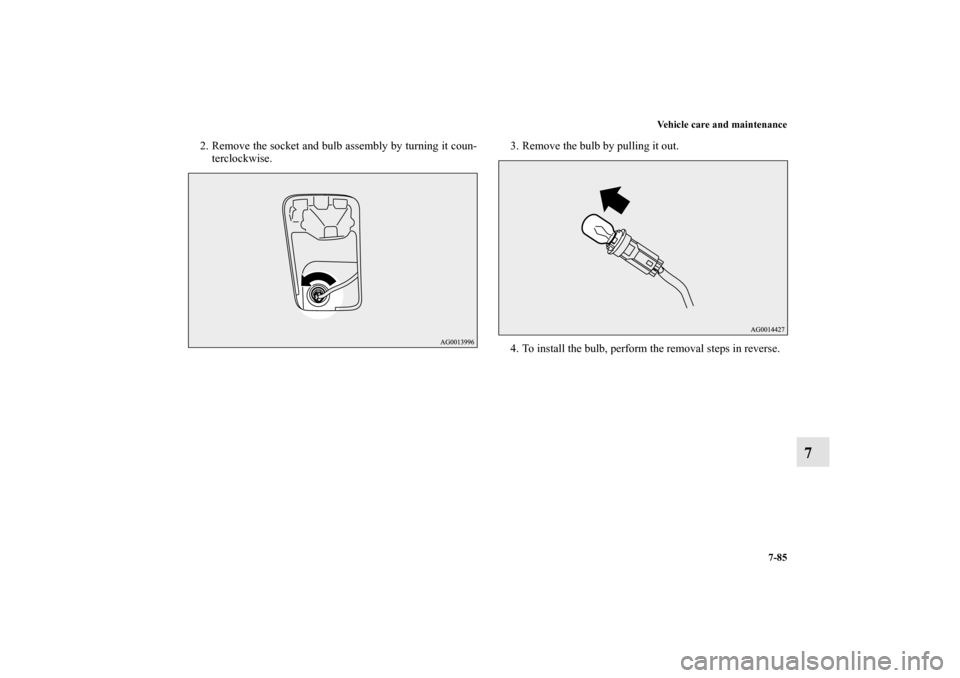
2. Remove the socket and bulb assembly by turning it coun-
terclockwise.3. Remove the bulb by pulling it out.
4. To install the bulb, perform the removal steps in reverse.
BK0103001US.book 85 ページ 2009年8月20日 木曜日 午前10時45分
Page 624 of 658
Vehicle care and maintenance
7-93
7 Cleaning the inside of your vehicle
N00945200109
After washing the inside of your vehicle with any cleaner, wipe
it dry in a shady, well ventilated area. NOTE�
Always read the instructions on the cleaner label.
Plastic, vinyl leather, fabric and flocked parts
N00945300139
1. Lightly wipe these off with a soft cloth soaked in a 3 %
solution of gentle soap and water.
2. Dip cloth in fresh water and wring out well. Using this
cloth, wipe off the detergent thoroughly.NOTE�
Do not use cleaners, conditioners, or protectants contain-
ing silicone or wax.
Such products may cause annoying reflections and
obscure vision.
Upholstery
N00945500131
1. To maintain the value of your new vehicle, maintain the
upholstery carefully and keep the interior clean.
Use a vacuum cleaner and brush to clean the seats. If
stained, vinyl and synthetic leather should be cleaned with
an appropriate cleaner. Cloth fabrics can be cleaned with
either upholstery cleaner or a 3 % solution of gentle soap
in lukewarm water.
2. Clean the carpeting with a vacuum cleaner and remove
any stains with carpet cleaner. Oil and grease can be
removed by lightly dabbing with a clean white cloth and
spot remover. NOTE�
If fuzzing is difficult to remove from the seat upholstery,
draw a suitable defuzzing brush over the surface in one
direction.
CAUTION
!�
Do not use organic substances (solvents, benzine,
kerosene, alcohol, gasoline, etc.) or alkaline or acidic
solutions.
These chemicals can cause discoloring, staining or
cracking of the surface.
If you use cleaners or polishing agents, make sure
their ingredients do not include the substances men-
tioned above.
BK0103001US.book 93 ページ 2009年8月20日 木曜日 午前10時45分
Page 641 of 658
9-4 Specifications
9
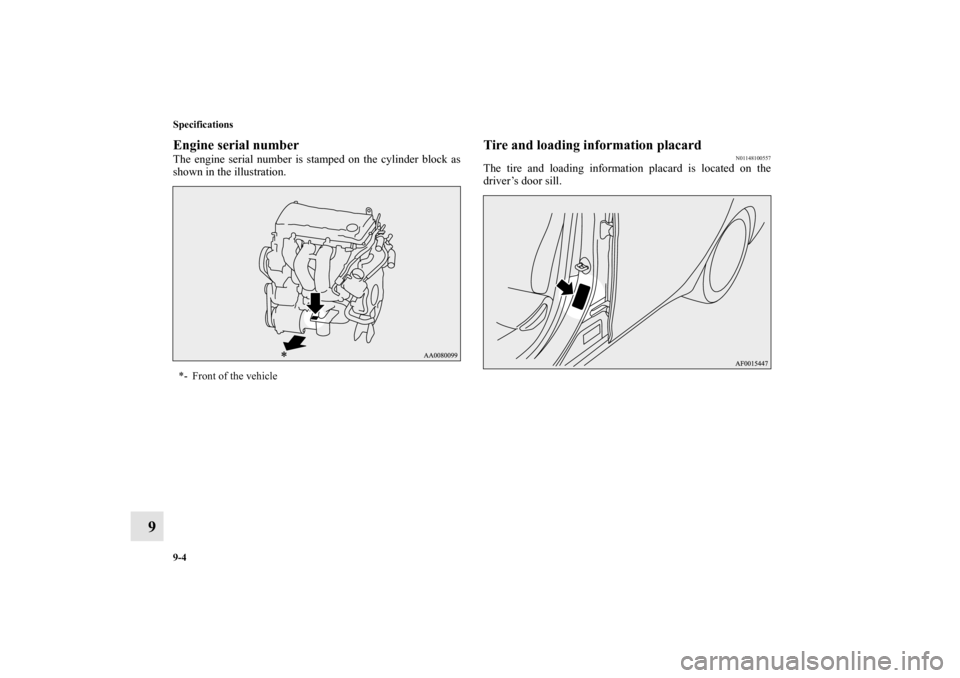
Engine serial numberThe engine serial number is stamped on the cylinder block as
shown in the illustration.
Tire and loading information placard
N01148100557
The tire and loading information placard is located on the
driver’s door sill.
*- Front of the vehicleBK0103001US.book 4 ページ 2009年8月20日 木曜日 午前10時45分