Page 137 of 161
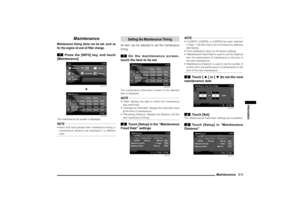
Maintenance 9-10 6 Enter the numbers to set the next
maintenance distance
eng_a223
NOTE Touch [Back Space] to delete one character at a
time. 7 Touch [Set]
The “Maintenance Distance” settings are completed. 8 Touch [Back]
eng_a224
The maintenance timing settings are completed.
Update
Updating the maintenance information
1 Touch [Update] for the item to be
updated in the maintenance screen
eng_a220
2 Touch [Yes]
eng_a225
Clear
Deleting the maintenance information
1
On the maintenance screen, touch
the item to delete the information
eng_a220
2 Touch [Clear]
eng_a221
3 Touch [Yes]
eng_a226
Page 138 of 161
Air Conditioner 9-11
Information
Air Conditioner
The air conditioner status can be viewed.
1 Press the [INFO] key, and touch
[Air Conditioner]
eng_a140
eng_a203
1) Blower speed indicator
Displayed in 9 levels.
2) Air direction/Outside air intake indicator
3) Auto mode indicator
Displayed when the AUTO mode is operating.
4) Rear window defogger indicatior
Displayed when the rear window defogger is
operating.
5) Air conditioner indicator
Displayed when the air conditioner is operating.
6) Front defroster indicator
Displayed when the windshield defogger is
operating.NOTE When air conditioning operations are performed in the navigation screen display, the display shown below
will appear.
eng_a204
A short time after air conditioner operations have
been completed, the screen will return to the
navigation display.
1)
2)3) 4) 5) 6)
Page 139 of 161
Mobile Phone 9-12
Mobile Phone
Only for cars equipped with hands-free Bluetooth
®
cellular phone interface systemIt is possible to make and receive phone calls.
For details, refer to the section titled “Features
and controls” in the vehicle owner’s manual.
Making Phone Calls
1 Press the [INFO] key, and touch
[Mobile Phone]
eng_a140
eng_a227
2 Enter the telephone number
eng_a228
NOTE Touch [Redial] to dial again the number previously
dialed.
Touch [Clear] to delete one character at a time. 3 Touch [Dial]
Receiving Phone Calls
1 When the incoming call screen is
displayed, press the [OFF HOOK] key
eng_a229
eng_a230
Phone plate
The On phone screen is displayed.
NOTE
will be displayed on the current location screen
when a “hands-free Bluetooth
® tcellular phone
interface system” is connected.
Not displayed in “Turn List” or “Arrow Guide” mode,
or when an intersection information map is shown.
Touch
to display the phone plate.
Page 140 of 161

Other Info 9-13
Information
Other Info
System information and information about the
current location can be viewed.
Support Info
System information for this navigation
system can be viewed.
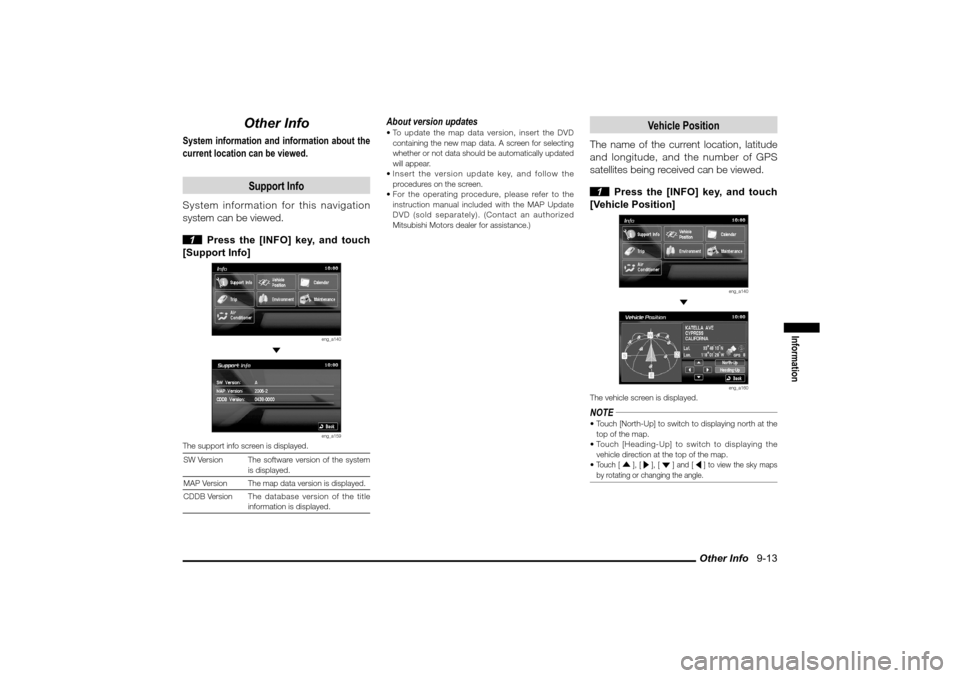
1 Press the [INFO] key, and touch
[Support Info]
eng_a140
eng_a159
The support info screen is displayed.
SW Version The software version of the system
is displayed.
MAP Version
The map data version is displayed.
CDDB VersionThe database version of the title
information is displayed.
About version updates To update the map data version, insert the DVD
containing the new map data. A screen for selecting
whether or not data should be automatically updated
will appear.
Insert the version update key, and follow the
procedures on the screen.
For the operating procedure, please refer to the
instruction manual included with the MAP Update
DVD (sold separately). (Contact an authorized
Mitsubishi Motors dealer for assistance.)
Vehicle Position
The name of the current location, latitude
and longitude, and the number of GPS
satellites being received can be viewed.
1 Press the [INFO] key, and touch
[Vehicle Position]
eng_a140
eng_a160
The vehicle screen is displayed.NOTE Touch [North-Up] to switch to displaying north at the
top of the map.
Touch [Heading-Up] to switch to displaying the
vehicle direction at the top of the map.
Touch [ ], [ ], [ ] and [ ] to view the sky maps
by rotating or changing the angle.
Page 141 of 161
Other Info 9-14 Vehicle Position Screen
eng_a160
a) GPS satellite position diagram
Shows the direction of vehicle travel and the
position of the GPS satellite receivers.
b) Longitude and latitude of current location
c) Number of receiving GPS satellites
d) GPS position measuring status
Shown when valid signals can be
received from 4 or more GPS satellites.
(The position is calculated in 3D: Latitude,
longitude, and altitude.)Shown when valid signals are received
from only 3 or fewer GPS satellites. (The
position is calculated in 2D: Latitude and
longitude.)
No icon Valid signals cannot be received from
any GPS satellite and position cannot be
calculated.
e) Name of current location
a)
b)
c) d)e)
Page 142 of 161
![MITSUBISHI LANCER 2010 8.G MMCS Manual Adjusting the Screen 10-1
Settings
Setting
Adjusting the Screen
Adjustments related to the screen display.
Display Off
Turns OFF the monitor display.
1 Press the [SET] key, and touch
[Display Off MITSUBISHI LANCER 2010 8.G MMCS Manual Adjusting the Screen 10-1
Settings
Setting
Adjusting the Screen
Adjustments related to the screen display.
Display Off
Turns OFF the monitor display.
1 Press the [SET] key, and touch
[Display Off](/manual-img/19/7447/w960_7447-141.png)
Adjusting the Screen 10-1
Settings
Setting
Adjusting the Screen
Adjustments related to the screen display.
Display Off
Turns OFF the monitor display.
1 Press the [SET] key, and touch
[Display Off]
eng_a018-2
eng_a161
The monitor display is turned OFF.NOTE At this time, although the navigation voice guidance
will be switched off, the AV audio will remain on. To turn ON the display again, either touch the
screen, or press any key.
Picture Control
Adjustments related to the picture quality.
1 Press the [SET] key, and touch
[Picture Control]
eng_a018-2
2
Touch [ - ] or [ + ] for “Brightness”,
“Contrast”, or “Black Level” to adjust
eng_a162
NOTE “Brightness” can be adjusted with headlights ON and
OFF separately. If adjusting the
picture quality
while a DVD image
is displayed,
“Tint” and “Color
Intensity” can also
be adjusted.
eng_a231
3 Touch [Back]
The picture quality adjustment is completed.
Screen Size
Switches between Screen Size and other
displays for DVD image etc..
1 Press the [SET] key, and touch
[Screen Size]
eng_a163-2
2
Touch one of the following buttons
eng_a232
[Normal] Displays the screen in normal 4:3 aspect
ratio.
[Full] Extends the display evenly both left and
right in wide mode.
[Wide]Extends the left and right parts only of
the display while leaving the center as is
in wide mode.
[Zoom] Magni es the image displayed using 4:3
aspect ratio. (I.e., the top and bottom
are out of frame.) 3 Touch [Back]
Screen Size switching is completed.
Page 143 of 161
Sound Control 10-2
Sound Control
Adjusts the sound.If Premium Sound System is not connected 1 Press the [SET] key, and touch
[Sound Control]
eng_a018-2
2
Touch each item to adjust the sound
eng_a164
NOTE Touch [Speed Compensated Volume &EQ off] to turn
ON sound quality and volume adjustments according
to vehicle speed. 3 Touch [Back]
The sound adjustment is completed.
If Premium Sound System is connected 1 Press the [SET] key, and touch
[Sound Control]
eng_a018-2
eng_a233
The sound control menu screen is displayed.
Audio Control
1 Touch [Audio Control] in the
Sound Control menu screen
2 Touch each item to adjust the
sound
eng_a234
NOTE PUNCH LEVEL represents subwoofer gain.
Touch [Speed Compensated Volume & EQ off] to
turn ON sound quality and volume adjustments
according to vehicle speed. 3 Touch [Back]
The sound adjustment is completed.
Page 144 of 161
![MITSUBISHI LANCER 2010 8.G MMCS Manual Sound Control 10-3
Settings
Music TypeThe music type can be selected. 1 Touch [Music Type] in the Sound
Control menu screen
2 Touch one of the music types
eng_a235
Acoustic
characteristic
Descr MITSUBISHI LANCER 2010 8.G MMCS Manual Sound Control 10-3
Settings
Music TypeThe music type can be selected. 1 Touch [Music Type] in the Sound
Control menu screen
2 Touch one of the music types
eng_a235
Acoustic
characteristic
Descr](/manual-img/19/7447/w960_7447-143.png)
Sound Control 10-3
Settings
Music TypeThe music type can be selected. 1 Touch [Music Type] in the Sound
Control menu screen
2 Touch one of the music types
eng_a235
Acoustic
characteristic
Description
NORMAL
Sounds good for all types of music.
POP
Tight bass and high frequency sound.
ROCK
Tuned for hard rock and heavy metal
with powerful drums, guitars, and
vocals.
HIP-HOP
Deep bass punch and well-defined
vocals.
COUNTRY Enhanced main vocals.
3 Touch [Back]
The sound adjustment is completed.
Sound FieldThe Sound Field can be selected. 1 Touch [Sound Field] in the Sound
Control menu screen
2 Touch one of the Sound Field
eng_a236
Sound eld type
Description
NORMAL
Allows the listeners to enjoy an
image of a sound stage where music
is performed so that the instrumental
sound surrounds them, while
keeping the vocal-ist in front.
STAGE
Places the image of a sound stage in
front of the driver with the vocalist in
the center (for driver only).
LIVEFront seat occupants are sur-
rounded by sound from front and
rear speakers.
HALL
Places the image of a sound stage
in front of the driver with the vocalist
in the center (for driver only). Sound
reflections are added to the rear
spekaers to simulate the experience
of being at a concert hall.Best with
classical or vocalist music.
3 Touch [Back]
The sound adjustment is completed.