2010 MERCEDES-BENZ SLS COUPE stop start
[x] Cancel search: stop startPage 267 of 361
Deleting the remote control memory
X
Selec tkey position 2with the Start/Stop
button (Y page 202).
X Press and hold transmitter buttons 0002
and 0014for approximately 20 seconds until
indicator lamp 0001flashes rapidly.
The memory is cleared.
i You should clear the remot econtrol mem-
ory before selling the vehicle. Charge maintenance socket*
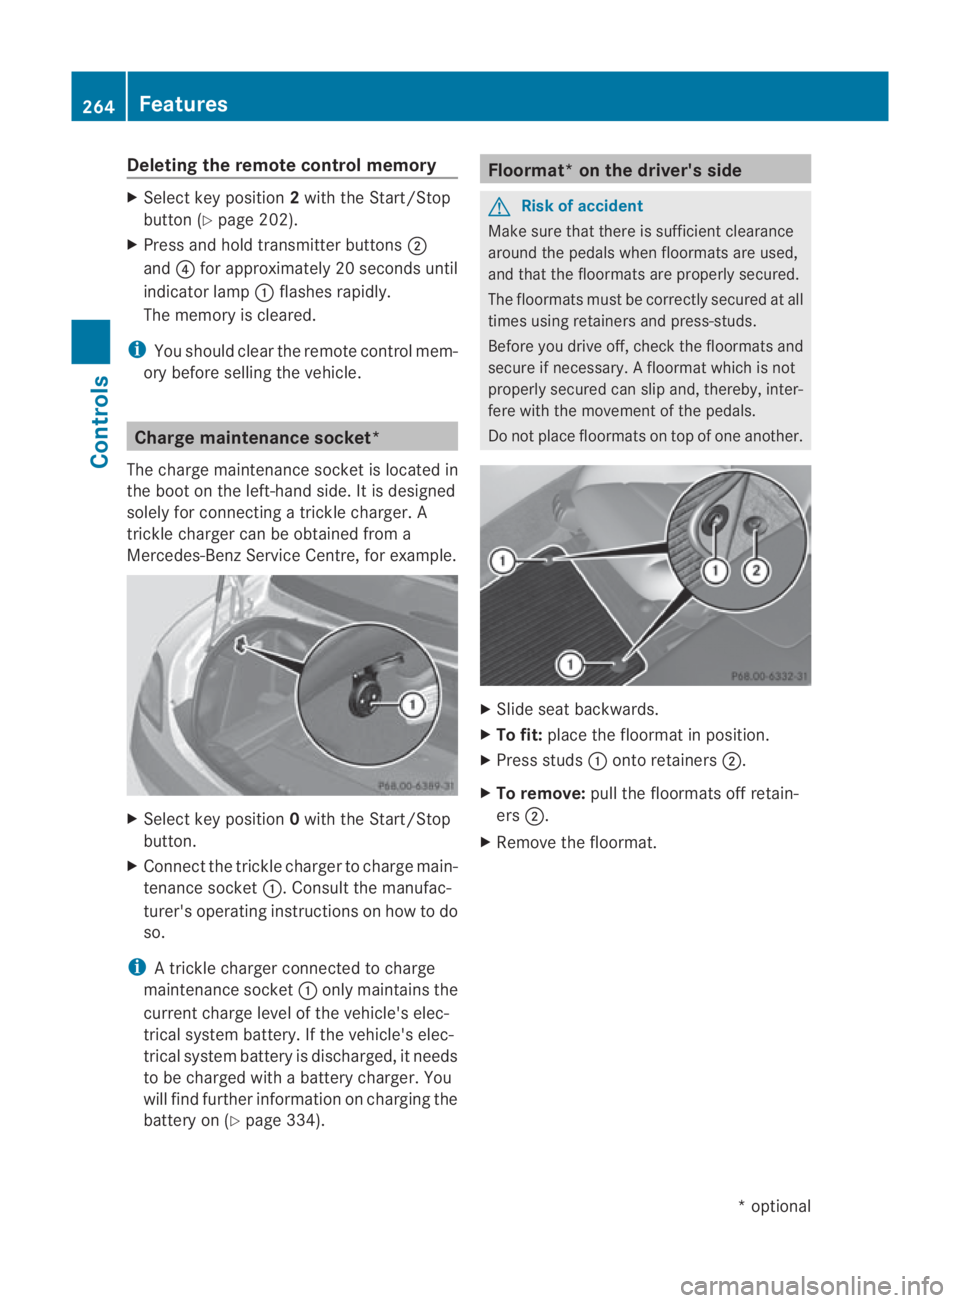
The charge maintenance socket is located in
the boot on the left-hand side. It is designed
solely for connecting a trickle charger. A
trickle charger can be obtained from a
Mercedes-Benz Service Centre, for example. X
Select key position 0with the Start/Stop
button.
X Connect the trickle charger to charge main-
tenance socket 0001. Consult the manufac-
turer's operating instructions on how to do
so.
i A trickle charger connected to charge
maintenance socket 0001only maintains the
current charge level of the vehicle's elec-
trical system battery. If the vehicle's elec-
trical system battery is discharged, it needs
to be charged with a battery charger. You
will find further information on charging the
battery on (Y page 334). Floormat* on the driver's side
G
Risk of accident
Make sure that there is sufficient clearance
around the pedals when floormats are used,
and that the floormats are properly secured.
The floormats must be correctly secured at all
times using retainers and press-studs.
Before you drive off, check the floormats and
secure if necessary. Afloormat which is not
properly secured can slip and, thereby, inter-
fere with the movemen tofthe pedals.
Do not place floormats on top of one another. X
Slide seat backwards.
X To fit: place the floormat in position.
X Press studs 0001onto retainers 0002.
X To remove: pull the floormats off retain-
ers 0002.
X Remove the floormat. 264
FeaturesControls
*o
ptional
BA 197 ECE RE 2010/6a; 1; 2, en-GB
sabbaeu
Version: 3.0.3.6 2010-05-07T14:19:43+02:00 - Seite 264
Page 272 of 361
i
If the bonnet can be raised slightly, it is
not properly engaged. Open it again and
close it with a little more force. Engine oil
Depending on driving style, the vehicle con-
sumes a maximum of 0.8 l oil per 1000 km.
The oil consumption may be highert han this
when the vehicle is new or if you frequently
drive at high engine speeds.
Checking the engine oil level X
To check the engine oil, move the vehicle
to level ground. Switch off the engine at
normal operating temperature after run-
ning it in neutral for 30 seconds. X
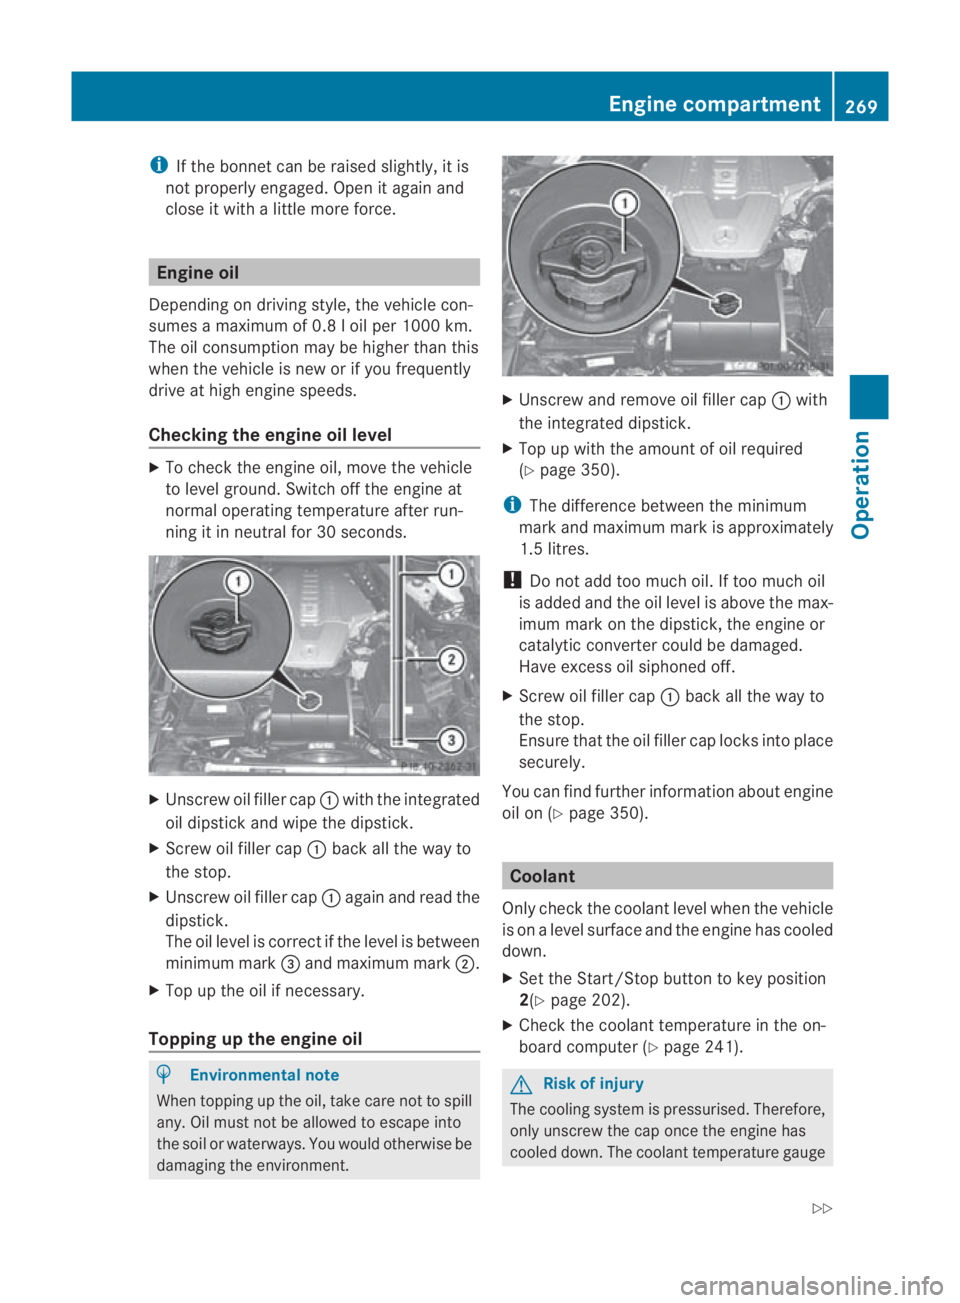
Unscrew oil filler cap 0001with the integrated
oil dipstick and wipe the dipstick.
X Screw oil filler cap 0001back all the way to
the stop.
X Unscrew oil filler cap 0001again and read the
dipstick.
The oil level is correct if the level is between
minimum mark 0015and maximum mark 0002.
X Top up the oil if necessary.
Topping up the engine oil H
Environmental note
When topping up the oil, take care not to spill
any. Oil must not be allowed to escape into
the soil or waterways. You would otherwise be
damaging the environment. X
Unscrew and remove oil filler cap 0001with
the integrated dipstick.
X Top up with the amount of oil required
(Y page 350).
i The difference between the minimum
mark and maximum mark is approximately
1.5 litres.
! Do not add too much oil. If too much oil
is added and the oil level is above the max-
imum mark on the dipstick, the engine or
catalytic converter could be damaged.
Have excess oil siphoned off.
X Screw oil filler cap 0001back all the way to
the stop.
Ensure that the oil filler cap locks into place
securely.
You can find further information about engine
oil on (Y page 350). Coolant
Only check the coolant level when the vehicle
is on a level surface and the engine has cooled
down.
X Set the Start/Stop button to key position
2(Y page 202).
X Check the coolant temperature in the on-
board computer (Y page 241). G
Risk of injury
The cooling system is pressurised. Therefore,
only unscrew the cap once the engine has
cooled down. The coolant temperature gauge Engine compartment
269Operation
BA 197 ECE RE 2010/6a; 1; 2, en-GB
sabbaeu Version: 3.0.3.6 2010-05-07T14:19:43+02:00 - Seite 269 Z
Page 276 of 361
G
Risk of accident
Do not fit anything else to the tyre valve other
than the standard valve cap .Inparticular, ret-
rofitted tyre pressure monitors which are
screwed on to the valve may overload it and
cause it to fail. Due to their design, the valve
is kept open continuously, which may lead to
air loss. G
Ris
kofa ccident
Should the tyre pressure drop repeatedly:
R check the tyre for foreign bodies.
R check whether the wheel is losing air or the
valve is leaking.
R make sure that only a valve cap approved
by Mercedes-Ben zhas been fitted on the
tyre valve.
Tyre pressures that are to olow have a nega-
tive effect on vehicle safety, which could lead
to your causing an accident.
If possible, you should only correc ttyre pres-
sures when the tyres are cold. Depending on
the ambien ttemperature, the speed you are
driving at and the load on the tyres, the tyre
temperature and thus the tyre pressure may
change by approximately 0.1 bar per 10 †.
Take this into account when checking the
pressure of warm tyres and only correct it if
it is too low for the current operating condi-
tions.
Driving with tyre pressure that is too high or
too low can:
R shorten the service life of the tyres
R cause increased tyre damage
R have a negative effec tonhandling charac-
teristics and thus the driving safety (e.g. by
causing aquaplaning) H
Environmental note
Chec kthe tyre pressure regularly, at least
every 14 days. Tyre pressure monitor
If a tyre pressure monitor system is fitted, the
vehicle's wheels have sensors fitted that
monitor the tyre pressures in all four tyres.
The tyre pressure monitor warns you when
the pressure drops in one or more of the
tyres. The tyre pressure monitor only func-
tions if the correct wheel electronics units are
fitted to all wheels. G
Risk of accident
The tyre pressure monitor does not warn you
of an incorrectly set tyre pressure. The table
on the inside of the fuel filler flap will help you
decide whether the tyre pressures should be
corrected.
The tyre pressure monitor is not able to warn
you of a sudden loss of pressure, e.g. if the
tyre is penetrated by a foreign object. In the
event of a sudden loss of pressure, bring the
vehicle to a halt by braking carefully. Do not
make any sudden steering movements when
doing so.
i The operation of the tyre pressure moni-
tor can be affected by interference from
radio transmitting equipment (e.g. radio
headphones, two-way radios) that may be
being operated in or near the vehicle.
Checking tyre pressure electronically X
Select key position 2with the Start/Stop
button (Y page 202).
X Press the 0008or000E button to select the
Service menu.
X Press the 000For000C button to select
Tyre pressure.
X Press the 000Abutton.
The current tyre pressure for each wheel will
be displayed in the multifunction display.
If the vehicle has been parked for longer than
20 minutes or if you have not driven faster
than 25 km/h since starting the vehicle, the
following message appears: Tyres and wheels
273Operation
BA 197 ECE RE 2010/6a; 1; 2, en-GB
sabbaeu Version: 3.0.3.6 2010-05-07T14:19:43+02:00 - Seite 273 Z
Page 277 of 361
Tyre pressures will be displayed
after a few minutes of driving
i
The tyre pressure values indicated by the
on-board computer may differ from those
measured at a filling station with a pressure
gauge.T he tyre pressures shown by the on-
board computer refer to those measured at
sea level. At high altitudes, the tyre pres-
sure values indicated by a pressure gauge
are higher than those shown by the on-
board computer. In this case, do not reduce
the tyre pressures.
i After a teach-in period, the tyre pressure
monitor automatically recognises new
wheels or new sensors. As long as a clear
allocation of the tyre pressure values to the
individual wheels is not possible, the Tyre
press. monitor active display message
is shown instead of the tyre pressure dis-
play.T he tyre pressures are already being
monitored.
Restarting the tyre pressure monitor When you restart the tyre pressure monitor,
all existing warning messages are deleted and
the warning lamps go out. The monitor uses
the currently set tyre pressures as the speci-
fied values for monitoring.
In most cases, the tyre pressure monitor will
automatically detect the new reference val-
ues, e.g. if you have:
R changed the tyre pressure
R changed the wheels or tyres
R fitted new wheels or tyres
i For an overview of the menus, see
(Y page 232).
If you wish to define the new reference values
manually:
X Use the table on the inside of the fuel filler
flap to ensure that the tyre pressure is set
correctly in all four tyres for the current
operating conditions. Also observe the notes in the section on
tyre pressures (Y
page 272).
X Select key position 2with the Start/Stop
button.
X Press the 0008or000E button to select the
Service menu.
X Press the 000For000C button to select
Tyre pressure.
X Press the 000Abutton.
The current pressure in each individual tyre
is displayed, or the following message
appears:
Tyre pressures will be displayed
after a few minutes of driving
X Press the 000Cbutton.
The following message appears in the mul-
tifunction display:
Use current pressures as new ref‐
erence values
X Press the 000Abutton.
The following message appears in the mul-
tifunction display:
Tyre press. monitor restarted
After a few minutes of driving, the current
pressures are adopted as the new monitor-
ing values.
Cancelling the restart X
Press the 0001button.
or
X Press the 000Fbutton to leave the menu.
Other messages in the multifunction
display If the following message appears in the mul-
tifunction display:
Please correct tyre pressure
X
Check the tyre pressure on all four wheels
and correct it if necessary.
i If the wheel positions on the vehicle are
interchanged, the tyre pressures may be
displayed for the wrong positions for a 274
Tyres and wheelsOperation
BA 197 ECE RE 2010/6a; 1; 2, en-GB
sabbaeu
Version: 3.0.3.6 2010-05-07T14:19:43+02:00 - Seite 274
Page 279 of 361
obtained at a qualified specialist workshop,
e.g. from a Mercedes-Benz Service Centre.
Under these circumstances, you should also
restrict the maximum speed of the vehicle
using permanent SPEED-
TRONIC 19
(Y page 245) so that it does not
exceed the maximum permissible speed for
the winter tyres.
Once you have fitted the winter tyres:
X Check the tyre pressures (Y page 272).
X Restart the tyre pressure monitor
(Y page 273).
i Speeds of up to 240 km/h with winter
tyre variant 1: despite what is stated on the
tyre pressure information label (fuel filler
flap), for speeds up to 240 km/ha nd winter
tyre variant 1 (Y page 354), the tyre pres-
sures can be reduced:
R front −40 kPa (−0.4 bar)
R rear −60 kPa (−0.6 bar)
This improves the ride comfort of your vehi-
cle; however, the fuel consumption may
increase slightly. G
Ris
kofa ccident
If you fit the spare wheel* when driving with
winter tyres, bear in mind that driving stability
will be impaired owing to unstable cornering
characteristics caused by the differen ttyres.
You should therefore adapt your driving style
and drive carefully.
Have the spare wheel* replaced at the near-
est qualified specialist workshop which has
the necessary specialist knowledge and tools
to carry out the wor krequired. Mercedes-
Benz recommends that you use a Mercedes-
Benz Service Centre for this purpose. In par-
ticular, work relevant to safety or on safety-
related systems must be carried out at a quali-
fied specialist workshop. Snow chains
For safety reasons, Mercedes-Benz recom-
mends that you only use snow chains which
have been specially approved for your vehicle
by Mercedes-Benz, or are of a corresponding
standard of quality.
If you intend to fit snow chains, please bear
the following points in mind:
R snow chains cannot be fitted to all wheel/
tyre combinations.
R snow chains must not be fitted to emer-
gency spare wheels, e.g. Minispare.
R fit snow chains only in pairs and only to the
rear wheels. Observe the manufacturer's
installation instructions.
Do not exceed the maximum permissible
speed of 50 km/h.
i You may wish to deactivate ESP ®
when
pulling away with snow chains fitted
(Y page 47). This way you can allow the
wheels to spin in a controlled manner, ach-
ieving an increased driving force (cutting
action). Winter driving
G
Risk of accident
Do not shift down for additional engine brak-
ing on a slippery road surface. This could
cause the drive wheels to lose their grip and
the vehicle could skid.
You should drive particularly carefully on slip-
pery road surfaces. Avoid sudden accelera-
tion, steering and braking manoeuvres.
If the vehicle threatens to skid or cannot be
stopped when moving at low speed:
X Engage neutral.
X Try to bring the vehicle under control using
corrective steering.
19 Only available for certain countries. 276
Winter operationOperation
BA 197 ECE RE 2010/6a; 1; 2, en-GB
sabbaeu
Version: 3.0.3.6 2010-05-07T14:19:43+02:00 - Seite 276
Page 284 of 361
Exterio
rcare
Automatic car wash G
Risk of accident
Braking efficiency is reduced after washing
the vehicle. This could cause an accident.
After the vehicle has bee nwashed, brake
firmly while paying attention to the traffic con-
ditions. This will warm up the brake discs,
thereby drying them mor equickly. Afte rwash-
ing the vehicle, drive particularly carefully
until the brakes are dry and braking power has
been fully restored.
You can wash the vehicle in an automatic car
wash from the very start.
If the vehicle is very dirty, pre-wash it before
cleaning it in an automatic car wash.
! When washing your vehicle in a tow-
through car wash, use the key instead of
the Start/Stop button.
Start the engine .Move the transmission
selector lever to N. Switch the engine off
again and make sure that you then leave
the key in position 2.You may otherwise
damage the vehicle, the transmission or
the car wash.
Check the transmission position in the
instrument cluster.
! Before switching off the engine, shift the
transmission to N. If you open the driver's
or front-passenger door, the transmission
remains in this position for up to 30
minutes if the key is in the ignition, even if
the engine is switched off. If you do not shift
the transmission to Nbeforehand, it shifts
automatically to parking position Pand
locks the wheels if the driver's or front-
passenger door is opened and the engine
is switched off. This may damage the vehi-
cle, the transmission or the car wash. !
Before driving into an automatic car wash,
make sure that it is suitable for the dimen-
sions of the vehicle. In particular, make
sure that:
R there is enough ground clearance
between the vehicle underbody and the
guide rails of the automatic car wash.
R the clearance width of the automatic car
wash is sufficient, particularly the width
of the guide rails
R you enter the automatic car wash
straight and in the centre of the guide
rails in order to avoid damaging the tyres
or wheel rims.
Fold in the exterior mirrors before the vehi-
cle is washed. The exterior mirrors could
otherwise be damaged.
! Make sure that the side windows are com-
pletely closed, that the ventilation/heater
blower is fully turned off and that the wind-
screen wiper switch is set to 0.Otherwise,
the rain/light senso rmay be activated, trig-
gering unintended wiper movements. This
could cause damage to the vehicle.
! In portal car washes, the windscree nwip-
ers may be moved up the windscreen by the
cleaning brushes when the ignition is
switched off.
Set the Start/Stop button to key position
2 to reset the windscreen wipers to their
original position.
! Vehicles with a mat tfinish*:
Do not use wash programs with a hot wax
treatment under any circumstances.
After using an automatic car wash, wipe off
wax and drying agents fro mthe windscreen
and the wiper blades. This will prevent smears
and reduce wiping noises caused by residue
on the windscreen. Care
281Operation
*optional
BA 197 ECE RE 2010/6a; 1; 2, en-GB
sabbaeu
Version: 3.0.3.6 2010-05-07T14:19:43+02:00 - Seite 281 Z
Page 286 of 361
Cleaning paintwork
Scratches, corrosive deposits, areas affected
by corrosio nand damage caused by inade-
quate care canno talways be completely
repaired. In such cases, visit a qualified spe-
cialist workshop immediately, e.g. a
Mercedes-Benz Service Centre.
X Remove the following types of dirt immedi-
ately, whilst avoiding rubbin gtoo hard.
Soak:
R insect remains with insect remover
R bird droppings with water
and rinse off the treated surface after-
wards.
Remove:
R tree resin, oils, fuels and greases by rub-
bing gently with a cloth soaked in petro-
leum ether or lighter fluid
R tar stain with tar remover
R wax with silicone remover
! Do not affix:
R stickers
R films
R magnetic plates or similar items
to painted surfaces. Otherwise, you could
damage the paintwork.
Cleaning the windows X
Clean the inside and outside of the win-
dows with a damp cloth and a cleaning
product approved and recommended by
Mercedes-Benz.
! Clean the water drainage channels of the
windscreen and the rear window at regular
intervals. Under certain circumstances,
deposits such as leaves, petals and pollen
may prevent water from draining away
leading to corrosion damage. Cleaning wiper blades G
Risk of injury
Before cleaning the windscreen or wiper
blades, turn the key to position 0in the igni-
tion lock or press the Start/Stop button
repeatedly until all indicator lamps in the
instrument cluster have gone out. The wind-
screen wipers could otherwise move and
injure you.
! Only fold the windscreen wipers away
from the windscreen when vertical. Other-
wise, you will damage the bonnet.
! Do not clean the wiper blades too often
and do not rub them too hard, as this will
result in damage to the graphite coating.
This could cause wiper noise.
X Switch off the engine.
X Take your foot off the brake pedal.
X Set the windscreen wipers to posi-
tion 0014 on the combination switch.
X Press the Start/Stop button repeatedly
until the windscreen wipers start.
X When the wiper arms have reached a ver-
tical position: press the Start/Stop button.
X Fold the wiper arm away from the wind-
screen until it engages.
X Set the wiper blade at right angles to the
wiper arm.
X Clean the wiper blades carefully using a
damp cloth.
X Fold the windscreen wipers back again
before switching on the ignition.
Cleaning the headlamps X
Clean the plastic lenses of the headlamps
and rear lighting with a damp sponge and
windscreen washer fluid or cleaning cloths.
! Only use windscreen washer fluid or
cleaning cloths which are suitable for plas-
tic lamp lenses. Unsuitable windscreen
washer fluid or cleaning cloths could Care
283Operation
BA 197 ECE RE 2010/6a; 1; 2, en-GB
sabbaeu Version: 3.0.3.6 2010-05-07T14:19:43+02:00 - Seite 283 Z
Page 295 of 361
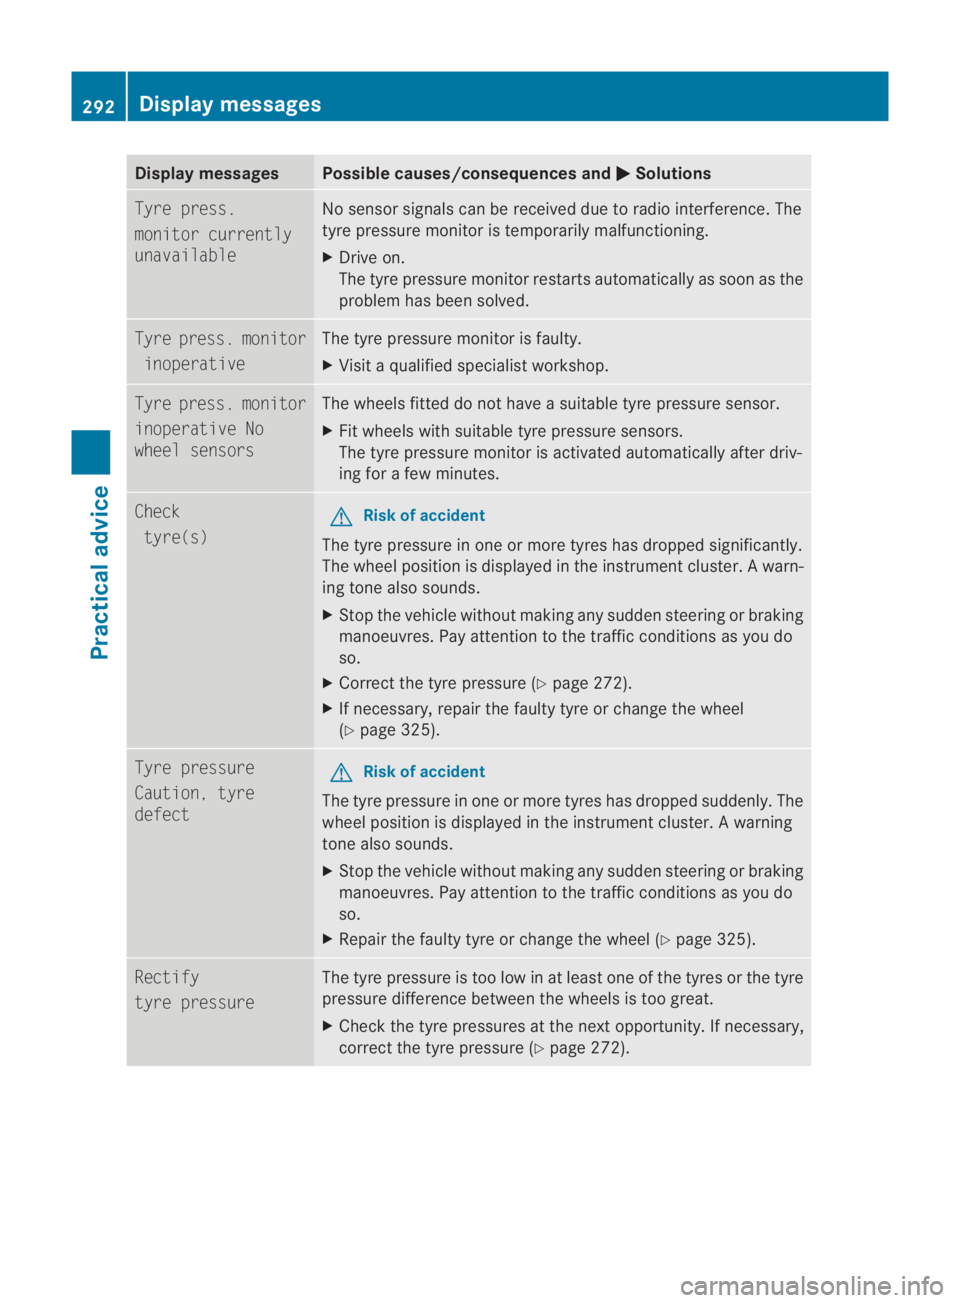
Display messages Possible causes/consequences and
0003 Solutions
Tyre press.
monitor currently
unavailable No sensor signals can be received due to radio interference. The
tyre pressure monitor is temporarily malfunctioning.
X
Drive on.
The tyre pressure monitor restarts automatically as soo nas the
problem has been solved. Tyre press. monitor
inoperative The tyre pressure monitor is faulty.
X
Visit a qualified specialist workshop. Tyre press. monitor
inoperative No
wheel sensors The wheels fitted do not have a suitable tyre pressure sensor.
X
Fit wheels with suitable tyre pressure sensors.
The tyre pressure monitor is activated automatically after driv-
ing for a few minutes. Check
tyre(s) G
Risk of accident
The tyre pressure in one or more tyres has dropped significantly.
The wheel position is displayed in the instrument cluster. Awarn-
ing tone also sounds.
X Stop the vehicle without making any sudde nsteering or braking
manoeuvres .Pay attentio nto the traffic conditions as you do
so.
X Correct the tyre pressure (Y page 272).
X If necessary, repair the faulty tyre or change the wheel
(Y page 325). Tyre pressure
Caution, tyre
defect
G
Risk of accident
The tyre pressure in one or more tyres has dropped suddenly. The
wheel position is displayed in the instrument cluster. Awarning
tone also sounds.
X Stop the vehicle without making any sudde nsteering or braking
manoeuvres .Pay attentio nto the traffic conditions as you do
so.
X Repairt he faulty tyre or change the wheel (Y page 325).Rectify
tyre pressure The tyre pressure is too low in at least one of the tyres or the tyre
pressure difference between the wheels is too great.
X
Check the tyre pressures at the next opportunity. If necessary,
correct the tyre pressure (Y page 272).292
Display messagesPractical advice
BA 197 ECE RE 2010/6a; 1; 2, en-GB
sabbaeu
Version: 3.0.3.6 2010-05-07T14:19:43+02:00 - Seite 292