Page 257 of 364

!
Only conduct operational or performance
tests on a two-axle dynamometer. If such
tests are necessary, contact an authorized
Mercedes-Benz Center. You could
otherwise seriously damage the brake
system or the transfer case which is not
covered by the Mercedes-Benz Limited
Warranty.
! Because the ESP ®
operates
automatically, the engine and ignition must
be shut off (SmartKey in starter switch
position 0 or 1 or KEYLESS-GO start/stop
button in position 0 or 1) when the parking
brake is being tested on a brake test
dynamometer. Such testing should be no
longer than 10 seconds.
Active braking action through the ESP ®
may otherwise seriously damage the brake
system which is not covered by the
Mercedes-Benz Limited Warranty.
If your brake system is only subjected to
moderate loads, you should occasionally test
the effectiveness of the brakes by applying
above-normal braking pressure at higher
speeds. This will also enhance the grip of the
brake pads. G
Warning!
Make sure not to endanger any other road
users when carrying out these braking
maneuvers.
Refer to the description of the Brake Assist
System (BAS) ( Y page 64).
Parking brake When driving on wet roads or dirt covered
surfaces, road salt and/or dirt can get into
the parking brake. To prevent corrosion and a reduction in the
braking power of the parking brake, observe
the following:
X
From time to time, lightly engage the
parking brake before driving off.
X Drive a distance of approximately 110 yds
(100 m) at a maximum speed of 12 mph
(20 km/h). G
Warning!
While performing this procedure please
assure that the vehicle is stopped before
applying the parking brake. Otherwise the
rear wheels could lock up. You could lose
control of the vehicle and cause an accident.
In addition, the vehicle’s brake lights do not
light up when the parking brake is engaged.
Make sure not to endanger any other road
users when you engage the parking brake. Driving off
Warm up the engine smoothly. Do not place
full load on the engine until the operating
temperature has been reached.
! When
driving off on a slippery surface, do
not allow a drive wheel to spin for an
extended period with the ESP ®
switched
off. Doing so may cause serious damage to
the drivetrain which is not covered by the
Mercedes-Benz Limited Warranty.
! Simultaneously depressing the
accelerator pedal and applying the brakes
reduces engine performance and causes
premature brake and drivetrain wear which
is not covered by the Mercedes-Benz
Limited Warranty. Hydroplaning
Depending
on the depth of the water layer on
the road, hydroplaning may occur, even at low
speeds and with new tires. In heavy rain or
when conditions indicate possible
hydroplaning: Driving instructions
255
Operation
251_AKB; 4; 52, en-US
d2ureepe, Version: 2.11.8.1 2009-03-23T09:22:52+01:00 - Seite 255 Z
Page 258 of 364

X
Reduce vehicle speed.
X Avoid track grooves in the road.
X Apply brakes cautiously. Standing water
! Do not drive through flooded areas.
Before
driving through water, determine its
depth.
If you must drive through standing water,
drive slowly to prevent water from entering
the passenger compartment or the engine
compartment. Water in these areas could
cause damage to electrical components or
wiring of the engine or transmission, or
could result in water being ingested by the
engine through the air intake causing
severe internal engine damage. Any such
damage is not covered by the Mercedes-
Benz Limited Warranty.
Prevent water from entering the passenger
compartment or the engine compartment. If
you must drive through standing water, keep
in mind that
R the maximum depth of the water may not
exceed 10 in (25 cm)
R you must drive slowly
i Vehicles with AIRMATIC:
If you have selected the raised level
(Y page 155) before driving through
standing water, the maximum water depth
is 12 in (30 cm). Trailer towing
G
Warning!
Failure to use proper equipment and driving
technique can result in a loss of vehicle
control when towing a trailer.
Improper towing or failure to follow the
instructions in this manual can result in
vehicle damage and/or serious personal injury. Follow the guidelines below carefully
to assure safe trailer operation.
Contact
an authorized Mercedes-Benz Center
should you require an explanation of
information contained in this manual.
Trailer hitch R
Only
install a trailer hitch receiver approved
for your vehicle.
For information on availability and
installation, contact an authorized
Mercedes-Benz Center.
R The bumpers on your vehicle are not
designed for use with clamp-type hitches.
Do not attach rental hitches or other
bumper-type hitches to them.
R To reduce the possibility of damage,
remove the hitch ball adapter from the
receiver when not in use.
Electrical connections The vehicle is prewired to accept the seven-
wire harness included in the Mercedes-Benz
approved trailer hitch receiver kit.
i
A four-pole conversion plug is available
from your authorized Mercedes-Benz
Center as a spare part.
For further information, contact an
authorized Mercedes-Benz Center.
Vehicle
and trailer weights and ratings The Gross Trailer Weight (GTW) is the weight
of the trailer plus the weight of all cargo,
equipment, luggage, etc. loaded on the
trailer. The maximum permissible GTW to be
towed: 3
500 lb (1 588 kg).
Trailer Tongue Weight Rating (TWR) is the
maximum permissible weight on the trailer
tongue: 350 lb (158 kg) limit for Mercedes-
Benz approved hitch receiver. 256
Driving instructions
Operation
251_AKB; 4; 52, en-US
d2ureepe,
Version: 2.11.8.1 2009-03-23T09:22:52+01:00 - Seite 256
Page 259 of 364

Loading a trailer
R
When
loading a trailer, you should observe
that neither the permissible GTW, nor the
Gross Vehicle Weight Rating (GVWR) are
exceeded. The GVWR is indicated on the
certification label located on the driver’s
door B-pillar ( Y page 236).
Maximum permissible values are listed on
the safety compliance certification labels
for the vehicle and for the trailer to be
towed.
The lowest value listed must be selected
when determining how the vehicle and
trailer are loaded.
R The tongue weight at the hitch ball must be
added to the rear axle weight to prevent
exceeding the rear Gross Axle Weight
Rating (GAWR). The GAWR is indicated on
the certification label located on the
driver’s door B-pillar ( Y page 236).
i Mercedes-Benz recommends loading the
trailer in such a manner that it has a tongue
weight between 8 % and 10 % of the GTW.
i The weight of other accessories,
passengers and cargo will reduce the
maximum trailer weight and tongue weight
your vehicle can tow.
Checking weights of vehicle and trailer
R To assure that the towing vehicle and trailer
are in compliance with the maximum
permissible weight limits, have the loaded
rig (towing vehicle including driver,
passengers and cargo, trailer fully loaded)
weighed on a commercial scale.
R Check the vehicle’s front and rear gross
axle weight, the Gross Trailer Weight (GTW)
and tongue weight.
The values as measured must not exceed
the weight limits listed under “Vehicle and
trailer weights and ratings” ( Y page 256).Coupling a trailer G
Warning!
Vehicles with AIRMATIC: While you are
coupling or decoupling a trailer, make sure
nobody locks or unlocks the vehicle and/or
opens or closes doors or the tailgate.
The vehicle’s level could change and you
could endanger yourself and/or others as a
result.
Make sure that you do not operate the ADS
switch or the vehicle level control system
when coupling/decoupling the trailer.
Observe maximum permitted trailer
dimensions (width and length).
Most states and all Canadian provinces
require
R safety chains between the towing vehicle
and the trailer
The chains should be criss-crossed under
the trailer tongue. They must be attached
to the hitch receiver, and not to the
vehicle’s bumper or axle.
Make sure to leave enough slack in the
chains to permit turning corners.
R a separate brake system at various trailer
weights
R a break-away switch on trailers with a
separate brake system.
Check
with your local state laws for specific
requirements.
The switch activates the trailer brakes in
the possible event that the trailer might
separate from the tow vehicle.
! Do not connect a trailer brake system (if
trailer is so equipped) directly to the
vehicle’s hydraulic brake system, as your
vehicle is equipped with antilock brakes. If
you do, neither the vehicle’s brakes nor the
trailer’s brakes will function properly.
i The provided vehicle electrical wiring
harness for trailer towing has a brake signal
wire for hook-up to a brake controller. Driving instructions
257
Operation
251_AKB; 4; 52, en-US
d2ureepe, Version: 2.11.8.1 2009-03-23T09:22:52+01:00 - Seite 257 Z
Page 260 of 364

X
Make sure the automatic transmission is in
park position P (Y page 116).
X Engage the parking brake for the vehicle
(Y page 114).
X Start the engine (Y page 110).
X Vehicles with AIRMATIC:
Set the vehicle level to highway
(Y page 154) and set the ADS to AUTO or
COMF (Y page 153).
X Turn off the engine ( Y page 114).
X Close all doors and the tailgate.
X Attach the trailer.
X Plug in all electrical connectors.
i Vehicles with AIRMATIC:
When you are towing a trailer, the vehicle
level
always remains in the highway setting.
The following applies additionally when
towing a trailer:
R The vehicle is lowered to the highway
level when it reaches a speed of 5 mph
(8 km/h) if not set to highway level.
R The highspeed level is not available.
The restrictions that apply to towing also
apply when using accessories that are
connected to the trailer power socket, such
as a bicycle rack.
Towing a trailer There are many different laws, including
speed limit restrictions, having to do with
trailer
towing. Make sure your rig will be legal,
not only for where you reside, but also for
where you will be driving. A good source for
this information can be the police or local
authorities.
Note the following, when driving with a trailer:
R In order to gain skill and an understanding
of the vehicle’s behavior, you should practice turning, stopping and backing up
in an area which is free of traffic.
R Before you start driving check the
-trailer hitch
- break-away switch
- safety chains
- electrical connections
- lighting
- tires
R Adjust the mirrors
(Y page 94) to permit
unobstructed view beyond rear of trailer.
R If the trailer has electric brakes, start your
vehicle and trailer moving slowly, and then
apply only the trailer brake controller by
hand to make sure the brakes are working
properly.
R Always secure items in the trailer to
prevent load shifts while driving.
R When towing a trailer, check occasionally
to make sure the load is secure, and that
trailer lighting and brakes (if so equipped)
are functioning properly.
R Take into consideration that when towing a
trailer, the handling characteristics are
different and less stable from those when
operating the vehicle without a trailer.
It is important to avoid sudden maneuvers.
R The vehicle and trailer combination is
heavier, and therefore limited in
acceleration and climbing ability, and has a
larger braking distance.
It is more prone to reacting to cross wind
gusts, and requires more sensitive steering
input.
R If possible, do not brake abruptly, but
rather engage the brake slightly at first to
permit the trailer to activate its brake. Then
increase the braking force.
! If the trailer should begin to sway, reduce
the vehicle’s speed immediately. 258
Driving instructions
Operation
251_AKB; 4; 52, en-US
d2ureepe,
Version: 2.11.8.1 2009-03-23T09:22:52+01:00 - Seite 258
Page 261 of 364

Do not attempt to straighten out the tow
vehicle
and trailer by increasing the speed.
R If the transmission shifts between gears on
inclines repeatedly, shift to a lower gear
range manually ( Y page 119). Select 4, 3,
2 or 1.
A lower gear and reduction of speed
reduces the chance of engine overloading
and/or overheating.
R When going down an incline, shift into a
lower gear and use the engine’s braking
effect.
Avoid riding the brakes, thus overheating
the vehicle and trailer brakes (if so
equipped).
R If the engine coolant rises to an extremely
high temperature when the air conditioning
is on, turn off the air conditioning system.
Engine coolant heat can be additionally
vented by opening the windows, switching
the climate control fan speed to high and
setting the temperature control to the
maximum.
R During a passing maneuver extreme care
must be exercised since your vehicle with
a trailer will require additional passing
distance ahead than when driving without
a trailer.
Because your vehicle and trailer is longer
than your vehicle alone, you will also need
to go much farther ahead of the passed
vehicle before you can return to your lane.
Decoupling a trailer G
Warning!
Vehicles with AIRMATIC: While you are
coupling or decoupling a trailer, make sure
nobody locks or unlocks the vehicle and/or
opens or closes doors or the tailgate.
The vehicle’s level could change and you
could endanger yourself and/or others as a
result. Make sure that you do not operate the ADS
switch or the vehicle level control system
when coupling/decoupling the trailer.
X Make sure the automatic transmission is in
park position P (Y page 116).
X Engage the parking brake for the vehicle
(Y page 114).
X Start the engine (Y page 110).
X Close all doors and the tailgate.
X Engage the parking brake for the trailer. G
Warning!
Vehicles with AIRMATIC: As soon as you
disconnect
the electrical connection between
the trailer and the vehicle, the vehicle will
lower. To help avoid personal injury, make
sure no one is near the wheel housing or
underneath the vehicle before the electrical
connection is disconnected.
When you decouple the trailer, the vehicle is
temporarily raised because the springs are
relieved of load. Be especially careful during
this process, as you could otherwise injure
yourself and/or others. Make sure that any
persons remaining in the vehicle do not press
the switches for vehicle level control or the
ADS.
X Disconnect all electrical plug connectors.
X Decouple the trailer.
X Make sure that the trailer coupling is free
of load.
X Turn off the engine ( Y page 114). Driving abroad
If
you plan to drive the vehicle outside the U.S.
or Canada, you should request dealer
network information for your destination from
any authorized Mercedes-Benz Center. Driving instructions
259
Operation
251_AKB; 4; 52, en-US
d2ureepe, Version: 2.11.8.1 2009-03-23T09:22:52+01:00 - Seite 259 Z
Page 262 of 364

Control and operation of radio
transmitter
Safety notes G
Warning!
Please do not forget that your primary
responsibility is to drive the vehicle. A driver’s
attention to the road must always be his/her
primary focus when driving. For your safety
and the safety of others, we recommend that
you pull over to a safe location and stop
before placing or taking a telephone call.
If you choose to use the telephone 15
while
driving, please use the hands-free device and
only use the telephone when road, weather
and traffic conditions permit. Some
jurisdictions prohibit the driver from using a
mobile telephone while driving a vehicle.
Only operate the COMAND 15
(Cockpit
Management and Data System) if road,
weather and traffic conditions permit.
Otherwise, you may not be able to observe
traffic conditions and could endanger yourself
and others.
Bear in mind that at a speed of just 30 mph
(approximately 50 km/h), your vehicle is
covering a distance of 44 feet (approximately
14 m) every second. Emission control
Certain systems of the engine serve to keep
the toxic components of the exhaust gases
within permissible limits required by law.
These systems will function properly only
when
maintained strictly according to factory
specifications. Any adjustments on the
engine should, therefore, be carried out only
by qualified Mercedes-Benz Center
authorized technicians.
Engine adjustments should not be altered in
any way. Moreover, the specified service
procedures must be carried out regularly according to Mercedes-Benz servicing
requirements. For details refer to the
Maintenance Booklet. G
Warning!
Inhalation of exhaust gas is hazardous to your
health. All exhaust gas contains carbon
monoxide (CO), and inhaling it can cause
unconsciousness and possible death.
Do
not run the engine in confined areas (such
as a garage) which are not properly ventilated.
If you think that exhaust gas fumes are
entering the vehicle while driving, have the
cause determined and corrected
immediately. If you must drive under these
conditions, drive only with at least one
window fully open at all times. Maintenance
Notes
The Maintenance System in your vehicle
tracks the distance driven and the time
elapsed since the last maintenance service.
It
calculates other maintenance service work
required, and calls for the next maintenance
service accordingly.
We strongly recommend that you have your
vehicle serviced at an authorized Mercedes-
Benz Center. Have it serviced in accordance
with the Maintenance Booklet at the times
called for by the maintenance service
indicator.
i Failure to have the vehicle maintained in
accordance with the Maintenance Booklet
and maintenance service indicator at the
designated times/mileage will result in
vehicle damage not covered by the
Mercedes-Benz Limited Warranty.
15 Observe all legal requirements. 260
Maintenance
Operation
251_AKB; 4; 52, en-US
d2ureepe,
Version: 2.11.8.1 2009-03-23T09:22:52+01:00 - Seite 260
Page 263 of 364

Maintenance service indicator
message
The maintenance service indicator message
will notify you when the next maintenance
service is required.
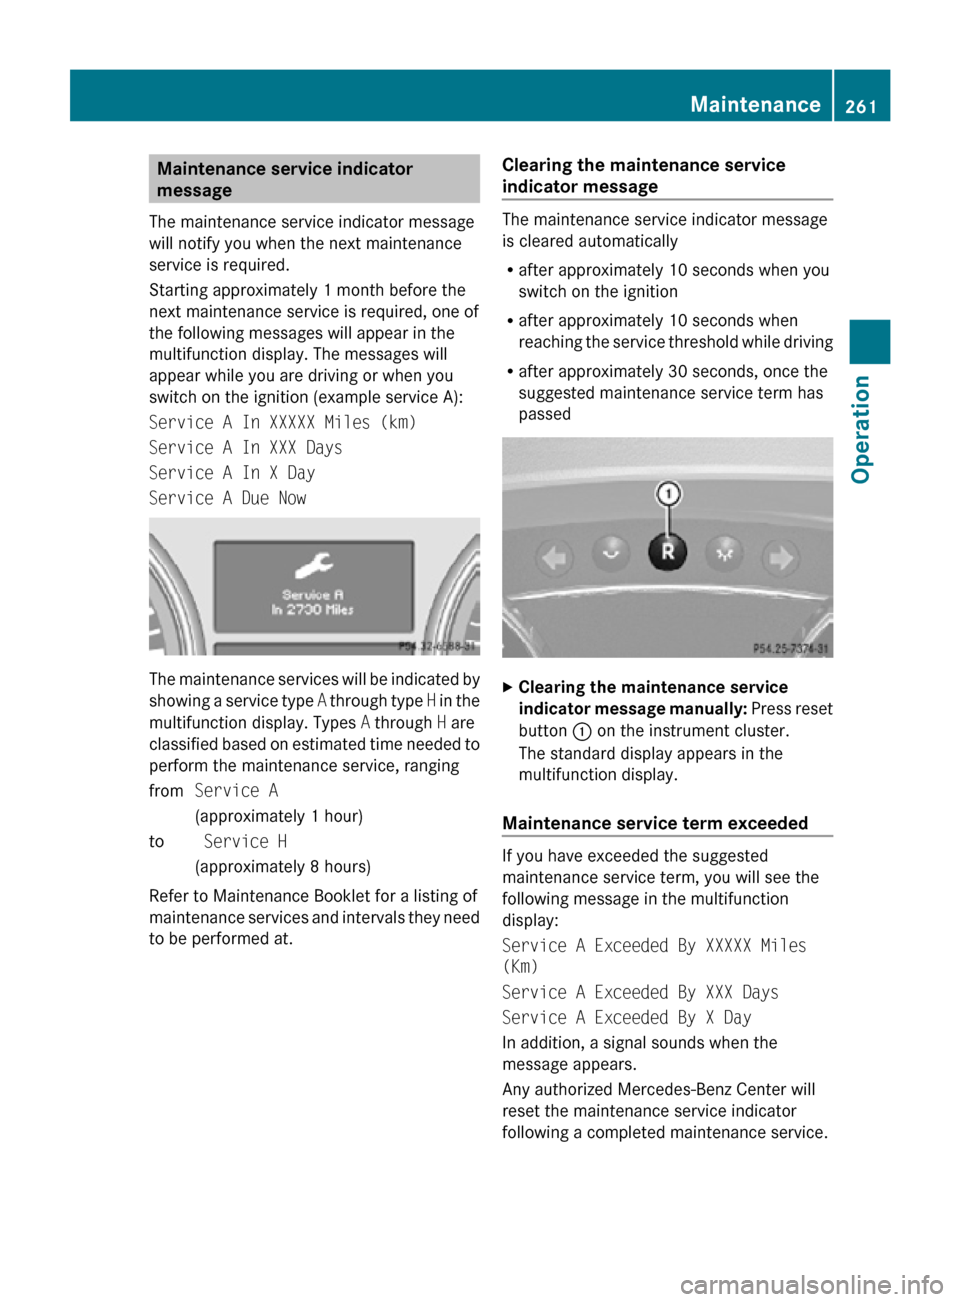
Starting approximately 1 month before the
next maintenance service is required, one of
the following messages will appear in the
multifunction display. The messages will
appear while you are driving or when you
switch on the ignition (example service A):
Service A In XXXXX Miles (km)
Service A In XXX Days
Service A In X Day
Service A Due Now The maintenance services will be indicated by
showing a service type
A through type H in the
multifunction display. Types A through H are
classified based on estimated time needed to
perform the maintenance service, ranging
from Service A
(approximately 1 hour)
to Service H
(approximately 8 hours)
Refer to Maintenance Booklet for a listing of
maintenance services and intervals they need
to be performed at. Clearing the maintenance service
indicator message The maintenance service indicator message
is cleared automatically
R
after approximately 10 seconds when you
switch on the ignition
R after approximately 10 seconds when
reaching the service threshold while driving
R after approximately 30 seconds, once the
suggested maintenance service term has
passed X
Clearing the maintenance service
indicator message manually: Press reset
button : on the instrument cluster.
The standard display appears in the
multifunction display.
Maintenance service term exceeded If you have exceeded the suggested
maintenance service term, you will see the
following message in the multifunction
display:
Service A Exceeded By XXXXX Miles
(Km)
Service A Exceeded By XXX Days
Service A Exceeded By X Day
In addition, a signal sounds when the
message appears.
Any authorized Mercedes-Benz Center will
reset the maintenance service indicator
following a completed maintenance service. Maintenance
261Operation
251_AKB; 4; 52, en-US
d2ureepe, Version: 2.11.8.1 2009-03-23T09:22:52+01:00 - Seite 261 Z
Page 264 of 364

Calling up the maintenance service
indicator display
i The menu overview can be found on
(Y page 126).
You can call up the maintenance service
indicator display at any time to check when
the next maintenance service is required.
X Switch on the ignition.
X Press button V or U on the
multifunction steering wheel repeatedly
until the standard display
(Y page 126)
appears in the multifunction display.
X Press button * or & on the
multifunction steering wheel until the
maintenance
service indicator display with
the service symbol ¯ and the
maintenance service deadline appears in
the multifunction display.
i If
the battery was disconnected, the days
of disconnection will not be included in the
count shown by the maintenance service
indicator. To arrive at the true maintenance
service deadline, you will need to subtract
these days from the days shown in the
maintenance service indicator message or
maintenance service indicator display.
Do not confuse the maintenance service
indicator with the engine oil level indicator
4. Resetting the maintenance service
indicator
In
the event that the maintenance service on
your vehicle is not carried out at an authorized
Mercedes-Benz Center, you can have the
maintenance service indicator reset.
The automotive maintenance facility carrying
out the maintenance service will find the
information for resetting the maintenance
service indicator in the maintenance-relevant
literature for your vehicle. Such literature is available at any authorized
Mercedes-Benz Center or directly from
Mercedes-Benz.
!
If the maintenance service indicator was
reset inadvertently, have an authorized
Mercedes-Benz Center correct it.
Only reset the maintenance service
indicator
if the proper maintenance service
has been performed. Resetting the system
without performing the proper
maintenance service as called for by the
maintenance service indicator will result in
engine damage and/or other vehicle
damage not covered by the Mercedes-Benz
Limited Warranty. Vehicle care
Cleaning and care of the vehicle
Notes Regular and proper care will help to maintain
the value of your vehicle.
G
Warning!
Many cleaning products can be hazardous.
Some are poisonous, others are flammable.
Always follow the instructions on the
particular container. Always open your
vehicle’s
doors or windows when cleaning the
inside.
Never use fluids or solvents that are not
designed for cleaning your vehicle.
Always lock away cleaning products and keep
them out of reach of children.
! When cleaning the vehicle, do not use
scouring agents. Never apply strong force
and only use a soft, wet cloth or sponge.
Otherwise you may scratch or damage the
surface to be cleaned.
While in operation, even while parked, your
vehicle is subjected to varying external
influences which, if gone unchecked, can 262
Vehicle care
Operation
251_AKB; 4; 52, en-US
d2ureepe,
Version: 2.11.8.1 2009-03-23T09:22:52+01:00 - Seite 262