Page 41 of 224
System Menu Overview ......................40
Switching the Display On/Off ............40
Time ...................................................... 41
Display Settings .................................. 41
Read-Out .............................................. 42
Voice Control ....................................... 42
Language Setting ................................ 44
Rear View Camera ............................... 44
Bluetooth ............................................. 44
Reset .................................................... 4539System Settings
Page 42 of 224

System Menu Overview
Vehicle Equipment
i This Operator’s Manual describes all
features, standard or optional, potentially
available for your vehicle at the time of
purchase. Please be aware that your
vehicle might not be equipped with all
features described in this manual.
Opening System Menu
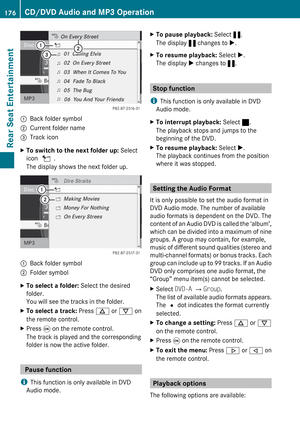
XPress the W function button.
or
XSelect System in the main function line.
The system menu appears.1Settings menu2Time=Display OffSettingsTimeDisplay
OffDisplay
( Y page 41)
Text reader speed
( Y page 42)
Voice Control
( Y page 42)
Language
( Y page 44)
Rear View
Camera
( Y page 44)
O Activate
Bluetooth ®
( Y page 44)
Reset
( Y page 45)
i Use this
function to
delete your
personal data,
e.g. before
selling your
vehicle.Set Time
( Y page
41)
Format
( Y page
41)
Time Zone
( Y page
41)( Y page
40)
Switching the Display On/Off
XTo switch the display off:
Select System £Display Off .
The display is switched off.XTo switch on the display: Press the 9
button, the k button or one of the
= , ; , : or 9 buttons.
or
XPress the q button.
The system menu appears.
i You can also press one of the function
buttons, e.g. the h button. This turns on
the display and switches to the
corresponding function.
40Switching the Display On/OffSystem Settings
Page 43 of 224

Time
Setting the Time
i The correct time must be set for the
following functions to operate correctly:
R Calculation of expected time of arrival
R Time stamps for calls received and calls
dialed
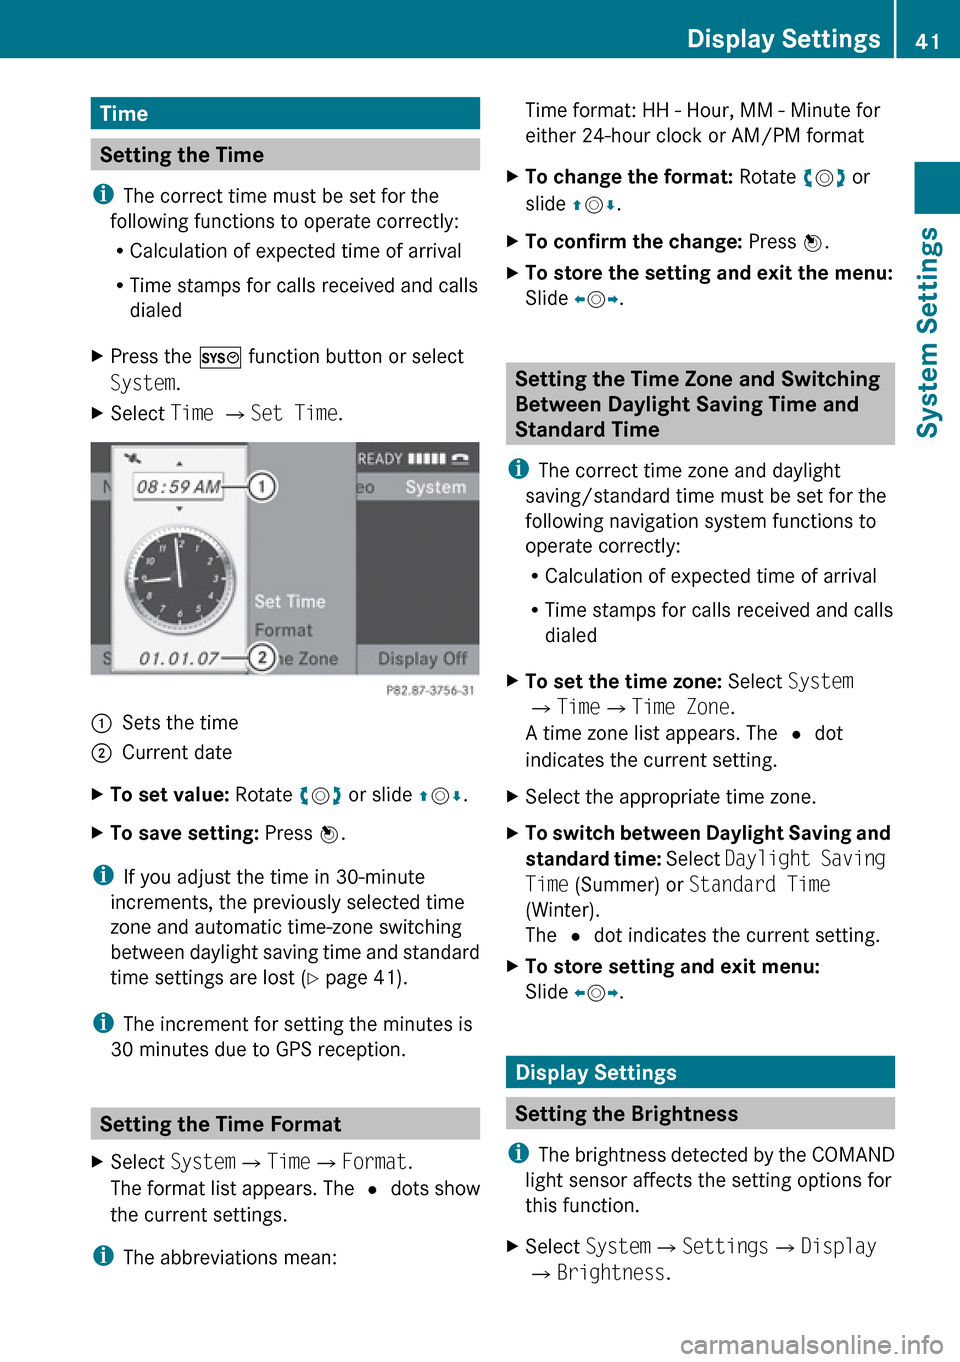
XPress the W function button or select
System .XSelect Time £ Set Time .1Sets the time2Current dateXTo set value: Rotate ym z or slide qm r.XTo save setting: Press n.
i
If you adjust the time in 30-minute
increments, the previously selected time
zone and automatic time-zone switching
between daylight saving time and standard
time settings are lost ( Y page 41).
i The increment for setting the minutes is
30 minutes due to GPS reception.
Setting the Time Format
XSelect System £Time £Format .
The format list appears. The R dots show
the current settings.
i The abbreviations mean:
Time format: HH - Hour, MM - Minute for
either 24-hour clock or AM/PM formatXTo change the format: Rotate ym z or
slide qm r.XTo confirm the change: Press n.XTo store the setting and exit the menu:
Slide om p.
Setting the Time Zone and Switching
Between Daylight Saving Time and
Standard Time
i The correct time zone and daylight
saving/standard time must be set for the
following navigation system functions to
operate correctly:
R Calculation of expected time of arrival
R Time stamps for calls received and calls
dialed
XTo set the time zone: Select System
£ Time £Time Zone .
A time zone list appears. The R dot
indicates the current setting.XSelect the appropriate time zone.XTo switch between Daylight Saving and
standard time: Select Daylight Saving
Time (Summer) or Standard Time
(Winter).
The R dot indicates the current setting.XTo store setting and exit menu:
Slide om p.
Display Settings
Setting the Brightness
i The brightness detected by the COMAND
light sensor affects the setting options for
this function.
XSelect System £Settings £Display
£ Brightness .Display Settings41System SettingsZ
Page 44 of 224

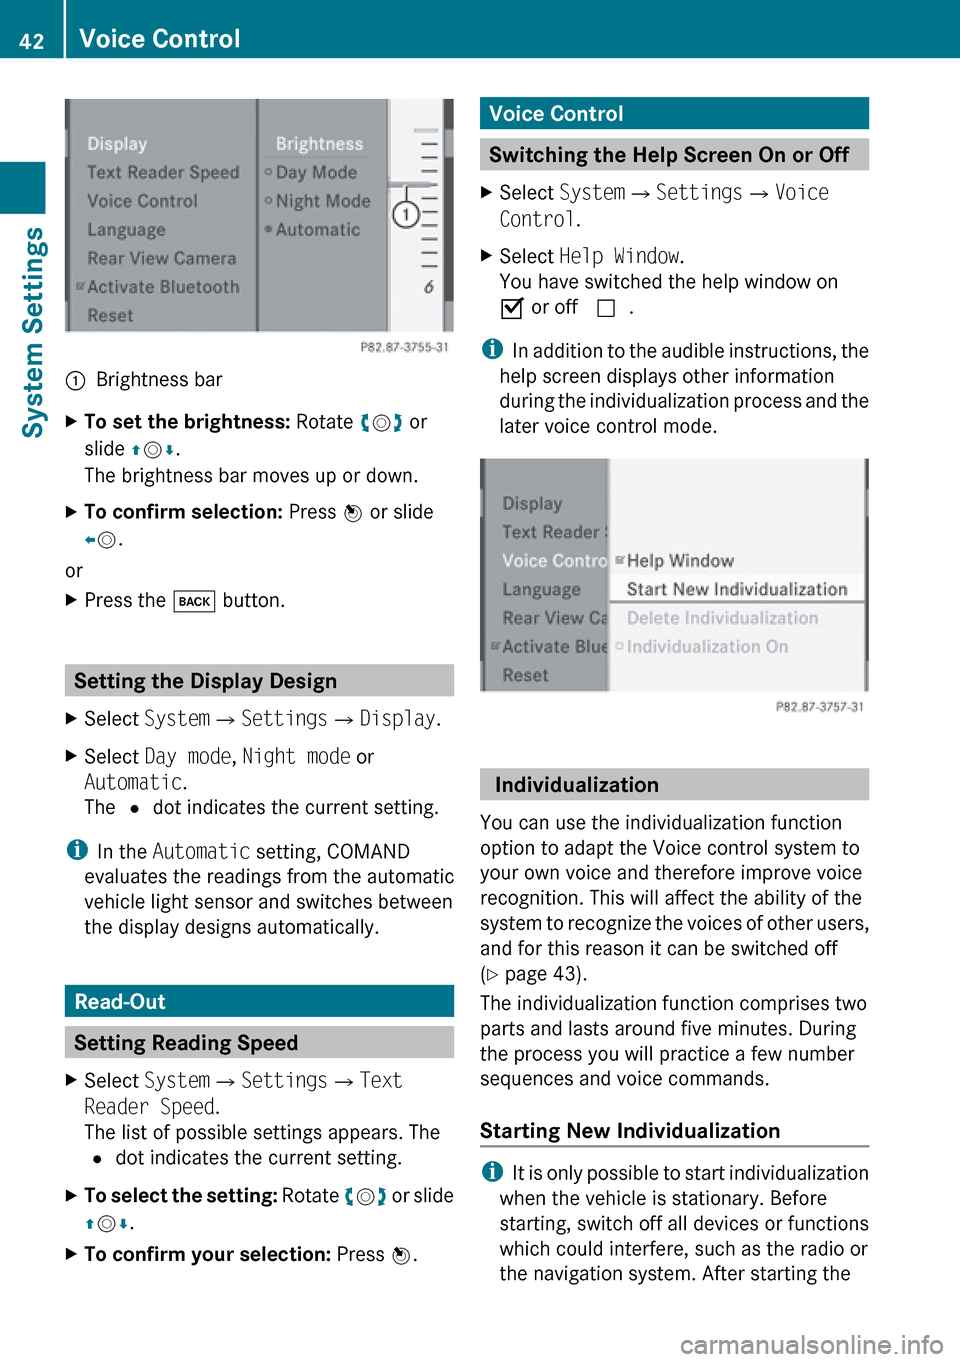
1Brightness barXTo set the brightness: Rotate ym z or
slide qm r.
The brightness bar moves up or down.XTo confirm selection: Press n or slide
o m .
or
XPress the k button.
Setting the Display Design
XSelect System £Settings £Display .XSelect Day mode , Night mode or
Automatic .
The R dot indicates the current setting.
i
In the Automatic setting, COMAND
evaluates the readings from the automatic
vehicle light sensor and switches between
the display designs automatically.
Read-Out
Setting Reading Speed
XSelect System £Settings £Text
Reader Speed .
The list of possible settings appears. The
R dot indicates the current setting.XTo select the setting: Rotate ym z or slide
q m r.XTo confirm your selection: Press n.Voice Control
Switching the Help Screen On or Off
XSelect System £Settings £Voice
Control .XSelect Help Window .
You have switched the help window on
Ç or off c.
i
In addition to the audible instructions, the
help screen displays other information
during the individualization process and the
later voice control mode.
Individualization
You can use the individualization function
option to adapt the Voice control system to
your own voice and therefore improve voice
recognition. This will affect the ability of the
system to recognize the voices of other users,
and for this reason it can be switched off
( Y page 43).
The individualization function comprises two
parts and lasts around five minutes. During
the process you will practice a few number
sequences and voice commands.
Starting New Individualization
i It is only possible to start individualization
when the vehicle is stationary. Before
starting, switch off all devices or functions
which could interfere, such as the radio or
the navigation system. After starting the
42Voice ControlSystem Settings
Page 45 of 224

session, the system guides you through the
training with spoken instructions.XSelect System £Settings £Voice
Control £Start New
Individualization .
You see and hear a prompt asking whether
you would like further information.XSelect Yes or No.
If you select No, the first part of
individualization begins. You hear a prompt
asking whether you would like to train the
system in numbers or in voice commands.
After selecting Yes, you see an information
display and hear information regarding the
individualization process. The first part of
individualization then begins automatically.
orXTo close the display: Press n.
You hear a prompt asking whether you
would like to train the system in numbers
or in voice commands.
At the end of the first part, you will see a
prompt asking whether you wish to begin the
second part.
XSelect Yes or No.
If you select No, individualization will be
canceled. The data from the first part is
stored automatically.
If you select Yes, the second part will begin.
Individualization is completed at the end of
the second part. You will see a corresponding
message. The data from the second part is
stored automatically.
Canceling the First or Second Part of
Individualization
XSelect Cancel .
A prompt appears asking whether you
really do wish to cancel.XSelect Yes or No.
If you select Yes, individualization will be
canceled. The data from the current part is
not stored.
If you select No, the current part begins
again.
Deleting Existing Individualization Data
XSelect System £Settings £Voice
Control £Delete
Individualization .
A prompt appears asking whether you
really wish to delete.XSelect Yes or No.
The individualization data will either be
deleted or not, depending on your
selection. You will see a corresponding
message.
Switching Individualization On and Off
XSelect System £Settings £Voice
Control £ Individualization On .
You have switched individualization on Ç
or off c.Voice Control43System SettingsZ
Page 46 of 224

Language Setting
This function allows you to determine the
language for the menu displays and the
navigation messages. The language selection
affects the input options in the editing and
smart speller.XSelect System £Setting £Language .
The list of languages appears. The R dot
indicates the current setting.XTo select a language: Rotate ym z or slide
q m r.
The selection moves up and down.XTo confirm the language selection:
Press n.
COMAND loads the selected language and
sets it.
Rear View Camera
COMAND shows the camera picture on the
display when
R the function is switched on in the System
Settings menu and
R the vehicle is shifted into reverse gear
As soon as you shift out of reverse gear, the
previous display is shown.
i In vehicles equipped with a rear view
camera, the Video Aux connection cannot
be used for external video sources.
Switching On/Off the Display of the
Rear View Camera XSwitch to System Menu
System settings menu with Rear View Camera
option
XSelect Settings £Rear View Camera .XSelect Activation by R gear .
Depending on the previous state the
function is switched on Ç or off c.
Bluetooth
General Information About
Bluetooth ®
i Bluetooth-capable devices must
correspond to a particular profile to be
connected to COMAND. Every Bluetooth
device has a Bluetooth-specific name.
Bluetooth ®
technology is the standard for
short-range wireless data transmission of up
to approximately 30 feet. Bluetooth ®
can be
used to exchange vCards, for example.
Bluetooth ®
is a registered trademark of the
Bluetooth Special Interest Group (SIG) Inc.
44BluetoothSystem Settings
Page 47 of 224
Switching Bluetooth On or Off XSelect System £Settings £Activate
Bluetooth .
Bluetooth is switched on Ç or off c.
Reset
i You can fully reset COMAND to the
factory settings. This process deletes all
personal data, among other things, (e.g.
station memory, address book entries,
entries in the destination memory and in
the last destinations of the navigation
system). It is recommended that you
perform a reset before the vehicle is
handed over or sold, for example.
XSelect System £Settings £Reset .
A prompt appears asking whether you wish
to reset.XSelect Yes or No.
If you select Yes, a prompt will appear again
asking whether you really wish to reset.XSelect Yes or No.
If you select Yes, a message will be shown.
COMAND is reset and restarted.Reset45System SettingsZ
Page 48 of 224