2010 JAGUAR XFR warning
[x] Cancel search: warningPage 790 of 3039

Steering Column - Steering Column Flexible Coupling
Removal and Installation
Removal
NOTE: Removal steps in this procedure may contain installation details. Published: 11-May-2011
1. Refer to: Battery Disconnect and Connect (414-01 Battery, Mounting and Cables, General Procedures).
2. WARNING: Make sure to support the vehicle with axle stands.
Raise and support the vehicle.
3. Refer to: Air Deflector (501-02 Front End Body Panels, Removal and Installation).
4. Refer to: Instrument Panel Lower Trim Panel (501-12 Instrument Panel and Console, Removal and Installation).
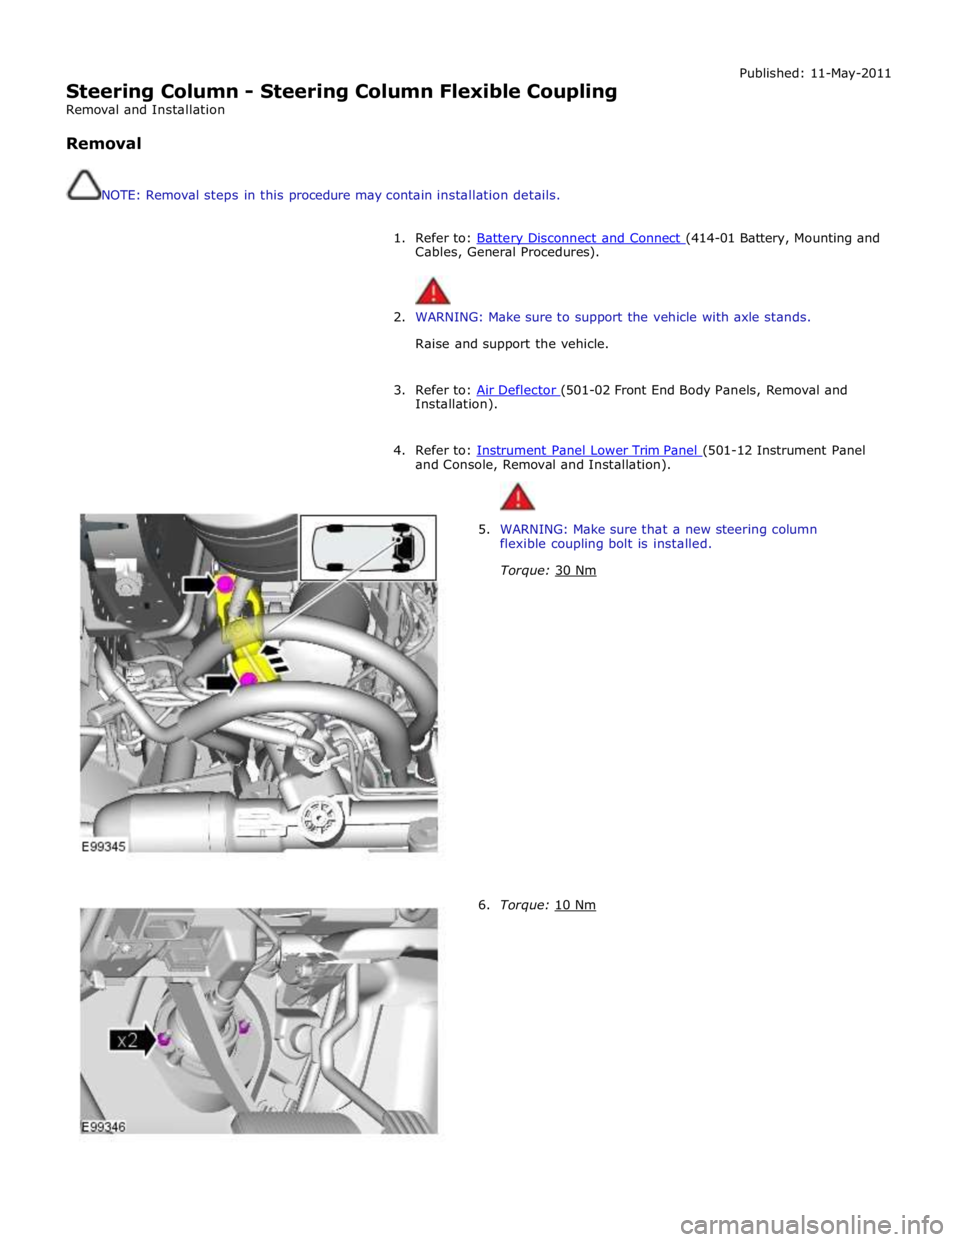
5. WARNING: Make sure that a new steering column
flexible coupling bolt is installed.
Torque: 30 Nm
6. Torque: 10 Nm
Page 813 of 3039

Component Tests
Engine Oil Leaks
NOTE: Before installing new gaskets or oil seals, make sure that the fault is clearly established.
If the oil leak cannot be identified clearly by a visual inspection, carry out an Ultraviolet test:
Fluorescent Oil Additive Method
1. Clean the engine with a suitable cleaning fluid (brake cleaner).
2. Drain the engine oil and refill with recommended oil, premixed with Diesel Engine Oil Dye or equivalent. Use a minimum
14.8 ml (0.5 ounce) to a maximum 29.6 ml (1 ounce) of fluorescent additive to all engines. If oil is not premixed,
fluorescent additive must first be added to the crankcase.
3. Run engine for 15 minutes. Stop the engine and inspect all seal and gasket areas for leaks using a 12 Volt Master UV
Diagnostic Inspection Kit or equivalent. A clear bright yellow or orange area will identify leak. For extremely small
leaks, several hours may be required for the leak to appear.
4. As necessary, pressurize the main oil gallery system to locate leaks due to incorrectly sealed, loose or cocked plugs. If
the flywheel bolts leak oil, look for sealer on the threads.
5. Repair all leaks as necessary.
Compression Test General Remarks
NOTES:
Removing fuses and disconnecting electrical components may cause the Engine Control Module (ECM) to log Diagnostic
Trouble Codes (DTCs). After the measurements have been carried out, DTCs should be cleared from memory by connecting to
the Manufacturer Approved Diagnostic System.
Only check the compression pressure with the valves set to the prescribed clearance (if this can be adjusted).
The compression pressure should be checked with the engine at normal operating temperature.
Check the Compression Pressure
WARNING: Move gear selector lever to 'P' position. Failure to follow this instruction may result in personal injury.
1. Remove the fuel pump relay.
2. Start the engine - the engine will start, run for a few seconds then stall.
3. Remove the spark plugs.
4. Install the compression tester.
5. Install an auxiliary starter switch in the starting circuit. With the ignition switch OFF, using the auxiliary starter switch,
crank the engine a minimum of five compression strokes and record the highest reading. Note the approximate number
of compression strokes required to obtain the highest reading.
6. Repeat the test on each cylinder, cranking the engine approximately the same number of compression strokes.
7. Install the removed components in reverse order, observing the specified tightening torques.
8. Clear all DTCs from the ECM.
Interpretation of the Results
NOTE: Due to the possibility of loose carbon that has become trapped between the valve face and seat effecting the
pressure readings, when carrying out a compression test and cylinders are found to have low pressures, install the spark plugs,
road test the vehicle and re-test the suspect cylinders. If the correct pressures are restored, no further action is required.
The indicated compression pressures are considered within specification if the lowest reading cylinder is within 75% of the
highest reading.
If the cylinder pressures are found to be low, carry out a leakdown test to determine the location of the fault (if any leakback
can be heard through the engine breather system suspect the piston rings, if any leakback can be heard through the inlet
system suspect the inlet valve or seat, if any leakback can be heard through the exhaust manifold suspect the exhaust valve
or seat. If the measurements for two cylinders next to each other are both too low then it is very likely that the cylinder head
gasket between them is burnt through. This can also be recognized by traces of engine oil in the coolant and/or coolant in the
Page 816 of 3039

9. WEAK VALVE SPRINGS: When the needle oscillation becomes more violent as engine RPM is increased, weak valve
springs are indicated. The reading at idle could be relatively steady.
10. LATE VALVE TIMING: A steady but low reading could be caused by late valve timing.
11.
IGNITION TIMING RETARDED: Retarded ignition timing will produce a steady but somewhat low reading.
12.
INSUFFICIENT SPARK PLUG GAP: When spark plugs are gapped too close, a regular, small pulsation of the needle can
occur.
13. INTAKE LEAK: A low, steady reading can be caused by an intake manifold or throttle body gasket leak.
14.
BLOWN HEAD GASKET: A regular drop of fair magnitude can be caused by a blown head gasket or warped cylinder head
to cylinder block surface.
15.
RESTRICTED EXHAUST SYSTEM: When the engine is first started and is idled, the reading may be normal, but as the
engine RPM is increased, the back pressure caused by a clogged muffler, kinked tail pipe or other concerns will cause
the needle to slowly drop to 0 kPa (0 in-Hg). The needle then may slowly rise. Excessive exhaust clogging will cause
the needle to drop to a low point even if the engine is only idling.
When vacuum leaks are indicated, search out and correct the cause. Excess air leaking into the system will upset the fuel
mixture and cause concerns such as rough idle, missing on acceleration or burned valves. If the leak exists in an accessory
such as the power brake booster, the unit will not function correctly. Always repair vacuum leaks.
Engine Oil Pressure Check
NOTE: Prior to checking the engine oil pressure, a road test of 6 miles (10 kilometres), must be carried out. Do not
attempt to attain engine normal operating temperature by allowing the engine to idle.
1. Disconnect the battery ground cable. Refer to section 414-00 - Charging System - General Information of the workshop
manual
2. WARNINGS:
The spilling of hot engine oil is unavoidable during this procedure, care must be taken to prevent scalding.
Wear protective gloves.
Remove the engine oil filter element
REFER to: Oil Filter Element (303-01C Engine - V8 5.0L Petrol, Removal and Installation).
NOTE: Ensure the oil filter element is not contaminated during this procedure
3. Install the oil filter element into special tool (Oil filter adapter number 303-1451)
4. Install the special tool (Oil filter adapter number 303-1451) to the engine. Torque: 25 Nm
5. Install the special tool (Oil pressure testing gauge, 303-871) and tighten the union
6. Connect the battery ground cable
7. Refer to owner hand book, check and top-up the engine oil if required
8. Start and run the engine
9. Note the oil pressure readings with the engine running at idle and 3500 RPM
10.
Turn off the engine
11.
Disconnect the battery ground cable
12. Remove the special tools
1. Clean the components
13.
Install the engine oil filter element
REFER to: Oil Filter Element (303-01C Engine - V8 5.0L Petrol, Removal and Installation).
NOTE: Ensure the oil filter element is not contaminated during this procedure
14.
Connect the battery ground cable
15. Refer to owner hand book, check and top-up the engine oil if required
www.JagDocs.com
Page 827 of 3039

Published: 02-Jun-2011
Engine System - General Information - Leakage Test Using Smoke Test Equipment
General Procedures
CAUTION: The compressed air line supply pressure must be between 3.5 and 12 bar (50 and 175 psi) for the smoke test
equipment to function correctly. Do not exceed this pressure. Failure to follow this instruction may result in damage to the
smoke test equipment.
NOTES:
The vehicle battery must be in good condition and fully charged before carrying out this procedure.
On vehicles with 3.0L TDV6, it will be necessary to insert smoke at both air cleaner outlet pipes independently if the right
hand turbocharger and associated hoses are to be tested.
In some cases it may be necessary to remove undertrays, trim or engine covers to obtain access to all potential leak
locations.
Some variation in the illustrations may occur, but the essential information is always correct.
For further information regarding operation of the test equipment refer to the manufacturers operators manual supplied
with the kit.
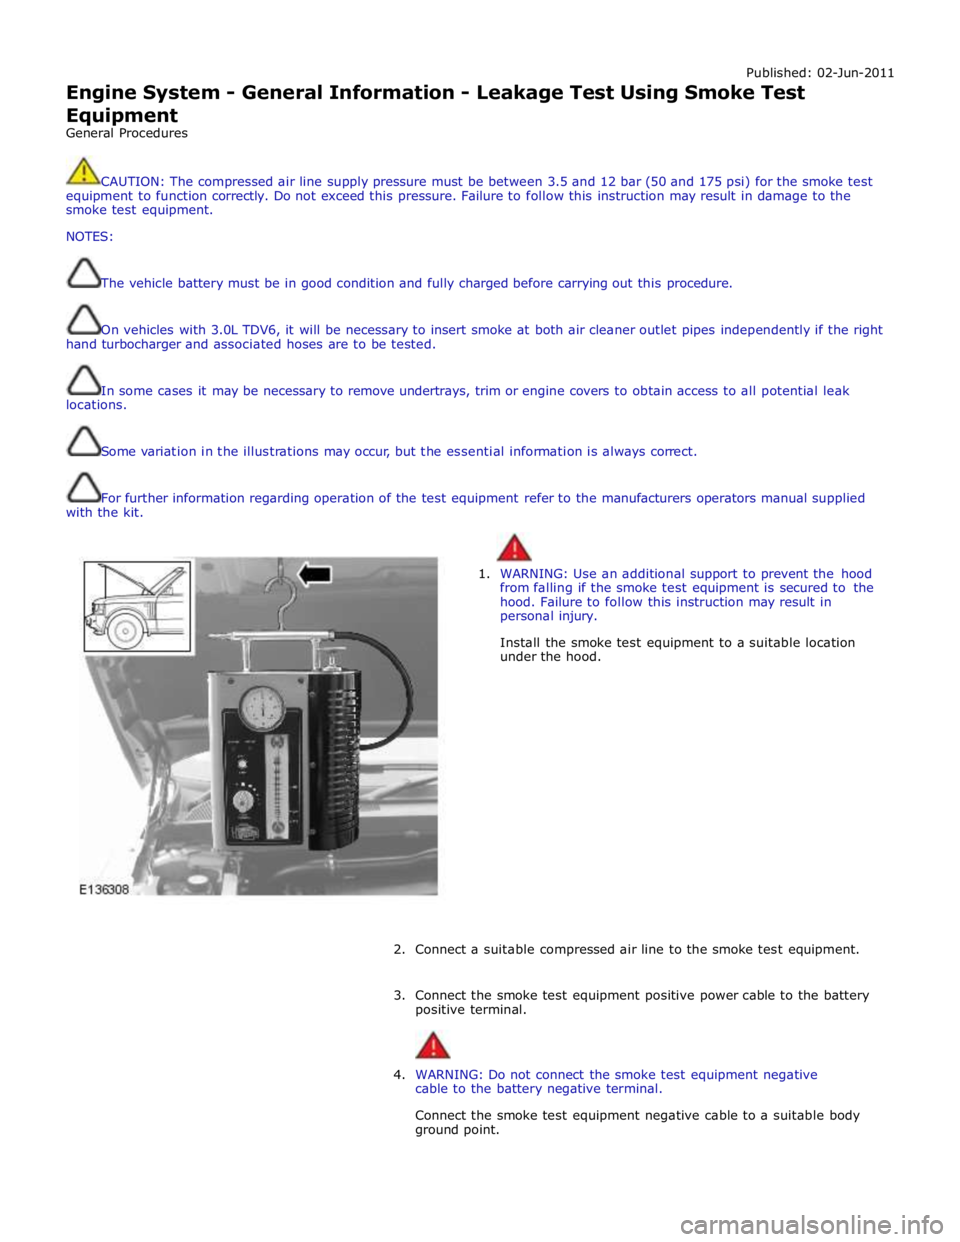
1. WARNING: Use an additional support to prevent the hood
from falling if the smoke test equipment is secured to the
hood. Failure to follow this instruction may result in
personal injury.
Install the smoke test equipment to a suitable location
under the hood.
2. Connect a suitable compressed air line to the smoke test equipment.
3. Connect the smoke test equipment positive power cable to the battery
positive terminal.
4. WARNING: Do not connect the smoke test equipment negative
cable to the battery negative terminal.
Connect the smoke test equipment negative cable to a suitable body
ground point.
Page 869 of 3039

Operating Temperature Range -40 to 160 °C (-40 to 320 °F) Oil Level Check
For additional information, refer to Engine Oil Draining and Filling (303-01A, General Procedures).
For accuracy, oil level checks should be performed with the vehicle on level ground when the oil is hot. The vehicle needs to
stand for approximately 10 minutes, after the engine is switched off, to allow the oil to drain back into the sump pan and the
oil level to stabilize. The oil level system will not give a reading until the oil level has stabilized.
With the ignition on, the engine stopped and the transmission in P (park), repeatedly press the trip button on the end of the
LH multifunction switch until the oil level icon and applicable message are displayed in the fuel gage/trip computer area of the message center, as shown below:
Item Description A Oil level is between 50% and 100% of recommended level. No top-up required. B Oil level is between 12.5% and 50% percent of recommended level. Add 0.5 liter (0.53 US quart) of oil. C Oil level is between 0% and 12.5% of recommended level. Add 1 liter (1.06 US quarts) of oil. D Oil level is above maximum for safe operation. Reduce oil level to recommended level. E Oil level is below minimum for safe operation. Add 1.5 liters (1.59 US quarts) of oil, then recheck level. F Oil level is stabilizing. Wait 10 minutes and then recheck level. If this display is accompanied by the message ENGINE OIL LEVEL MONITOR SYSTEM FAULT, a fault with the oil level monitoring system is indicated. System Fault Warning
If there is a fault with the system, in addition to being displayed during an oil level check, the message ENGINE OIL LEVEL
MONITOR SYSTEM FAULT will be temporarily displayed when the ignition is first switched on.
Page 871 of 3039

Engine - V8 S/C 5.0L Petrol - Engine Oil Draining and Filling
General Procedures
Draining Published: 11-May-2011
WARNING: The spilling of hot engine oil is unavoidable during this procedure, care must be taken to prevent scalding.
CAUTION: Correct installation of the oil filler cap can be obtained by tightening the cap until hard stop.
NOTE: Clean the components general area prior to dismantling.
1. CAUTION: Make sure the engine is warm.
Start the engine and allow to run for 10 minutes, stop the engine.
2.
3. Refer to: Engine Cover - V8 5.0L Petrol/V8 S/C 5.0L Petrol (501-05 Interior Trim and Ornamentation, Removal and Installation).
4.
Loosen the element cover 4 complete turns to allow
engine oil to drain from the filter cover.
Make sure that the O-ring seal is exposed.
5. NOTE: Allow 10 minutes for the engine oil to drain from the oil filter
housing. www.JagDocs.com
Page 872 of 3039

6. NOTE: Remove and discard the O-ring seal.
7. Remove and discard the oil filter element.
8. WARNING: Do not work on or under a vehicle supported only by a
jack. Always support the vehicle on safety stands.
Raise and support the vehicle.
9. Refer to: Air Deflector (501-02 Front End Body Panels, Removal and Installation).
10. CAUTIONS:
Be prepared to collect escaping oil.
Allow at least 10 minutes for the engine oil to drain.
NOTE: Discard the sealing washer.
Page 878 of 3039

Published: 11-May-2011
Engine - V8 S/C 5.0L Petrol - Engine Oil Vacuum Draining and Filling
General Procedures
Special Tool(s)
303-1484
Vacuum Pump, Oil Drain
303-1484-01
Adapter for 303-1484
Draining
WARNING: The spilling of hot engine oil is unavoidable during this procedure, care must be taken to prevent scalding.
CAUTION: Correct installation of the oil filler cap can be obtained by tightening the cap until hard stop.
NOTES:
Make sure that the vehicle is parked on level ground.
Clean the components general area prior to dismantling.
1.
Start the engine and allow to run for 10 minutes, stop the
engine.
2. CAUTION: Allow 10 minutes from turning the engine off
before starting oil extraction.
3. Refer to: Engine Cover - V8 5.0L Petrol/V8 S/C 5.0L Petrol (501-05 Interior Trim and Ornamentation, Removal and Installation).