Page 2843 of 3039
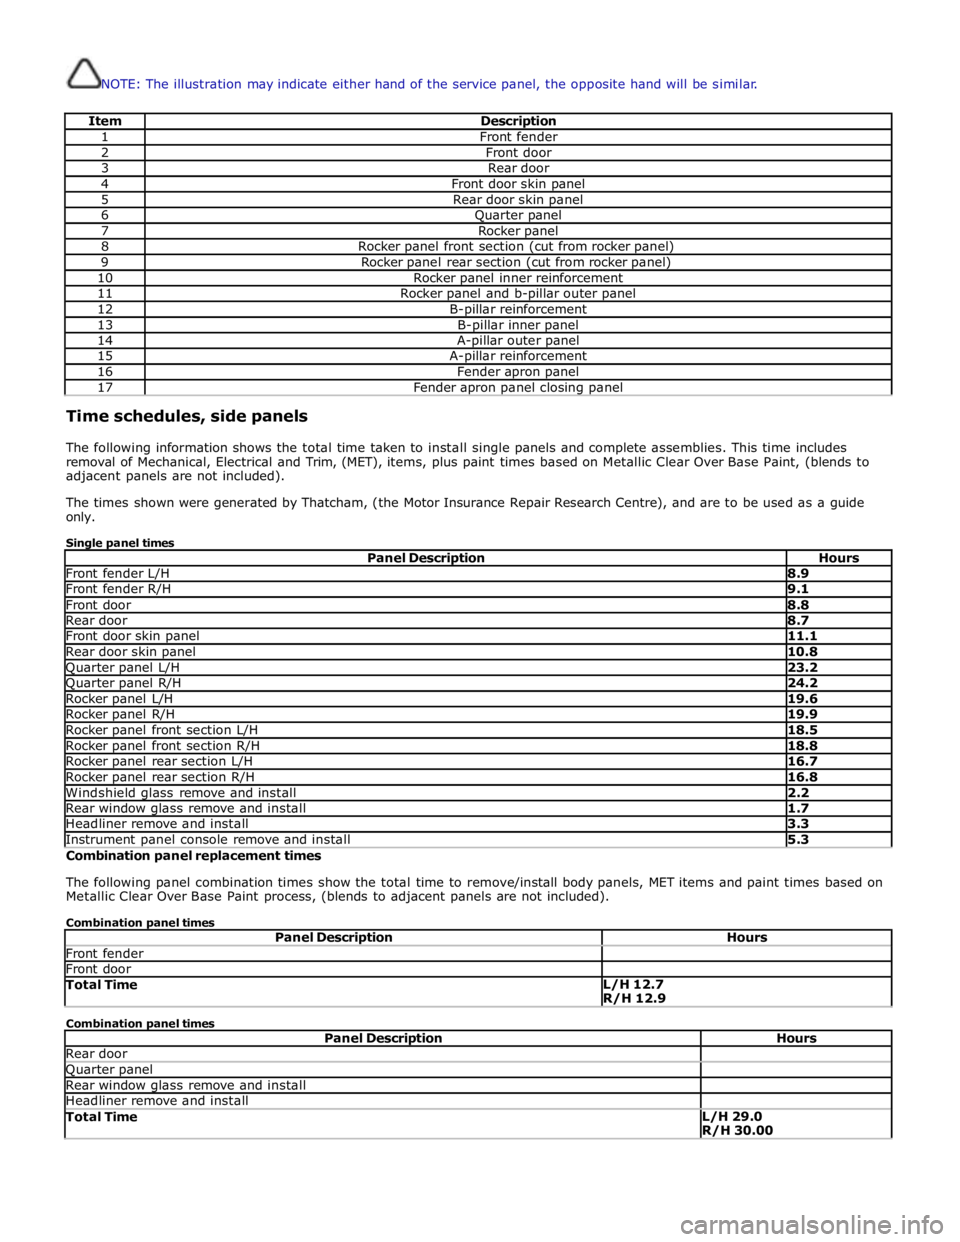
NOTE: The illustration may indicate either hand of the service panel, the opposite hand will be similar.
Item Description 1 Front fender 2 Front door 3 Rear door 4 Front door skin panel 5 Rear door skin panel 6 Quarter panel 7 Rocker panel 8 Rocker panel front section (cut from rocker panel) 9 Rocker panel rear section (cut from rocker panel) 10 Rocker panel inner reinforcement 11 Rocker panel and b-pillar outer panel 12 B-pillar reinforcement 13 B-pillar inner panel 14 A-pillar outer panel 15 A-pillar reinforcement 16 Fender apron panel 17 Fender apron panel closing panel Time schedules, side panels
The following information shows the total time taken to install single panels and complete assemblies. This time includes
removal of Mechanical, Electrical and Trim, (MET), items, plus paint times based on Metallic Clear Over Base Paint, (blends to
adjacent panels are not included).
The times shown were generated by Thatcham, (the Motor Insurance Repair Research Centre), and are to be used as a guide
only.
Single panel times
Panel Description Hours Front fender L/H 8.9 Front fender R/H 9.1 Front door 8.8 Rear door 8.7 Front door skin panel 11.1 Rear door skin panel 10.8 Quarter panel L/H 23.2 Quarter panel R/H 24.2 Rocker panel L/H 19.6 Rocker panel R/H 19.9 Rocker panel front section L/H 18.5 Rocker panel front section R/H 18.8 Rocker panel rear section L/H 16.7 Rocker panel rear section R/H 16.8 Windshield glass remove and install 2.2 Rear window glass remove and install 1.7 Headliner remove and install 3.3 Instrument panel console remove and install 5.3 Combination panel replacement times
The following panel combination times show the total time to remove/install body panels, MET items and paint times based on
Metallic Clear Over Base Paint process, (blends to adjacent panels are not included).
Combination panel times
Panel Description Hours Front fender Front door Total Time L/H 12.7
R/H 12.9 Combination panel times
Panel Description Hours Rear door Quarter panel Rear window glass remove and install Headliner remove and install Total Time L/H 29.0
R/H 30.00
Page 2844 of 3039
Front door Rear door Rocker panel and b-pillar outer panel B-pillar reinforcement B-pillar inner panel Headliner remove and install Total Time L/H 39.0
R/H 39.0 Combination panel times
Panel Description Hours Front fender Front door Rear door Quarter panel Rear window glass remove and install Headliner remove and install Total Time L/H 36.2
R/H 37.4 Combination panel times
Panel Description Hours Front fender Front door A-pillar outer panel A-pillar reinforcement Fender apron panel Fender apron panel closing panel Windshield glass remove and install Instrument panel console remove and install Headliner remove and install Total Time L/H 46.4
R/H 46.6 www.JagDocs.com
Page 2860 of 3039
21.
22. Cut a window in the old panel, above the front door lower
hinge reinforcement, to enable access to the spot welds as
indicated.
NOTE: The spot welds indicated should be drilled right
through, to enable MAG plug welding and a MIG braze slot
on installation. The MIG braze slot is required as the
original panel is MIG brazed in this area.
Drill out the spot welds as indicated.
Page 2881 of 3039
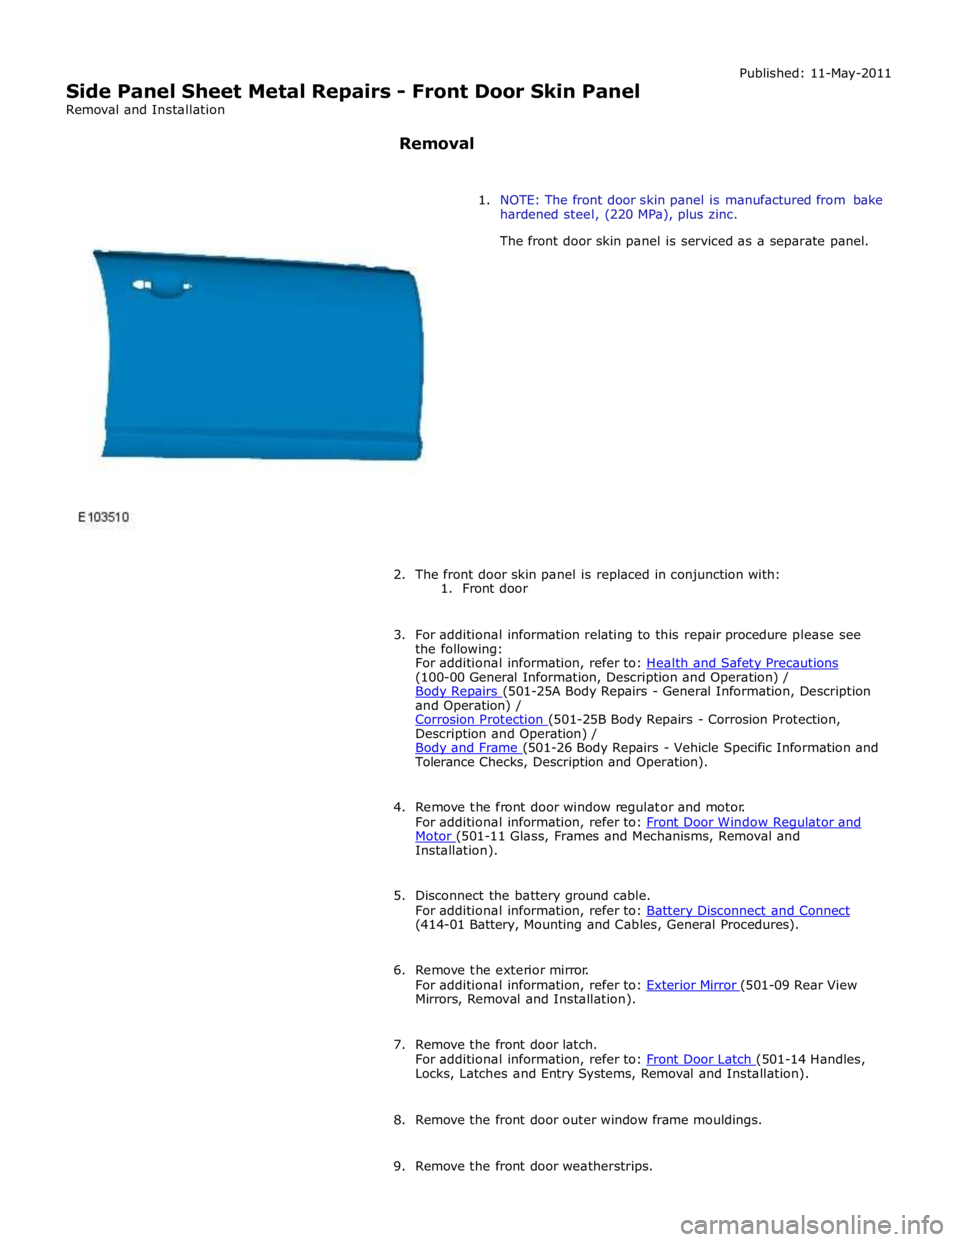
(100-00 General Information, Description and Operation) /
Body Repairs (501-25A Body Repairs - General Information, Description and Operation) /
Corrosion Protection (501-25B Body Repairs - Corrosion Protection, Description and Operation) /
Body and Frame (501-26 Body Repairs - Vehicle Specific Information and Tolerance Checks, Description and Operation).
4. Remove the front door window regulator and motor.
For additional information, refer to: Front Door Window Regulator and Motor (501-11 Glass, Frames and Mechanisms, Removal and Installation).
5. Disconnect the battery ground cable.
For additional information, refer to: Battery Disconnect and Connect (414-01 Battery, Mounting and Cables, General Procedures).
6. Remove the exterior mirror.
For additional information, refer to: Exterior Mirror (501-09 Rear View Mirrors, Removal and Installation).
7. Remove the front door latch.
For additional information, refer to: Front Door Latch (501-14 Handles, Locks, Latches and Entry Systems, Removal and Installation).
8. Remove the front door outer window frame mouldings.
9. Remove the front door weatherstrips.
Page 2887 of 3039
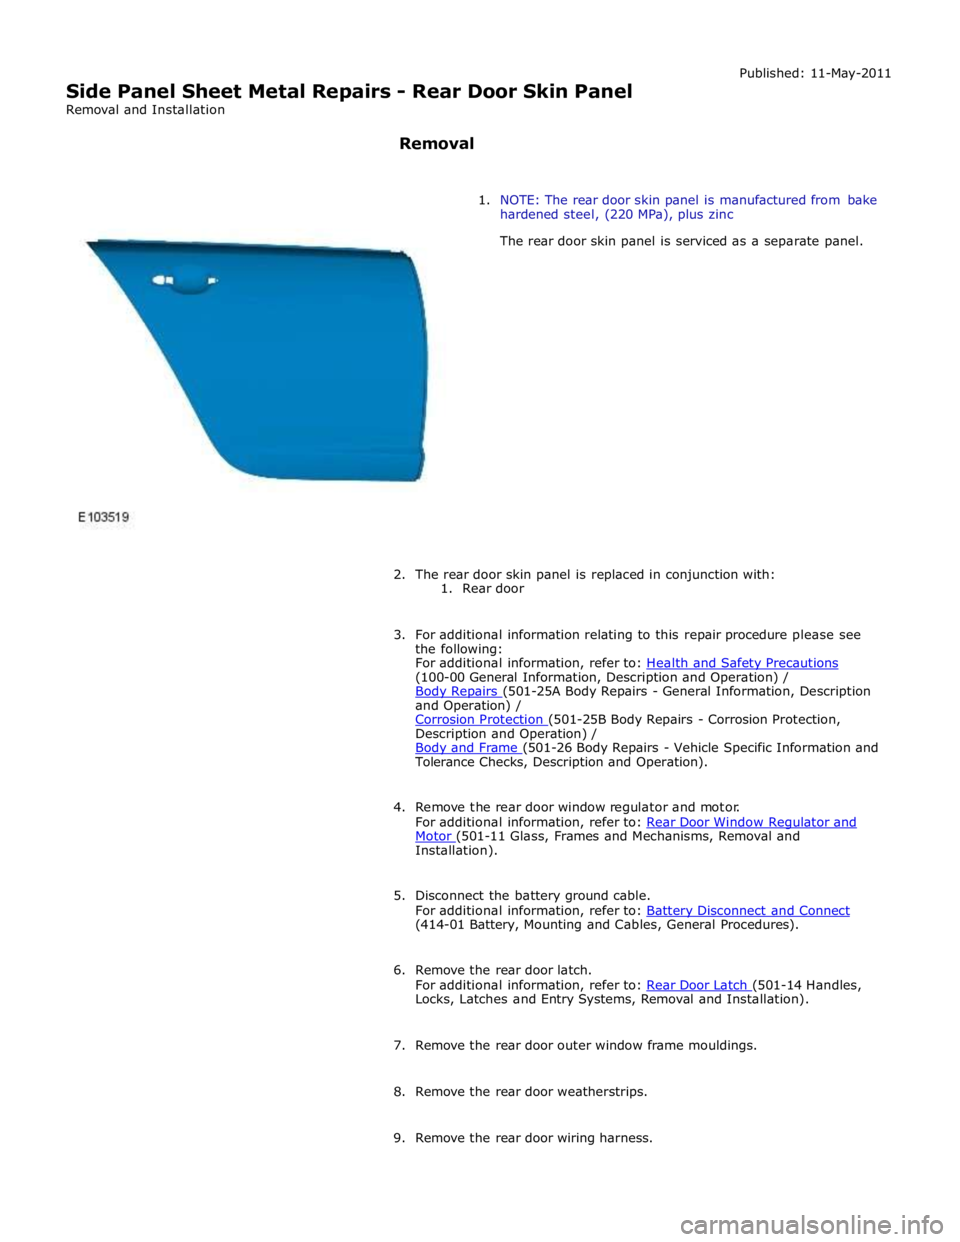
(100-00 General Information, Description and Operation) /
Body Repairs (501-25A Body Repairs - General Information, Description and Operation) /
Corrosion Protection (501-25B Body Repairs - Corrosion Protection, Description and Operation) /
Body and Frame (501-26 Body Repairs - Vehicle Specific Information and Tolerance Checks, Description and Operation).
4. Remove the rear door window regulator and motor.
For additional information, refer to: Rear Door Window Regulator and Motor (501-11 Glass, Frames and Mechanisms, Removal and Installation).
5. Disconnect the battery ground cable.
For additional information, refer to: Battery Disconnect and Connect (414-01 Battery, Mounting and Cables, General Procedures).
6. Remove the rear door latch.
For additional information, refer to: Rear Door Latch (501-14 Handles, Locks, Latches and Entry Systems, Removal and Installation).
7. Remove the rear door outer window frame mouldings.
8. Remove the rear door weatherstrips.
9. Remove the rear door wiring harness.
Page 2941 of 3039
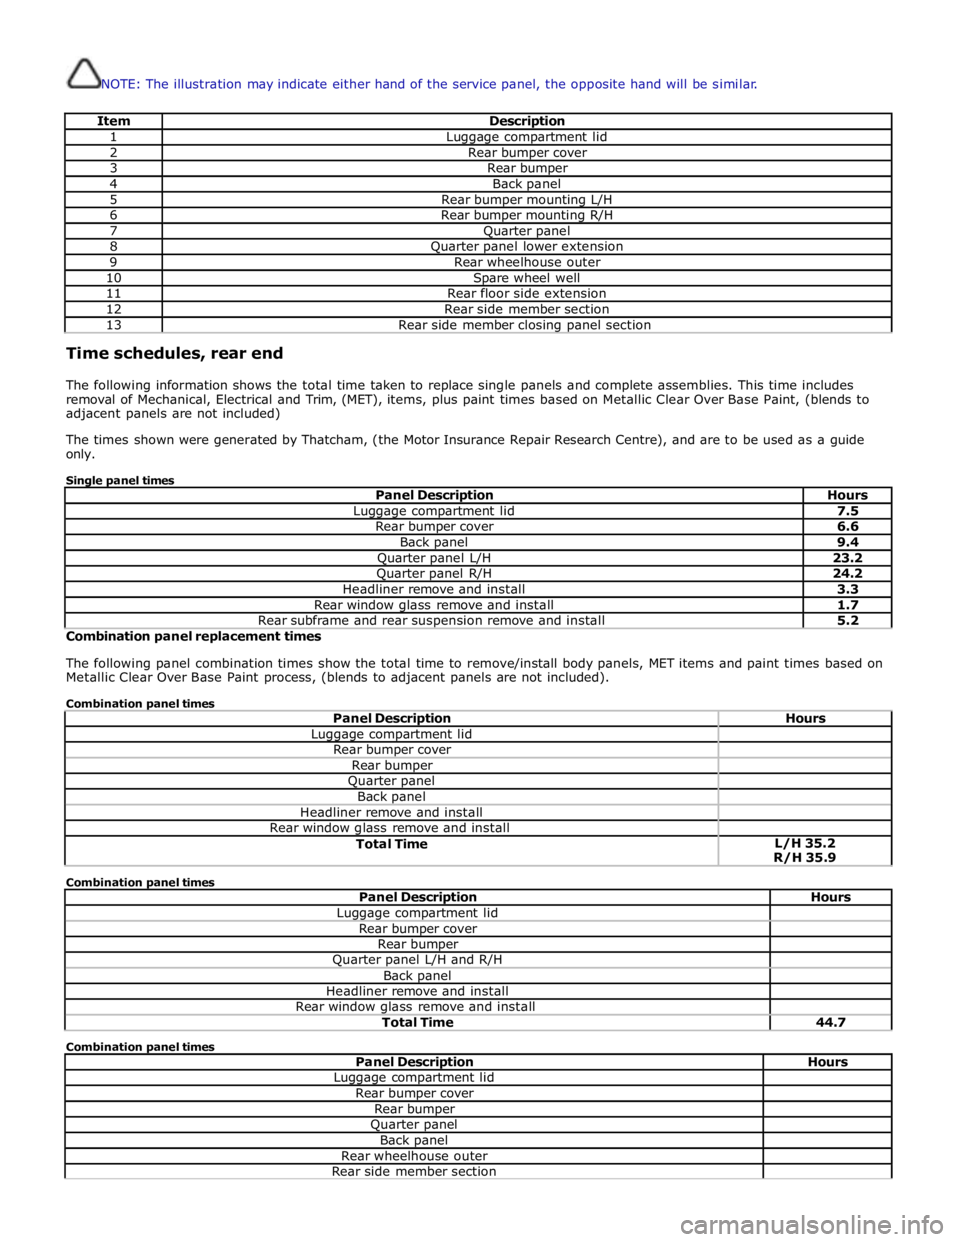
NOTE: The illustration may indicate either hand of the service panel, the opposite hand will be similar.
Item Description 1 Luggage compartment lid 2 Rear bumper cover 3 Rear bumper 4 Back panel 5 Rear bumper mounting L/H 6 Rear bumper mounting R/H 7 Quarter panel 8 Quarter panel lower extension 9 Rear wheelhouse outer 10 Spare wheel well 11 Rear floor side extension 12 Rear side member section 13 Rear side member closing panel section Time schedules, rear end
The following information shows the total time taken to replace single panels and complete assemblies. This time includes
removal of Mechanical, Electrical and Trim, (MET), items, plus paint times based on Metallic Clear Over Base Paint, (blends to
adjacent panels are not included)
The times shown were generated by Thatcham, (the Motor Insurance Repair Research Centre), and are to be used as a guide
only.
Single panel times
Panel Description Hours Luggage compartment lid 7.5 Rear bumper cover 6.6 Back panel 9.4 Quarter panel L/H 23.2 Quarter panel R/H 24.2 Headliner remove and install 3.3 Rear window glass remove and install 1.7 Rear subframe and rear suspension remove and install 5.2 Combination panel replacement times
The following panel combination times show the total time to remove/install body panels, MET items and paint times based on
Metallic Clear Over Base Paint process, (blends to adjacent panels are not included).
Combination panel times
Panel Description Hours Luggage compartment lid Rear bumper cover Rear bumper Quarter panel Back panel Headliner remove and install Rear window glass remove and install Total Time L/H 35.2
R/H 35.9 Combination panel times
Panel Description Hours Luggage compartment lid Rear bumper cover Rear bumper Quarter panel L/H and R/H Back panel Headliner remove and install Rear window glass remove and install Total Time 44.7 Combination panel times
Panel Description Hours Luggage compartment lid Rear bumper cover Rear bumper Quarter panel Back panel Rear wheelhouse outer Rear side member section
Page 2942 of 3039
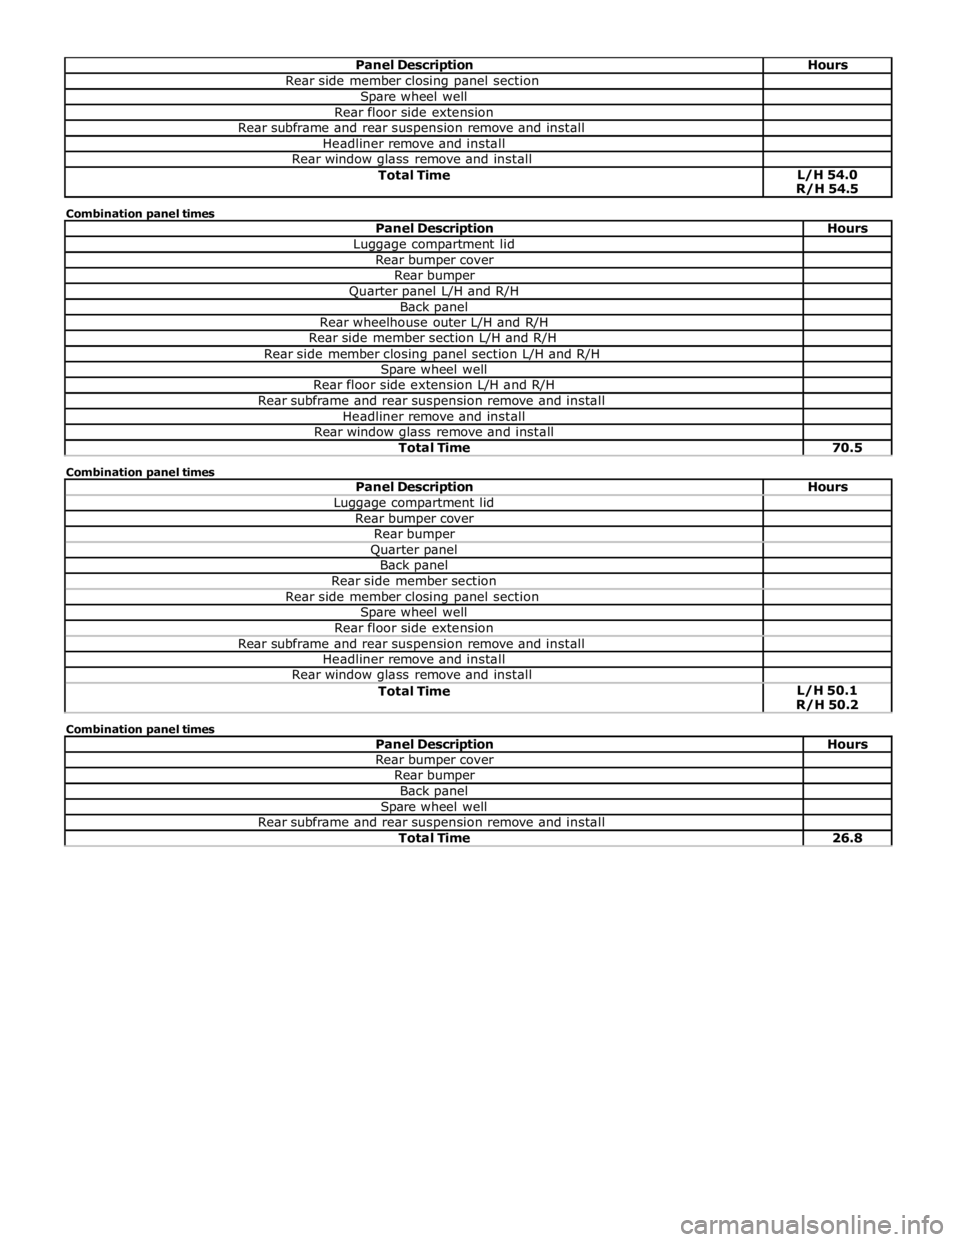
Rear side member closing panel section Spare wheel well Rear floor side extension Rear subframe and rear suspension remove and install Headliner remove and install Rear window glass remove and install Total Time L/H 54.0
R/H 54.5 Combination panel times
Panel Description Hours Luggage compartment lid Rear bumper cover Rear bumper Quarter panel L/H and R/H Back panel Rear wheelhouse outer L/H and R/H Rear side member section L/H and R/H Rear side member closing panel section L/H and R/H Spare wheel well Rear floor side extension L/H and R/H Rear subframe and rear suspension remove and install Headliner remove and install Rear window glass remove and install Total Time 70.5 Combination panel times
Panel Description Hours Luggage compartment lid Rear bumper cover Rear bumper Quarter panel Back panel Rear side member section Rear side member closing panel section Spare wheel well Rear floor side extension Rear subframe and rear suspension remove and install Headliner remove and install Rear window glass remove and install Total Time L/H 50.1
R/H 50.2 Combination panel times
Panel Description Hours Rear bumper cover Rear bumper Back panel Spare wheel well Rear subframe and rear suspension remove and install Total Time 26.8
Page 2950 of 3039
Supplemental Restraint System, Removal and Installation).
23. Remove the rear window glass.
24. Remove the audio unit antenna amplifier.
For additional information, refer to: Audio Unit Antenna Amplifier (415-01A Information and Entertainment System, Removal and
Installation).
25. If the left-hand rear quarter panel is to be repaired, remove the diversity
antenna module.
26. Remove the C-Pillar side impact sensor.
For additional information, refer to: C-Pillar Side Impact Sensor (501-20B Supplemental Restraint System, Removal and Installation).
27. Remove the rear door striker.
28. Remove the luggage compartment lid.
29. If the right-hand rear quarter panel is to be repaired, drain the fuel tank.
For additional information, refer to: Fuel Tank Draining (310-00 Fuel System - General Information, General Procedures).
30. If the right-hand rear quarter panel is to be repaired, remove the fuel
filler door.
31. If the right-hand rear quarter panel is to be repaired, remove the fuel
tank filler pipe.
For additional information, refer to: Fuel Tank Filler Pipe (310-01 Fuel
Tank and Lines - 3.0L, Removal and Installation) /
Fuel Tank Filler Pipe (310-01 Fuel Tank and Lines - 4.2L, Removal and
Installation).
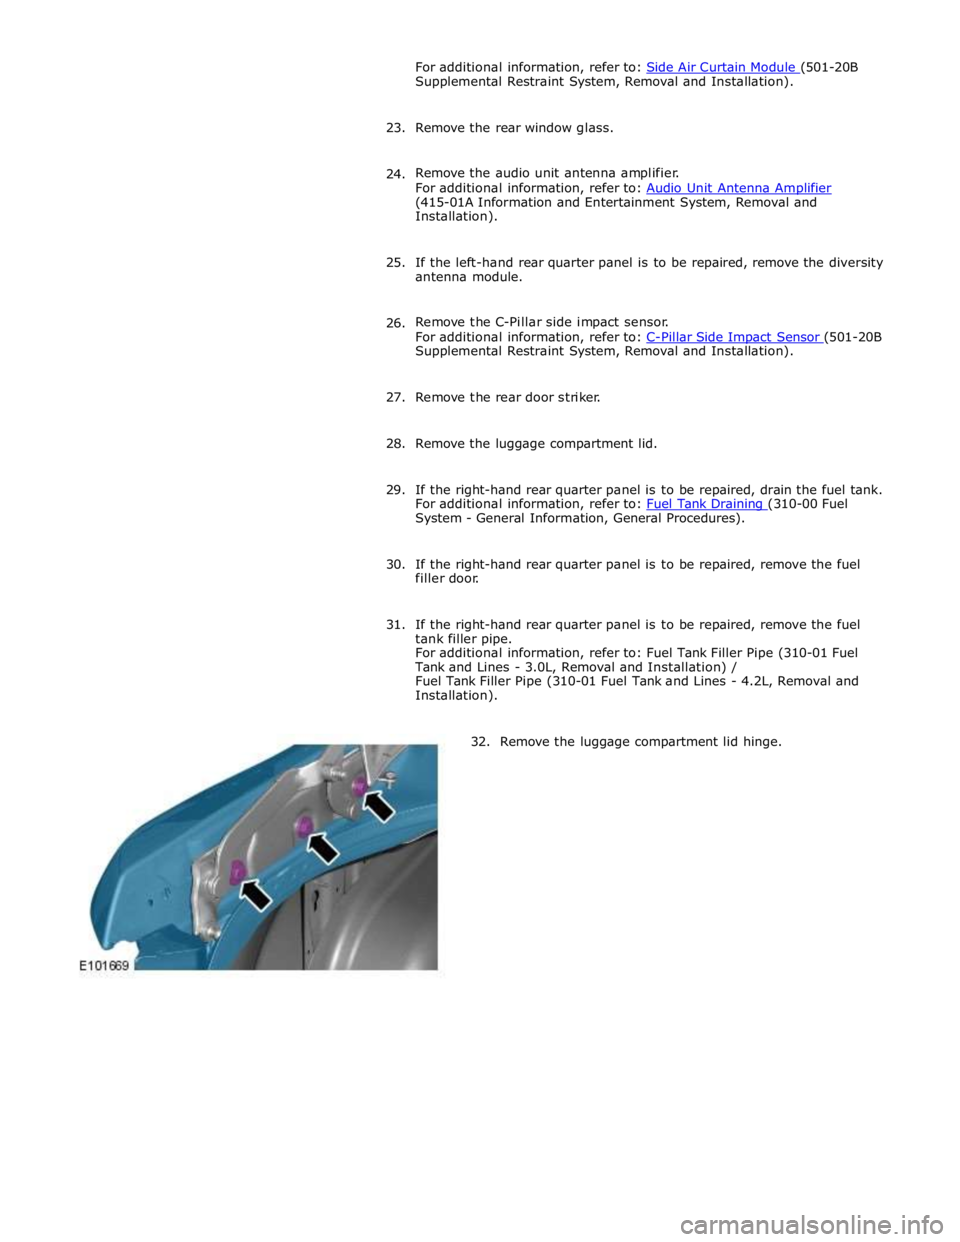
32. Remove the luggage compartment lid hinge.