2010 CHEVROLET EQUINOX stop start
[x] Cancel search: stop startPage 12 of 394
1-6 Keys, Doors and Windows
Shutting the Engine Off After a
Remote Start
To shut off the engine:
.Press/until the parking lamps
turn off.
.Turn on the hazard warning
flashers.
.Insert the key and turn it to ON/
RUN and then back to
LOCK/OFF.
Conditions in Which Remote Start
Will Not Work
The remote vehicle start feature will
not operate if:
.The key is in the ignition.
.The hood or doors are not
closed.
.The hazard warning flashers
are on.
.There is an emission control
system malfunction.
.The engine coolant temperature
is too high.
.The oil pressure is low.
.Two remote vehicle starts have
already been used.
.The vehicle is not in P (Park).
Door Locks
{WARNING
Unlocked doors can be
dangerous.
.Passengers, especially
children, can easily open the
doors and fall out of a moving
vehicle. The chance of being
thrown out of the vehicle in a
crash is increased if the
doors are not locked. So, all
passengers should wear
safety belts properly and the
doors should be locked
whenever the vehicle is
driven. (Continued)
WARNING (Continued)
.Young children who get into
unlocked vehicles may be
unable to get out. A child can
be overcome by extreme heat
and can suffer permanent
injuries or even death from
heat stroke. Always lock the
vehicle whenever leaving it.
.Outsiders can easily enter
through an unlocked door
when you slow down or stop
your vehicle. Locking your
doors can help prevent this
from happening.
To lock or unlock a door from the
outside of the vehicle, use the
Remote Keyless Entry (RKE)
transmitter. Pull the handle once
from the inside to unlock the door,
and a second time to open it.
Page 16 of 394
1-10 Keys, Doors and Windows
mounted cargo during power
operation. The liftgate can still be
fully opened manually.
OFF:The liftgate only operates
manually in this position.
Manual operation of a liftgate that
also has power operation requires
more effort than with a standard
manual liftgate.
In either the MAX or the 3/4 mode,
the liftgate can be power opened
and closed by:
.First pressingKand then
pressing and holding
Von the
Remote Keyless Entry (RKE)
transmitter until the liftgate starts
moving. See Remote Keyless
Entry (RKE) System Operation
on page 1‑3.
.Pressing the power liftgate
button on the center of the mode
switch, located on the overhead
console.
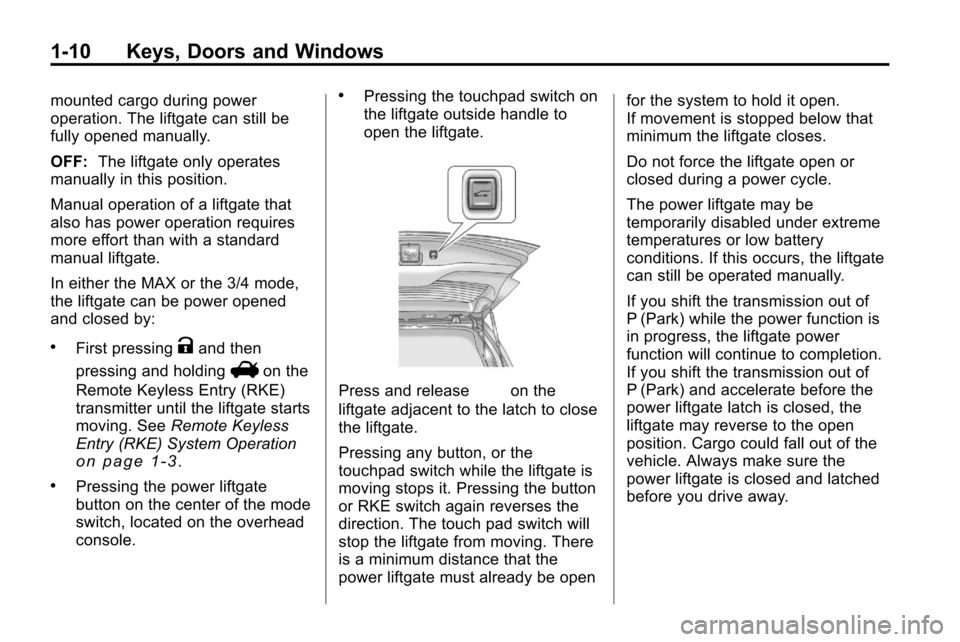
.Pressing the touchpad switch on
the liftgate outside handle to
open the liftgate.
Press and release&on the
liftgate adjacent to the latch to close
the liftgate.
Pressing any button, or the
touchpad switch while the liftgate is
moving stops it. Pressing the button
or RKE switch again reverses the
direction. The touch pad switch will
stop the liftgate from moving. There
is a minimum distance that the
power liftgate must already be open for the system to hold it open.
If movement is stopped below that
minimum the liftgate closes.
Do not force the liftgate open or
closed during a power cycle.
The power liftgate may be
temporarily disabled under extreme
temperatures or low battery
conditions. If this occurs, the liftgate
can still be operated manually.
If you shift the transmission out of
P (Park) while the power function is
in progress, the liftgate power
function will continue to completion.
If you shift the transmission out of
P (Park) and accelerate before the
power liftgate latch is closed, the
liftgate may reverse to the open
position. Cargo could fall out of the
vehicle. Always make sure the
power liftgate is closed and latched
before you drive away.
Page 29 of 394
Seats and Restraints 2-3
Front Seats
Seat Adjustment
{WARNING
You can lose control of the
vehicle if you try to adjust a
manual driver's seat while the
vehicle is moving. The sudden
movement could startle and
confuse you, or make you push a(Continued)
WARNING (Continued)
pedal when you do not want to.
Adjust the driver's seat only when
the vehicle is not moving.
To adjust the seat position:
1. Pull the handle located at the front of the seat.
2. Move the seat forward or backward to adjust the seat
position.
3. Release the handle to stop the seat from moving.
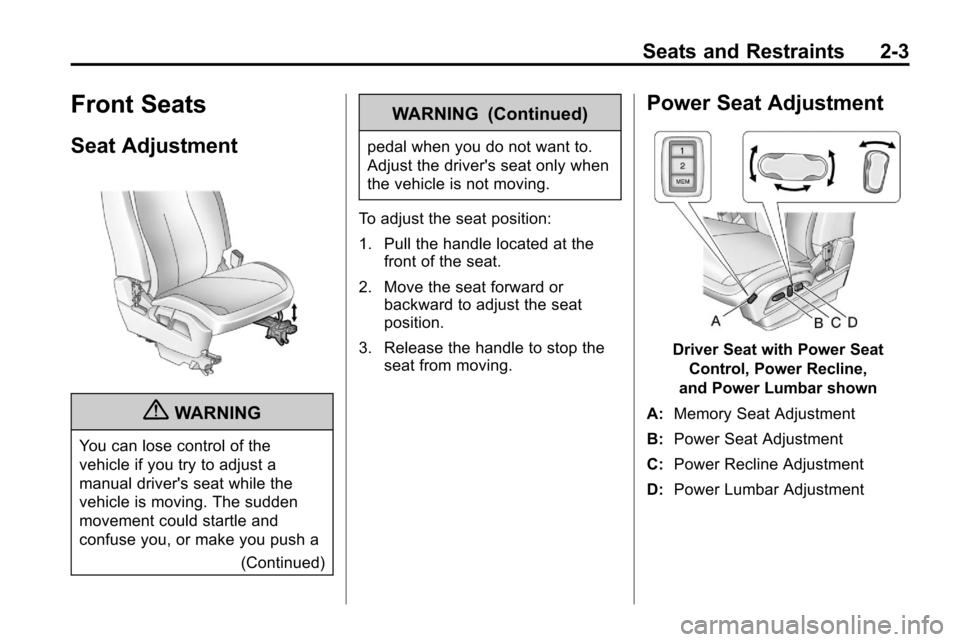
Power Seat Adjustment
Driver Seat with Power Seat
Control, Power Recline,
and Power Lumbar shown
A: Memory Seat Adjustment
B: Power Seat Adjustment
C: Power Recline Adjustment
D: Power Lumbar Adjustment
Page 31 of 394
Seats and Restraints 2-5
To stop recall movement of the RKE
remote recall feature, press one of
the power seat controls, memory
buttons, or power mirror buttons.
Memory Seat recall may stop if
the seat is blocked. Remove the
obstruction and then press the
memory button again. If the memory
function does not work properly, see
your dealer for service.
Easy Exit Seat
If the easy exit seat feature is on in
the Driver Information Center (DIC),
automatic adjustment occurs when
the ignition is turned to LOCK/OFF
and the driver door is opened. The
driver seat moves back.
SeeVehicle Personalization
on
page 4‑34for more information.
Lumbar Adjustment
Power Lumbar
Seats with power lumbar have
controls located on the outboard
side of the seat. See Power Seat
Adjustment
on page 2‑3for more
information.
Adjust lumbar support by using the
rocker switch (D) on the outboard
side of the driver seat.
Release the switch when the
seatback reaches the desired level
of lumbar support.
Reclining Seatbacks
Manual Reclining Seatbacks
{WARNING
You can lose control of the
vehicle if you try to adjust a
manual driver's seat while the
vehicle is moving. The sudden
(Continued)
WARNING (Continued)
movement could startle and
confuse you, or make you push a
pedal when you do not want to.
Adjust the driver's seat only when
the vehicle is not moving.
{WARNING
If either seatback is not locked, it
could move forward in a sudden
stop or crash. That could cause
injury to the person sitting there.
Always push and pull on the
seatbacks to be sure they are
locked.
Vehicles with manual reclining
seatbacks have a lever on the
outboard side of the seat. Lift the
lever and move the seatback to the
desired position, then release the
lever. The seatback should not
move when pushed or pulled.
Page 84 of 394
3-2 Storage
Roof Rack System
{WARNING
If something is carried on top of
the vehicle that is longer or wider
than the roof rack—like paneling,
plywood, or a mattress— the wind
can catch it while the vehicle is
being driven. The item being
carried could be violently torn off,
and this could cause a collision,
and damage the vehicle. Never
carry something longer or wider
than the roof rack on top of the
vehicle unless using a GM
Certified accessory carrier.
This vehicle may be equipped with
a roof rack. For roof racks that do
not have cross rails included,
GM Certified cross rails can be
purchased as an accessory. See
your dealer for additional
information. Notice:
Loading cargo on the
roof rack that weighs more than
100 kg (220 lbs) or hangs over the
rear or sides of the vehicle may
damage the vehicle. Load cargo
so that it rests evenly between
the crossrails, making sure to
fasten cargo securely.
To prevent damage or loss of cargo
when driving, check to make sure
cross rails and cargo are securely
fastened. Loading cargo on the roof
rack will make the vehicle's center
of gravity higher. Avoid high speeds,
sudden starts, sharp turns, sudden
braking or abrupt maneuvers,
otherwise it may result in loss of
control. If driving for a long distance,
on rough roads, or at high speeds,
occasionally stop the vehicle to
make sure the cargo remains in its
place. Do not exceed the maximum
vehicle capacity when loading the
vehicle. For more information on
vehicle capacity and loading, see
Vehicle Load Limits on page 8‑24.
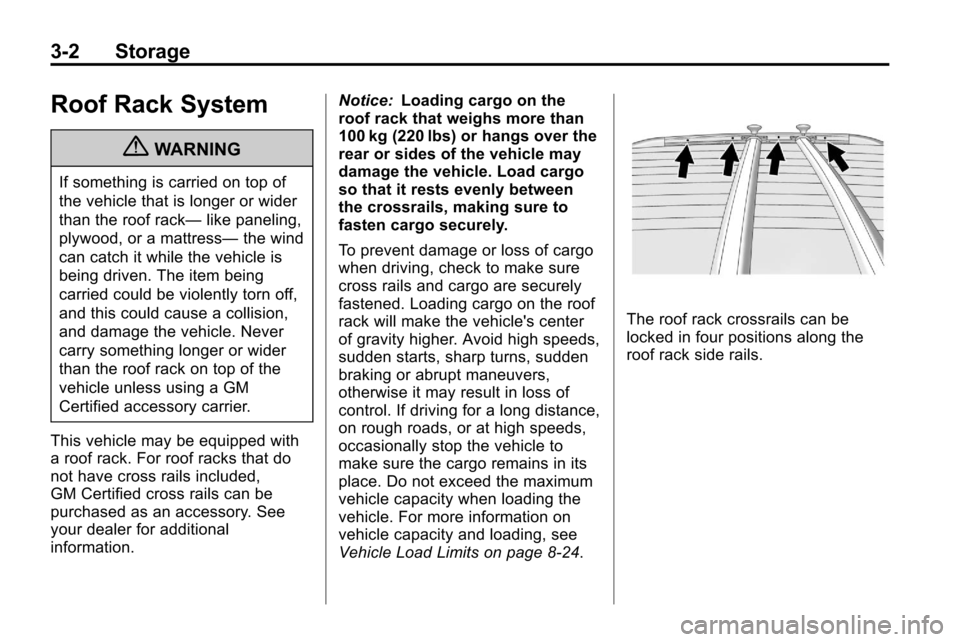
The roof rack crossrails can be
locked in four positions along the
roof rack side rails.
Page 100 of 394
4-14 Instruments and Controls
Engine Coolant
Temperature Gauge
United StatesCanada
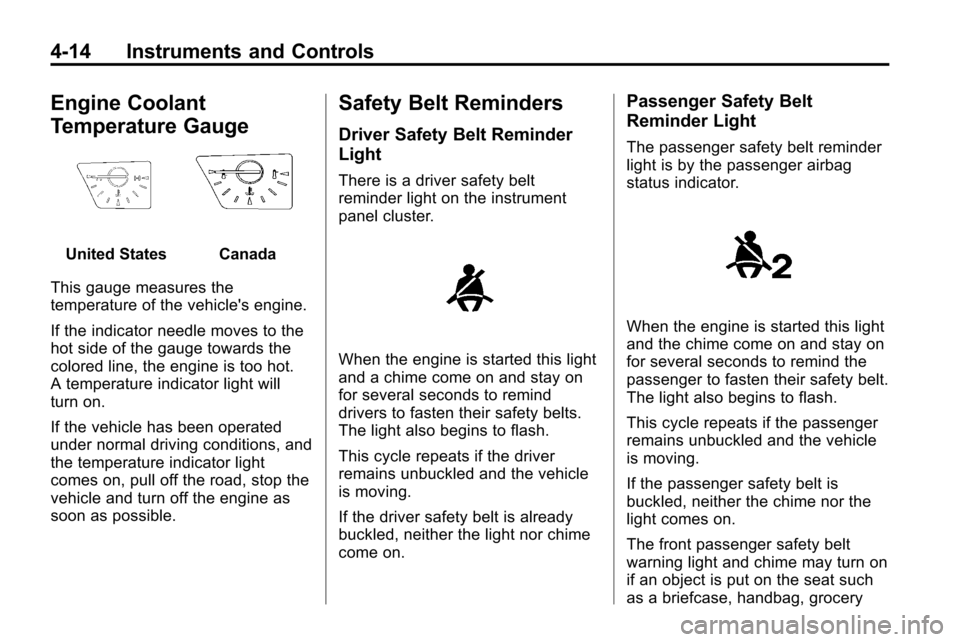
This gauge measures the
temperature of the vehicle's engine.
If the indicator needle moves to the
hot side of the gauge towards the
colored line, the engine is too hot.
A temperature indicator light will
turn on.
If the vehicle has been operated
under normal driving conditions, and
the temperature indicator light
comes on, pull off the road, stop the
vehicle and turn off the engine as
soon as possible.
Safety Belt Reminders
Driver Safety Belt Reminder
Light
There is a driver safety belt
reminder light on the instrument
panel cluster.
When the engine is started this light
and a chime come on and stay on
for several seconds to remind
drivers to fasten their safety belts.
The light also begins to flash.
This cycle repeats if the driver
remains unbuckled and the vehicle
is moving.
If the driver safety belt is already
buckled, neither the light nor chime
come on.
Passenger Safety Belt
Reminder Light
The passenger safety belt reminder
light is by the passenger airbag
status indicator.
When the engine is started this light
and the chime come on and stay on
for several seconds to remind the
passenger to fasten their safety belt.
The light also begins to flash.
This cycle repeats if the passenger
remains unbuckled and the vehicle
is moving.
If the passenger safety belt is
buckled, neither the chime nor the
light comes on.
The front passenger safety belt
warning light and chime may turn on
if an object is put on the seat such
as a briefcase, handbag, grocery
Page 103 of 394
Instruments and Controls 4-17
emissions are at acceptable levels
for the life of the vehicle, helping to
produce a cleaner environment.
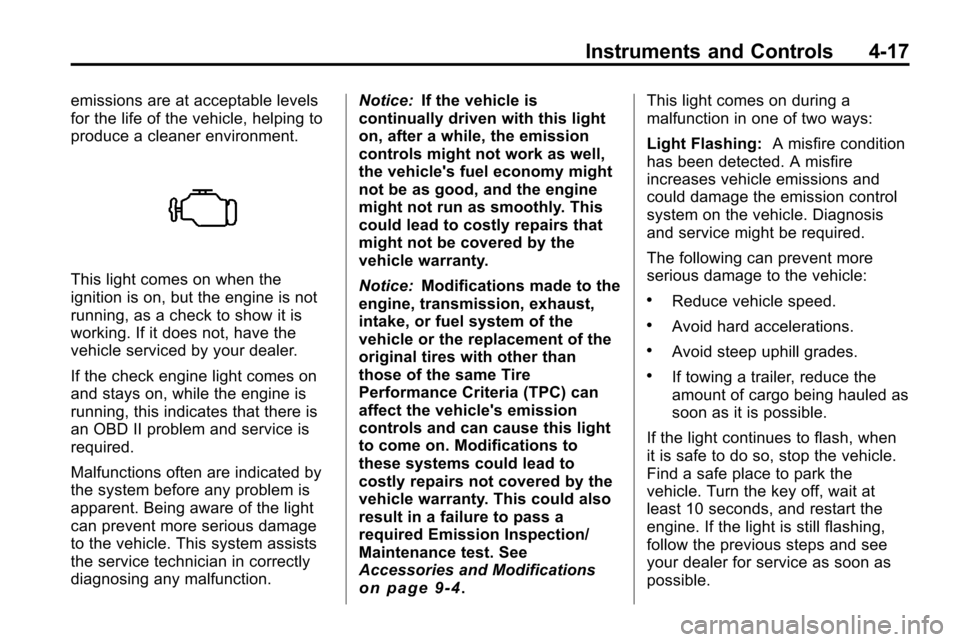
This light comes on when the
ignition is on, but the engine is not
running, as a check to show it is
working. If it does not, have the
vehicle serviced by your dealer.
If the check engine light comes on
and stays on, while the engine is
running, this indicates that there is
an OBD II problem and service is
required.
Malfunctions often are indicated by
the system before any problem is
apparent. Being aware of the light
can prevent more serious damage
to the vehicle. This system assists
the service technician in correctly
diagnosing any malfunction.Notice:
If the vehicle is
continually driven with this light
on, after a while, the emission
controls might not work as well,
the vehicle's fuel economy might
not be as good, and the engine
might not run as smoothly. This
could lead to costly repairs that
might not be covered by the
vehicle warranty.
Notice: Modifications made to the
engine, transmission, exhaust,
intake, or fuel system of the
vehicle or the replacement of the
original tires with other than
those of the same Tire
Performance Criteria (TPC) can
affect the vehicle's emission
controls and can cause this light
to come on. Modifications to
these systems could lead to
costly repairs not covered by the
vehicle warranty. This could also
result in a failure to pass a
required Emission Inspection/
Maintenance test. See
Accessories and Modifications
on page 9‑4. This light comes on during a
malfunction in one of two ways:
Light Flashing:
A misfire condition
has been detected. A misfire
increases vehicle emissions and
could damage the emission control
system on the vehicle. Diagnosis
and service might be required.
The following can prevent more
serious damage to the vehicle:
.Reduce vehicle speed.
.Avoid hard accelerations.
.Avoid steep uphill grades.
.If towing a trailer, reduce the
amount of cargo being hauled as
soon as it is possible.
If the light continues to flash, when
it is safe to do so, stop the vehicle.
Find a safe place to park the
vehicle. Turn the key off, wait at
least 10 seconds, and restart the
engine. If the light is still flashing,
follow the previous steps and see
your dealer for service as soon as
possible.
Page 105 of 394
Instruments and Controls 4-19
down. The diagnostic system is
designed to evaluate critical
emission control systems during
normal driving. This can take
several days of routine driving.
If this has been done and the
vehicle still does not pass the
inspection for lack of OBD II
system readiness, your dealer
can prepare the vehicle for
inspection.
Brake System Warning
Light
The vehicle brake system consists
of two hydraulic circuits. If one
circuit is not working, the remaining
circuit can still work to stop the
vehicle. For normal braking
performance, both circuits need to
be working
United StatesCanada
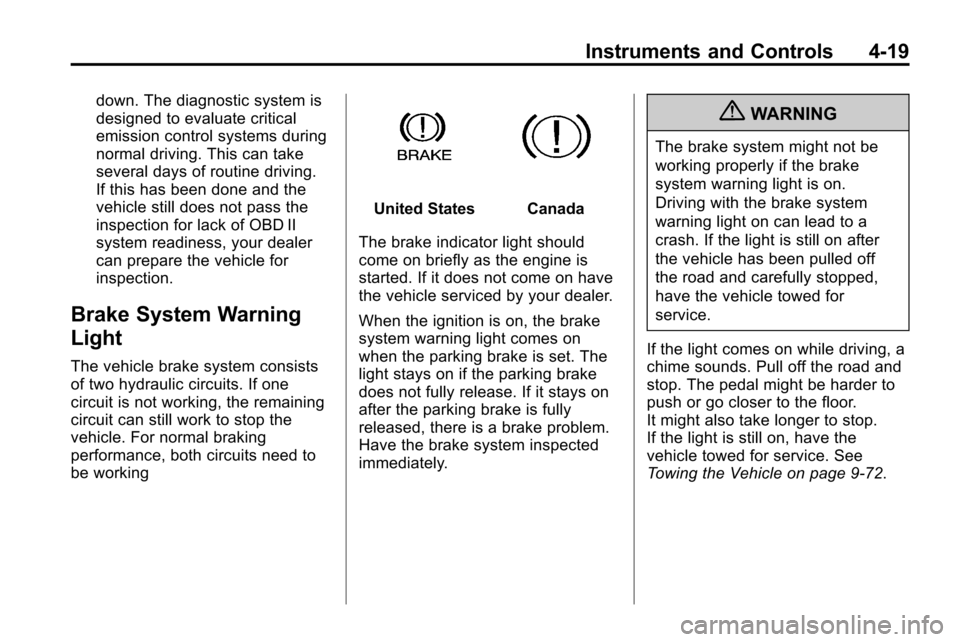
The brake indicator light should
come on briefly as the engine is
started. If it does not come on have
the vehicle serviced by your dealer.
When the ignition is on, the brake
system warning light comes on
when the parking brake is set. The
light stays on if the parking brake
does not fully release. If it stays on
after the parking brake is fully
released, there is a brake problem.
Have the brake system inspected
immediately.
{WARNING
The brake system might not be
working properly if the brake
system warning light is on.
Driving with the brake system
warning light on can lead to a
crash. If the light is still on after
the vehicle has been pulled off
the road and carefully stopped,
have the vehicle towed for
service.
If the light comes on while driving, a
chime sounds. Pull off the road and
stop. The pedal might be harder to
push or go closer to the floor.
It might also take longer to stop.
If the light is still on, have the
vehicle towed for service. See
Towing the Vehicle on page 9‑72.