2010 CHEVROLET EQUINOX towing
[x] Cancel search: towingPage 2 of 394

2010 Chevrolet Equinox Owner ManualM
Driving and Operating. . . . . . . . 8-1
Driving Information . . . . . . . . . . . . . 8-2
Starting and Operating . . . . . . . 8-28
Engine Exhaust . . . . . . . . . . . . . . 8-34
Automatic Transmission . . . . . . 8-35
Drive Systems . . . . . . . . . . . . . . . . 8-38
Brakes . . . . . . . . . . . . . . . . . . . . . . . 8-38
Ride Control Systems . . . . . . . . 8-41
Cruise Control . . . . . . . . . . . . . . . . 8-44
Object Detection Systems . . . . 8-46
Fuel . . . . . . . . . . . . . . . . . . . . . . . . . . 8-53
Towing . . . . . . . . . . . . . . . . . . . . . . . 8-57
Conversions and Add-Ons . . . 8-64 Vehicle Care
. . . . . . . . . . . . . . . . . . 9-1
General Information . . . . . . . . . . . . 9-3
Vehicle Checks . . . . . . . . . . . . . . . . 9-4
Headlamp Aiming . . . . . . . . . . . . 9-27
Bulb Replacement . . . . . . . . . . . . 9-30
Electrical System . . . . . . . . . . . . . 9-34
Wheels and Tires . . . . . . . . . . . . . 9-40
Jump Starting . . . . . . . . . . . . . . . . 9-69
Towing . . . . . . . . . . . . . . . . . . . . . . . 9-72
Appearance Care . . . . . . . . . . . . . 9-75
Service and Maintenance . . . 10-1
General Information . . . . . . . . . . 10-1
Scheduled Maintenance . . . . . . 10-2
Recommended Fluids,
Lubricants, and Parts . . . . . . . 10-7
Maintenance Records . . . . . . . 10-10 Technical Data
. . . . . . . . . . . . . . . 11-1
Vehicle Identification . . . . . . . . . . 11-1
Vehicle Data . . . . . . . . . . . . . . . . . . 11-2
Customer Information . . . . . . . 12-1
Customer Information . . . . . . . . 12-1
Reporting Safety Defects . . . . 12-13
Vehicle Data Recording and
Privacy . . . . . . . . . . . . . . . . . . . . 12-14
Index . . . . . . . . . . . . . . . . . . . . . i-1
Page 60 of 394
2-34 Seats and Restraints
A wet seat can affect the
performance of the passenger
sensing system. Here is how:
.The passenger sensing system
may turn off the passenger
airbag when liquid is soaked
into the seat. If this happens, the
off indicator will be lit, and the
airbag readiness light on the
instrument panel will also be lit.
.Liquid pooled on the seat that
has not soaked in may make it
more likely that the passenger
sensing system will enable (turn
on) the passenger airbag while a
child restraint or child occupant
is on the seat. If the passenger
airbag is turned on, the on
indicator will be lit.
If the passenger seat gets wet, dry
the seat immediately. If the airbag
readiness light is lit, do not install a
child restraint or allow anyone to
occupy the seat. See Airbag
Readiness Light
on page 4‑15for
important safety information. The on indicator may be lit if an
object, such as a briefcase,
handbag, grocery bag, laptop or
other electronic device, is put on
an unoccupied seat. If this is not
desired remove the object from
the seat.
{WARNING
Stowing of articles under the
passenger seat or between the
passenger seat cushion and
seatback may interfere with the
proper operation of the passenger
sensing system.
Servicing the
Airbag-Equipped Vehicle
Airbags affect how the vehicle
should be serviced. There are parts
of the airbag system in several
places around the vehicle. Your
dealer and the service manual have
information about servicing the
vehicle and the airbag system.To purchase a service manual, see
Service Publications Ordering
Information on page 12‑12.
{WARNING
For up to 10 seconds after the
ignition is turned off and the
battery is disconnected, an airbag
can still inflate during improper
service. You can be injured if you
are close to an airbag when it
inflates. Avoid yellow connectors.
They are probably part of the
airbag system. Be sure to follow
proper service procedures, and
make sure the person performing
work for you is qualified to do so.
Page 103 of 394
Instruments and Controls 4-17
emissions are at acceptable levels
for the life of the vehicle, helping to
produce a cleaner environment.
This light comes on when the
ignition is on, but the engine is not
running, as a check to show it is
working. If it does not, have the
vehicle serviced by your dealer.
If the check engine light comes on
and stays on, while the engine is
running, this indicates that there is
an OBD II problem and service is
required.
Malfunctions often are indicated by
the system before any problem is
apparent. Being aware of the light
can prevent more serious damage
to the vehicle. This system assists
the service technician in correctly
diagnosing any malfunction.Notice:
If the vehicle is
continually driven with this light
on, after a while, the emission
controls might not work as well,
the vehicle's fuel economy might
not be as good, and the engine
might not run as smoothly. This
could lead to costly repairs that
might not be covered by the
vehicle warranty.
Notice: Modifications made to the
engine, transmission, exhaust,
intake, or fuel system of the
vehicle or the replacement of the
original tires with other than
those of the same Tire
Performance Criteria (TPC) can
affect the vehicle's emission
controls and can cause this light
to come on. Modifications to
these systems could lead to
costly repairs not covered by the
vehicle warranty. This could also
result in a failure to pass a
required Emission Inspection/
Maintenance test. See
Accessories and Modifications
on page 9‑4. This light comes on during a
malfunction in one of two ways:
Light Flashing:
A misfire condition
has been detected. A misfire
increases vehicle emissions and
could damage the emission control
system on the vehicle. Diagnosis
and service might be required.
The following can prevent more
serious damage to the vehicle:
.Reduce vehicle speed.
.Avoid hard accelerations.
.Avoid steep uphill grades.
.If towing a trailer, reduce the
amount of cargo being hauled as
soon as it is possible.
If the light continues to flash, when
it is safe to do so, stop the vehicle.
Find a safe place to park the
vehicle. Turn the key off, wait at
least 10 seconds, and restart the
engine. If the light is still flashing,
follow the previous steps and see
your dealer for service as soon as
possible.
Page 105 of 394
Instruments and Controls 4-19
down. The diagnostic system is
designed to evaluate critical
emission control systems during
normal driving. This can take
several days of routine driving.
If this has been done and the
vehicle still does not pass the
inspection for lack of OBD II
system readiness, your dealer
can prepare the vehicle for
inspection.
Brake System Warning
Light
The vehicle brake system consists
of two hydraulic circuits. If one
circuit is not working, the remaining
circuit can still work to stop the
vehicle. For normal braking
performance, both circuits need to
be working
United StatesCanada
The brake indicator light should
come on briefly as the engine is
started. If it does not come on have
the vehicle serviced by your dealer.
When the ignition is on, the brake
system warning light comes on
when the parking brake is set. The
light stays on if the parking brake
does not fully release. If it stays on
after the parking brake is fully
released, there is a brake problem.
Have the brake system inspected
immediately.
{WARNING
The brake system might not be
working properly if the brake
system warning light is on.
Driving with the brake system
warning light on can lead to a
crash. If the light is still on after
the vehicle has been pulled off
the road and carefully stopped,
have the vehicle towed for
service.
If the light comes on while driving, a
chime sounds. Pull off the road and
stop. The pedal might be harder to
push or go closer to the floor.
It might also take longer to stop.
If the light is still on, have the
vehicle towed for service. See
Towing the Vehicle on page 9‑72.
Page 206 of 394
8-2 Driving and Operating
California FuelRequirements . . . . . . . . . . . . . . 8-54
Fuels in Foreign Countries . . . 8-54
Fuel Additives . . . . . . . . . . . . . . . 8-55
Filling the Tank . . . . . . . . . . . . . . 8-56
Filling a Portable Fuel Container . . . . . . . . . . . . . . . . . . . 8-57
Towing
General TowingInformation . . . . . . . . . . . . . . . . . 8-57
Driving Characteristics and Towing Tips . . . . . . . . . . . . . . . . 8-58
Trailer Towing . . . . . . . . . . . . . . . . 8-61
Towing Equipment . . . . . . . . . . . 8-63
Trailer Sway Control (TSC) . . . . . . . . . . . . . . 8-64
Conversions and Add-Ons
Add-On Electrical
Equipment . . . . . . . . . . . . . . . . . 8-64
Driving Information
Driving for Better Fuel
Economy
Driving habits can affect fuel
mileage. Here are some driving tips
to get the best fuel economy
possible.
.Avoid fast starts and accelerate
smoothly.
.Brake gradually and avoid
abrupt stops.
.Avoid idling the engine for long
periods of time.
.When road and weather
conditions are appropriate, use
cruise control, if equipped.
.Always follow posted speed
limits or drive more slowly when
conditions require.
.Keep vehicle tires properly
inflated.
.Combine several trips into a
single trip.
.Replace the vehicle's tires with
the same TPC Spec number
molded into the tire's sidewall
near the size.
.Follow recommended scheduled
maintenance.
Page 227 of 394
Driving and Operating 8-23
To save fuel, run the engine for only
short periods as needed to warm
the vehicle and then shut the engine
off and close the window most of
the way to save heat. Repeat this
until help arrives but only when you
feel really uncomfortable from the
cold. Moving about to keep warm
also helps.
If it takes some time for help to
arrive, now and then when you run
the engine, push the accelerator
pedal slightly so the engine runs
faster than the idle speed. This
keeps the battery charged to restart
the vehicle and to signal for help
with the headlamps. Do this as little
as possible to save fuel.If the Vehicle is Stuck
Slowly and cautiously spin the
wheels to free the vehicle when
stuck in sand, mud, ice, or snow.
If stuck too severely for the traction
system to free the vehicle, turn the
traction system off and use the
rocking method.
{WARNING
If the vehicle's tires spin at high
speed, they can explode, and you
or others could be injured. The
vehicle can overheat, causing an
engine compartment fire or other
damage. Spin the wheels as little
as possible and avoid going
above 55 km/h (35 mph) as
shown on the speedometer.
For information about using tire
chains on the vehicle, see Tire
Chains on page 9‑58.
Rocking the Vehicle to Get
it Out
Turn the steering wheel left and
right to clear the area around the
front wheels. Turn off any traction
system. Shift back and forth
between R (Reverse) and a forward
gear, spinning the wheels as little as
possible. To prevent transmission
wear, wait until the wheels stop
spinning before shifting gears.
Release the accelerator pedal while
shifting, and press lightly on the
accelerator pedal when the
transmission is in gear. Slowly
spinning the wheels in the forward
and reverse directions causes a
rocking motion that could free the
vehicle. If that does not get the
vehicle out after a few tries, it might
need to be towed out. If the vehicle
does need to be towed out, see
Towing the Vehicle on page 9‑72.
Page 229 of 394
Driving and Operating 8-25
Rating (GAWR) for the front and
rear axle. See“Certification
Label” later in this section.
Steps for Determining Correct
Load Limit
1.Locate the statement “The
combined weight of
occupants and cargo should
never exceed XXX kg or
XXX lbs” on your vehicle's
placard.
2.Determine the combined
weight of the driver and
passengers that will be riding
in your vehicle.
3.Subtract the combined
weight of the driver and
passengers from XXX kg or
XXX lbs.
4.The resulting figure equals
the available amount of cargo
and luggage load capacity.
For example, if the “XXX”
amount equals 1400 lbs and there will be five 150 lb
passengers in your vehicle,
the amount of available cargo
and luggage load capacity
is 650 lbs (1400
−750
(5 x 150) = 650 lbs).
5.Determine the combined
weight of luggage and cargo
being loaded on the vehicle.
That weight may not safely
exceed the available cargo
and luggage load capacity
calculated in Step 4.
6.If your vehicle will be towing
a trailer, the load from your
trailer will be transferred to
your vehicle. Consult this
manual to determine how this
reduces the available cargo
and luggage load capacity of
your vehicle.
See Trailer Towing
on page 8‑61
for important information on
towing a trailer, towing safety
rules and trailering tips.
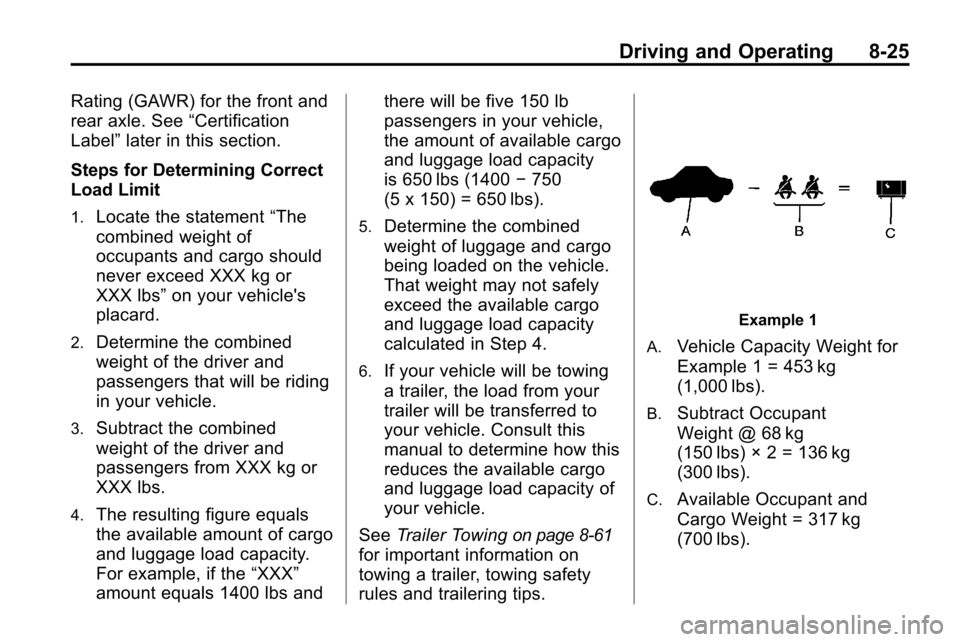
Example 1
A.
Vehicle Capacity Weight for
Example 1 = 453 kg
(1,000 lbs).
B.Subtract Occupant
Weight @ 68 kg
(150 lbs) × 2 = 136 kg
(300 lbs).
C.Available Occupant and
Cargo Weight = 317 kg
(700 lbs).
Page 232 of 394
8-28 Driving and Operating
Starting and
Operating
New Vehicle Break-In
Notice:The vehicle does not
need an elaborate break-in. But it
will perform better in the long run
if you follow these guidelines:
.Do not drive at any one
constant speed, fast or slow,
for the first 805 km
(500 miles). Do not make
full-throttle starts. Avoid
downshifting to brake or
slow the vehicle.
.During the first 1 000 km
(600 miles), avoid using more
than moderate acceleration
in lower gears and avoid
vehicle speeds above
110 km/h (68 mph).
.Between the first 1 000 km
(600 miles) and 5 000 km
(3,000 miles), heavy
acceleration in lower gears can be used. Vehicle speeds
above 110 km/h (68 mph)
should be limited to
five minutes per use.
.Avoid making hard stops for
the first 322 km (200 miles) or
so. During this time the new
brake linings are not yet
broken in. Hard stops with
new linings can mean
premature wear and earlier
replacement. Follow this
breaking-in guideline every
time you get new brake
linings.
.Do not tow a trailer during
break-in. See
Driving
Characteristics and Towing
Tips
on page 8‑58for the
trailer towing capabilities of
your vehicle and more
information.
Following break‐in, engine speed
and load can be gradually
increased.
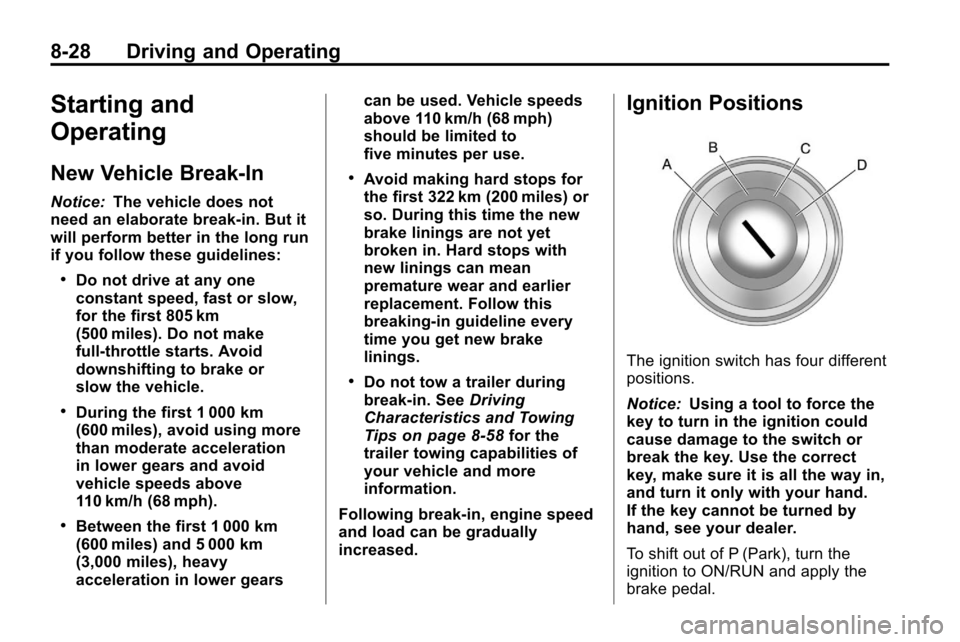
Ignition Positions
The ignition switch has four different
positions.
Notice: Using a tool to force the
key to turn in the ignition could
cause damage to the switch or
break the key. Use the correct
key, make sure it is all the way in,
and turn it only with your hand.
If the key cannot be turned by
hand, see your dealer.
To shift out of P (Park), turn the
ignition to ON/RUN and apply the
brake pedal.