2010 CHEVROLET EQUINOX jump start
[x] Cancel search: jump startPage 2 of 394

2010 Chevrolet Equinox Owner ManualM
Driving and Operating. . . . . . . . 8-1
Driving Information . . . . . . . . . . . . . 8-2
Starting and Operating . . . . . . . 8-28
Engine Exhaust . . . . . . . . . . . . . . 8-34
Automatic Transmission . . . . . . 8-35
Drive Systems . . . . . . . . . . . . . . . . 8-38
Brakes . . . . . . . . . . . . . . . . . . . . . . . 8-38
Ride Control Systems . . . . . . . . 8-41
Cruise Control . . . . . . . . . . . . . . . . 8-44
Object Detection Systems . . . . 8-46
Fuel . . . . . . . . . . . . . . . . . . . . . . . . . . 8-53
Towing . . . . . . . . . . . . . . . . . . . . . . . 8-57
Conversions and Add-Ons . . . 8-64 Vehicle Care
. . . . . . . . . . . . . . . . . . 9-1
General Information . . . . . . . . . . . . 9-3
Vehicle Checks . . . . . . . . . . . . . . . . 9-4
Headlamp Aiming . . . . . . . . . . . . 9-27
Bulb Replacement . . . . . . . . . . . . 9-30
Electrical System . . . . . . . . . . . . . 9-34
Wheels and Tires . . . . . . . . . . . . . 9-40
Jump Starting . . . . . . . . . . . . . . . . 9-69
Towing . . . . . . . . . . . . . . . . . . . . . . . 9-72
Appearance Care . . . . . . . . . . . . . 9-75
Service and Maintenance . . . 10-1
General Information . . . . . . . . . . 10-1
Scheduled Maintenance . . . . . . 10-2
Recommended Fluids,
Lubricants, and Parts . . . . . . . 10-7
Maintenance Records . . . . . . . 10-10 Technical Data
. . . . . . . . . . . . . . . 11-1
Vehicle Identification . . . . . . . . . . 11-1
Vehicle Data . . . . . . . . . . . . . . . . . . 11-2
Customer Information . . . . . . . 12-1
Customer Information . . . . . . . . 12-1
Reporting Safety Defects . . . . 12-13
Vehicle Data Recording and
Privacy . . . . . . . . . . . . . . . . . . . . 12-14
Index . . . . . . . . . . . . . . . . . . . . . i-1
Page 144 of 394
6-14 Infotainment System
Press and release thegSEEK or
lSEEK buttons to jump forward or
back 30 seconds in the time shift
buffer.
When the radio station is changed,
the buffer is cleared and
automatically restarted for the
current station. Content from a
previously tuned station is no longer
available.
The time shift feature is not
available while recording or with
other sources of playback.
Pausing AM/FM with the Vehicle
Turned Off
If AM/FM is paused when the
vehicle is turned off, the radio
continues to buffer the current radio
station for up to 20 minutes. If the
vehicle is turned back on within
20 minutes, the radio resumes
playback from the paused point.
Satellite Radio
Vehicles with an XM™ Satellite
Radio tuner and a valid XM Satellite
Radio subscription can receive XM
programming.
XM Satellite Radio Service
XM is a satellite radio service that is
based in the 48 contiguous United
States and 10 Canadian provinces.
XM Satellite Radio has a wide
variety of programming and
commercial-free music,
coast-to-coast, and in digital-quality
sound. A service fee is required to
receive the XM service. For more
information, contact XM at
www.xmradio.com or call
1-800-929-2100 in the U.S. and
www.xmradio.ca or call
1-877-438-9677 in Canada.
Control Buttons
The buttons used to control the XM
radio are:
RADIO/BAND: Press to turn the
radio on and choose between AM,
FM, and XM™, if equipped.
gSEEK /lSEEK: Press to go
to the previous or next station.
FAV: Press to open the
favorites list.
k: Press to pause and resume
time shifted data. See “Time Shifting
(Radio with CD/DVD and MEM)”
later in this section.
1 to 6: Press to select preset
stations.
MENU/SEL: Turn to select stations.
Press to open the XM Satellite
Radio menu.
Page 270 of 394
9-2 Vehicle Care
Wheels and Tires
Tires . . . . . . . . . . . . . . . . . . . . . . . . . 9-40
Tire Sidewall Labeling . . . . . . . 9-40
Tire Designations . . . . . . . . . . . . 9-42
Tire Terminology andDefinitions . . . . . . . . . . . . . . . . . . 9-43
Tire Pressure . . . . . . . . . . . . . . . . 9-46
Tire Pressure Monitor System . . . . . . . . . . . . . . . . . . . . . 9-47
Tire Pressure Monitor Operation . . . . . . . . . . . . . . . . . . 9-49
Tire Inspection . . . . . . . . . . . . . . . 9-52
Tire Rotation . . . . . . . . . . . . . . . . . 9-52
When It Is Time for New Tires . . . . . . . . . . . . . . . . . . . . . . . 9-53 Buying New Tires . . . . . . . . . . . . 9-54
Different Size Tires and
Wheels . . . . . . . . . . . . . . . . . . . . . 9-55
Uniform Tire Quality Grading . . . . . . . . . . . . . . . . . . . . 9-56
Wheel Alignment and Tire Balance . . . . . . . . . . . . . . . . . . . . 9-57
Wheel Replacement . . . . . . . . . 9-57
Tire Chains . . . . . . . . . . . . . . . . . . 9-58
If a Tire Goes Flat . . . . . . . . . . . 9-59
Tire Changing . . . . . . . . . . . . . . . 9-61
Compact Spare Tire . . . . . . . . . 9-68
Jump Starting
Jump Starting . . . . . . . . . . . . . . . . 9-69
Towing
Towing the Vehicle . . . . . . . . . . . 9-72
Recreational Vehicle Towing . . . . . . . . . . . . . . . . . . . . . 9-72
Appearance Care
Exterior Care . . . . . . . . . . . . . . . . 9-75
Interior Care . . . . . . . . . . . . . . . . . 9-79
Page 275 of 394

Vehicle Care 9-7
A.Engine Air Cleaner/Filteron
page 9‑13.
B. Engine Cover on page 9‑9.
C. Engine Oil Dipstick (out of view). See Engine Oil
on
page 9‑10.
D. Engine Oil Fill Cap. See Engine
Oil on page 9‑10. E. Brake Fluid Reservoir. See
Brakes on page 9‑21.
F. Engine Compartment Fuse
Block on page 9‑34.
G. Remote Positive (+) Terminal. See Jump Startingon
page 9‑69.
H. Remote Negative (−) Terminal. See Jump Starting
on
page 9‑69. I.
Battery on page 9‑24.
J. Engine Coolant Surge Tank and Pressure Cap. See Engine
Coolant on page 9‑15.
K. Windshield Washer Fluid Reservoir. See Washer Fluid
on
page 9‑21.
Page 277 of 394
Vehicle Care 9-9
A.Engine Air Cleaner/Filteron
page 9‑13.
B. Power Steering Fluid (2.4L L4
Engine)
on page 9‑20or
Power Steering Fluid (3.0L
V6 Engine) on page 9‑20.
C. Engine Oil Fill Cap. See Engine
Oil on page 9‑10.
D. Engine Cover on page 9‑9.
E. Engine Oil Dipstick (out of view). See Engine Oil
on
page 9‑10.
F. Brake Fluid Reservoir. See Brakes on page 9‑21. G.
Engine Compartment Fuse
Block on page 9‑34.
H. Remote Positive (+) Terminal. See Jump Starting
on
page 9‑69.
I. Remote Negative (−) Terminal. See Jump Starting
on
page 9‑69.
J. Battery on page 9‑24.
K. Engine Coolant Surge Tank and Pressure Cap. See Engine
Coolant on page 9‑15.
L. Windshield Washer Fluid Reservoir. See Washer Fluid
on
page 9‑21.
Engine Cover
3.0L V6 Engine Cover
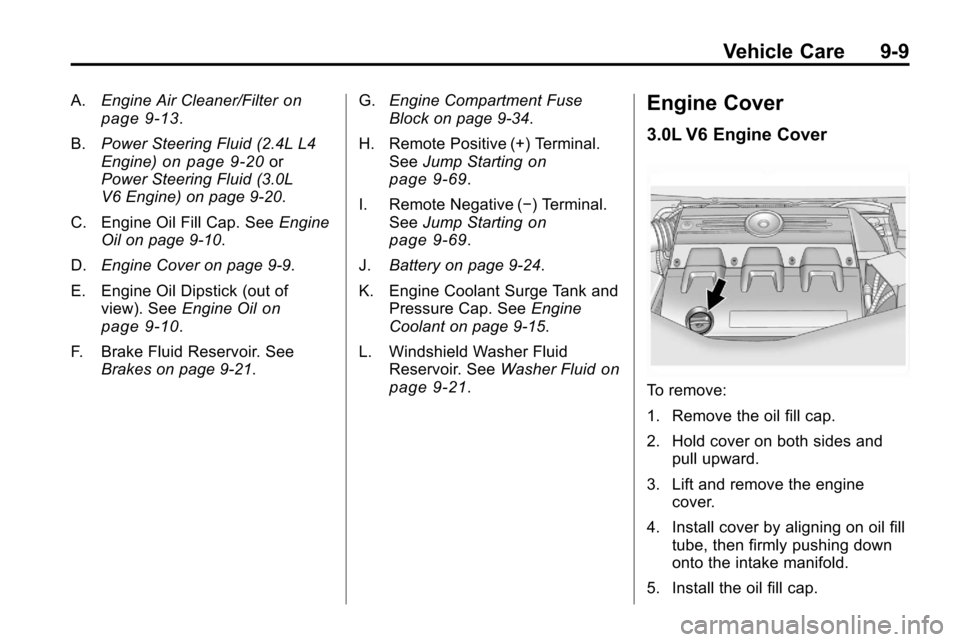
To remove:
1. Remove the oil fill cap.
2. Hold cover on both sides and pull upward.
3. Lift and remove the engine cover.
4. Install cover by aligning on oil fill tube, then firmly pushing down
onto the intake manifold.
5. Install the oil fill cap.
Page 292 of 394
9-24 Vehicle Care
Battery
Refer to the replacement number on
the original battery label when a
new battery is needed.
{DANGER
Battery posts, terminals, and
related accessories contain lead
and lead compounds, chemicals
known to the State of California to
cause cancer and reproductive
harm. Wash hands after handling.
Vehicle Storage
{WARNING
Batteries have acid that can burn
you and gas that can explode.
You can be badly hurt if you are
not careful. SeeJump Starting
on
page 9‑69
for tips on working
around a battery without
getting hurt. Infrequent Usage: Remove the
black, negative (−) cable from the
battery to keep the battery from
running down.
Extended Storage: Remove the
black, negative (−) cable from the
battery or use a battery trickle
charger.
All-Wheel Drive
Transfer Case
When to Check and Change
Lubricant
Refer to the Maintenance Schedule
to determine how often to check the
lubricant and when to change it.
See
Scheduled Maintenance
on
page 10‑2. How to Check Lubricant
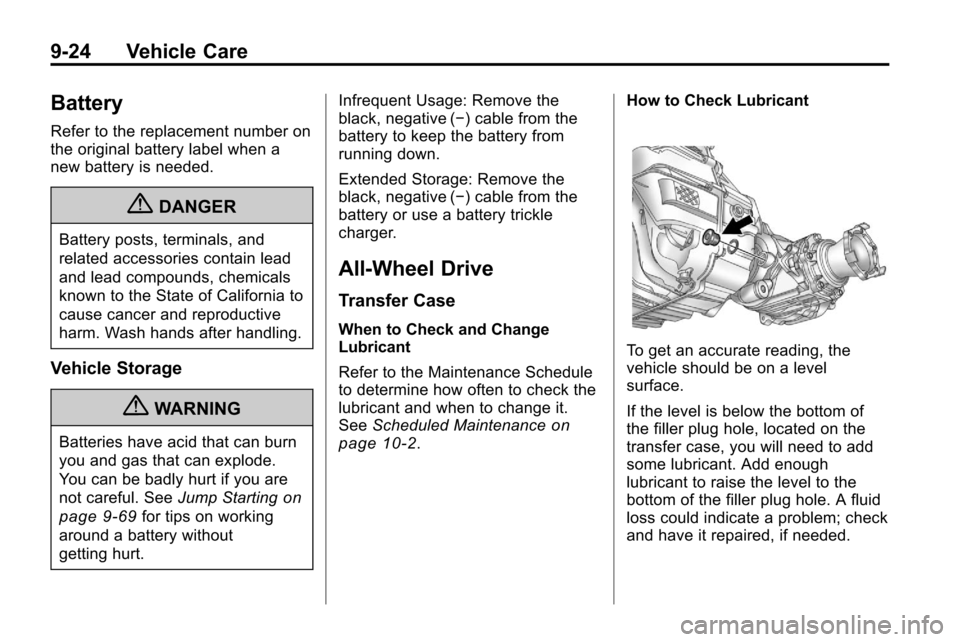
To get an accurate reading, the
vehicle should be on a level
surface.
If the level is below the bottom of
the filler plug hole, located on the
transfer case, you will need to add
some lubricant. Add enough
lubricant to raise the level to the
bottom of the filler plug hole. A fluid
loss could indicate a problem; check
and have it repaired, if needed.
Page 337 of 394
Vehicle Care 9-69
Jump Starting
Jump starting can be used on
vehicles with run‐down batteries by
using jumper cables and another
vehicle.
{WARNING
Batteries can hurt you. They can
be dangerous because:
.They contain acid that can
burn you.
.They contain gas that can
explode or ignite.
.They contain enough
electricity to burn you.
If you do not follow these steps
exactly, some or all of these
things can hurt you.
{WARNING
Using an open flame near a
battery can cause battery gas to
explode. People have been hurt
doing this, and some have been
blinded. Use a flashlight if you
need more light.
Be sure the battery has enough
water. You do not need to add
water to the battery installed in
your new vehicle. But if a battery
has filler caps, be sure the right
amount of fluid is there. If it is low,
add water to take care of that
first. If you do not, explosive gas
could be present.
Battery fluid contains acid that
can burn you. Do not get it on
you. If you accidentally get it in
your eyes or on your skin, flush
the place with water and get
medical help immediately. Be sure to use the following steps to
do it safely. Ignoring these steps
could result in costly damage to the
vehicle that would not be covered
by the warranty.
Trying to start the vehicle by
pushing or pulling it will not work,
and it could damage the vehicle.
Notice:
If you leave the radio or
other accessories on during the
jump starting procedure, they
could be damaged. The repairs
would not be covered by the
warranty. Always turn off the
radio and other accessories when
jump starting the vehicle.
Notice: If the jumper cables are
connected or removed in the
wrong order, electrical shorting
may occur and damage the
vehicle. The repairs would not be
covered by the vehicle warranty.
Always connect and remove the
jumper cables in the correct
order, making sure that the
cables do not touch each other or
other metal.
Page 338 of 394
9-70 Vehicle Care
1. The vehicle used to jump startmust have 12-volt battery with a
negative ground.
Notice: If the other vehicle's
system is not a 12-volt system
with a negative ground, both
vehicles can be damaged. Only
use vehicles with 12-volt systems
with negative grounds to jump
start your vehicle.
2. The vehicles should be close enough for the jumper cables to
reach, but the vehicles should
not be touching. Touching could
cause grounding and possible
electrical system damage.
Put both vehicles in P (Park)
and set the parking brake firmly.
3. Unplug accessories plugged into the cigarette lighter or the
accessory power outlet. Turn off
the radio and all lamps that are
not needed. Turn off the ignition
on both vehicles. 4. Locate the positive (+) and
negative (−) terminals on both
vehicles. Some vehicles have
remote jump starting terminals.
{WARNING
An electric fan can start up even
when the engine is not running
and can injure you. Keep hands,
clothing and tools away from any
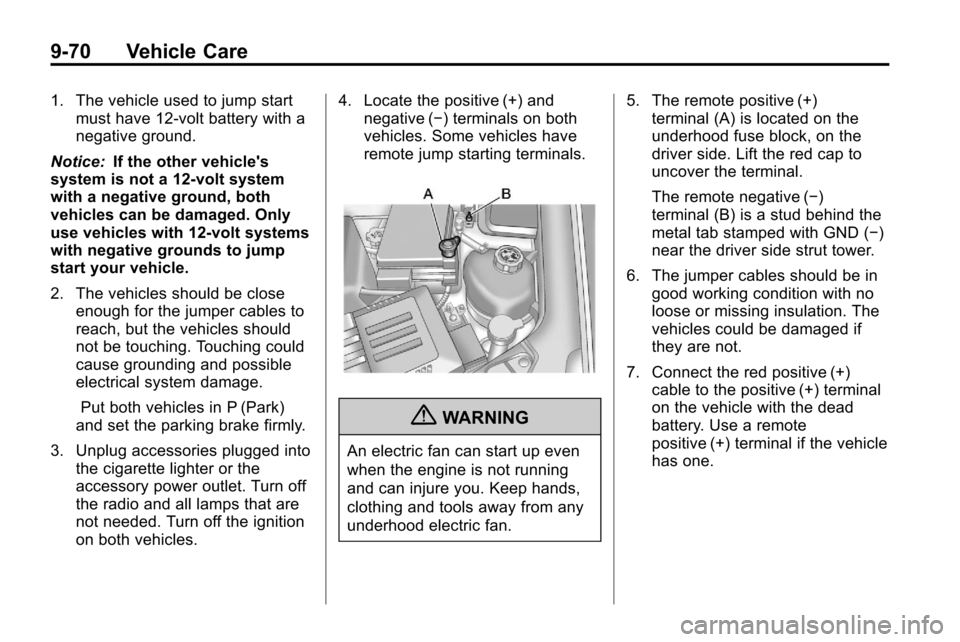
underhood electric fan. 5. The remote positive (+)
terminal (A) is located on the
underhood fuse block, on the
driver side. Lift the red cap to
uncover the terminal.
The remote negative (−)
terminal (B) is a stud behind the
metal tab stamped with GND (−)
near the driver side strut tower.
6. The jumper cables should be in good working condition with no
loose or missing insulation. The
vehicles could be damaged if
they are not.
7. Connect the red positive (+) cable to the positive (+) terminal
on the vehicle with the dead
battery. Use a remote
positive (+) terminal if the vehicle
has one.