2010 CHEVROLET EQUINOX manual transmission
[x] Cancel search: manual transmissionPage 2 of 394

2010 Chevrolet Equinox Owner ManualM
Driving and Operating. . . . . . . . 8-1
Driving Information . . . . . . . . . . . . . 8-2
Starting and Operating . . . . . . . 8-28
Engine Exhaust . . . . . . . . . . . . . . 8-34
Automatic Transmission . . . . . . 8-35
Drive Systems . . . . . . . . . . . . . . . . 8-38
Brakes . . . . . . . . . . . . . . . . . . . . . . . 8-38
Ride Control Systems . . . . . . . . 8-41
Cruise Control . . . . . . . . . . . . . . . . 8-44
Object Detection Systems . . . . 8-46
Fuel . . . . . . . . . . . . . . . . . . . . . . . . . . 8-53
Towing . . . . . . . . . . . . . . . . . . . . . . . 8-57
Conversions and Add-Ons . . . 8-64 Vehicle Care
. . . . . . . . . . . . . . . . . . 9-1
General Information . . . . . . . . . . . . 9-3
Vehicle Checks . . . . . . . . . . . . . . . . 9-4
Headlamp Aiming . . . . . . . . . . . . 9-27
Bulb Replacement . . . . . . . . . . . . 9-30
Electrical System . . . . . . . . . . . . . 9-34
Wheels and Tires . . . . . . . . . . . . . 9-40
Jump Starting . . . . . . . . . . . . . . . . 9-69
Towing . . . . . . . . . . . . . . . . . . . . . . . 9-72
Appearance Care . . . . . . . . . . . . . 9-75
Service and Maintenance . . . 10-1
General Information . . . . . . . . . . 10-1
Scheduled Maintenance . . . . . . 10-2
Recommended Fluids,
Lubricants, and Parts . . . . . . . 10-7
Maintenance Records . . . . . . . 10-10 Technical Data
. . . . . . . . . . . . . . . 11-1
Vehicle Identification . . . . . . . . . . 11-1
Vehicle Data . . . . . . . . . . . . . . . . . . 11-2
Customer Information . . . . . . . 12-1
Customer Information . . . . . . . . 12-1
Reporting Safety Defects . . . . 12-13
Vehicle Data Recording and
Privacy . . . . . . . . . . . . . . . . . . . . 12-14
Index . . . . . . . . . . . . . . . . . . . . . i-1
Page 16 of 394
1-10 Keys, Doors and Windows
mounted cargo during power
operation. The liftgate can still be
fully opened manually.
OFF:The liftgate only operates
manually in this position.
Manual operation of a liftgate that
also has power operation requires
more effort than with a standard
manual liftgate.
In either the MAX or the 3/4 mode,
the liftgate can be power opened
and closed by:
.First pressingKand then
pressing and holding
Von the
Remote Keyless Entry (RKE)
transmitter until the liftgate starts
moving. See Remote Keyless
Entry (RKE) System Operation
on page 1‑3.
.Pressing the power liftgate
button on the center of the mode
switch, located on the overhead
console.
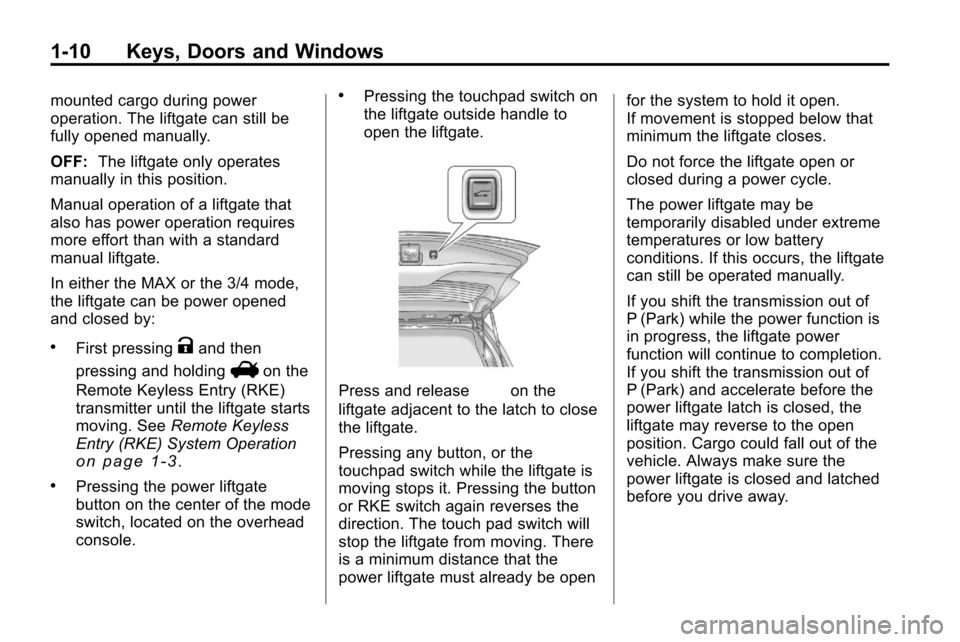
.Pressing the touchpad switch on
the liftgate outside handle to
open the liftgate.
Press and release&on the
liftgate adjacent to the latch to close
the liftgate.
Pressing any button, or the
touchpad switch while the liftgate is
moving stops it. Pressing the button
or RKE switch again reverses the
direction. The touch pad switch will
stop the liftgate from moving. There
is a minimum distance that the
power liftgate must already be open for the system to hold it open.
If movement is stopped below that
minimum the liftgate closes.
Do not force the liftgate open or
closed during a power cycle.
The power liftgate may be
temporarily disabled under extreme
temperatures or low battery
conditions. If this occurs, the liftgate
can still be operated manually.
If you shift the transmission out of
P (Park) while the power function is
in progress, the liftgate power
function will continue to completion.
If you shift the transmission out of
P (Park) and accelerate before the
power liftgate latch is closed, the
liftgate may reverse to the open
position. Cargo could fall out of the
vehicle. Always make sure the
power liftgate is closed and latched
before you drive away.
Page 205 of 394
Driving and Operating 8-1
Driving and
Operating
Driving Information
Driving for Better FuelEconomy . . . . . . . . . . . . . . . . . . . . 8-2
Defensive Driving . . . . . . . . . . . . . 8-3
Drunk Driving . . . . . . . . . . . . . . . . . 8-3
Control of a Vehicle . . . . . . . . . . . 8-4
Braking . . . . . . . . . . . . . . . . . . . . . . . 8-4
Steering . . . . . . . . . . . . . . . . . . . . . . . 8-5
Off-Road Recovery . . . . . . . . . . . . 8-6
Loss of Control . . . . . . . . . . . . . . . . 8-7
Off-Road Driving . . . . . . . . . . . . . . 8-8
Driving on Wet Roads . . . . . . . 8-19
Highway Hypnosis . . . . . . . . . . . 8-20
Hill and Mountain Roads . . . . . 8-20
Winter Driving . . . . . . . . . . . . . . . 8-21
If the Vehicle is Stuck . . . . . . . . 8-23
Vehicle Load Limits . . . . . . . . . . 8-24
Starting and Operating
New Vehicle Break-In . . . . . . . . 8-28
Ignition Positions . . . . . . . . . . . . 8-28
Retained Accessory Power (RAP) . . . . . . . . . . . . . . . 8-29
Starting the Engine . . . . . . . . . . 8-30
Engine Coolant Heater . . . . . . . 8-31
Shifting Into Park . . . . . . . . . . . . 8-32
Shifting Out of Park . . . . . . . . . . 8-33
Parking Over Things
That Burn . . . . . . . . . . . . . . . . . . 8-33
Engine Exhaust
Engine Exhaust . . . . . . . . . . . . . . 8-34
Running the Vehicle WhileParked . . . . . . . . . . . . . . . . . . . . . 8-34
Automatic Transmission
Automatic Transmission . . . . . 8-35
Manual Mode . . . . . . . . . . . . . . . . 8-37
Fuel Economy Mode . . . . . . . . . 8-37
Drive Systems
All-Wheel Drive . . . . . . . . . . . . . . 8-38
Brakes
Antilock BrakeSystem (ABS) . . . . . . . . . . . . . . 8-38
Parking Brake . . . . . . . . . . . . . . . 8-40
Brake Assist . . . . . . . . . . . . . . . . . 8-40
Hill Start Assist (HSA) . . . . . . . 8-41
Ride Control Systems
Traction Control System (TCS) . . . . . . . . . . . . . . 8-41
StabiliTrak System . . . . . . . . . . . 8-43
Cruise Control
Cruise Control . . . . . . . . . . . . . . . 8-44
Object Detection Systems
Ultrasonic Parking Assist . . . . 8-46
Rear Vision Camera (RVC) . . . . . . . . . . . . . 8-49
Fuel
Fuel . . . . . . . . . . . . . . . . . . . . . . . . . 8-53
Recommended Fuel . . . . . . . . . 8-54
Gasoline Specifications . . . . . . 8-54
Page 240 of 394
8-36 Driving and Operating
the shift lever button before shifting
from P (Park) when the ignition key
is in ON/RUN. If you cannot shift out
of P (Park), ease pressure on the
shift lever, then push the shift lever
all the way into P (Park) as you
maintain brake application. Then
press the shift lever button and
move the shift lever into another
gear. SeeShifting Out of Park
on
page 8‑33.
R (Reverse): Use this gear to
back up.
Notice: Shifting to R (Reverse)
while the vehicle is moving
forward could damage the
transmission. The repairs would
not be covered by the vehicle
warranty. Shift to R (Reverse) only
after the vehicle is stopped.
To rock the vehicle back and forth to
get out of snow, ice or sand without
damaging the transmission, see If
the Vehicle is Stuck on page 8‑23. N (Neutral):
In this position the
engine and transmission do not
connect. Use N (Neutral) to restart a
vehicle that is already moving.
{WARNING
Shifting into a drive gear while the
engine is running at high speed is
dangerous. Unless your foot is
firmly on the brake pedal, the
vehicle could move very rapidly.
You could lose control and hit
people or objects. Do not shift
into a drive gear while the engine
is running at high speed.
Notice: Shifting out of P (Park) or
N (Neutral) with the engine
running at high speed may
damage the transmission. The
repairs would not be covered by
the vehicle warranty. Be sure the
engine is not running at high
speed when shifting the vehicle. D (Drive):
This position is for
normal driving. It provides the best
fuel economy. If you need more
power for passing, and you are:
.Going less than 56 km/h
(35 mph), push the accelerator
pedal about halfway down.
.Going about 56 km/h (35 mph) or
more, push the accelerator all
the way down.
Notice: If the vehicle seems to
accelerate slowly or not shift
gears when you go faster, and
you continue to drive the vehicle
that way, you could damage the
transmission. Have the vehicle
serviced right away. You can
drive in L (Low) when you are
driving less than 56 km/h (35 mph)
and D (Drive) for higher speeds
until then.
M (Manual Mode): Allows the
driver to select the range of gear
positions. If the vehicle has this
feature, see Manual Mode
on
page 8‑37.
Page 241 of 394
Driving and Operating 8-37
Manual Mode
Electronic Range Select
(ERS) Mode
ERS or manual mode allows for the
selection of the range of gear
positions. Use this mode when
driving down hill or towing a trailer
to limit the top gear and vehicle
speed. The shift position indicator
within the Driver Information Center
(DIC) will display a number next to
the M indicating the highest
available gear under manual mode
and the driving conditions when
manual mode was selected.
To use this feature:
1. Move the shift lever toM (Manual Mode).
2. Press the plus/minus button on the shift lever, to increase or
decrease the gear range
available. When shifting to M (Manual Mode),
the transmission will shift to a preset
lower gear range. For this preset
range, the highest gear available is
displayed next to the M in the DIC.
See
Driver Information Center (DIC)
on page 4‑24for more information.
All gears below that number are
available to use. For example, when
4 (Fourth) is shown next to the M,
1 (First) through 4 (Fourth) gears are
shifted automatically. To shift to
5 (Fifth) gear, press the + (Plus)
button or shift into D (Drive).
M (Manual Mode) will prevent
shifting to a lower gear range if the
engine speed is too high. If vehicle
speed is not reduced within the time
allowed, the lower gear range shift
will not be completed. Slow the
vehicle, then press the −(Minus)
button to the desired lower gear
range.
While using the ERS, cruise control
can be used.
Fuel Economy Mode
The vehicle may have a Fuel
Economy Mode. When engaged,
fuel economy mode can improve the
vehicle's fuel economy.
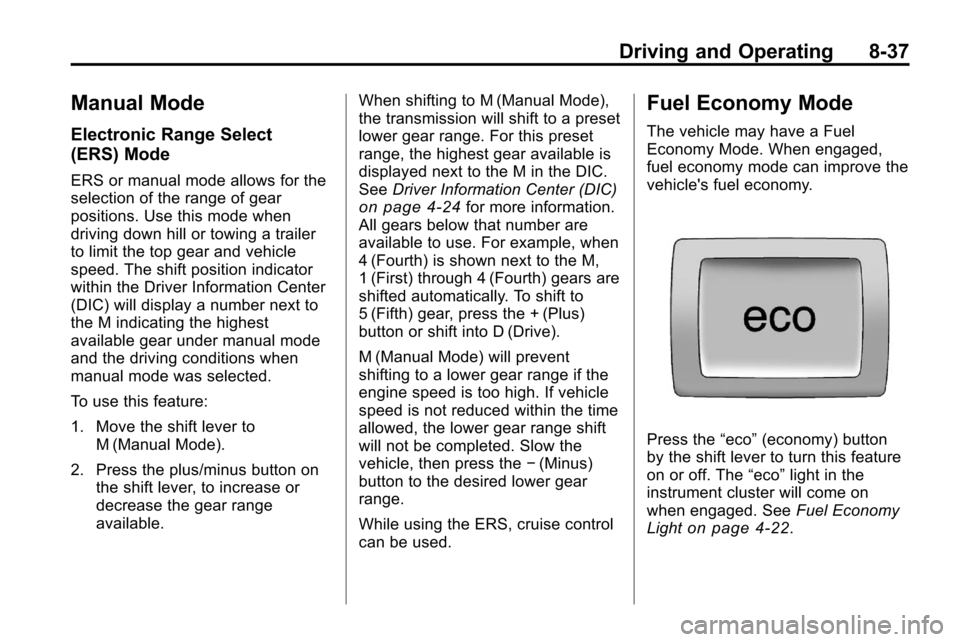
Press the “eco”(economy) button
by the shift lever to turn this feature
on or off. The “eco”light in the
instrument cluster will come on
when engaged. See Fuel Economy
Light
on page 4‑22.
Page 265 of 394
Driving and Operating 8-61
3. When the wheel chocks are inplace, release the brake pedal
until the chocks absorb the load.
4. Reapply the brake pedal. Then apply the parking brake and shift
into P (Park).
5. Release the brake pedal.
Leaving After Parking on a Hill
1. Apply and hold the brake pedal.
2. Start the engine.
3. Shift into a gear.
4. Release the parking brake.
5. Let up on the brake pedal.
6. Drive slowly until the trailer is clear of the chocks.
7. Stop and have someone pick up and store the chocks.
Maintenance When Trailer
Towing
The vehicle needs service more
often when pulling a trailer. See this
manual's Maintenance Schedule or
Index for more information. Things
that are especially important in
trailer operation are automatic
transmission fluid, engine oil, axle
lubricant, belts, cooling system and
brake system. Inspect these before
and during the trip.
Check periodically to see that all
hitch nuts and bolts are tight.
Engine Cooling When Trailer
Towing
The cooling system may temporarily
overheat during severe operating
conditions. See Engine Overheating
on page 9‑18.
Trailer Towing
Before pulling a trailer, there are
three important considerations that
have to do with weight:
.The weight of the trailer
.The weight of the trailer tongue
.The total weight on the vehicle's
tires
Weight of the Trailer
How heavy can a trailer safely be?
Speed, altitude, road grades,
outside temperature, special
equipment, and the amount of
tongue weight the vehicle can carry
must be considered. See “Weight of
the Trailer Tongue” later in this
section for more information.
Maximum trailer weight is calculated
assuming only the driver is in the
tow vehicle and it has all the
required trailering equipment.
The weight of additional optional
equipment, passengers and cargo in
the tow vehicle must be subtracted
from the maximum trailer weight.
Page 281 of 394
Vehicle Care 9-13
There is a special procedure for
checking and changing the
transmission fluid. Because this
procedure is difficult, this should be
done at your dealer service
department. Contact your dealer for
additional information or the
procedure can be found in the
service manual. To purchase a
service manual, seeService
Publications Ordering Information
on
page 12‑12.
Change the fluid and filter at the
intervals listed in Scheduled
Maintenance
on page 10‑2, and be
sure to use the fluid listed in
Recommended Fluids and
Lubricants on page 10‑7.
Engine Air Cleaner/Filter
See Engine Compartment Overviewon page 9‑6for the location of the
engine air cleaner/filter.
When to Inspect the Engine Air
Cleaner/Filter
Inspect the air cleaner/filter at the
Maintenance IIintervals and replace
it at the first oil change after each
80 000 km (50,000 mile) interval.
See Scheduled Maintenance
on
page 10‑2for more information.
If driving in dusty/dirty conditions,
inspect the filter at each engine oil
change.
How to Inspect the Engine Air
Cleaner/Filter
To inspect the air cleaner/filter,
remove the filter from the vehicle
and lightly shake the filter to release
loose dust and dirt. If the filter
remains caked with dirt, a new filter
is required. To inspect or replace the engine air
cleaner/filter:
1. Open the hood. See
Hood
on
page 9‑5.
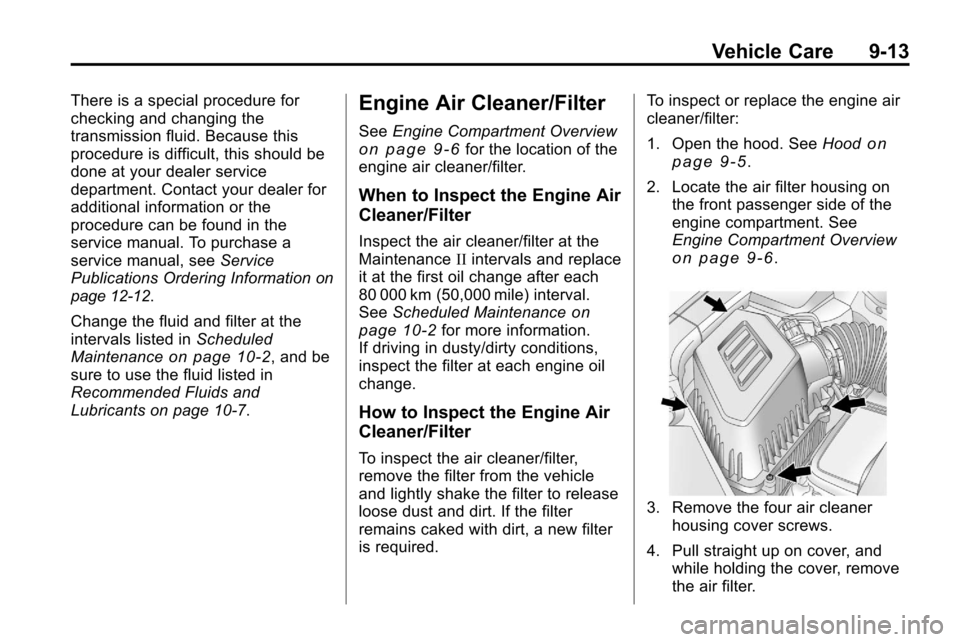
2. Locate the air filter housing on the front passenger side of the
engine compartment. See
Engine Compartment Overview
on page 9‑6.
3. Remove the four air cleaner
housing cover screws.
4. Pull straight up on cover, and while holding the cover, remove
the air filter.
Page 328 of 394
9-60 Vehicle Care
If a tire goes flat, avoid further tire
and wheel damage by driving slowly
to a level place. Turn on the hazard
warning flashers. SeeHazard
Warning Flashers on page 5‑2.
{WARNING
Changing a tire can be
dangerous. The vehicle can slip
off the jack and roll over or fall on
you or other people. You and they
could be badly injured or even
killed. Find a level place to
change your tire. To help prevent
the vehicle from moving:
1. Set the parking brake firmly.
2. Put an automatic transmission shift lever in
P (Park), or shift a manual
transmission to 1 (First) or
R (Reverse).
(Continued)
WARNING (Continued)
3. Turn off the engine and donot restart while the vehicle
is raised.
4. Do not allow passengers to remain in the vehicle.
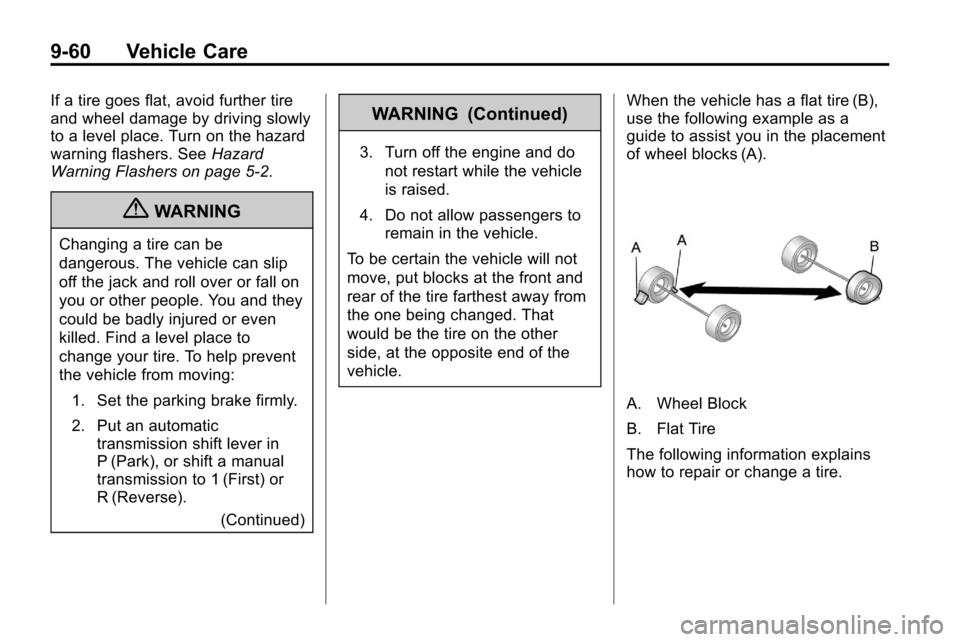
To be certain the vehicle will not
move, put blocks at the front and
rear of the tire farthest away from
the one being changed. That
would be the tire on the other
side, at the opposite end of the
vehicle. When the vehicle has a flat tire (B),
use the following example as a
guide to assist you in the placement
of wheel blocks (A).
A. Wheel Block
B. Flat Tire
The following information explains
how to repair or change a tire.